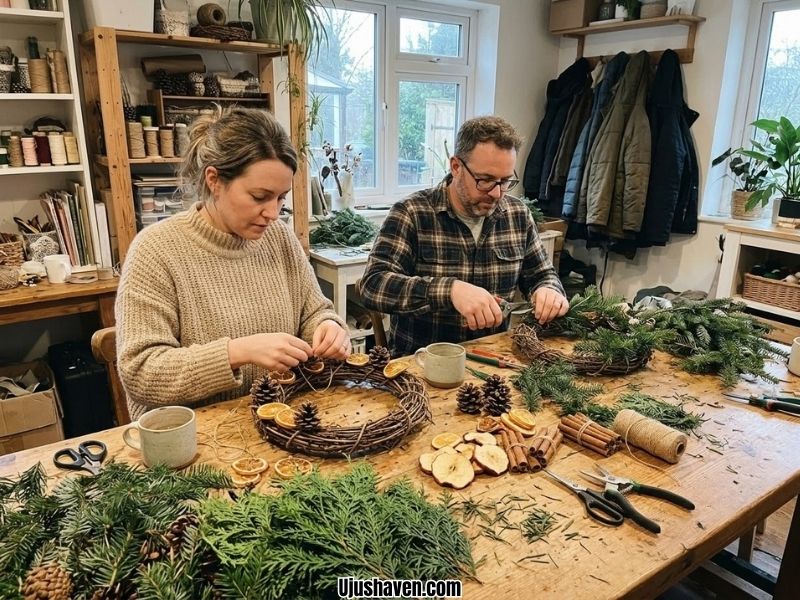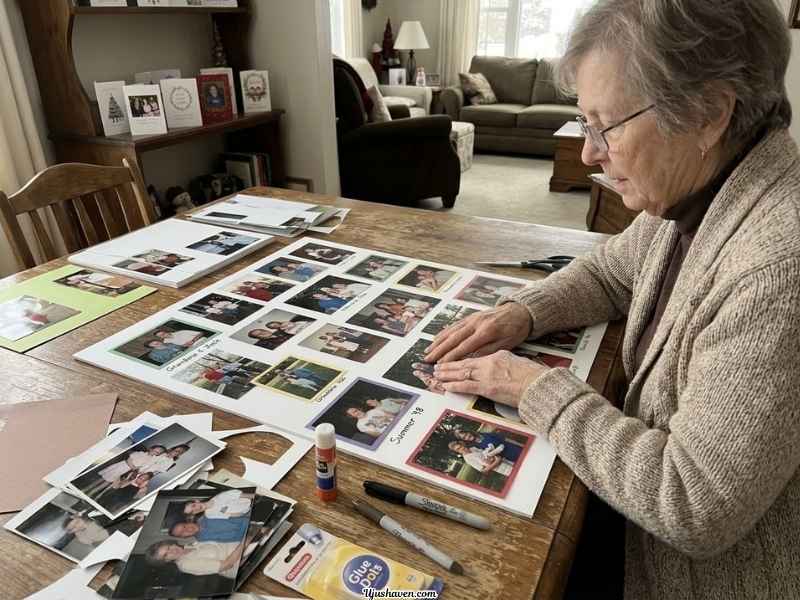
Easy Christmas Craft Ideas For Seniors should feel genuinely easy, not like a project that looks simple in a photo but becomes fiddly once you actually sit down to make it.
And honestly, some “senior crafts” online can feel either too childish or surprisingly complicated.
That’s why this list focuses on crafts that are truly doable.
Each one uses a handful of simple supplies, follows a few straightforward steps, and leaves plenty of room for imperfections.
You’re making something festive, not taking a crafting exam.
These ideas are for seniors who want to enjoy making something with their own hands, as well as family members, caregivers, and activity coordinators crafting alongside them.
Some work beautifully for a quiet afternoon at home, while others are easy to enjoy around a shared table.
Of course, “easy” looks different for everyone.
Some people are perfectly comfortable with scissors, while others may prefer pre-cut pieces, so I’ve noted adaptations where they genuinely help.
If you’re crafting with family or friends, you may also enjoy 20 Easy Christmas Crafts for Adults: Simple DIY Gifts Everyone Will Love for more simple projects to make together.
Save this list for later, then let’s look at what makes a Christmas craft truly senior-friendly.
What Makes a Christmas Craft Easy for Seniors?
A good craft doesn’t need to be perfect to look lovely. Every one of these easy Christmas craft ideas for seniors follows the same simple rules:
- Few materials, mostly things you may already have at home
- Larger pieces that are comfortable to hold
- Little or no cutting
- Minimal gluing, with easier options where they help
- Short project time, so nobody runs out of steam halfway through
- Calm, repeating motions like wrapping, stringing, and dabbing
- No pressure to get a perfect result
Still, easy doesn’t mean the same thing for everybody.
Where a step could be tough on tired hands or eyes, I’ve added a small tip.
And you’re always free to skip a step or do it your own way.
15 Easy Christmas Craft Ideas for Seniors
Here are 15 easy Christmas craft ideas for seniors, in no particular order.
Pick one for today, and save the rest for the cold afternoons ahead.
1. Pinecone Christmas Trees

Pinecones already look like tiny Christmas trees, so most of the work is done for you.
This one is slow and gentle, and a crooked tree just looks more charming.
Dab on some paint, press on a few pom-poms, and you have a little table decoration by the end of the afternoon.
Make a few for the mantel, or give one to each neighbor.
What You’ll Need
- Small pinecones, clean and dry
- Green acrylic paint
- A sponge or wide, soft brush
- Small pom-poms or large buttons
- Tacky glue
- A small square of cardboard (optional, for a base)
How to Make It
- Cover your table with newspaper. Dab green paint all over a pinecone with the sponge or brush, letting the paint settle between the scales. Set it on the newspaper and let it dry completely.
- Once it’s dry, put a small dot of tacky glue on the back of a pom-pom and press it between the scales. Hold it for a few seconds, then repeat all around the pinecone, spacing them out like ornaments.
- If you want the tree to stand up, spread glue on the cardboard square, press the bottom of the pinecone into it, and hold until it grips.
- Leave it alone until the glue is fully dry before you move it or display it.
Helpful Tip: Pinecones from the yard can carry bugs and sap. Ask a helper to dry them in a low oven on a foil-lined tray, or buy a bag of craft pinecones to skip the worry.
2. Paper Plate Christmas Wreaths
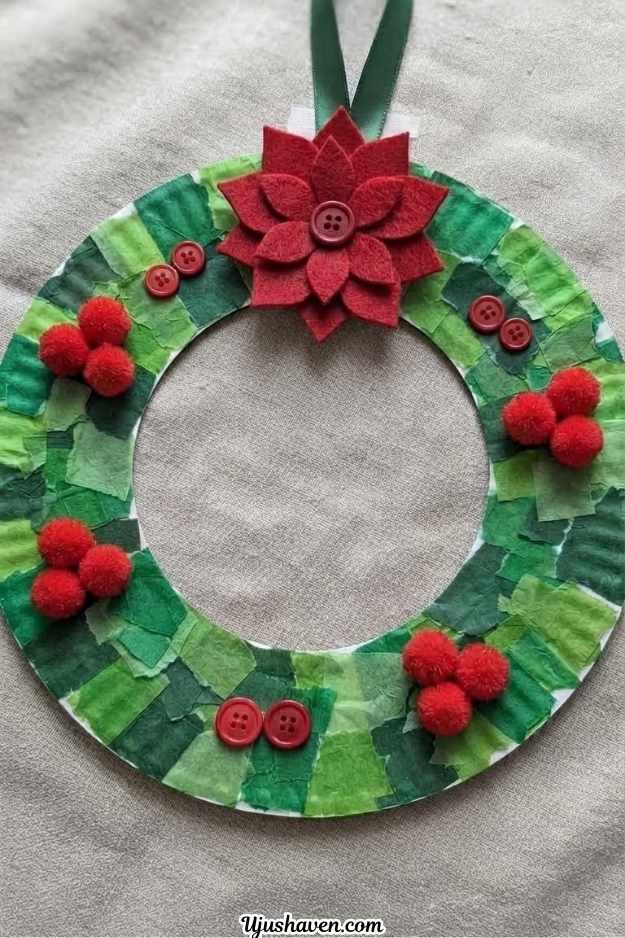
This is one of the friendliest crafts on the list because the paper is torn, not cut, and tearing is surprisingly relaxing.
Once the green pieces are glued on and the red “berries” go in, you get a cheerful wreath for a door, a window, or the wall beside a favorite chair.
Every wreath ends up different, and that’s the fun of it.
What You’ll Need
- A sturdy paper plate
- Green construction paper or tissue paper
- Glue stick
- Red pom-poms or red buttons
- Ribbon
- Tape
- Scissors (for the one-time center cut)
How to Make It
- Cut out the middle of the plate so only the wide rim is left, like a ring. Do this ahead of time or ask a helper, so the rest of the project needs no cutting.
- Tear the green paper into small, rough pieces. They don’t need to be neat or the same size.
- Rub the glue stick over one section of the rim and press torn pieces on, overlapping them so no plate shows through. Move around the ring until it’s covered.
- Glue the red pom-poms on in little groups of two or three, like berries, holding each one for a moment.
- Tape a loop of ribbon to the back at the top, and hang your wreath.
Helpful Tip: If the glue stick starts to drag on the paper, switch to a fresh section of the plate and press more gently.
3. Popsicle Stick Christmas Trees
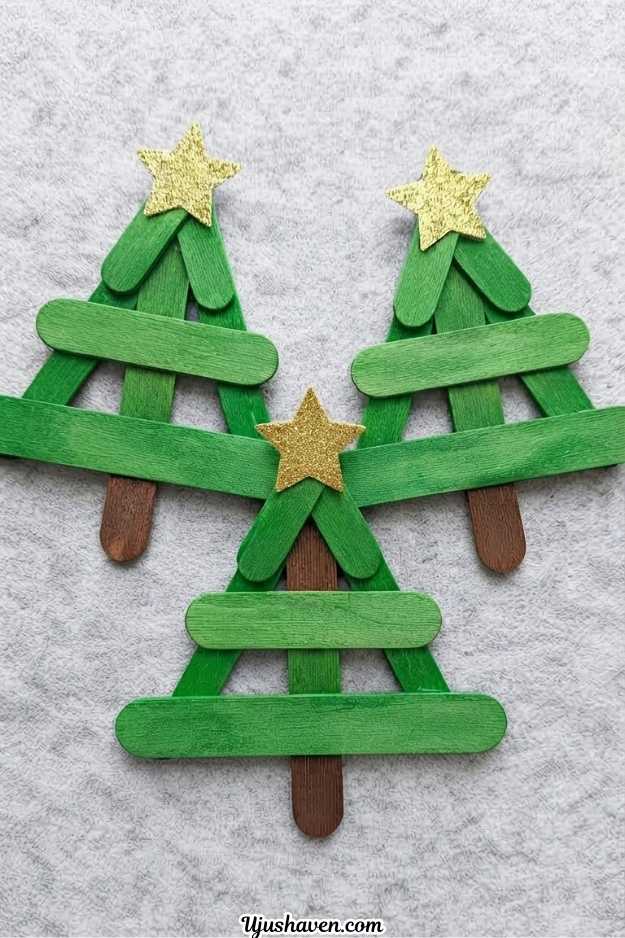
These stacked trees are less “school project” than they sound, especially in rich greens with a gold star on top.
The sticks come in different sizes, so there’s no cutting at all.
Make a small forest and line it up on a windowsill, or tuck one into a gift bag.
Choose chunky jumbo sticks, since they are easier to hold and glue.
What You’ll Need
- Craft sticks in three sizes: jumbo, regular, and mini
- Green paint (or pre-colored green sticks)
- Brown paint or a brown marker
- Tacky glue
- A star sticker or small gold button
How to Make It
- Paint the jumbo, regular, and mini sticks green and let them dry. Paint one more mini stick brown for the trunk. If you bought pre-colored sticks, skip the painting.
- Lay the jumbo stick flat on the table. Run a line of glue along its top edge, then press the regular stick on, centered, so it sits just above and overlaps the jumbo stick a little.
- Run glue along the top edge of the regular stick and press the mini stick on in the same way, centered.
- Turn the tree over and glue the brown mini stick across the back of the jumbo stick so a little shows below it as the trunk.
- Press the star sticker or glue the gold button at the top. Leave the tree flat until the glue dries completely.
Helpful Tip: Pre-colored sticks skip the painting and drying, which makes this one even quicker.
4. Christmas Card Garland
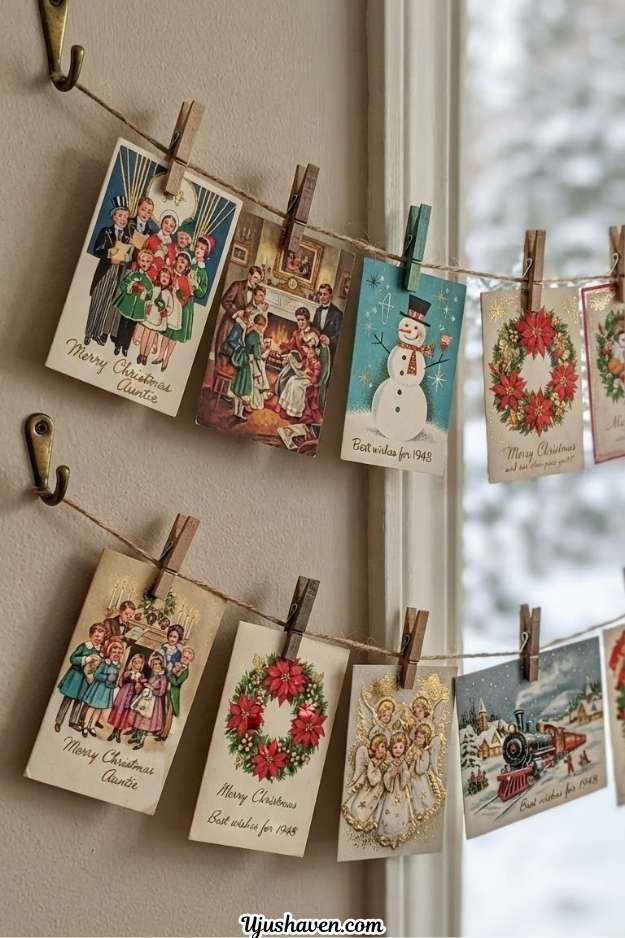
Most of us have a stack of old Christmas cards we can’t quite bring ourselves to throw out.
This garland gives them a second life.
Each card is a little reminder of the person who sent it, so hanging them up feels warm and personal, and no crafting skill is needed at all.
Last year’s cards work perfectly.
What You’ll Need
- Saved Christmas cards
- A long piece of twine or ribbon
- Mini clothespins, or a hole punch
- Tape or removable wall hooks
How to Make It
- Decide where the garland will hang, like a mantel, a wall, or a window. Fix each end of the twine in place with tape or a removable hook, pulling it fairly straight.
- Look through your cards and pick your favorites. Fold each one so it stands open nicely.
- Clip each card onto the twine with a clothespin, spacing them evenly. If clothespins are hard on your fingers, punch two holes along the top edge of each card instead and thread the twine through them.
- Step back and swap the cards around until the colors look nicely mixed.
Helpful Tip: Clothespin springs can be hard on sore fingers. A hole punch or a small piece of tape works just as well.
5. Salt Dough Christmas Ornaments

Salt dough is soft, forgiving, and pleasantly squishy, which makes it a lovely craft for hands that enjoy something to do.
You mix it with a spoon, cut shapes with cookie cutters, and bake.
A mistake? Just roll it back into a ball. These ornaments last for years, and many families add one to the tree each December, so it’s a nice one to date on the back.
What You’ll Need
- Plain flour, salt, and water (2 cups flour, 1 cup salt, 1 cup water)
- A big bowl and a spoon
- A rolling pin
- Cookie cutters
- A drinking straw
- Ribbon
- Acrylic paint (optional)
How to Make It
- Mix the flour and salt in the bowl. Add the water a little at a time, stirring with the spoon, then knead with your hands until the dough is smooth. If it’s sticky, add a sprinkle of flour. If it’s crumbly, add a few drops of water.
- Dust the table with flour and roll the dough out until it’s thick enough that it won’t snap, about as thick as a cookie. Press out shapes with the cookie cutters, and poke a hole near the top of each with the straw.
- Lay the shapes on a baking tray lined with baking paper. Bake on the lowest oven setting until they are completely hard and dry all the way through, turning them over once. Thin ones finish sooner than thick ones. Or leave them out to air dry for a few days, turning them over once a day.
- Let them cool completely. Paint them if you like and let the paint dry, then thread ribbon through the hole and tie it in a knot.
Helpful Tip: If rolling is hard on the wrists, let a helper handle the rolling and the oven while you press the shapes and paint.
Salt dough is not edible, so keep it away from anyone who might taste it.
6. Painted Wooden Ornaments
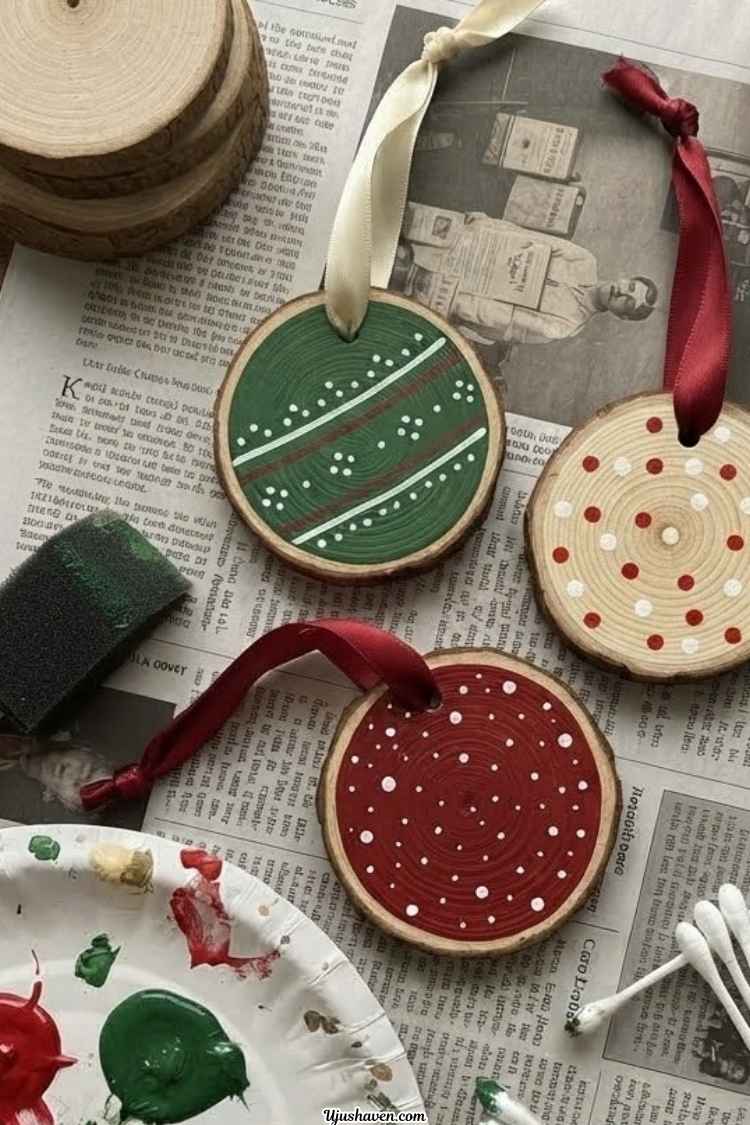
Plain wooden ornaments are a calm little canvas.
You don’t need to draw anything: dots, stripes, and simple color blocks look sweet and handmade.
A cotton swab makes perfect polka dots, so there’s no tiny brush work.
Paint a few in the colors of your own tree, or make a set as gifts, since a handmade ornament always feels personal.
What You’ll Need
- Unfinished wooden ornaments with holes already drilled, or wood slices
- Acrylic paint in a few colors
- A foam brush
- Cotton swabs
- Ribbon or twine
- Newspaper and a paper plate
How to Make It
- Cover the table with newspaper. Squeeze a little of each paint color onto the paper plate so it’s easy to reach.
- Use the foam brush to paint the front and edges of each ornament in one base color. Let it dry completely.
- Dip a cotton swab into a second color and press it onto the dry ornament to make dots. Use a fresh swab for each new color. Add stripes with the edge of the foam brush if you like, and let the paint dry.
- Cut a piece of ribbon or twine, thread it through the hole, and knot the ends together to make a hanging loop.
Helpful Tip: If a brush handle is thin, wrap it with a rubber band or a small piece of foam so it’s easier to hold.
7. Button Christmas Tree Cards
A card made of buttons feels like something you’d find in a keepsake box.
You glue large green buttons into a tree shape, top it with a yellow “star,” and write a short message inside.
It’s a gentle, no-rush project, and a handmade card means more to the person who gets it than anything from a store.
What You’ll Need
- A blank card or a folded sheet of cardstock
- Large green buttons in a mix of sizes
- One yellow or gold button
- Glue dots or tacky glue
- A pencil and a pen
How to Make It
- Lay the card on the table with the front facing up. Lightly draw a triangle with the pencil as your tree guide, with a short stump at the bottom.
- Start at the bottom of the triangle with your biggest buttons. Peel a glue dot, stick it to the back of a button, and press the button onto the card, holding it for a few seconds. If you’re using tacky glue, dab a little on the back instead.
- Work upward row by row, using smaller buttons as the tree gets narrower, until the triangle is filled.
- Glue the yellow button at the top as the star. Let the card dry open before you close it, then write your message inside.
Helpful Tip: Pick larger buttons, and use glue dots if liquid glue feels messy. Peel, press, done.
8. Recycled Christmas Jar Lanterns
An old pasta sauce jar can turn into a soft, glowing lantern with a few scraps of tissue paper.
The colors blend into a stained-glass look, and there’s no need to cut anything neatly.
Set one on a table or a windowsill and let the little light do the work.
What You’ll Need
- A clean glass jar with the label removed
- Red, green, and gold tissue paper
- Mod Podge, or white glue mixed with a little water
- A foam brush
- Twine or ribbon
- A battery-operated LED tea light
How to Make It
- Wash the jar, peel off the label, and rub away any sticky leftovers. Dry the jar well. Then tear the tissue paper into small, rough squares.
- Brush a thin layer of glue onto one patch of the jar, press a tissue square on, and smooth it flat. Overlap the next square slightly and keep going all the way around, leaving the top rim clear.
- Brush one more thin coat of glue over the outside of the tissue to seal it. Stand the jar upright and let it dry completely before you move it.
- Tie twine or ribbon around the neck of the jar. Switch on the LED tea light and drop it inside.
Helpful Tip: Use LED tea lights only, never real candles, because the tissue paper can catch fire. And before you start, have someone check that the jar has no chips or sharp edges.
9. Beaded Candy Cane Ornaments
Threading beads is one of those quiet, rhythmic tasks that many people find relaxing.
Here, a pipe cleaner does all the hard work, so there’s no needle and no tiny holes to find.
Red and white beads create the candy cane stripes.
Choose big beads, and these come together in minutes.
They also look lovely hung on a gift or tied onto a package.
What You’ll Need
- Red and white pony beads, or other large beads with big holes
- Red or white pipe cleaners
- Thin ribbon
- A shallow tray or muffin tin for the beads
How to Make It
- Pour the beads into the tray so they stay in one place. Take a pipe cleaner and fold one end over into a small bend, so the beads can’t slide off.
- Thread the beads onto the open end one at a time, alternating red and white, until the pipe cleaner is nearly full. Leave a short bare piece at the end.
- Bend the top of the pipe cleaner into a candy cane hook. Twist the bare end tightly around the pipe cleaner just below the last bead, so the beads stay put.
- Tie a ribbon in a bow around the curve of the hook. The bow also gives you something to hang it by.
Helpful Tip: A muffin tin keeps beads from rolling away, which is a big help at a shared table.
Enjoy working with beads? See 15 DIY Wood Bead Christmas Ornaments That Add a Cozy Handmade Touch to Your Holiday Decor
10. Yarn-Wrapped Cardboard Star Ornaments
Wrapping yarn around cardboard is slow, soothing, and almost impossible to get wrong.
As the yarn builds up, the star turns soft and colorful, and any gaps just add charm.
Use leftover yarn from a knitting basket, or buy a skein in Christmas colors.
It’s a great way to turn a cereal box into something pretty.
What You’ll Need
- A cardboard star (cut from a cereal box, or pre-cut)
- Chunky yarn in red, green, or cream
- Tape
- A button for the center
- Tacky glue
- Scissors
How to Make It
- Trace a star-shaped cookie cutter or a paper template onto a cereal box and cut it out. Or ask a helper to cut a few stars ahead of time.
- Tape the end of the yarn to the back of the star near one point, so it won’t slip.
- Wrap the yarn around the star, over the points and across the middle, in any direction you like. Pull it gently snug and keep going until most of the cardboard is covered.
- Snip the yarn, leaving a short tail, and tape the tail to the back. Glue the button in the center.
- Cut a short piece of yarn, thread it through one point of the star, and tie the ends together to make a hanging loop.
Helpful Tip: Chunky yarn is easier to see and handle than thin yarn, and it covers the cardboard faster.
11. Christmas Photo Ornaments
A photo ornament is the kind of thing people keep forever.
Slide in a picture of a grandchild, an old family Christmas, or a pet, and you have a gift that costs very little and means a lot.
Decorate the frame with stickers or a few dabs of paint, and write the year on the back. Make one for each person at the family table.
What You’ll Need
- Photo ornament frames (the snap-together kind), or wooden ornament blanks
- Small photos or photocopies
- Scissors
- Stickers or paint pens
- Ribbon
- Glue dots (if using wooden blanks)
How to Make It
- Choose a photo and hold the frame over it to check how it will look. Trim the edges with scissors if the photo is too big.
- Open the frame, place the photo inside facing front, and snap the frame closed. If you’re using a wooden blank, stick the photo on with glue dots instead.
- Decorate the edges of the frame with stickers or paint pens. If you use paint, let it dry before you handle the ornament.
- Thread ribbon through the hanging hole and tie the ends in a knot. Write the year and a name on the back with a pen.
Helpful Tip: Use copies instead of original photos. That way a precious picture never gets glued or trimmed by accident.
12. Cinnamon Stick Christmas Trees
These little trees make the whole room smell like Christmas.
You stand a handful of cinnamon sticks upright, tie them, and finish with a bow or a tiny star, and that’s all there is to it.
They look rustic and simple, so there’s no pressure for them to be fancy.
A small basket of them on a kitchen table is lovely.
What You’ll Need
- Cinnamon sticks (enough to make a bunch you can hold in one hand)
- Twine
- A small button or wooden bead for the top
- Tacky glue
- Scissors
- A small wooden disc or flat button (optional, for stability)
How to Make It
- Hold the cinnamon sticks upright in one hand, bunched together. Wrap twine around the top a few times and tie it in a tight knot, then snip off the extra twine.
- Gently spread the bottoms of the sticks apart into a circle, so the bunch stands up like a little tepee. Set it on the table to check that it stands.
- Wrap another piece of twine around the middle of the sticks, tie it snugly, and trim the ends. This holds the shape in place.
- Put a dab of glue on the top and press the button or bead on. Leave it to dry before you move it.
Helpful Tip: If your tree wobbles, glue the bottoms of the sticks to a small flat disc or button so it stands steady.
13. Watercolor Christmas Cards
If you’ve ever worried that you can’t paint, this is the craft that proves you can.
Watercolor is loose and forgiving, and when the colors blur together it only looks prettier.
A soft green blob can be a tree, and a few red dots can be berries.
Nobody needs to see anything but a lovely, handmade card.
What You’ll Need
- Thick watercolor paper or blank cards
- A basic watercolor paint set
- A round brush with a thick handle
- A cup of water
- A paper towel
- Masking tape
How to Make It
- Tape the edges of the card to the table with masking tape, so it doesn’t slide around while you paint.
- Dip the brush in water, rub it on the green paint until it’s soaked with color, and paint a loose triangle or a few simple branches. Don’t worry about neat edges.
- While the paint is still damp, rinse the brush and blot it on the paper towel. Dab on red dots for berries and a yellow star at the top. The colors will blur a little, and that’s just fine.
- Let the card dry completely, then peel off the tape gently. Write your message inside with a pen.
Helpful Tip: Don’t try to paint neat lines. The soft, blurry edges are what make watercolor look good.
14. Felt Christmas Tree Decorations
Felt is soft, light, and easy on the fingers, which makes it a favorite for crafting at any age.
These small trees take buttons, sequins, and a dab of glue.
Start with pre-cut tree shapes and the whole thing becomes a sit-down-and-decorate project, with nothing to cut.
They look cheerful on a tree, and they’re a nice little gift to tuck into a card.
What You’ll Need
- Pre-cut felt Christmas tree shapes
- Large buttons in different colors
- Tacky glue or glue dots
- Ribbon
- Scissors
- Sequins (optional)
How to Make It
- Lay a felt tree flat on the table. Arrange the buttons on top first to plan where each one will go.
- Glue the buttons on one at a time. Add a glue dot or a dab of tacky glue to the back of a button, press it onto the felt, and hold it for a few seconds.
- Cut a short piece of ribbon, fold it in half to make a loop, and glue the two ends to the back of the tree at the top. Hold it until it grips.
- Leave the tree lying flat until the glue is completely dry before you hang it.
Helpful Tip: You can buy felt shapes pre-cut at most craft stores. If you cut your own, trace a cookie cutter and ask a helper to do the cutting.
15. Christmas Memory Jar
This is one of the Easy Christmas Craft Ideas for Seniors that isn’t really about crafting skills. It’s about memories.
You decorate a jar, then write short notes about favorite Christmases, funny stories, or people you miss, and drop them inside.
Family can add their own. On Christmas Eve, pull a few out and read them aloud.
It’s an honest, heartfelt craft, and it makes a wonderful gift.
What You’ll Need
- A clean jar with a lid
- Colored paper, pre-cut into strips
- A pen with a comfortable grip
- Ribbon
- A sticker or label for the front
How to Make It
- Wash and dry the jar and lid. Tie a ribbon around the neck of the jar and finish with a knot or a bow.
- Stick the label or sticker on the front. If you like, write “Christmas Memories” and the year on it.
- Write one favorite memory on each paper strip. One short sentence is plenty, like “Dad burning the rolls again.”
- Fold each strip and drop it into the jar, then close the lid. Keep the jar where everyone can see it and invite family to add their own.
Helpful Tip: Cut the strips ahead of time, and keep each memory short so it’s easy to write and easy to read aloud later.
Want to turn a handmade gift into a full present? Peek at 20 Christmas Mug Gift Ideas That Are Easy to Put Together
Not Sure Which One to Start With?
Here’s a simple way to choose:
- Need something quick? Try the Christmas Card Garland or the Beaded Candy Cane Ornaments.
- Want to make a gift? The Christmas Memory Jar and Christmas Photo Ornaments are the most meaningful.
- Want a calm, quiet afternoon? The Yarn-Wrapped Cardboard Star Ornaments and Watercolor Christmas Cards are very soothing.
- Have little patience for mess? Choose the Felt Christmas Tree Decorations or the Button Christmas Tree Cards.
Simple Ways to Make Christmas Crafting More Comfortable
Even the easiest craft feels harder when the setup works against you.
A few small changes can make a big difference to how much people enjoy these easy Christmas craft ideas for seniors.
Prep the Pieces Before You Sit Down
Cut, punch, or measure ahead of time.
Pre-cut felt, pre-cut stars, and plates with the centers already removed turn a tiring project into a relaxing one.
If you’re helping someone else, this is the kindest thing you can do.
One honest note for helpers: do the prep, but let the person do the making.
Finishing a craft for someone can take away the best part.
Choose Glue That Suits the Hands
- Glue sticks are mess-free and easy to hold
- Glue dots only need a peel and a press
- Tacky glue in a squeeze bottle works well when you don’t need to squeeze hard
Set Up the Table Well
- Work under bright light, and keep a lamp nearby for close work
- Use a non-slip mat or a damp paper towel under cards and paper
- Put small items like buttons and beads in a tray or muffin tin
- Sit somewhere comfortable, with the supplies within easy reach
Take It Slowly
Plan for short sessions, and take a break whenever hands or eyes get tired.
A cup of tea in the middle is encouraged. If a step feels too hard, skip it or let someone else take over.
Watch Out for Small Pieces
Buttons, beads, and sequins can be a choking risk for some people, especially anyone living with memory loss.
If that applies, supervise closely or pick the larger, safer options, like the paper plate wreath or the watercolor cards.
Easy Christmas Craft Ideas for Senior Groups
Planning for a senior center, a church group, or a family gathering? These easy Christmas craft ideas for seniors work well when more than one person is at the table.
Best for senior centers and activity rooms
- Paper Plate Christmas Wreaths
- Christmas Card Garland
- Watercolor Christmas Cards
- Beaded Candy Cane Ornaments
Best for church groups and gift-making
- Button Christmas Tree Cards
- Christmas Photo Ornaments
- Christmas Memory Jar
- Felt Christmas Tree Decorations
Best for family afternoons
- Salt Dough Christmas Ornaments
- Painted Wooden Ornaments
- Pinecone Christmas Trees
- Cinnamon Stick Christmas Trees
A few things make group crafting go smoothly.
Set up each place with its own tray of supplies, finish the cutting before people arrive, and have a finished sample on the table so everyone can see where they’re headed.
And keep the mood relaxed. Nobody is being graded.
Grandkids stopping by? Give them something fun to do too with 20 Easy Christmas Snowman Crafts For Kids
Frequently Asked Questions About Easy Christmas Craft Ideas for Seniors
What are the easiest Christmas crafts for seniors?
Among these easy Christmas craft ideas for seniors, the paper plate wreath, Christmas card garland, watercolor cards, and beaded candy canes are the easiest. They need few supplies, little to no cutting, and very little cleanup.
What are easy Christmas craft ideas for seniors with arthritis?
Look for projects with larger pieces and minimal gripping, like glue dots instead of liquid glue, chunky yarn, thick-handled brushes, and jumbo craft sticks. Prep the cutting beforehand, and take breaks often.
Are these crafts suitable for seniors with memory loss or dementia?
Many of them can be, with a few changes. Choose simple, familiar activities like painting, tearing paper, or the memory jar, and avoid small pieces unless someone is supervising. Keep sessions short and relaxed, and talk with a caregiver if you’re unsure what suits the person.
How can I do Christmas crafts with seniors in a nursing home or senior center?
Pick two or three projects, prep the materials in advance, and give each person a tray with everything they need. Pre-cut pieces and large supplies keep the group moving without frustration.
How long do these crafts take?
Most take well under an hour once your supplies are ready. Salt dough and the jar lanterns need extra drying or baking time, so start those a day early.
Final Thoughts
Christmas crafting should feel good, not stressful.
I hope these easy Christmas craft ideas for seniors give you something you can actually enjoy making, like a pinecone tree on the windowsill or a memory jar the whole family adds to.
Pick the one that sounds most like you, gather your supplies, and don’t worry about how it turns out.
A little crooked and a little uneven is what makes a handmade gift special.
Save this post for later, and come back to these easy Christmas craft ideas for seniors whenever you need a simple idea.