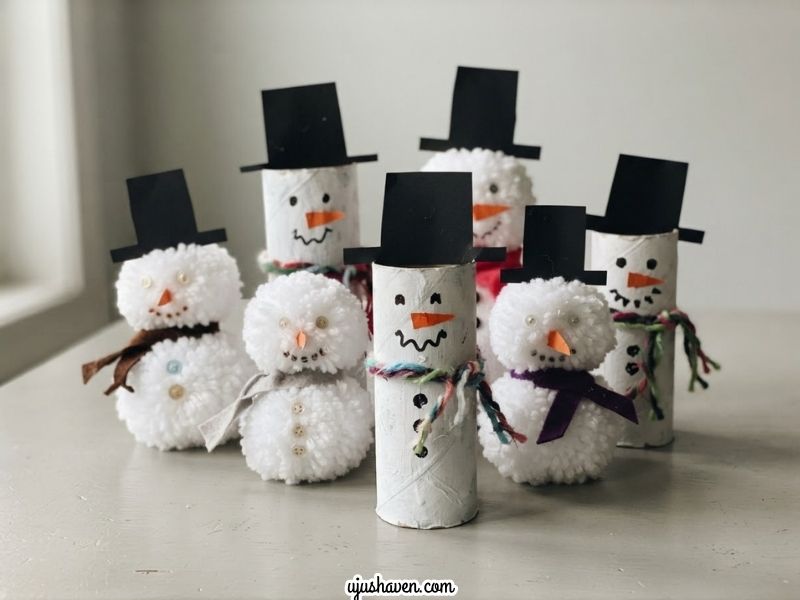
Easy Christmas snowman crafts for kids are perfect for those December afternoons when the children want to make something festive, but you don’t want to spend the whole day gathering complicated supplies or cleaning up a craft-room disaster.
Snowmen are especially fun because kids can take a very simple shape and turn it into a little character of their own.
A paper snowman can have a crooked hat, a giant carrot nose, too many buttons, or a scarf in a completely unexpected color and somehow, those little details make it even sweeter.
The ideas in this list keep things simple, using familiar craft supplies and everyday materials you may already have at home.
Some are quick enough for a short activity, while others can become Christmas decorations, ornaments, keepsakes, or little gifts for family.
If your kids enjoy hands-on projects, you might also like these 15 Easy Popsicle Stick Crafts For Kids They’ll Love Making when you’re ready for another simple afternoon craft.
So grab the paper, cotton balls, and a few festive extras, and let the snowman-making begin.
Why Snowman Crafts Make Such a Sweet Christmas Activity for Kids
Snowmen are one of those Christmas shapes kids can recognize and create without needing much explanation.
A few simple pieces of paper, some cotton balls, buttons, or craft sticks can quickly turn into a cheerful little snowman.
Here are a few reasons these easy Christmas snowman crafts for kids work so well for a festive afternoon at home:
The basic shape is simple.
Kids don’t need advanced cutting or crafting skills to make a snowman. Even a few uneven circles can turn into something cute.
They leave plenty of room for creativity.
One child might give their snowman a huge hat and tiny buttons, while another adds a long scarf and silly expression. Both are perfectly fine.
You can use what you already have.
Paper, cotton balls, markers, glue, cardboard, popsicle sticks, and scraps from other projects can go a long way.
The finished crafts can actually be used.
Some can become Christmas ornaments, decorations, cards, gift tags, or little keepsakes instead of ending up forgotten in a drawer.
They don’t have to be perfect.
In fact, a slightly crooked snowman often has more personality than one that looks like it came straight from a craft store.
The best part? You can pick a project based on how much time and patience everyone has that day, then simply let the kids enjoy making their own little piece of Christmas.
20 Easy Christmas Snowman Crafts For Kids
1. Paper Plate Snowman Craft
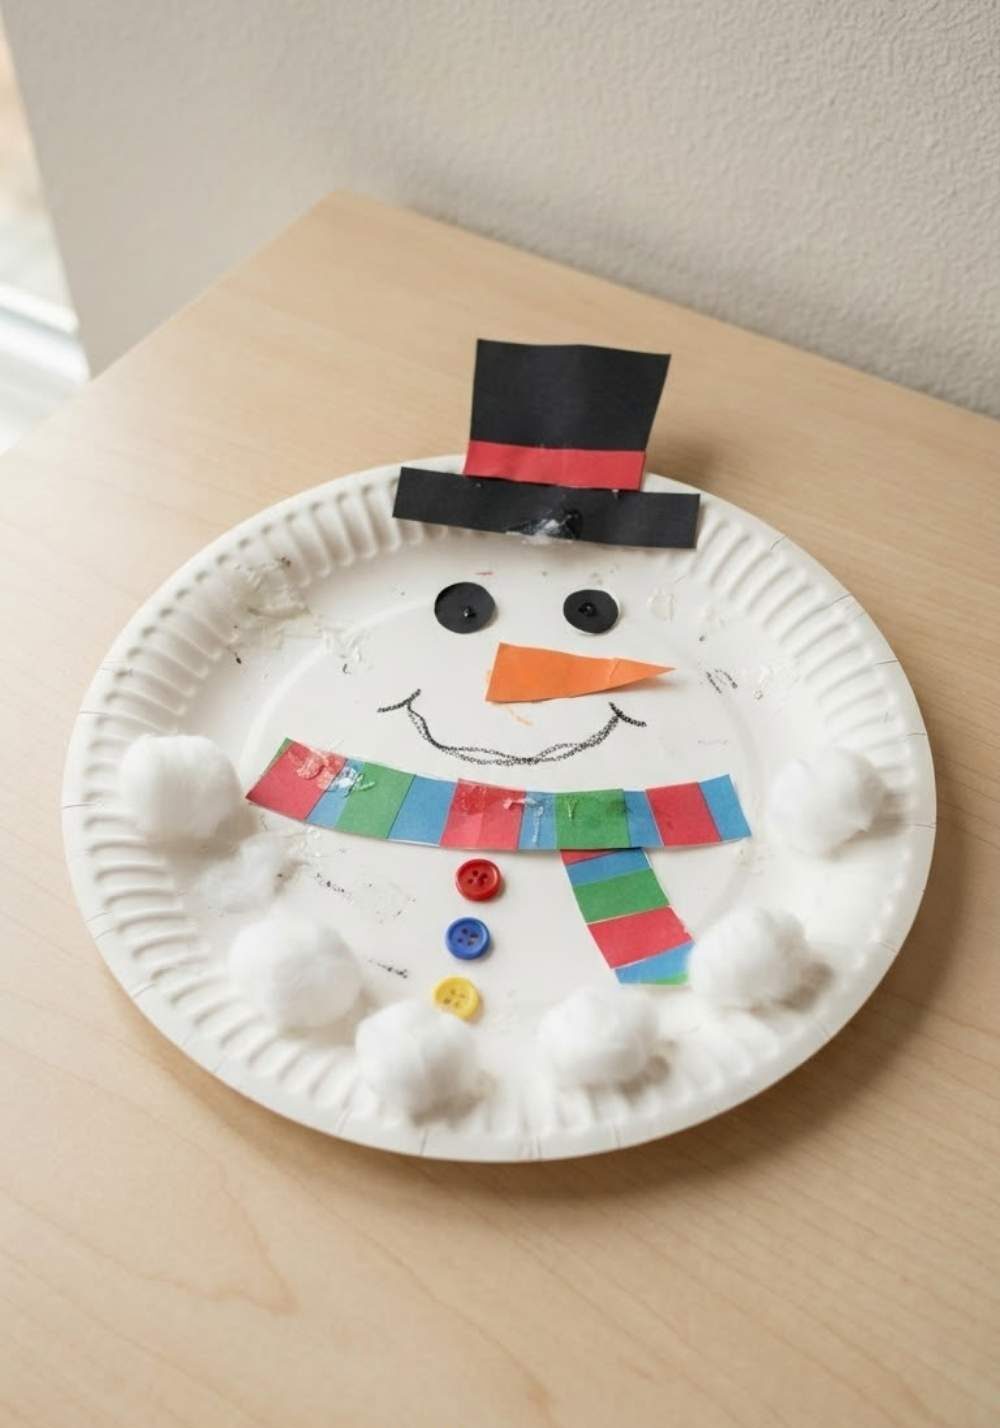
A paper plate makes a wonderfully simple snowman base, and kids can have fun giving each one its own little personality.
This is an easy place to start because the supplies are familiar and the finished snowman can go straight onto the fridge or Christmas display.
What you’ll need
- 1 white paper plate
- Black construction paper
- Orange construction paper
- Colored construction paper for the scarf
- Glue
- Child-safe scissors
- Black marker
- Cotton balls
- Optional: buttons, pom-poms, crayons, or stickers
How to make it
- Make the face. Cut two black circles for the eyes, several tiny circles for the mouth, and a small orange triangle for the carrot nose.
- Put the face together. Glue the eyes, nose, and mouth onto the front of the paper plate.
- Add the scarf and hat. Cut a long strip of colored paper for the scarf and glue it across the lower part of the plate. Cut a simple hat from black paper and glue it to the top.
- Finish decorating. Add buttons, pom-poms, cotton balls, or any other small details the kids like. Let the snowman dry completely before displaying it.
Little tip: Let each child choose their own scarf and hat colors. A few slightly wonky details only make the snowmen more fun.
2. Cotton Ball Snowman Craft
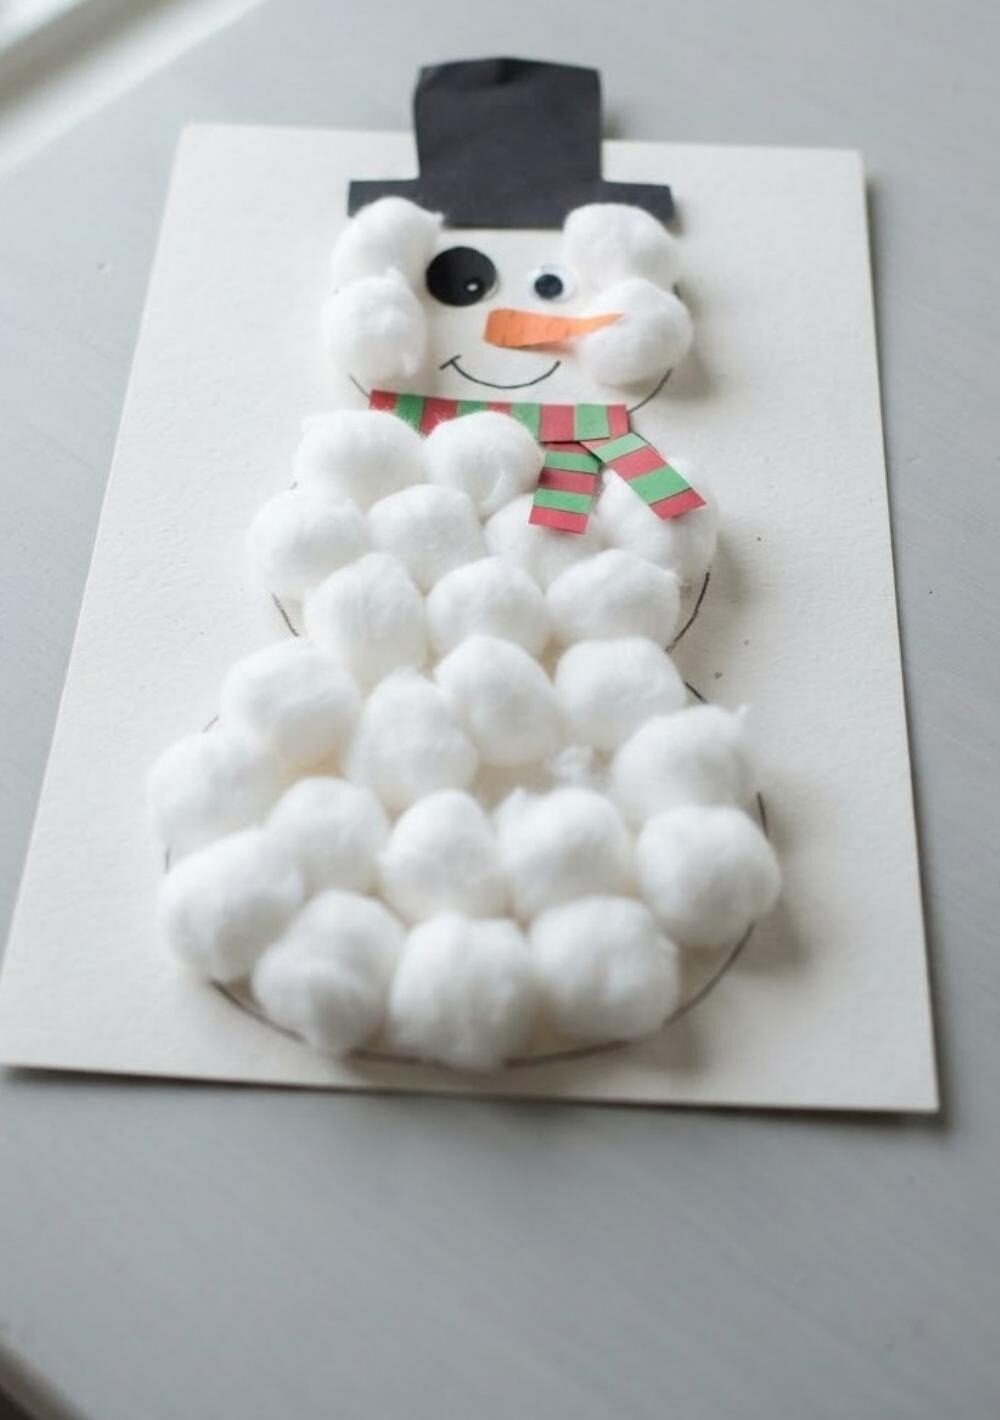
This fluffy snowman is a lovely choice when you want something simple and a little more hands-on.
Kids get to cover their snowman with soft cotton balls, then add the familiar little details that bring him to life.
What you’ll need
- White cardstock or thick white paper
- Cotton balls
- Glue
- Black construction paper
- Orange construction paper
- Colored paper for the scarf
- Child-safe scissors
- Black marker
- Optional: googly eyes and small pom-poms
How to make it
- Draw the snowman. Draw three circles on the cardstock, with the largest at the bottom and the smallest at the top.
- Cover him in snow. Spread glue inside the circles and press cotton balls onto the paper until the snowman is nicely covered. Let the glue set for a few minutes.
- Add his face and clothes. Cut black circles for the eyes and an orange triangle for the nose, then glue them onto the top section. Add a paper scarf and a simple hat.
- Give him a few finishing touches. Add a smiling mouth, buttons, pom-poms, or other small decorations. Leave the craft flat until the glue has dried.
Why kids enjoy it: The cotton balls make the craft feel a little like building a snowman without having to step outside into the cold.
Want another simple craft kids can make with everyday supplies? Take a peek at 20 Gratitude Crafts for Kids: Sweet Ways for Little Hands to Say Thank You.
3. Popsicle Stick Snowman
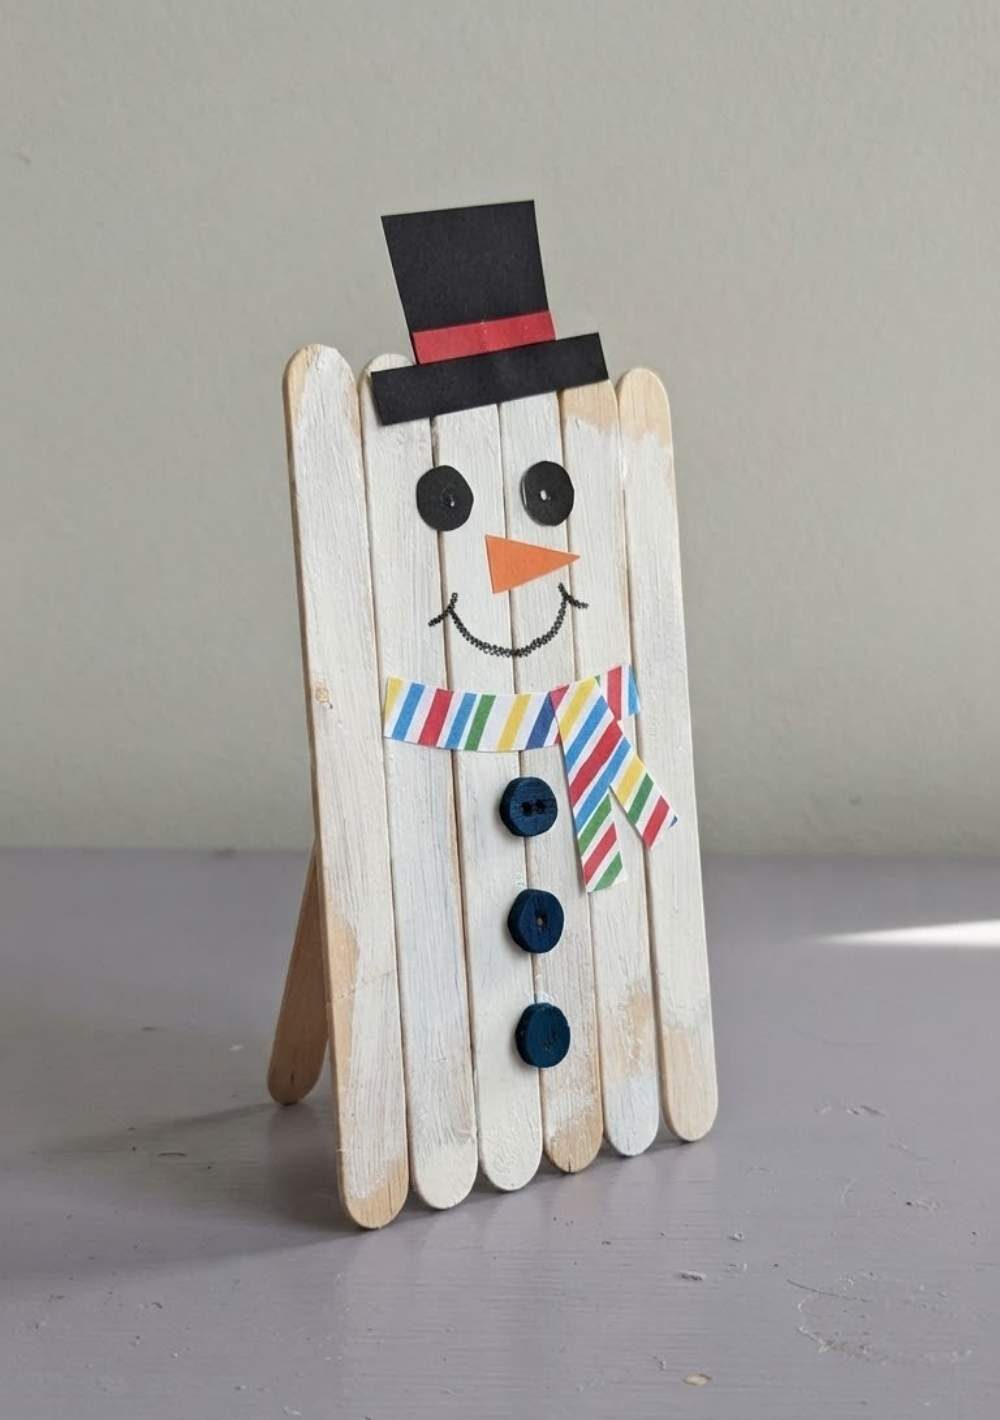
A few popsicle sticks can become a sweet little snowman decoration with very little fuss.
Kids can paint their snowman white and then have fun choosing the details for his face, hat, and scarf.
What you’ll need
- 6 wooden popsicle sticks
- 1 extra popsicle stick
- White washable paint
- Paintbrush
- Black construction paper
- Orange construction paper
- Colored paper for the scarf
- Glue
- Black marker
- Child-safe scissors
- Optional: ribbon, buttons, or pom-poms
How to make it
- Build the base. Lay six popsicle sticks side by side. Glue the extra stick across the back near the top to hold them together, then leave it to dry.
- Paint the snowman. Turn the sticks over and paint the front white. Allow the paint to dry completely.
- Add the face and scarf. Cut black paper eyes and an orange paper carrot nose, then glue them onto the snowman. Add a simple mouth with a marker and glue a strip of colored paper across the neck as a scarf.
- Finish with a hat and buttons. Cut a small hat from black paper and glue it to the top. Add buttons, pom-poms, or other details if desired.
- Turn it into an ornament. If you want to hang it on the tree, glue a small loop of ribbon to the back once everything is completely dry.
4. Snowman Paper Cup Craft
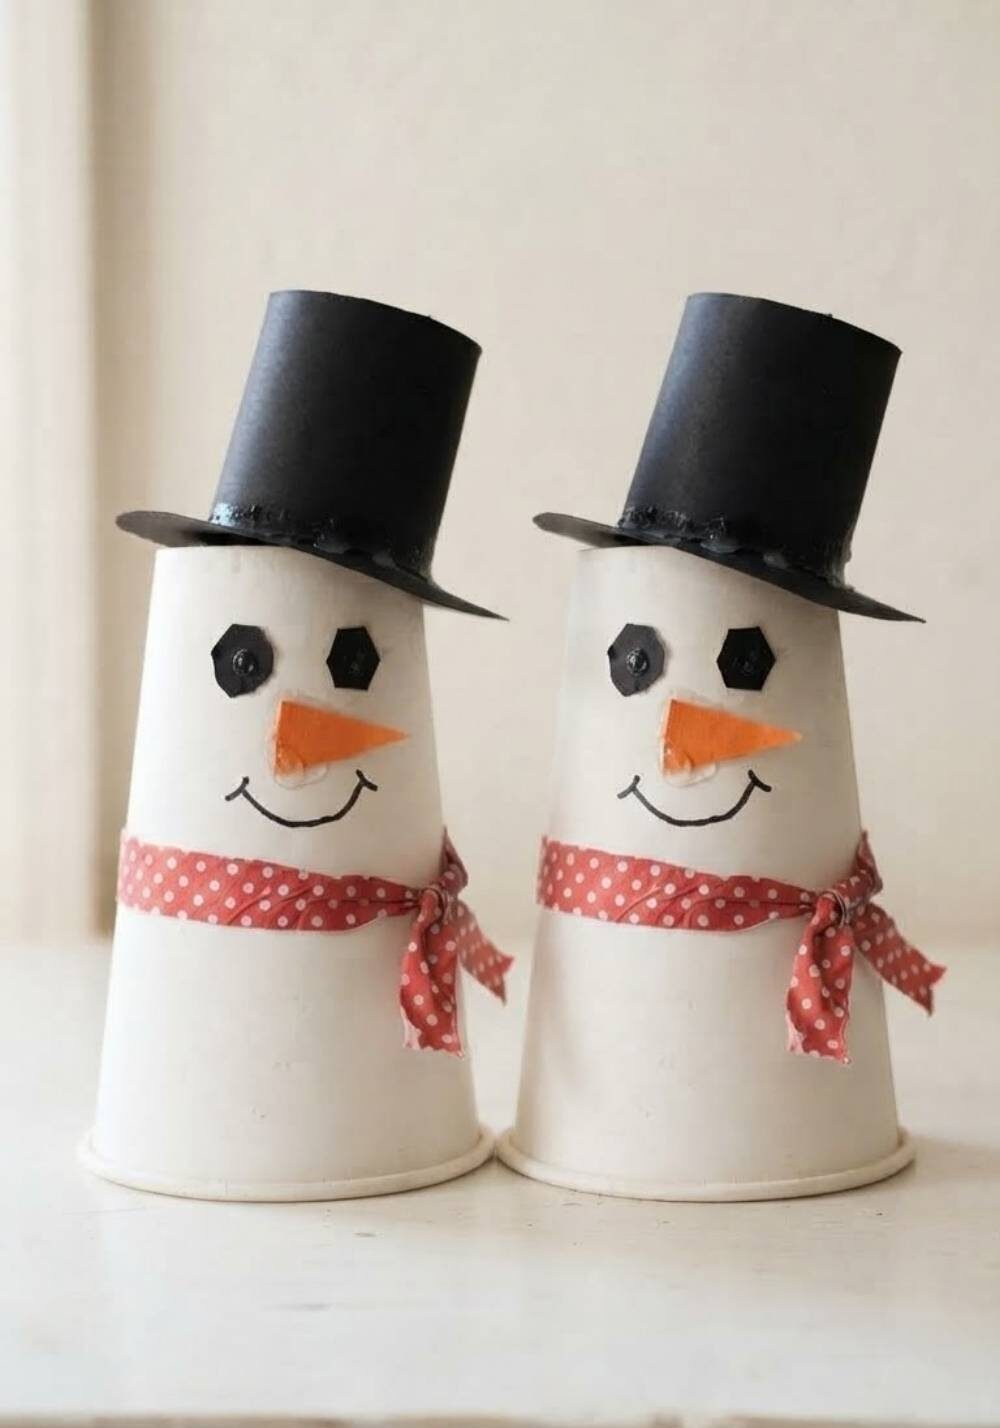
An ordinary white paper cup can become a tiny standing snowman in just a few simple steps.
It is a nice option when the kids want to make something they can stand on a shelf rather than another flat paper craft.
What you’ll need
- 1 white paper cup
- Black construction paper
- Orange construction paper
- Colored paper for the scarf
- Glue
- Child-safe scissors
- Black marker
- Optional: googly eyes, pom-poms, cotton balls, or buttons
How to make it
- Prepare the cup. Turn the paper cup upside down so the open end faces the table.
- Make the face. Cut two black circles for the eyes and a small orange triangle for the nose. Glue them onto the front of the cup, then draw a simple smiling mouth.
- Add the scarf and buttons. Cut a narrow strip of colored paper, wrap it around the lower part of the snowman’s face, and glue it in place. Add paper buttons or draw them with a marker.
- Finish the hat. Cut a simple hat from black paper and glue it to the top of the cup. Add a few cotton balls or a pom-pom if the kids want extra detail.
- Let it dry. Leave the snowman standing until all the glue is completely dry.
Looking for another craft that turns a few basic supplies into something cute? 15 Straw Flower Crafts for Kids That Turn Simple Straws Into Something Surprisingly Cute has plenty of easy inspiration.
5. Snowman Christmas Ornament
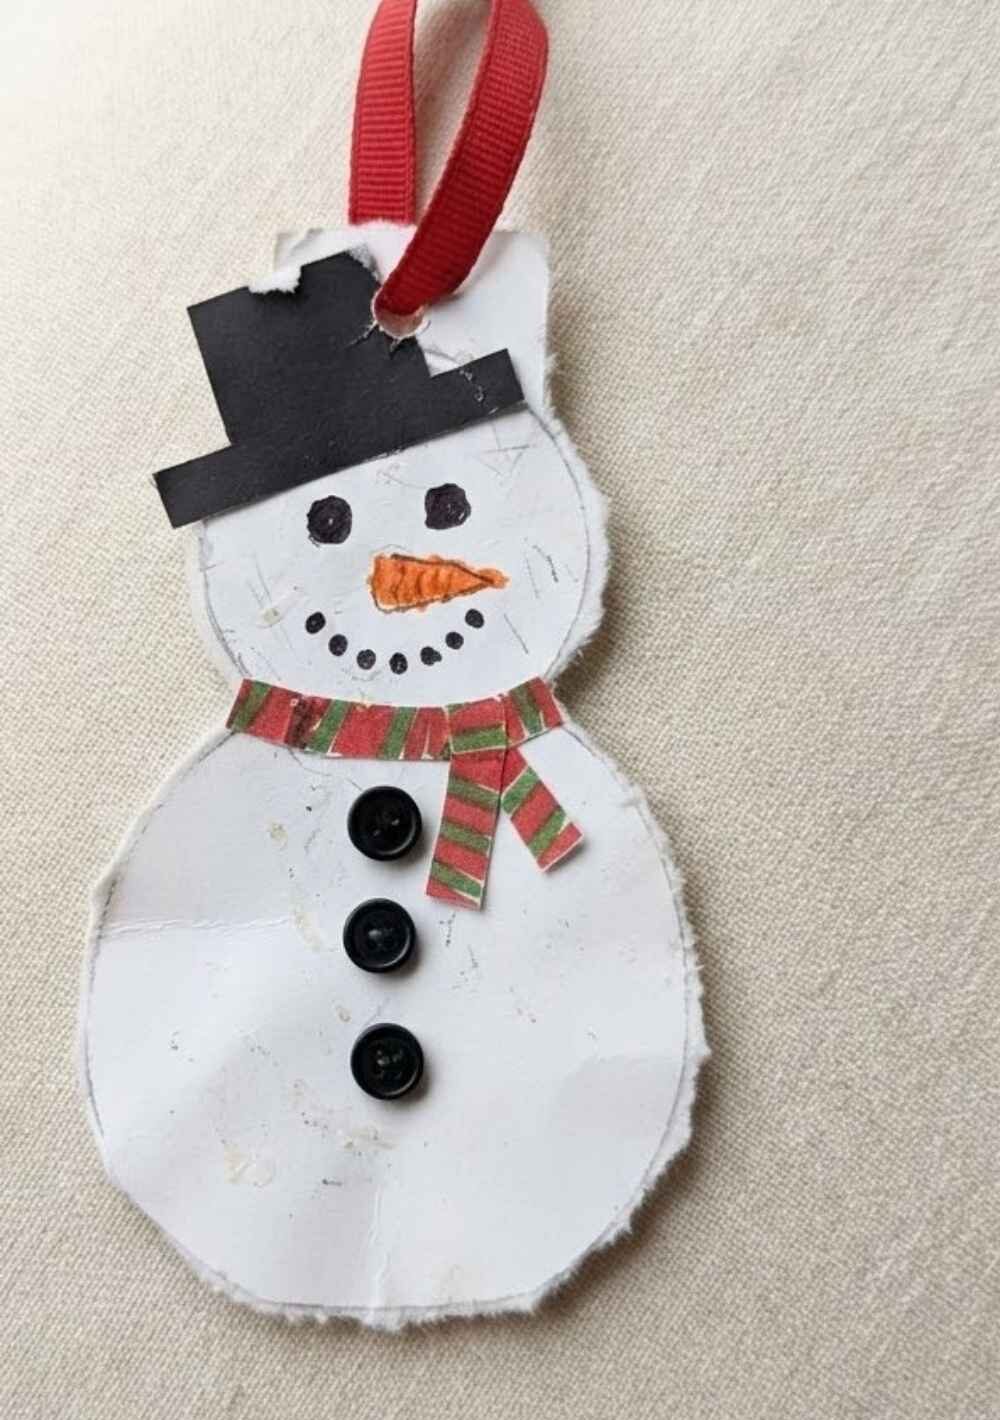
This simple paper snowman can become a handmade Christmas tree ornament that the kids will enjoy seeing again every year.
It also makes a lovely little keepsake without requiring complicated craft supplies.
What you’ll need
- White cardstock
- Black construction paper
- Orange construction paper
- Colored paper for the scarf
- Glue
- Child-safe scissors
- Black marker
- Hole punch
- Ribbon or string
- Optional: buttons, pom-poms, stickers, or glitter
How to make it
- Cut the snowman. Draw a simple snowman shape on the white cardstock and cut it out.
- Add his face. Cut black circles for the eyes and mouth, an orange triangle for the nose, and glue them onto the snowman. Draw any extra details with the marker.
- Dress him up. Add a colored paper scarf, a simple black paper hat, and buttons or other decorations down the front.
- Make it hangable. Punch one hole near the top of the snowman’s head and thread a short piece of ribbon or string through it. Tie the ends together securely.
- Add a keepsake detail. Write the child’s name and the year on the back before hanging it on the Christmas tree.
6. Snowman Handprint Craft
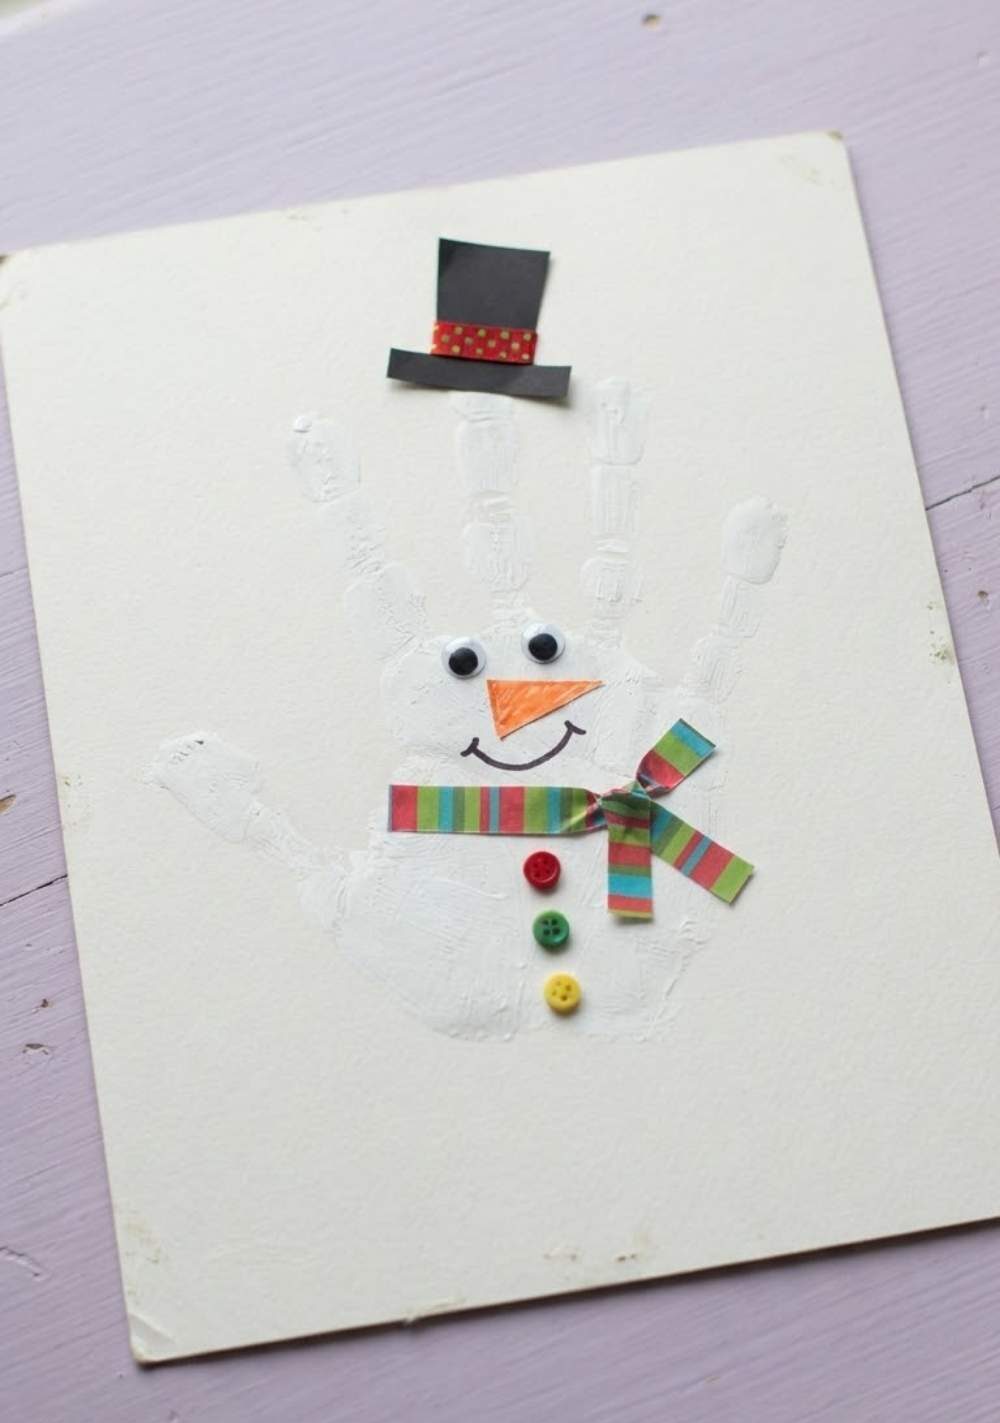
Handprint crafts are especially sweet around Christmas because they capture a little piece of the child at that particular age.
This one doesn’t need many supplies, and the kids can do most of the decorating themselves once the paint dries.
What you’ll need
- White cardstock
- Washable white paint
- Paintbrush
- Black marker
- Orange construction paper
- Colored paper for the scarf
- Glue
- Child-safe scissors
- Optional: googly eyes and pom-poms
How to make it
- Make the handprint. Paint the child’s palm and fingers with washable white paint, then press the hand firmly onto the cardstock with the fingers pointing upward. Carefully lift the hand away and let the print dry.
- Turn it into a snowman. Once the paint is dry, add two eyes, a small orange paper carrot nose, and a smiling mouth to the handprint.
- Add the Christmas details. Cut a strip of colored paper for the scarf and glue it across the lower part of the snowman. Add a paper hat and a few buttons if desired.
- Finish the keepsake. Write the child’s name and the year somewhere on the page and let the craft dry completely before displaying it.
Little tip: Keep the decorations simple here. The handprint is the part you’ll be glad you saved.
Enjoy making little keepsakes with the kids? 20 Gratitude Crafts for Kids: Sweet Ways for Little Hands to Say Thank You is another lovely project to keep in your back pocket.
7. Snowman Cardboard Tube Craft
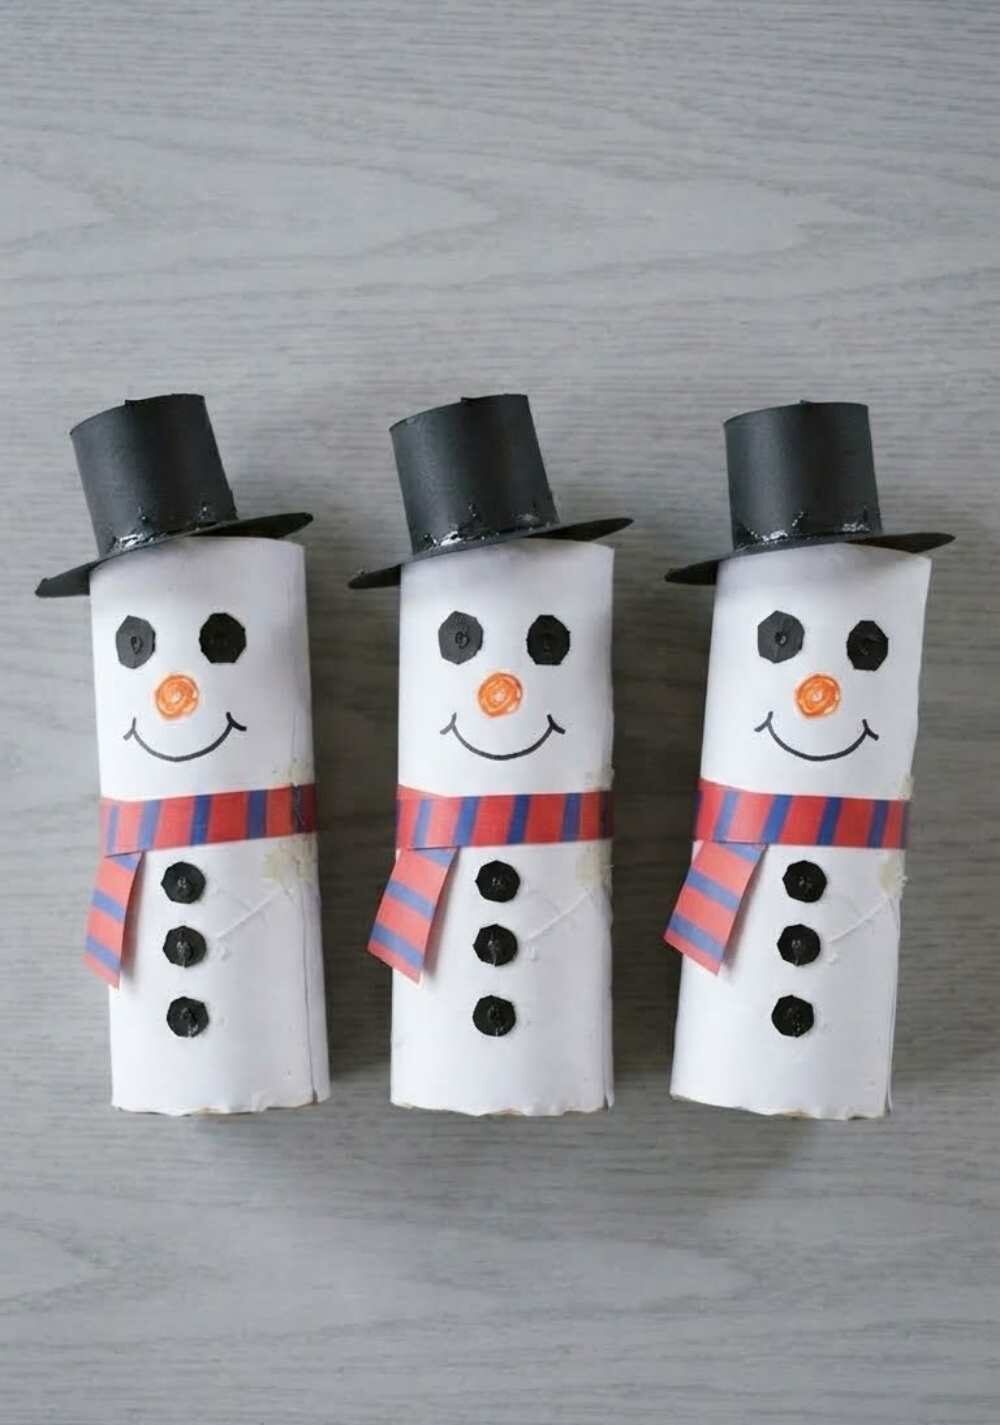
An empty cardboard tube can easily become a little standing snowman.
Covering it with white paper keeps the project simple and means kids don’t have to wait around for a whole tube of paint to dry.
What you’ll need
- 1 clean empty cardboard toilet paper tube
- White paper
- Black construction paper
- Orange construction paper
- Colored paper for the scarf
- Glue
- Child-safe scissors
- Black marker
- Optional: buttons, pom-poms, or googly eyes
How to make it
- Cover the tube. Cut a piece of white paper large enough to wrap around the cardboard tube. Wrap it around the tube and glue the edges together.
- Make the face. Cut black paper eyes and an orange paper carrot nose, then glue them onto the front. Add a smiling mouth with the marker.
- Add the clothes. Cut a narrow strip of colored paper for the scarf and wrap it around the tube. Add a simple black paper hat and a few buttons.
- Let the snowman dry. Leave it standing while the glue dries, then place it on a shelf, table, or Christmas craft display.
8. Snowman Paper Bag Puppet

This snowman is a craft and a little toy rolled into one.
Once the glue has dried, kids can slide their hands into the paper bag and make their snowman wave, talk, and join in all sorts of silly Christmas stories.
What you’ll need
- 1 white or plain paper lunch bag
- White construction paper
- Black construction paper
- Orange construction paper
- Colored paper for the scarf
- Glue
- Child-safe scissors
- Black marker
- Optional: googly eyes and pom-poms
How to make it
- Make the face. Lay the paper bag flat with the bottom flap facing upward. Cut a large white circle or oval and glue it onto the flap.
- Add the features. Cut black circles for the eyes and an orange triangle for the nose. Glue them onto the white face and draw a smiling mouth.
- Dress the snowman. Cut a strip of colored paper for the scarf and glue it below the face. Add a simple paper hat above the face.
- Finish the body. Add buttons or other small paper details to the front of the bag.
- Let the play begin. Once everything is dry, place your hand inside the bag and move the flap to make the snowman talk.
Fun idea: Let each child give their snowman a name and make up a tiny Christmas story.
9. Snowman Bookmark Craft
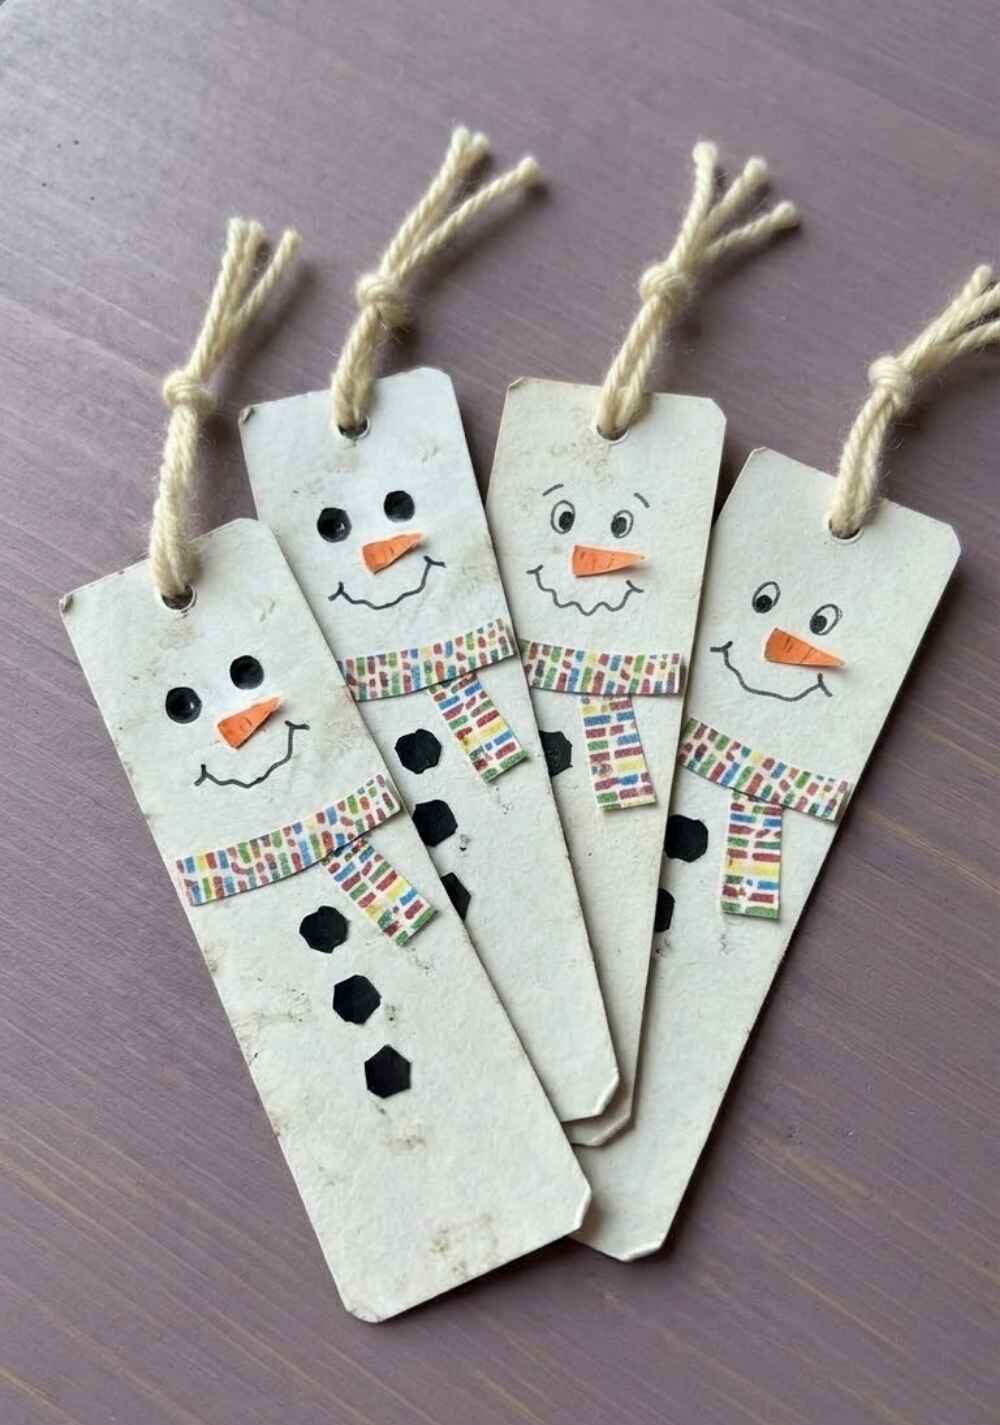
A handmade snowman bookmark is a nice little project because the finished craft actually gets used.
Kids can make one for their own books or create a few to give along with Christmas gifts.
What you’ll need
- White cardstock
- Black construction paper
- Orange construction paper
- Colored paper for the scarf
- Glue
- Child-safe scissors
- Black marker
- Hole punch
- Ribbon or yarn
How to make it
- Cut the bookmark. Cut a rectangle from white cardstock, about 2 inches wide and 6 inches long. Slightly round the top corners if you like.
- Create the face. Cut two small black circles for the eyes and a tiny orange triangle for the nose. Glue them near the top and draw a smiling mouth.
- Add the snowman’s clothes. Cut a narrow strip of colored paper for the scarf and glue it across the bookmark. Add small black paper circles or drawn buttons underneath.
- Add the finishing touch. Punch a hole near the top and thread a short piece of ribbon or yarn through it. Tie it securely and let the glue dry.
Gift idea: Make a few with different scarf colors and tuck them into Christmas books for family members.
10. Moving Snowman Paper Craft
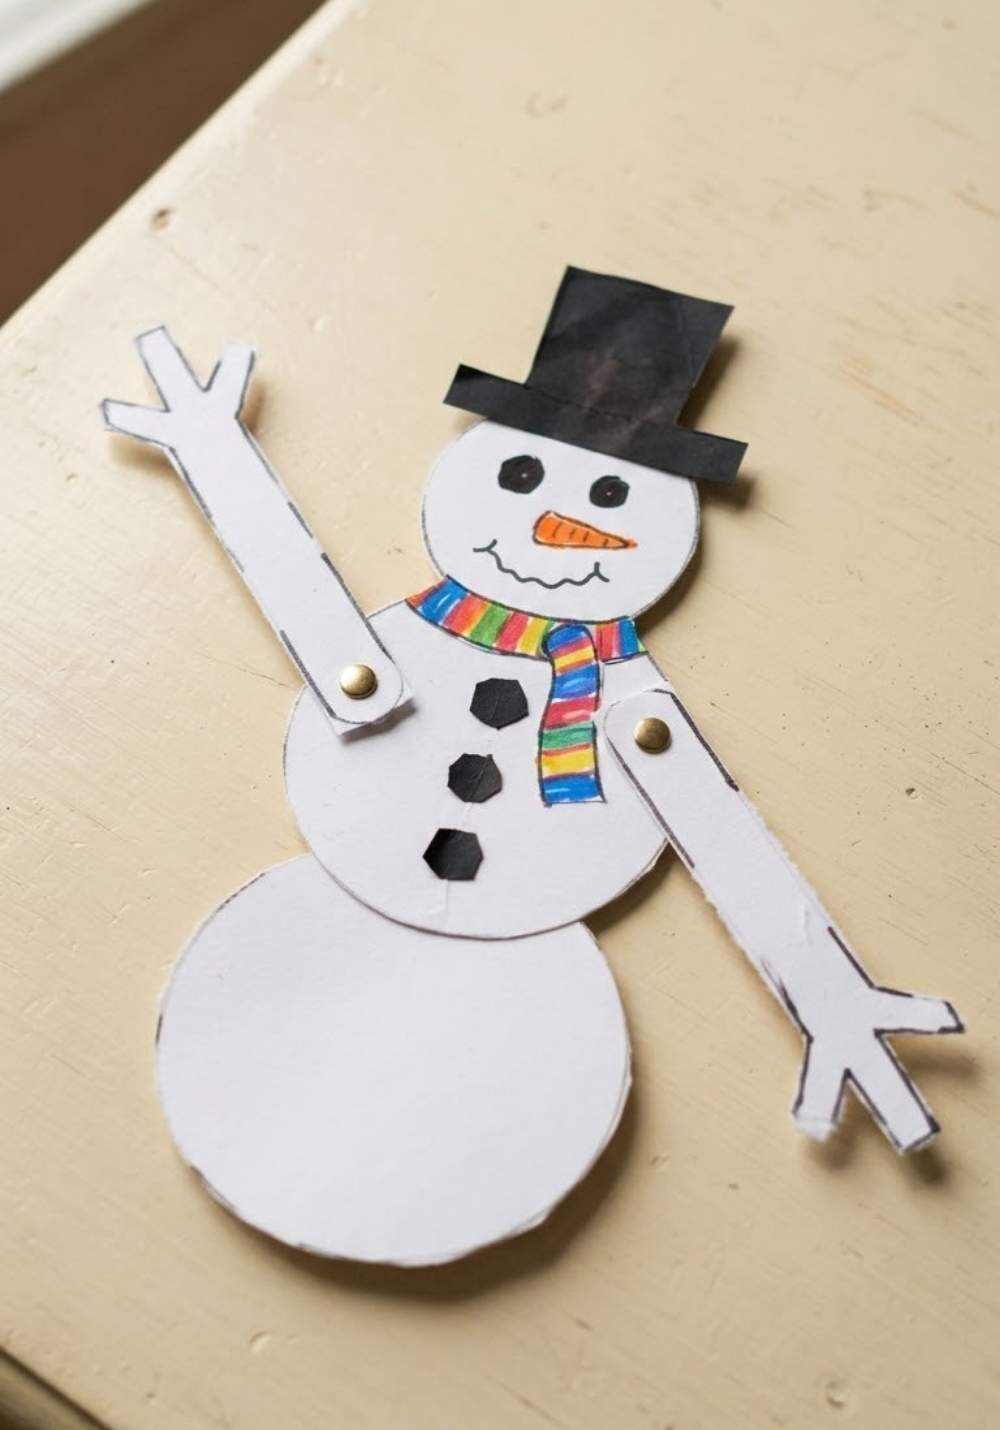
This little snowman can actually move his arms, which makes him more fun than a regular paper snowman. Kids can make him wave, stretch, or simply give him a funny pose.
What you’ll need
- White cardstock or thick white paper
- Black construction paper
- Orange construction paper
- Colored paper for the scarf
- 2 paper fasteners
- Glue
- Child-safe scissors
- Black marker
- Pencil
How to make it
- Make the snowman. Cut three white circles in different sizes and glue them together, with the largest at the bottom. Add black paper eyes, an orange paper nose, and a smiling mouth.
- Make the arms move. Cut two long, thin arms from brown or black paper. Punch a hole near the top of each arm and another hole on each side of the snowman’s middle section.
- Attach the arms. Push a paper fastener through each arm and the matching hole in the snowman, then open the fastener at the back to hold it in place.
- Finish the snowman. Add a paper scarf, a simple hat, and a few buttons. Let everything dry before letting the kids play with the moving arms.
Looking for another simple activity where kids can make something with their hands? Try 15 Easy Popsicle Stick Crafts For Kids They’ll Love Making.
11. Snowman Pom-Pom Craft
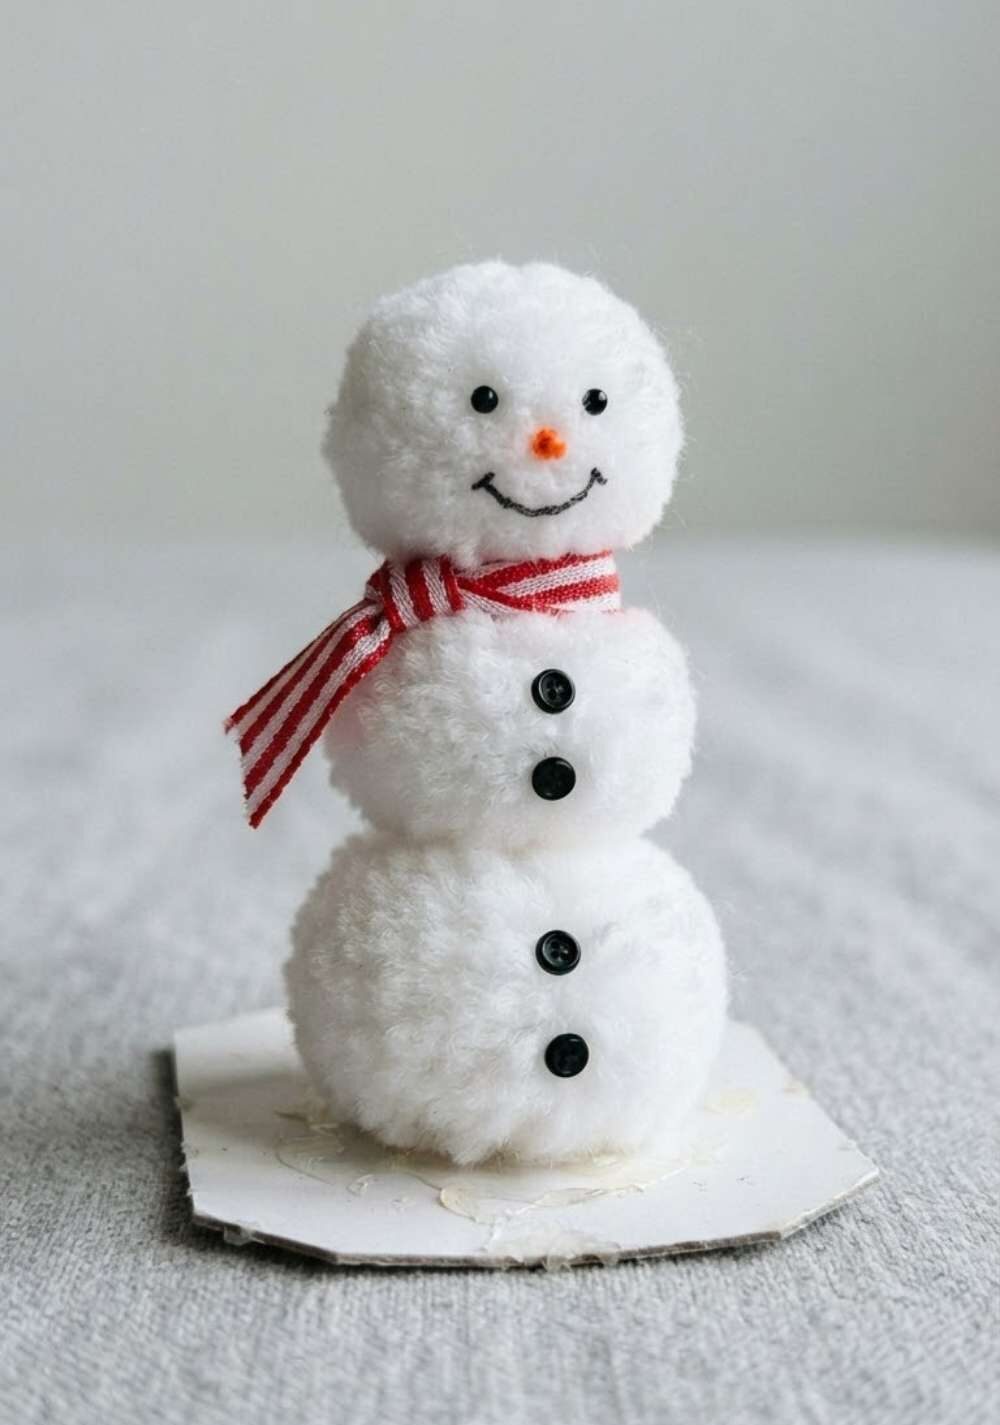
White pom-poms make this little snowman soft, fluffy, and surprisingly cute.
It is a nice quick project for kids who enjoy sticking things together without having to do much cutting.
What you’ll need
- 3 white pom-poms in different sizes
- White cardstock or a small piece of cardboard
- 2 small black pom-poms or googly eyes
- Orange construction paper
- Colored paper or ribbon for the scarf
- Glue
- Child-safe scissors
- Black marker
- Optional: small pom-pom for the hat
How to make it
- Build the snowman. Glue the largest pom-pom near the bottom of the cardstock, then add the medium and smallest pom-poms above it to form the body and head.
- Add the face. Glue on the eyes, then cut a tiny orange triangle for the carrot nose and attach it to the smallest pom-pom. Draw a little mouth with the marker.
- Dress him up. Tie a short piece of ribbon around the neck for the scarf and add small black buttons to the body.
- Finish and dry. Add a tiny pom-pom hat or any other simple details the kids like, then leave the snowman flat until the glue has dried.
Want to make something from an everyday material instead? 15 Straw Flower Crafts for Kids That Turn Simple Straws Into Something Surprisingly Cute has another batch of easy ideas.
12. Snowman Rock Painting
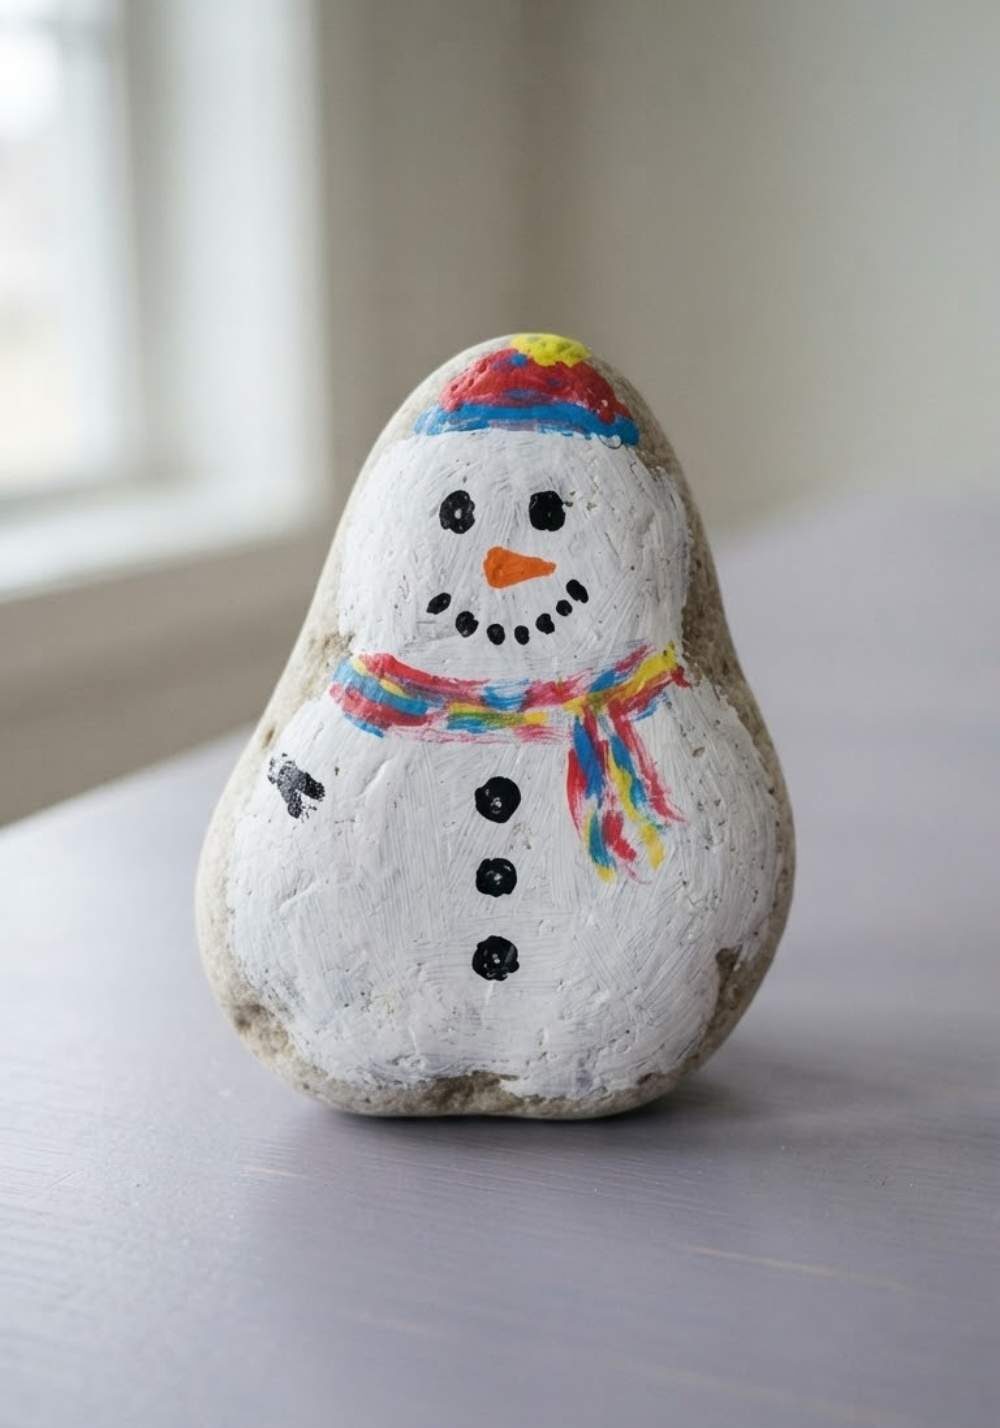
A smooth rock can become a tiny Christmas snowman with just a few dots of paint.
Kids don’t have to be great at painting for this one to work, the simple shapes are part of the charm.
What you’ll need
- 1–3 smooth, clean rocks
- White washable or acrylic paint
- Black paint or black marker
- Orange paint or orange marker
- Small paintbrush
- Water for rinsing the brush
- Paper towel
- Optional: colored paint for a hat and scarf
How to make it
- Prepare the rocks. Wash the rocks and let them dry completely. Place them on newspaper or another protected surface before painting.
- Paint the snowman. Cover the front of each rock with white paint and let it dry. Then add two black eyes, a smiling mouth, and a small orange carrot nose.
- Add the details. Paint or draw a few buttons down the front and give each snowman a simple hat or scarf in a color the kids like.
- Let them dry. Leave the painted rocks undisturbed until all the paint is completely dry. An adult can add a clear sealer afterward if the rocks will be kept outdoors.
Easy idea: Use different-sized rocks to make a little snowman family.
13. Snowman Clothespin Craft

A wooden clothespin is all you need to make a tiny snowman decoration.
Once finished, these little snowmen can clip onto cards, gift bags, ribbon, or even a Christmas display.
What you’ll need
- 1 wooden clothespin
- White washable paint
- Paintbrush
- Black marker
- Orange marker or orange construction paper
- Colored paper for the scarf
- Glue
- Child-safe scissors
- Optional: small pom-pom and ribbon
How to make it
- Paint the clothespin. Cover the wooden clothespin with white paint and let it dry completely.
- Make the face. Draw two black eyes and a smiling mouth. Add a small orange triangle for the carrot nose using an orange marker, or cut one from paper and glue it on.
- Add the clothes. Cut a thin strip of colored paper and glue it around the snowman’s neck for a scarf. Add a few black dots for buttons and a small paper hat if desired.
- Let it dry. Once everything is secure, use the little snowman as a clip for a Christmas card, gift bag, or piece of ribbon.
Need a few more handmade Christmas decorations? Take a look at 15 DIY Wood Bead Christmas Ornaments That Add a Cozy Handmade Touch to Your Holiday Decor.
14. Snowman Suncatcher Craft
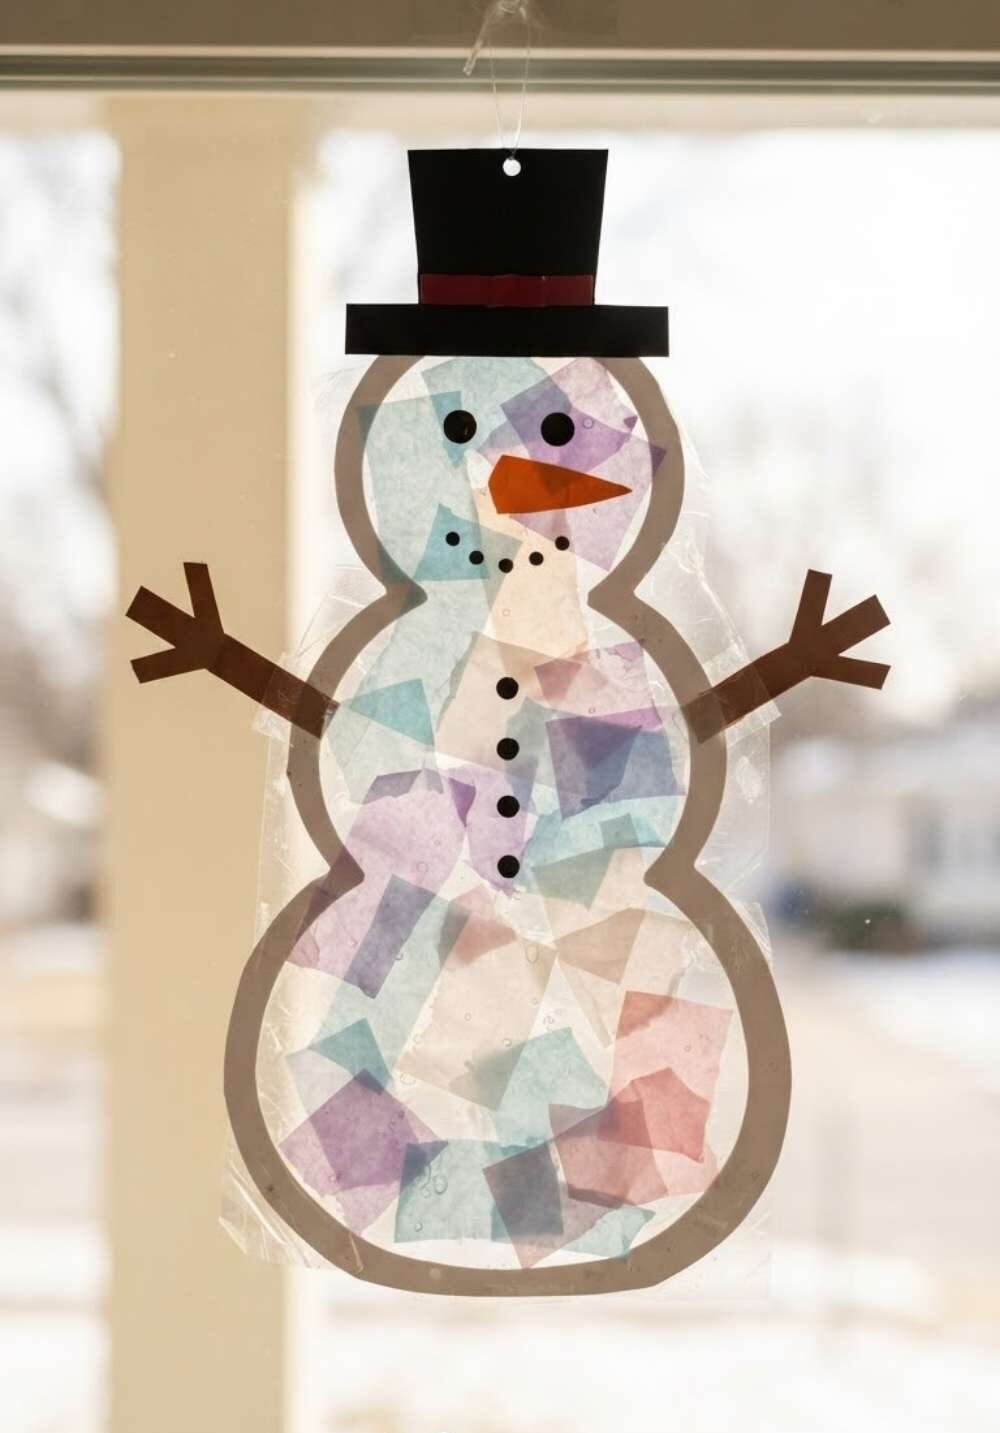
This simple snowman suncatcher is a sweet way to bring a little Christmas fun to a window.
Kids can fill the snowman with small pieces of tissue paper and don’t have to worry about getting every piece in the perfect spot.
What you’ll need
- White cardstock
- Clear contact paper
- Small pieces of tissue paper
- Black construction paper
- Orange construction paper
- Glue
- Child-safe scissors
- Pencil
How to make it
- Make the snowman outline. Draw a simple snowman on the cardstock and carefully cut out the inside of the shape, leaving a white border around it.
- Add the tissue paper. Cut a piece of clear contact paper slightly larger than the opening. Peel off the backing and place it behind the snowman with the sticky side facing forward. Let the kids cover the opening with small pieces of tissue paper.
- Seal the snowman. Place another piece of clear contact paper over the back to hold all the tissue paper in place.
- Add his face. Cut black eyes and an orange carrot nose and glue them onto the front. Add a paper scarf and hat if desired.
- Display it. Hang the finished snowman near a window where the light can shine through the tissue paper.
15. Snowman Bottle Cap Craft
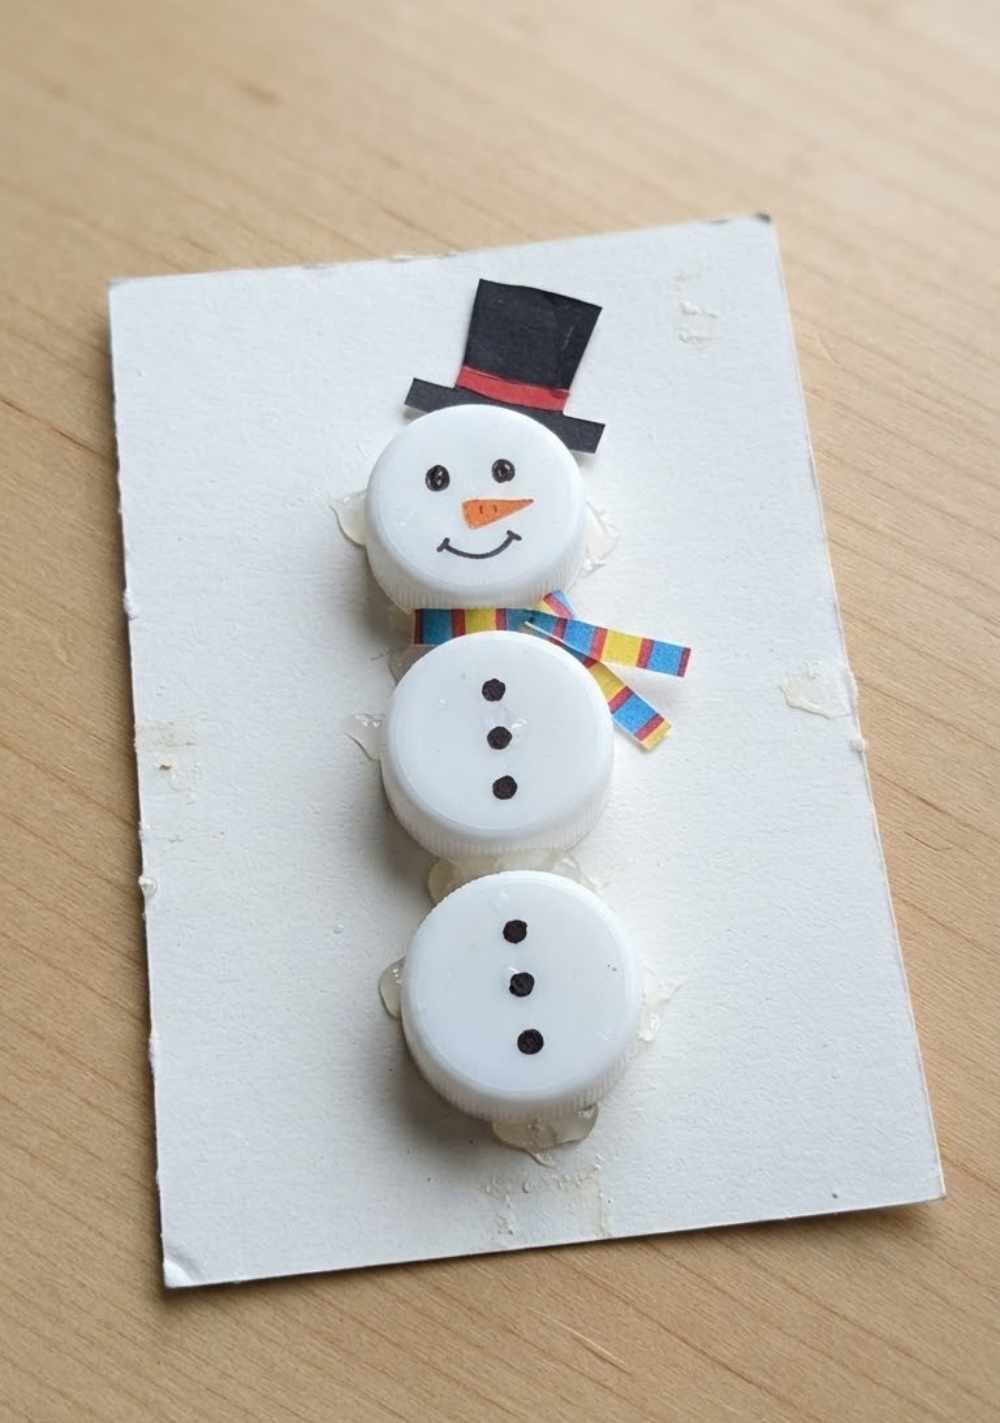
A few clean bottle caps can turn into a tiny snowman decoration with very little effort.
It is a fun way to use up small bits of craft material you may already have around the house.
What you’ll need
- 3 clean white bottle caps
- White cardstock
- Black marker
- Orange construction paper
- Colored paper for the scarf
- Glue
- Child-safe scissors
- Optional: googly eyes, buttons, ribbon, or pom-poms
How to make it
- Arrange the snowman. Place three bottle caps in a straight line on the white cardstock, one above another, and glue them down. Let the glue dry.
- Add the face. Put two eyes on the top bottle cap, then cut a tiny orange triangle for the nose and glue it below the eyes. Draw a small smile with the marker.
- Dress him up. Add black dots for buttons and a narrow strip of colored paper for the scarf. A small paper hat can finish the look.
- Turn it into a decoration. Leave it as a little picture, or trim around the snowman and attach a ribbon to the back once everything is dry.
Parent note: Make sure the bottle caps are clean and supervise younger children around these small pieces.
Want a craft that gets kids outside first? Try Nature Crafts for Kids: Easy Outdoor Activities Using Leaves, Sticks & Stones for simple ideas using things they can collect.
16. Snowman Paper Snow Globe
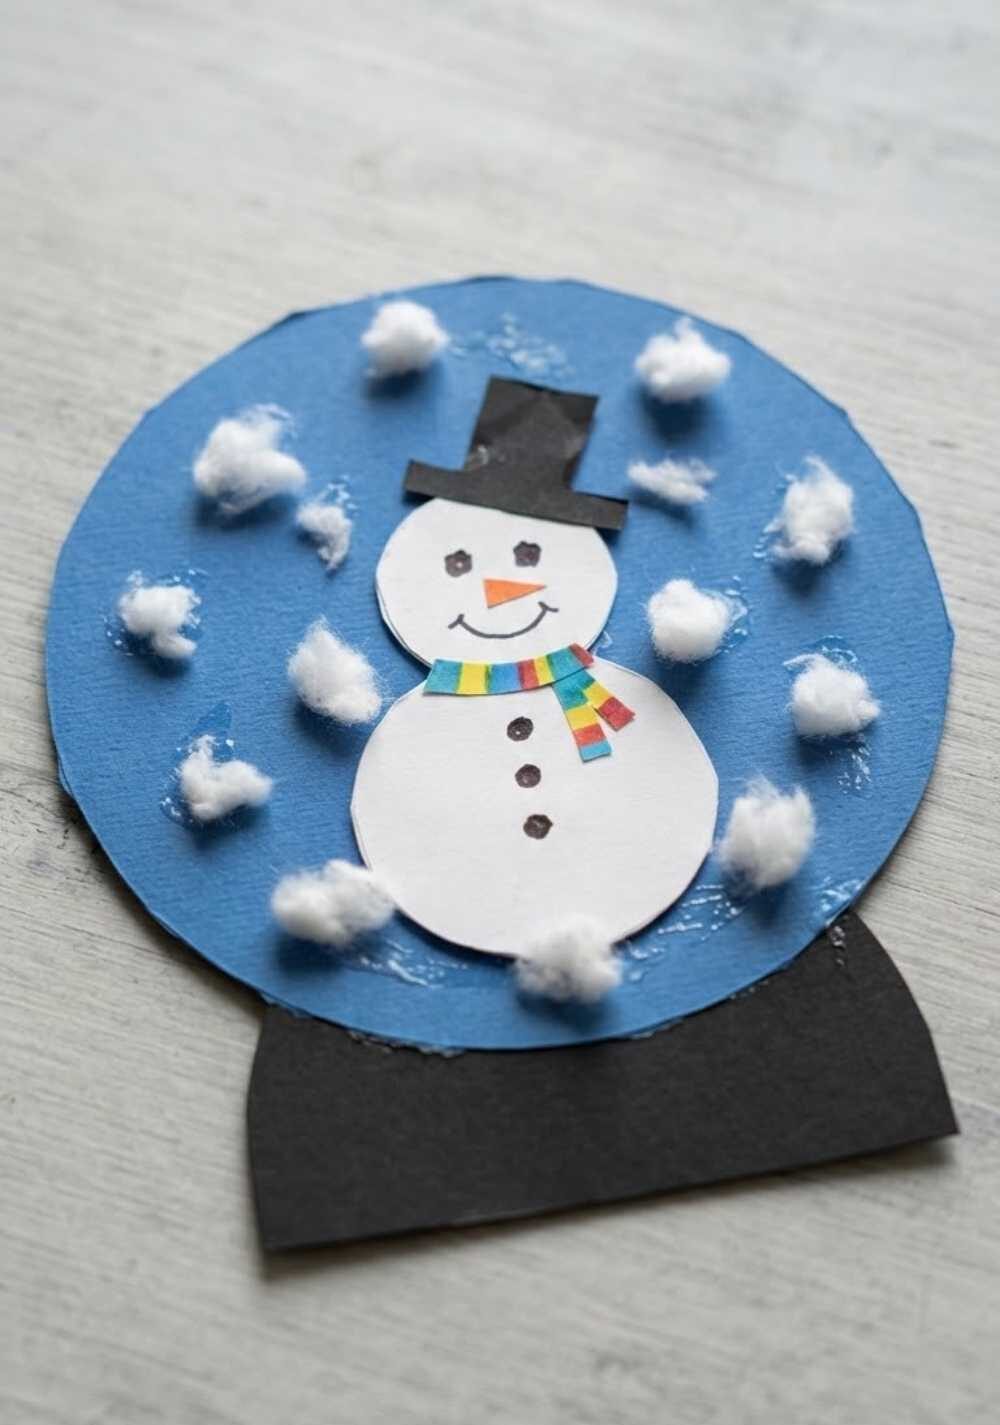
A paper snow globe gives kids a whole little Christmas scene to create around their snowman.
It looks special enough to display but is still a very manageable paper craft.
What you’ll need
- Blue cardstock
- White cardstock
- Black construction paper
- Orange construction paper
- Colored paper for the scarf
- Cotton balls
- Glue
- Child-safe scissors
- Black marker
How to make it
- 1. Make the snow globe. Draw and cut a large circle from the blue cardstock. Cut a simple snowman from white cardstock and glue it near the bottom of the blue circle.
- 2. Add the snowman details. Give him black eyes, an orange carrot nose, a smiling mouth, a colored scarf, and a simple hat.
- 3. Create the snowy scene. Pull small pieces from cotton balls and glue them around the snowman to look like snow. Add a few tiny white paper dots for falling snow.
- Add the base. Cut a simple globe base from black or colored paper and glue it underneath the circle.
- Let it dry. Leave the finished snow globe flat until all the glue has dried before displaying it.
17. Snowman Photo Keepsake Craft
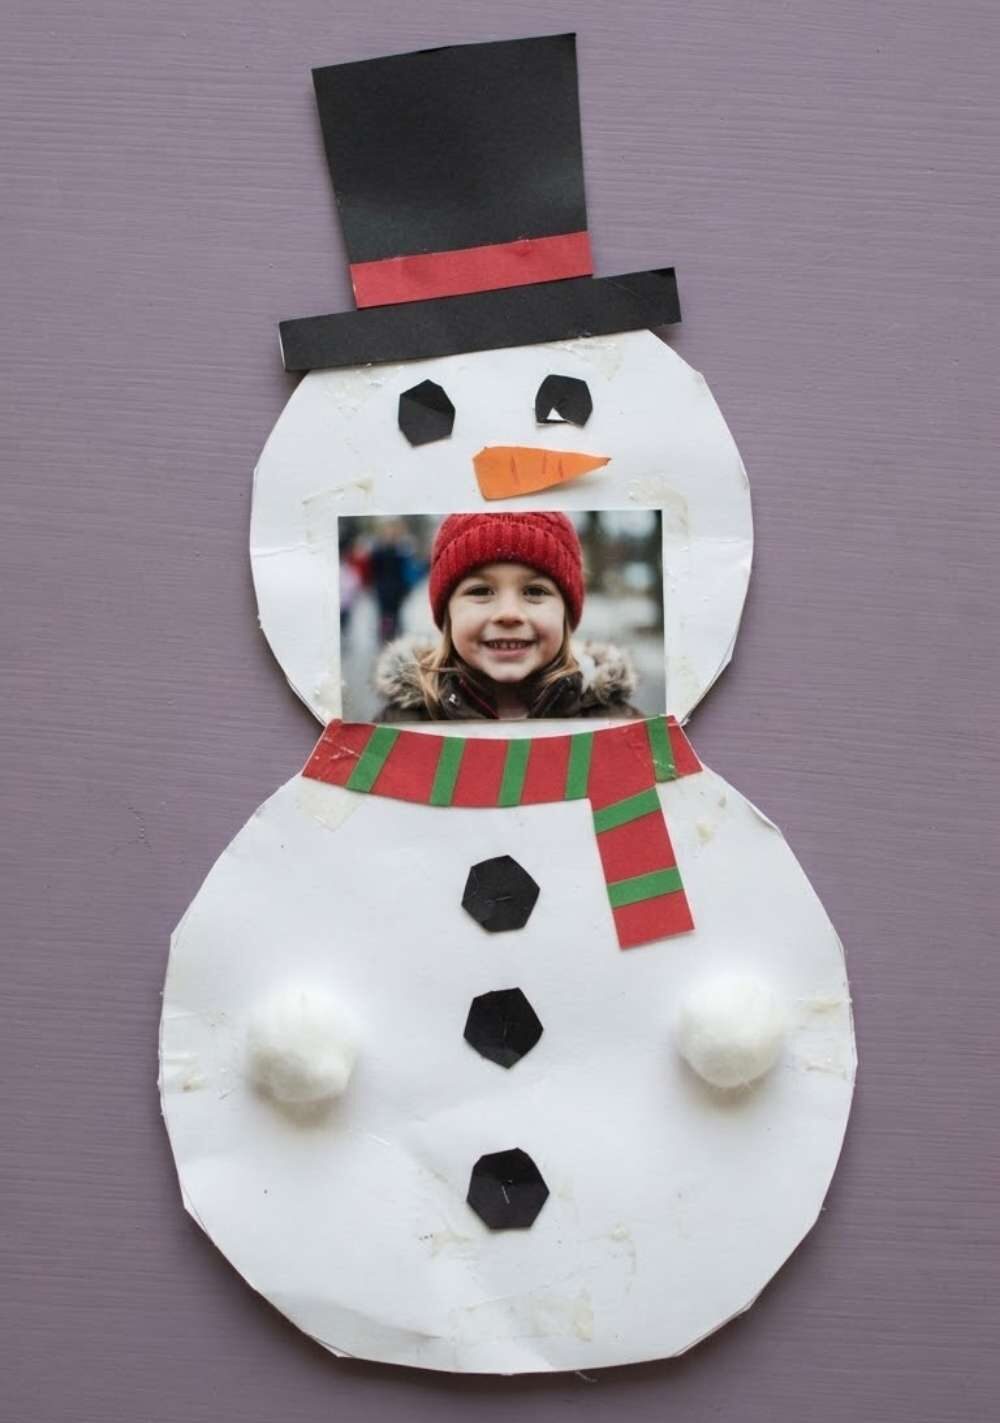
This one is especially nice when you want the Christmas craft to mean a little more.
A child’s photo becomes part of the snowman, creating something you can tuck away and enjoy again later.
What you’ll need
- 1 printed photo of the child
- White cardstock
- Black construction paper
- Orange construction paper
- Colored paper for the scarf
- Glue
- Child-safe scissors
- Black marker
- Optional: cotton balls, stickers, or pom-poms
How to make it
- Prepare the snowman. Cut a large snowman shape from white cardstock and choose a photo where the child’s head and shoulders are clearly visible.
- Add the photo. Trim the photo if needed and glue it onto the upper part of the snowman so it becomes the snowman’s face and upper body.
- Add the Christmas details. Glue on an orange paper carrot nose, add a paper scarf below the photo, and place a simple paper hat above it. Draw or add buttons underneath.
- Finish the keepsake. Decorate with a few cotton balls or stickers, then write the child’s name and the year somewhere on the snowman.
18. Snowman Christmas Garland
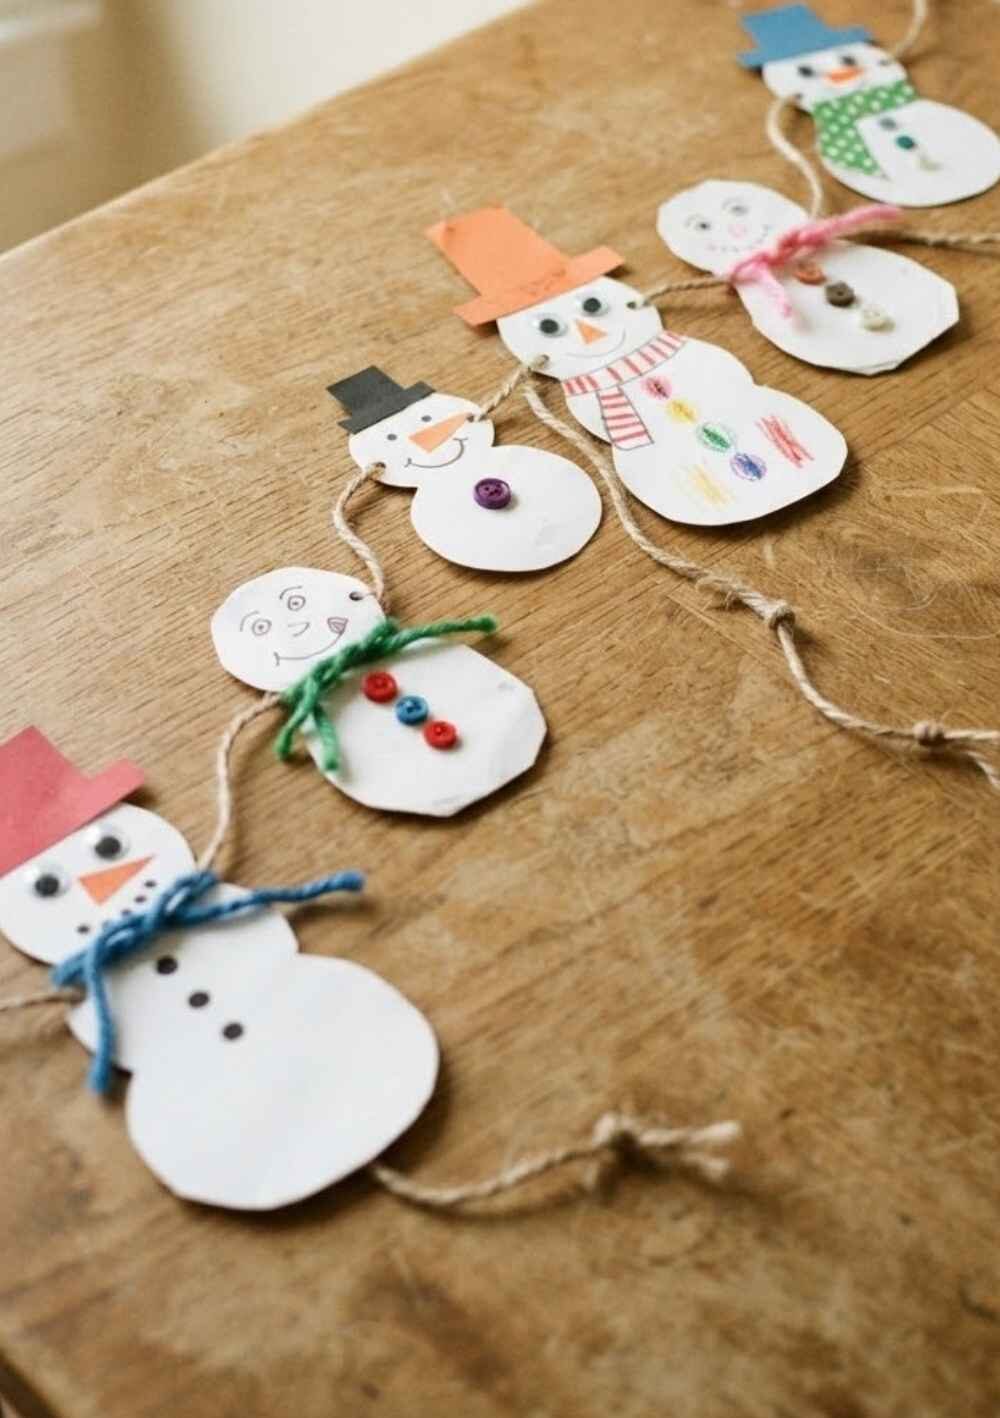
One little snowman is cute, but a whole row of them makes a cheerful Christmas decoration.
This is also a nice craft for siblings or friends because everyone can make a few snowmen for the same garland.
What you’ll need
- White cardstock
- Black construction paper
- Orange construction paper
- Colored paper for scarves
- Glue
- Child-safe scissors
- Black marker
- Hole punch
- Yarn or ribbon
How to make it
- Make the snowmen. Cut several simple snowman shapes from white cardstock. Give each one eyes, an orange carrot nose, a smiling mouth, and a few buttons.
- Add their personalities. Cut small hats and scarves from colored paper and glue different combinations onto the snowmen.
- Prepare them for hanging. Once the glue has dried, punch two small holes near the top of each snowman.
- Make the garland. Thread the yarn or ribbon through the holes, leaving a little space between each snowman.
- Hang it up. Display the finished garland across a shelf, wall, doorway, or Christmas craft corner.
19. Snowman Christmas Gift Tag
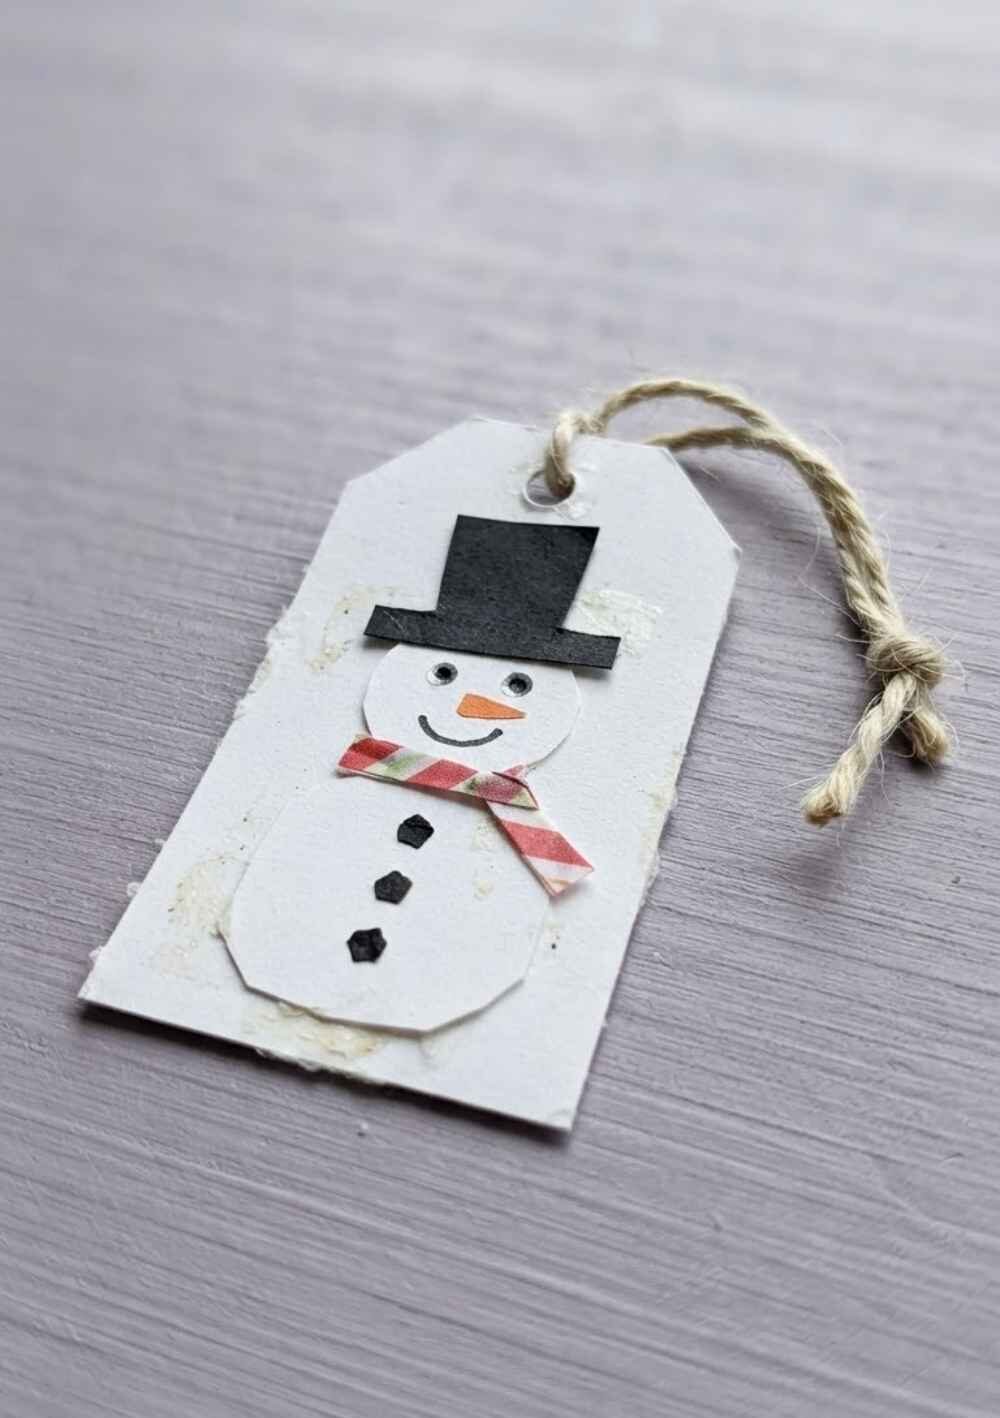
These little snowman tags are easy enough to make several at once and useful enough to go straight onto Christmas presents.
Kids can make a batch for different family members and choose a different scarf for each one.
What you’ll need
- White cardstock
- Black construction paper
- Orange construction paper
- Colored paper for scarves
- Glue
- Child-safe scissors
- Black marker
- Hole punch
- Ribbon or string
How to make it
- Cut the tags. Cut small rectangles from white cardstock, about 2 by 3 inches. Slightly round the top corners if you like.
- Make the snowman face. Glue on two tiny black eyes and a small orange carrot nose, then draw a smiling mouth and add a few black buttons.
- Add the scarf. Cut a thin strip of colored paper and glue it across the tag. Add a small paper hat if desired.
- Make it ready for a gift. Punch a hole near the top and thread a short piece of ribbon or string through it. Write “To” and “From” on the back.
- Let it dry. Allow the glue to dry fully before attaching the tags to gifts.
20. Snowman Christmas Card
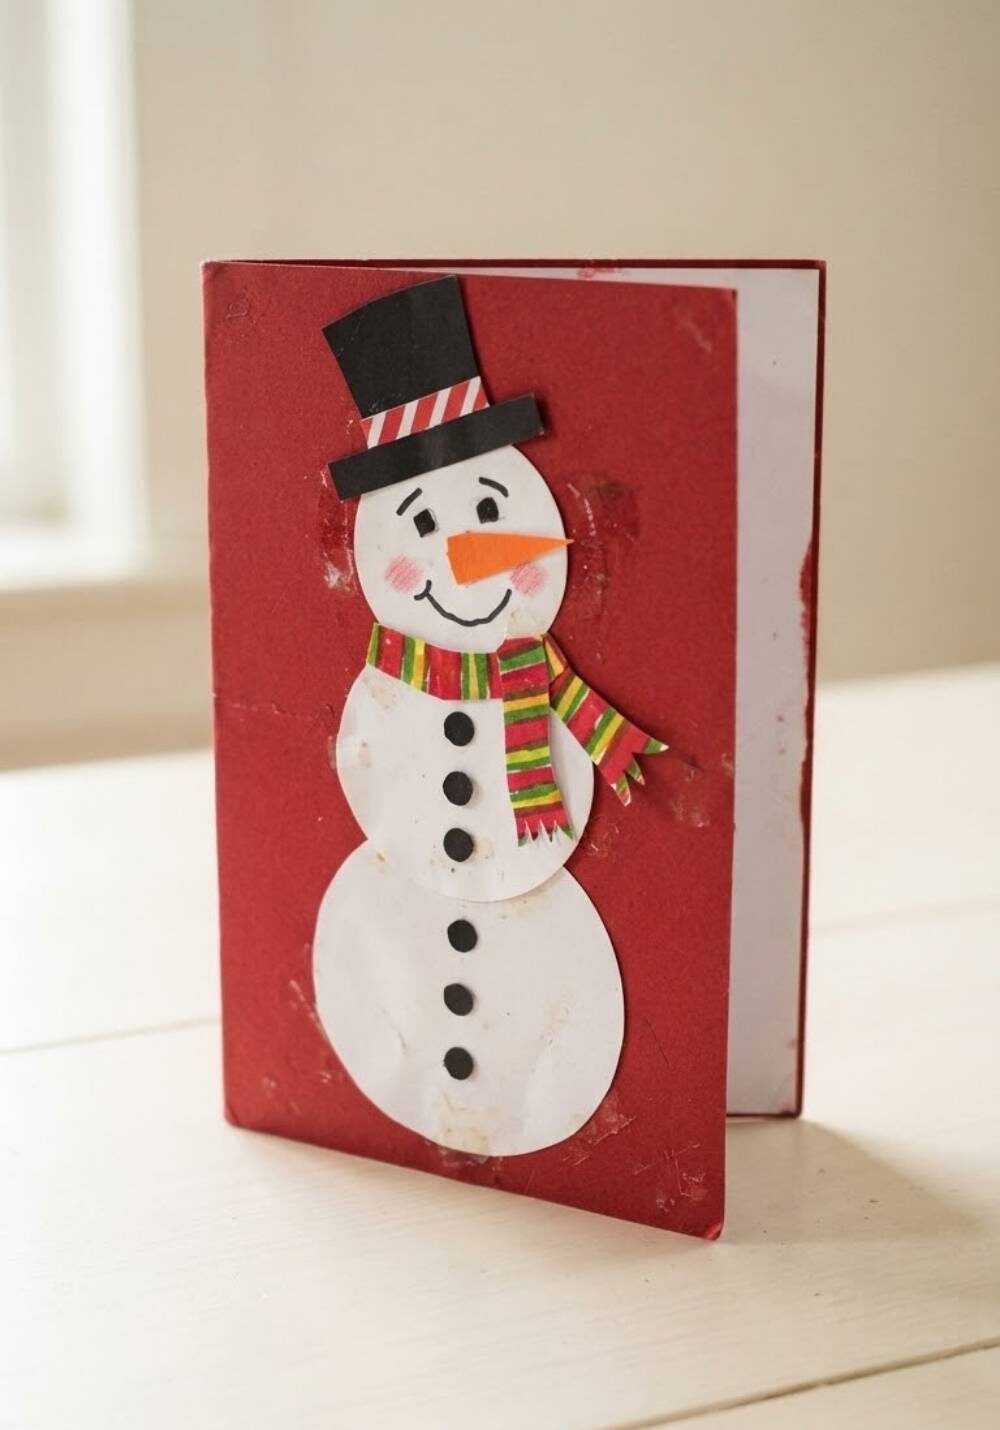
A handmade snowman card is a lovely way to finish the list because kids can make something and then give it to someone they love.
The basic design is simple, but they can make the message inside completely their own.
What you’ll need
- Colored cardstock for the card base
- White cardstock
- Black construction paper
- Orange construction paper
- Colored paper for the scarf
- Glue
- Child-safe scissors
- Black marker
- Optional: cotton balls, buttons, stickers, or pom-poms
How to make it
- Make the card. Fold the colored cardstock in half to create your card. Cut three white circles in different sizes for the snowman’s body and arrange them on the front.
- Add the face. Glue on black eyes, an orange carrot nose, and a simple paper or marker-drawn smile.
- Dress the snowman. Add a strip of colored paper for the scarf, a simple black paper hat, and a few buttons down the front.
- Add a little extra if you like. A few cotton balls, stickers, or pom-poms can add a festive touch, but the card is already finished without them.
- Write the message. Let the kids add their own Christmas greeting, drawing, or little note inside before giving the card to someone special.
Planning to keep the Christmas crafting going after the kids finish? 20 Easy Christmas Crafts for Adults: Simple DIY Gifts Everyone Will Love has ideas for your own cozy crafting time.
Easy Ways to Display Easy Christmas Snowman Crafts For Kids
Once the kids have finished making their easy Christmas snowman crafts for kids, don’t hide them away in a drawer.
A few simple display ideas can make their hard work feel like part of the Christmas decorating.
- Create a little snowman gallery: Tape the paper snowmen along a wall, fridge, or hallway where everyone can see them.
- Hang the ornaments: Add handmade snowman ornaments to the Christmas tree alongside your regular decorations.
- Make a garland: String several snowmen together and hang them across a shelf, doorway, or craft corner.
- Save the keepsakes: Handprint and photo snowmen can go into a Christmas memory box to bring out each year.
- Use the gift tags and cards: Let the kids add their handmade pieces to presents for family and friends.
Want to add more handmade decorations to the tree? See 15 DIY Wood Bead Christmas Ornaments That Add a Cozy Handmade Touch to Your Holiday Decor.
And if you’re still in the Christmas crafting mood, 20 Easy Christmas Crafts for Adults: Simple DIY Gifts Everyone Will Love has a few ideas for the grown-ups too.
Frequently Asked Questions About Easy Christmas Snowman Crafts For Kids
What are the easiest Christmas snowman crafts for kids?
Some of the easiest options are the paper plate snowman, cotton ball snowman, popsicle stick snowman, paper bag puppet, and simple Christmas card. They don’t require complicated techniques, and kids can personalize them with whatever craft supplies you already have at home.
What supplies do I need for snowman crafts?
You can get quite a lot done with basic supplies such as white paper or cardstock, construction paper, glue, child-safe scissors, markers, cotton balls, popsicle sticks, pom-poms, and googly eyes. You don’t need every supply for every craft, so choose a few projects and gather only what you’ll actually use.
Can younger kids make these snowman crafts?
Yes. Many of these crafts are suitable for younger children, especially the cotton ball, paper plate, handprint, and simple paper snowman projects. Younger kids may need help with cutting, gluing, or attaching small pieces, while older children can handle more of the project themselves.
How can I make Christmas snowman crafts less messy?
Set up a small crafting area with a washable surface or tray, put out only the supplies needed for that particular craft, and keep wipes or paper towels nearby. For younger children, glue sticks can also make things a little easier to manage than liquid glue.
What can kids do with their finished snowman crafts?
Quite a few can become Christmas decorations, ornaments, garlands, cards, bookmarks, gift tags, or keepsakes. You can also write the child’s name and the year on the back of special pieces so you’ll remember when they were made.
Final Thoughts
Christmas crafting doesn’t have to be complicated to be memorable. With a few simple supplies and a little imagination, these easy Christmas snowman crafts for kids can turn an ordinary afternoon into something festive and fun.
Let the kids choose their favorite, add their own silly details, and don’t worry about crooked hats or wonky smiles. Those little imperfections are often what make handmade Christmas crafts so special.
Pick a project, gather your supplies, and enjoy making a little Christmas magic together.