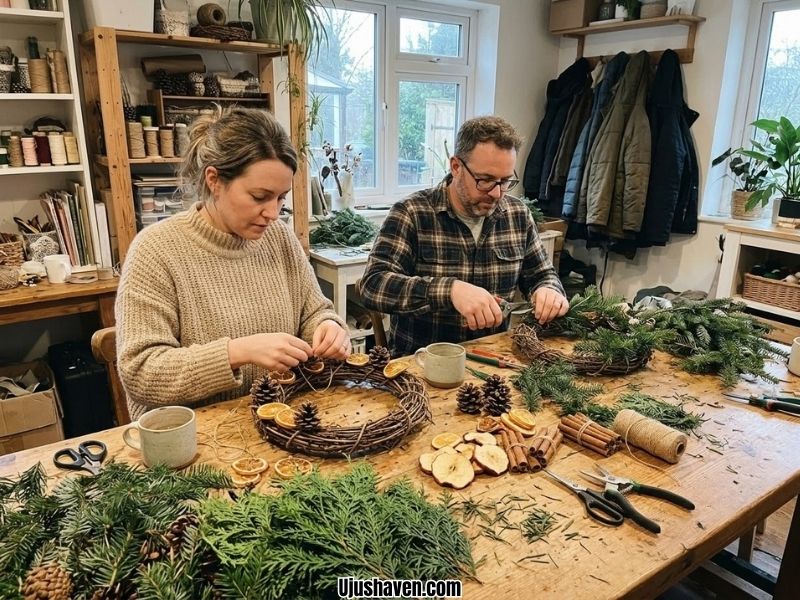
December can feel a little different when you have December Crafts for Seniors planned for the whole month, rather than just a few Christmas projects squeezed into the final week.
There are quiet days at the beginning of the month, gifts and preparations in the middle, family celebrations as Christmas gets closer, and those slower days after Christmas when everyone is ready to breathe again.
That’s why I put these 25 crafts together as a simple December craft plan.
You’ll find easy projects for each part of the month, from useful little things to make and give to festive decorations, memory projects, and a few New Year crafts to finish the month on a cheerful note.
They’re meant to be enjoyable without requiring a craft room full of supplies or complicated instructions.
And if you’re specifically looking for Christmas projects, I also have a collection of “easy Christmas crafts for seniors” 15 Easy Christmas Craft Ideas for Seniors you can dip into alongside these ideas.
For now, grab a few basic supplies and let’s make December a little more creative, cozy, and enjoyable from beginning to end.
A Simple Plan for December Crafts for Seniors
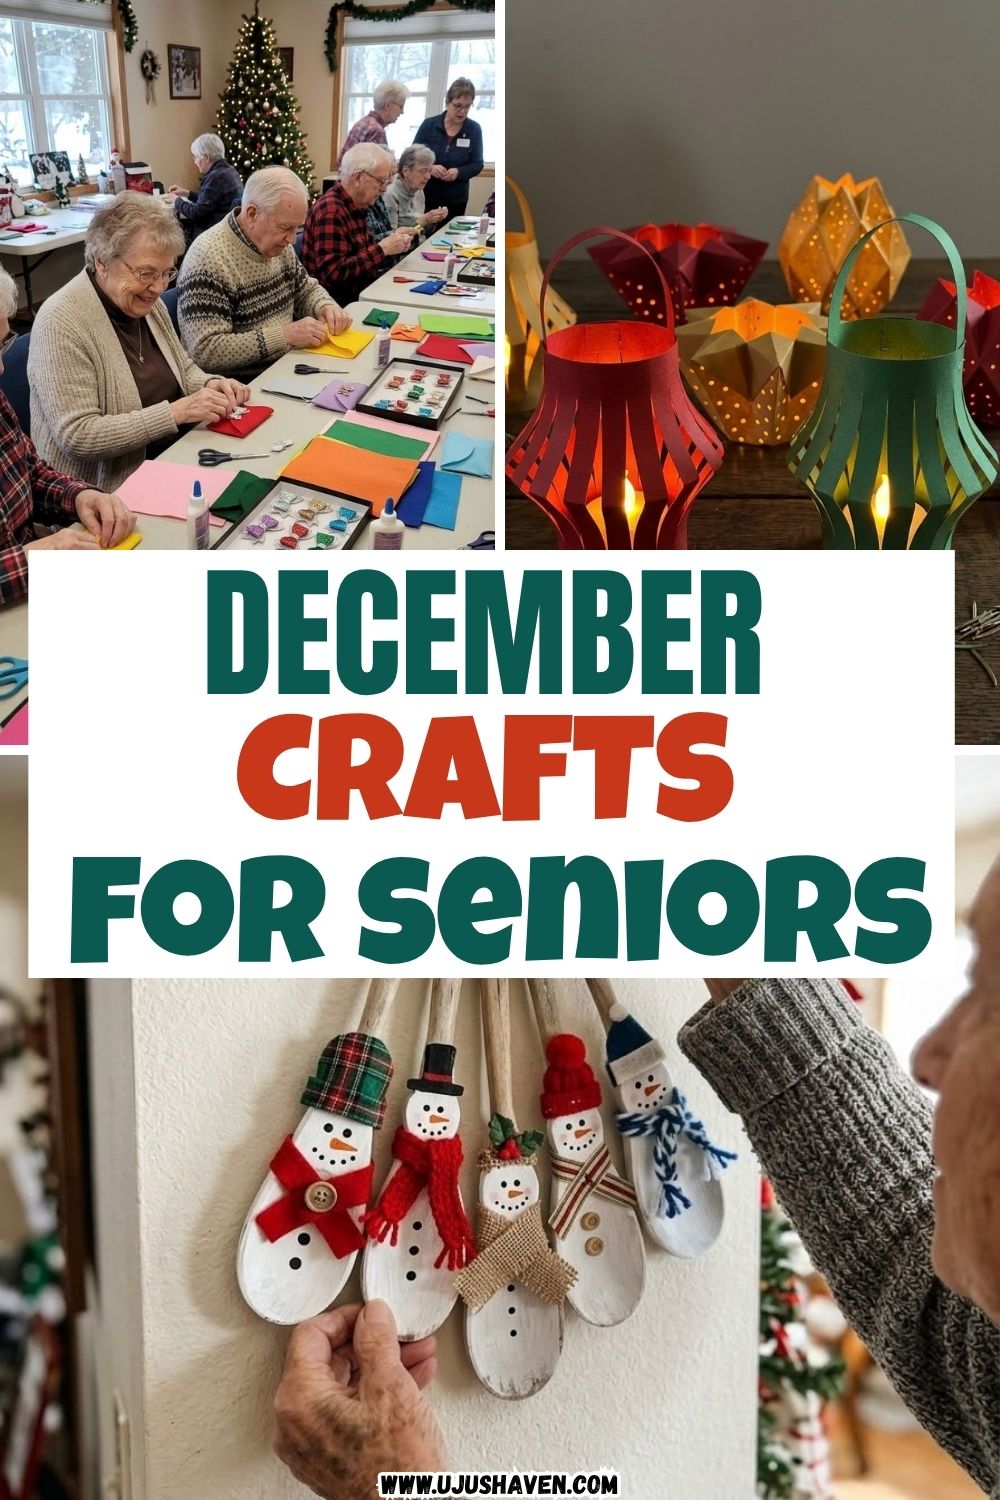 Think of this plan as a calendar you can follow loosely.
Each week has its own mood, so the December crafts for seniors in each section match what is usually going on at that point in the month.
Start at Week 1 and work your way through, or jump straight to the week you need.
Most of the supplies are things you already have at home or can pick up in one trip to a dollar store.
That is what makes these December crafts for seniors easy to start.
Every craft uses the same easy layout: a short introduction, a simple supply list, a few steps, ways to make it more comfortable, and a note on why it is so enjoyable.
Week 1 December: A Gentle Start to the Month
The first week of December is for easing in.
Nothing is rushed yet, so these December crafts for seniors are small, calm, and satisfying, the kind you can finish in one sitting with a cup of tea nearby.
If the quiet afternoons still feel long, 20 Winter Boredom Busters for Adults has plenty more ideas to fill them.
1. DIY December Countdown Calendar
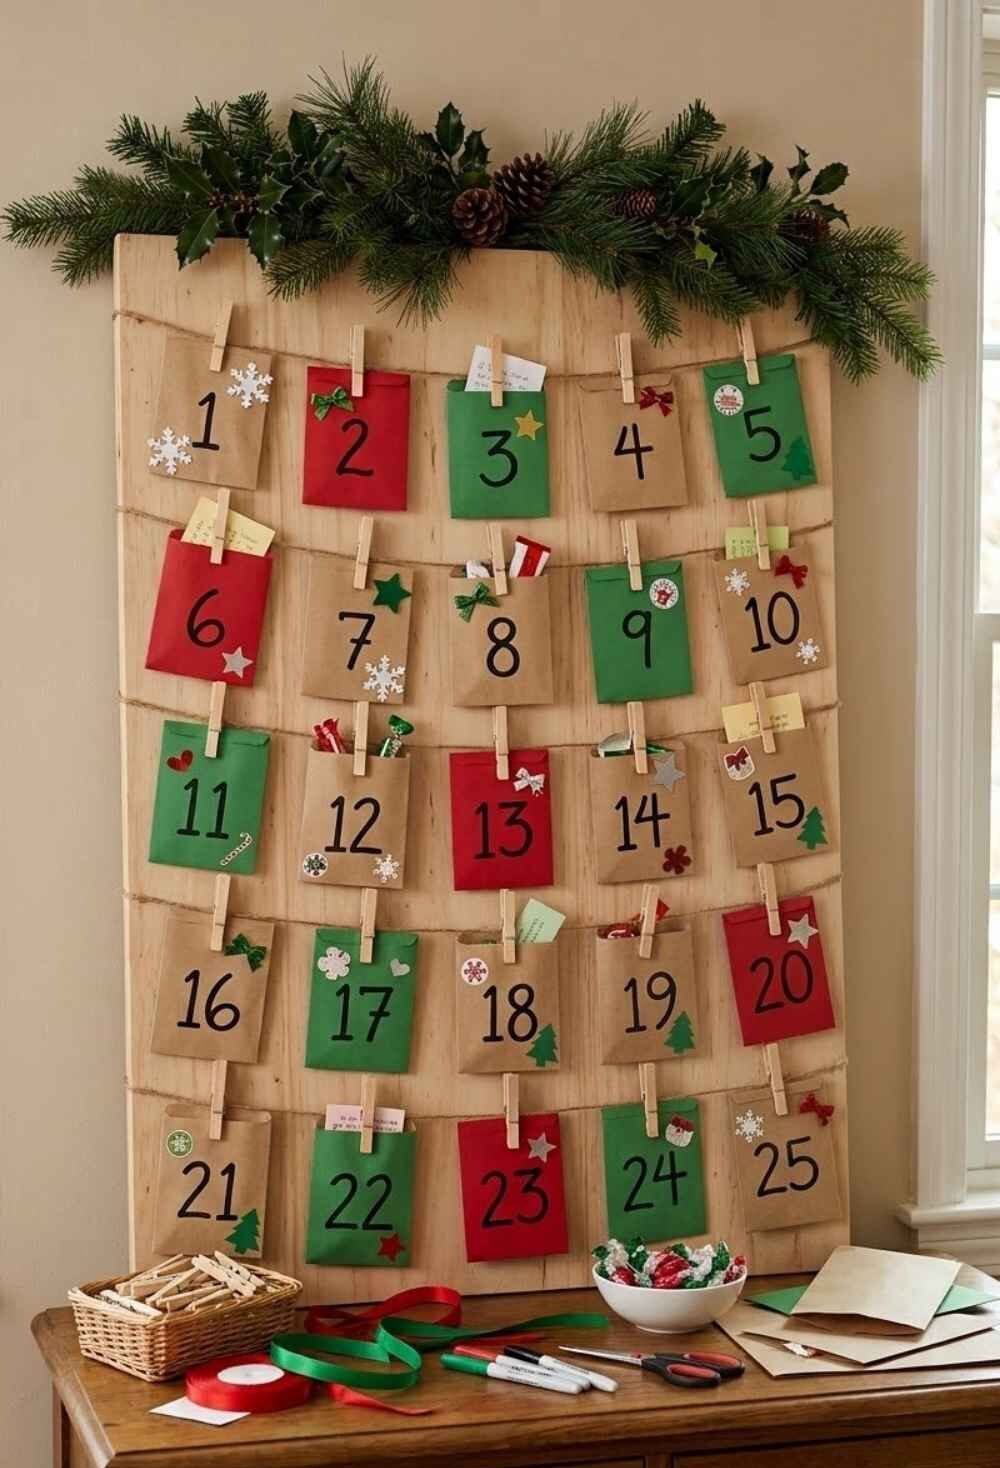 A countdown calendar gives every day of the month a small purpose, which makes it one of the nicest December crafts for seniors to start with.
Little envelopes are filled with notes, treats, or kind thoughts, then opened one at a time.
For seniors, it turns the whole month into something to look forward to, even on the quietest mornings.
What You’ll Need
- 25 small kraft paper envelopes or paper bags
- A marker or number stickers
- Twine or ribbon
- Mini clothespins
- Short notes, wrapped candies, or small treats
How to Make It
- Number each envelope from 1 to 25 with a marker or number stickers.
- Slip a short note, a favorite candy, or a daily thought inside each one.
- Stretch the twine across a mantel, window, or wall and secure both ends.
- Clip the envelopes along the twine in order, then open one each morning.
Make It Easier
- Limited hand strength or arthritis: Hang each envelope from a loop of ribbon over a hook instead of squeezing clothespins.
- Vision difficulties: Write the numbers with a thick black marker on light-colored envelopes.
- Reduced dexterity: Tape the envelopes straight onto a door or wall in a simple grid.
Why Seniors May Enjoy It
A small surprise waits each morning, which makes even a quiet day feel lighter. Filling the envelopes is a pleasure too, since every note means thinking of someone.
2. Paper Quilling Greeting Card Art
Quilling is the old craft of rolling thin paper strips into shapes, and it suits the calm of early December very well.
A few coils and teardrops become a poinsettia, a snowflake, or a wreath on a handmade card. It is slow, quiet work that rewards patience.
What You’ll Need
- Quilling paper strips in red, green, and white
- A slotted quilling tool or a toothpick
- White craft glue
- Blank cards or folded cardstock
- Tweezers and small scissors
How to Make It
- Wind a paper strip loosely around the tool, then let it relax into an open coil.
- Pinch one end of the coil to make a teardrop for a petal. Make five or six petals this way, and two or three leaves by pinching both ends of a coil.
- Arrange the petals in a circle on the card with the points toward the middle, then add one small round coil in the center.
- Place the leaves beside the flower, glue each piece down with a small dot of glue, and let the card dry flat.
Make It Easier
- Limited hand strength or arthritis: Use a fat toothpick or a pencil with a foam grip so the tool is easier to hold.
- Vision difficulties: Choose wider strips in strong, contrasting colors.
- Reduced dexterity: Skip the tight rolling and simply fold strips into loops, then glue the ends.
Why Seniors May Enjoy It
Watching a flat strip turn into a tiny flower brings a real sense of calm. The finished cards feel far more personal than anything from a shop.
3. Decorated Wooden Spoon Wall Art
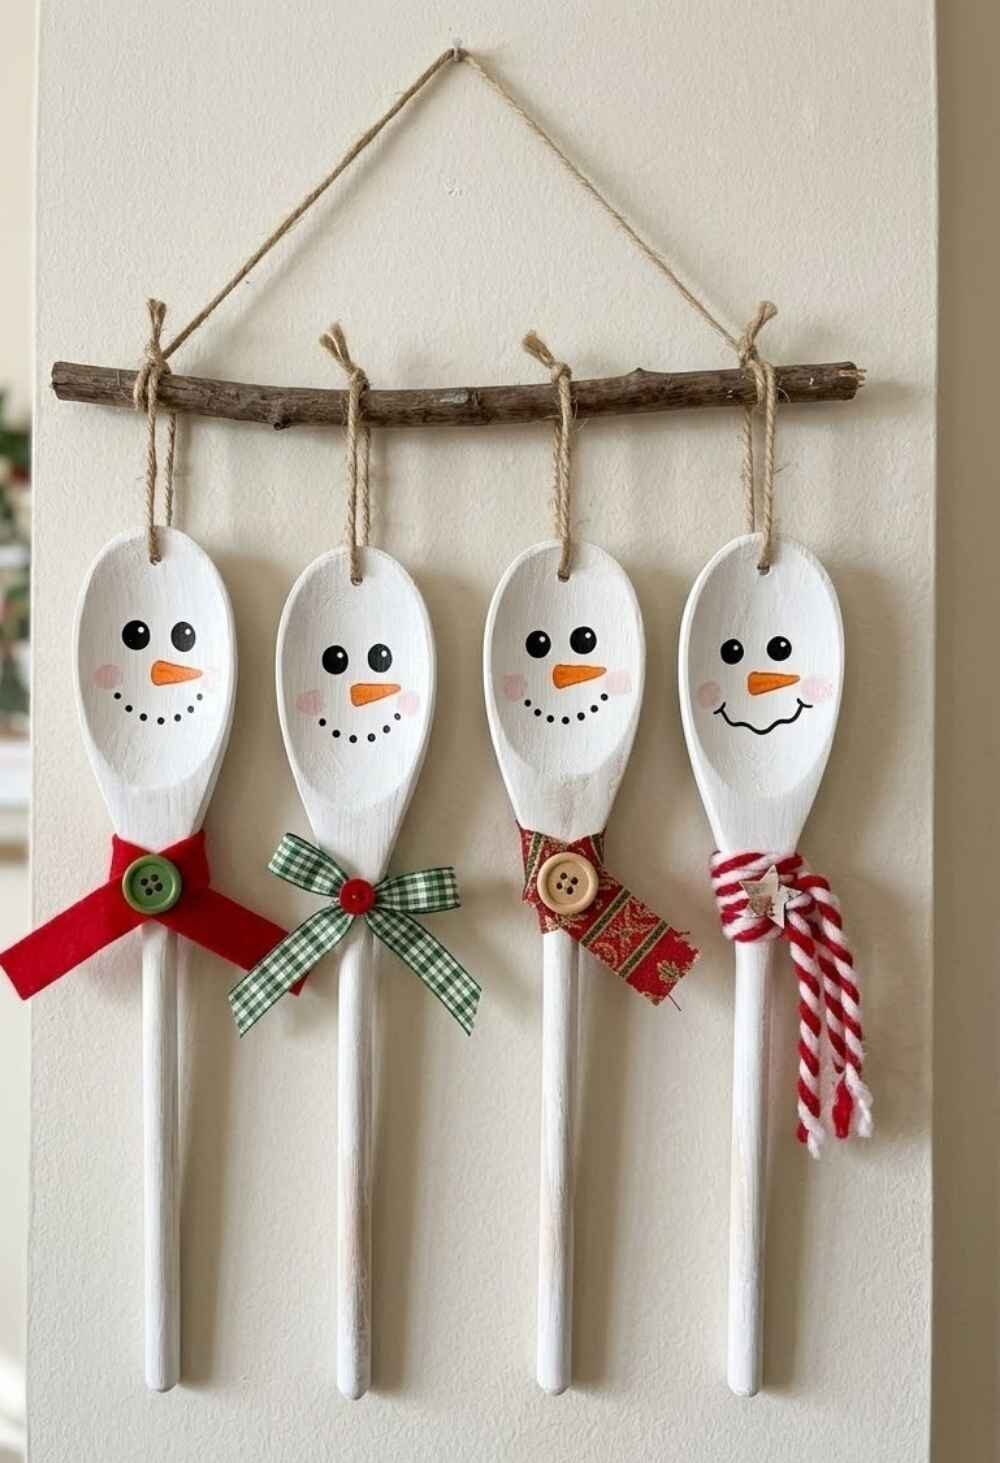 Wooden spoons are cheap, easy to hold, and already shaped like little faces or flowers, which makes them ideal for a first week project.
Painted as snowmen, reindeer, or winter blooms, a small group of them looks charming on a kitchen wall.
They are also a good way to bring a little color to the room early in the month.
What You’ll Need
- 3 to 5 plain wooden spoons
- Acrylic paint in white, red, orange, and black
- A few soft brushes
- Fine-tip paint pens
- Ribbon or twine for hanging
How to Make It
- Wipe each spoon clean and paint the bowl with a base color. Let it dry.
- Add faces, scarves, or simple patterns with a small brush or paint pen.
- Tie a ribbon around each handle just below the bowl.
- Add a twine loop at the top and hang the spoons together on a wall or door.
Make It Easier
- Limited hand strength or arthritis: Wrap the brush handle in foam tubing or a rolled washcloth for a wider, softer grip.
- Vision difficulties: Keep the designs bold and simple, such as big dots for eyes and a single stripe for a scarf.
- Reduced dexterity: Press on stickers or use the end of a cotton swab to dot on the details.
Why Seniors May Enjoy It
Painting a face onto a plain spoon is playful in the best way. It is a project that tends to bring out a smile, and a few jokes along the way.
4. DIY Fabric Scrap Bookmarks
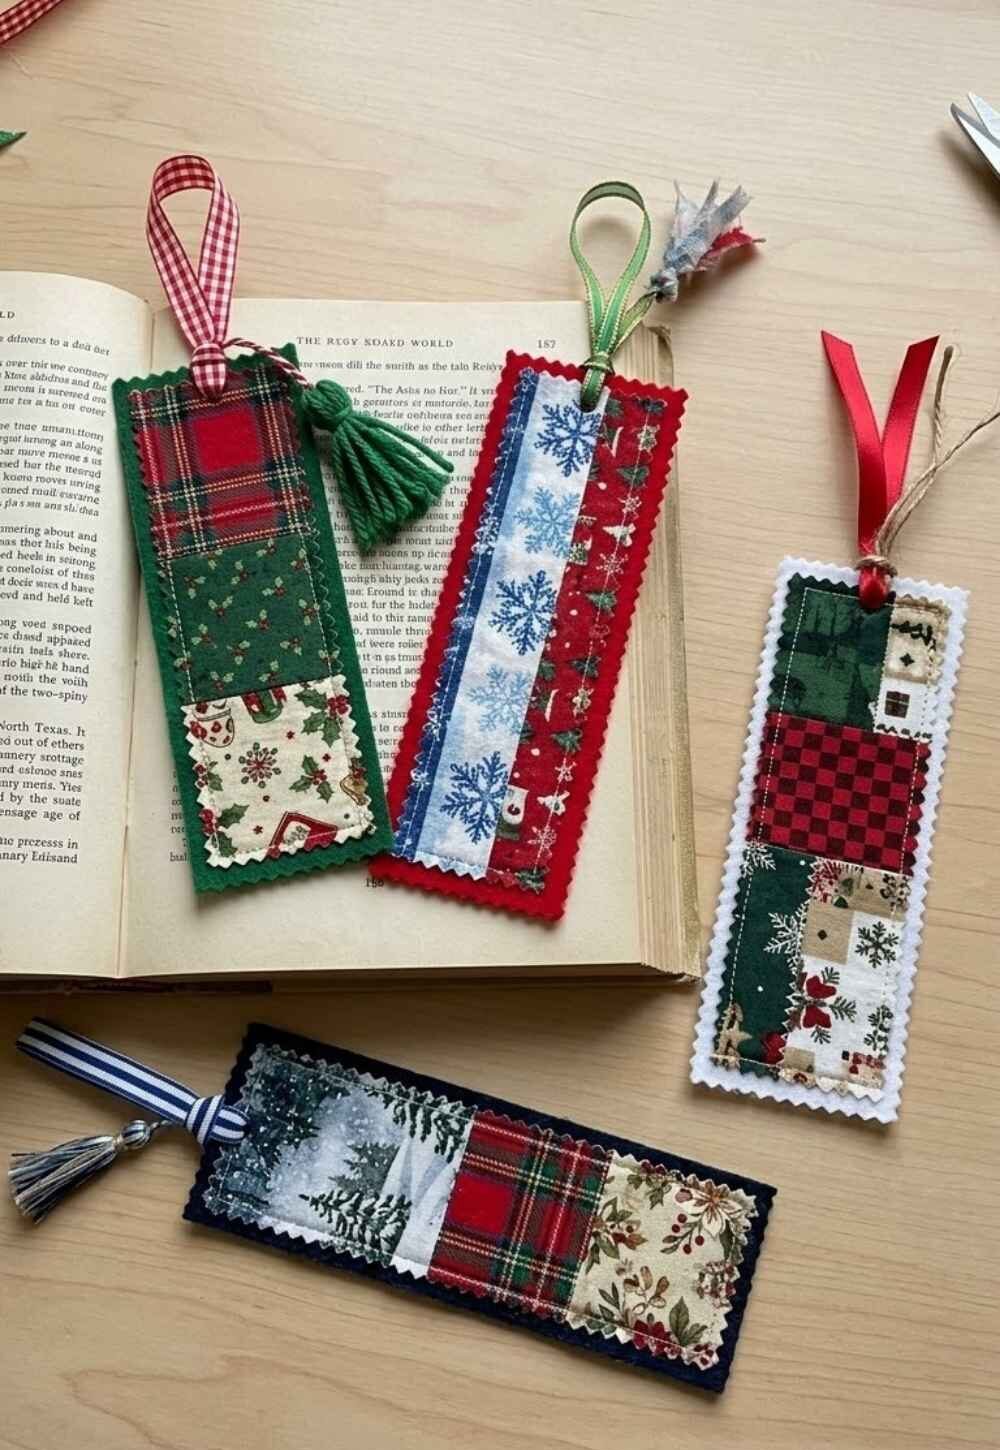 Everyone has a little pile of leftover fabric somewhere, and this is a kind way to use it.
Cut into neat strips and finished with a ribbon, these bookmarks are small enough to finish in an afternoon.
They also make good gifts for any reader on your list.
What You’ll Need
- Fabric scraps in Christmas prints or solid colors
- Felt or thin cardstock for the backing
- Fabric glue or a glue stick
- Scissors or pinking shears
- Thin ribbon for a tassel
How to Make It
- Cut a fabric strip about as wide as two fingers and a little longer than your hand, then cut the backing to match.
- Spread glue over the backing and press the fabric on top, smoothing out any wrinkles.
- Trim the edges evenly, using pinking shears for a decorative zigzag border.
- Fold a short piece of ribbon in half, glue it to the top, and add a small tassel.
Make It Easier
- Limited hand strength or arthritis: Use spring-loaded scissors, which open on their own after each cut.
- Vision difficulties: Pick fabrics with large, bold prints so it is easy to see where to trim.
- Reduced dexterity: Ask a friend to pre-cut the strips so you can focus on gluing and decorating.
Why Seniors May Enjoy It
Old scraps get a second life, which is satisfying in its own quiet way. A handmade bookmark tucked into a favorite book makes the gift feel thoughtful.
5. Handmade Paper Flower Bouquets
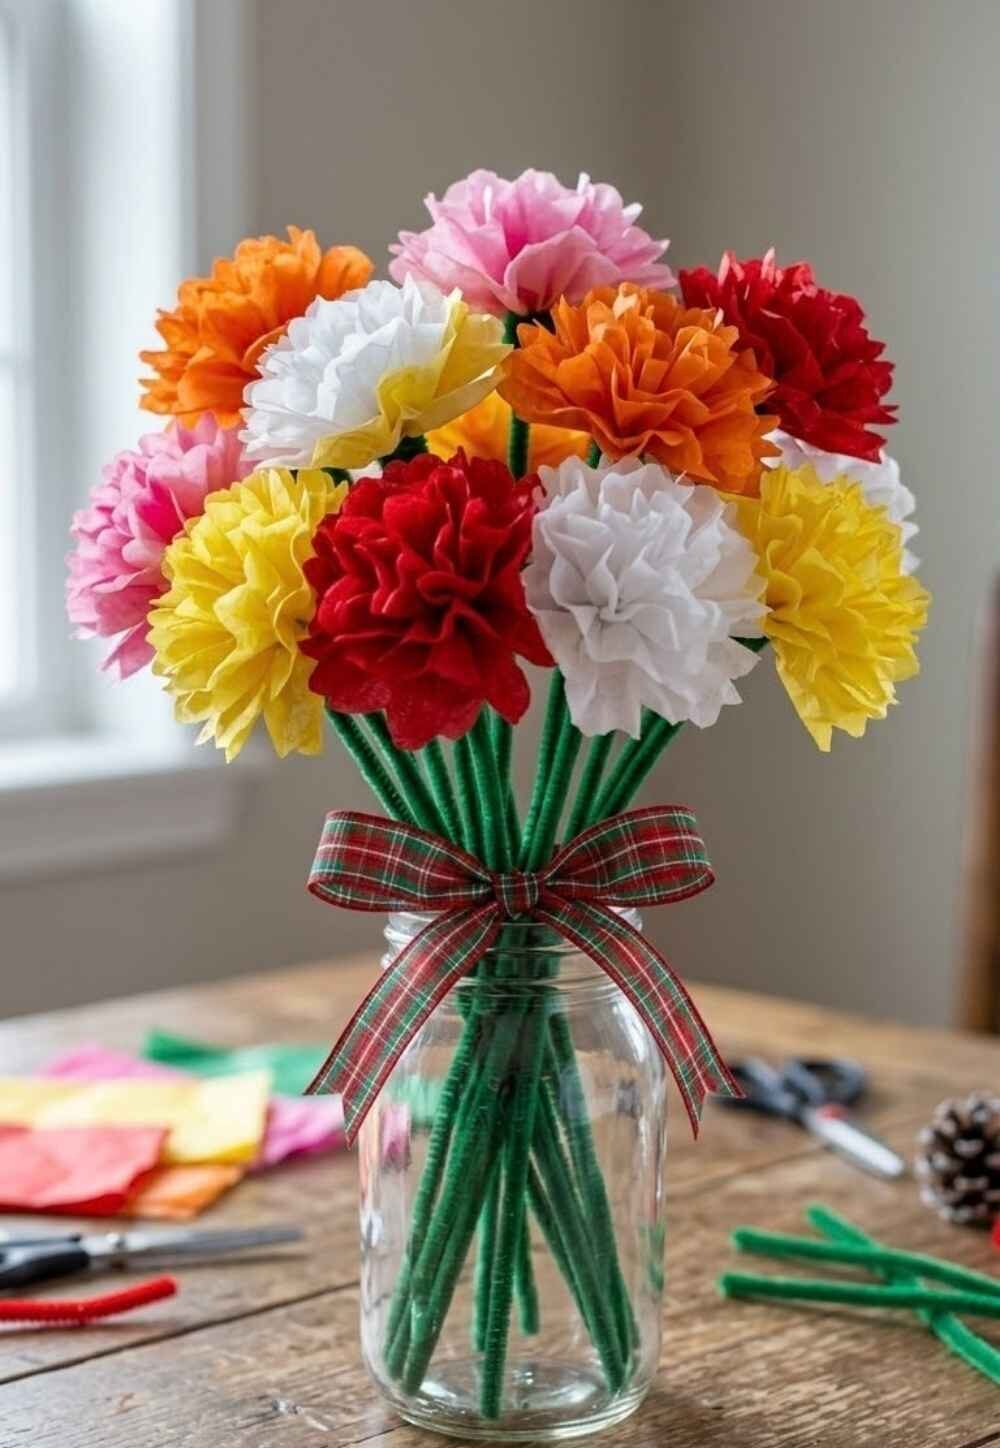 A bouquet of paper flowers adds fresh color to a table without any watering.
Tissue paper and pipe cleaners are soft and forgiving, so even beginners get lovely results.
It is a cheerful project to close out the first week of December.
What You’ll Need
- Several sheets of tissue paper per flower
- Pipe cleaners (chenille stems)
- Scissors
- Ribbon
- A small jar or vase
How to Make It
- Stack the tissue sheets and fold them back and forth like a fan.
- Wrap a pipe cleaner tightly around the middle of the folded paper.
- Trim the ends into rounded or pointed shapes, then spread the folds apart.
- Gently pull each layer upward and toward the center to make it fluffy.
- Tie a ribbon around the stems and place the flowers in a jar.
Make It Easier
- Limited hand strength or arthritis: Use fewer sheets so the paper is easier to fold and pinch.
- Vision difficulties: Choose bright colors that stand out from the table or workspace.
- Reduced dexterity: Start with pre-cut squares of tissue paper and skip the trimming step.
Why Seniors May Enjoy It
Fluffing out each layer feels a bit like watching a flower bloom. A full bouquet on the table is a lovely reward for an afternoon of folding.
Week 2 December: Crafts to Make and Give
By the second week, many of us start thinking about gifts. This is where December crafts for seniors become useful as well as enjoyable, because everything here is small, personal, and easy to wrap. If you want more handmade gift ideas, 20 Easy Christmas Crafts for Adults is a good place to look next.
6. DIY No-Sew Fabric Gift Pouches
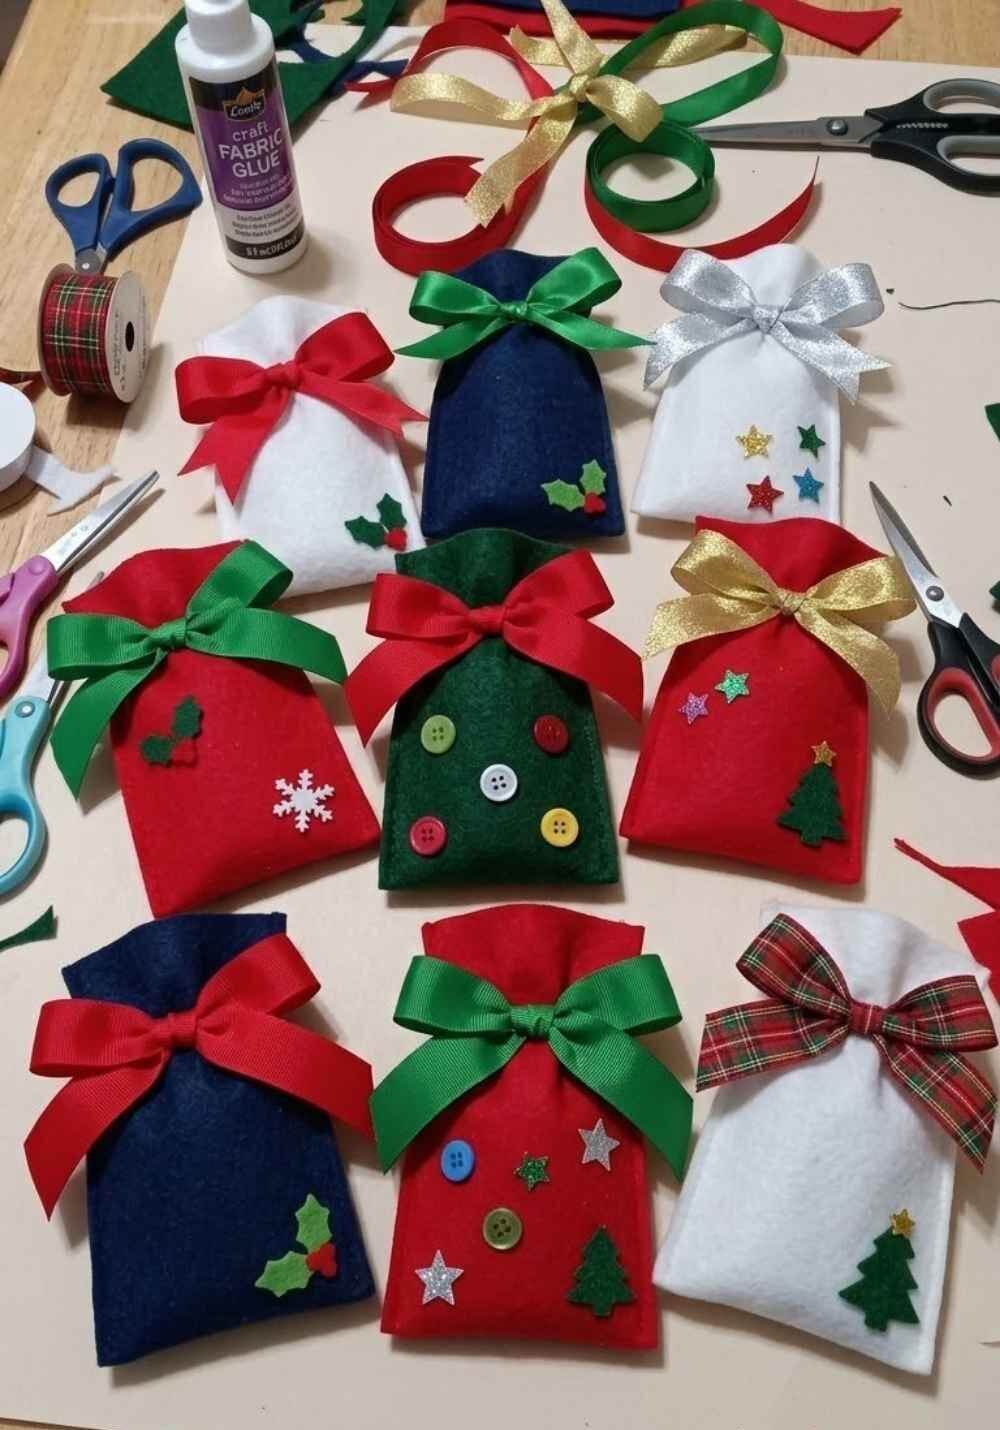 These pouches are a pretty way to hold a small gift, and they are made without a needle or thread.
Fabric glue does the work, and the result is something the receiver can keep and reuse.
They pair nicely with tea bags, candy, or a little jar of hand cream.
What You’ll Need
- Felt, which does not fray, or a tightly woven cotton fabric
- Fabric glue or fusible tape
- Ribbon or cord
- Scissors
- Buttons or stickers for decoration
How to Make It
- Cut the fabric into a rectangle big enough to hold your gift, then fold it in half so the short ends meet.
- Open the fold slightly, run a thin line of fabric glue along each side edge on the inside, and press them closed.
- Let the glue dry until it feels firm.
- Fill it with a small gift and tie the top closed with ribbon.
Make It Easier
- Limited hand strength or arthritis: Use fusible tape strips instead of squeezing a glue bottle.
- Vision difficulties: Choose a light fabric and a dark ribbon so the edges are easy to see.
- Reduced dexterity: Tie the top with a wide ribbon, which is easier to handle than thin cord.
Why Seniors May Enjoy It
You end up with a finished gift in just a few minutes. Many people make a whole stack in one sitting and feel wonderfully productive.
7. Hand-Painted Picture Frames
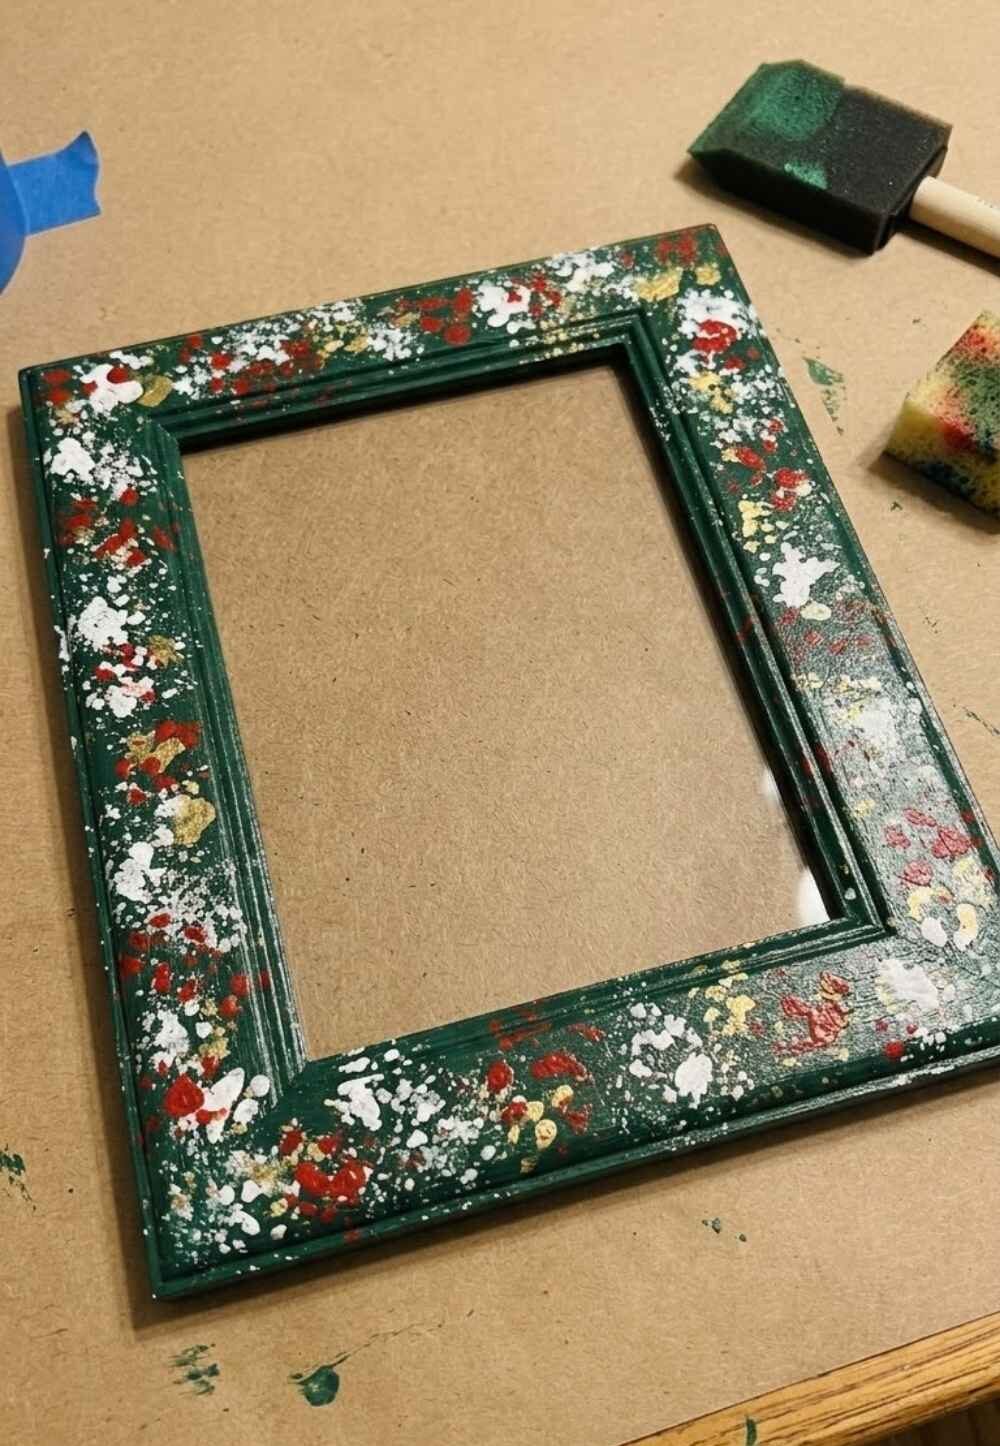 A plain wooden frame becomes a keepsake with just a little paint.
Fill it with a family photo, and you have a gift that feels thoughtful without costing much.
This is also a nice excuse to look back through old pictures.
What You’ll Need
- A plain wooden frame
- Acrylic paint in two or three colors
- A foam brush
- Painter’s tape
- A small sponge
- A favorite photo
How to Make It
- Remove the glass and backing, and wipe the frame with a damp cloth.
- Paint the frame with one base color and let it dry completely.
- Press a sponge dipped in a second color along the frame to make a speckled or snowy pattern.
- Once dry, put the glass and backing back in place and add the photo.
Make It Easier
- Limited hand strength or arthritis: A wide foam brush is much easier to hold than a thin one.
- Vision difficulties: Choose paint colors that contrast clearly with the frame so you can see what is covered.
- Reduced dexterity: Use painter’s tape to mark a border, which keeps the lines tidy without a steady hand.
Why Seniors May Enjoy It
Choosing the photo is often the best part. It is a gift that carries a memory with it.
8. Decorative Homemade Recipe Cards
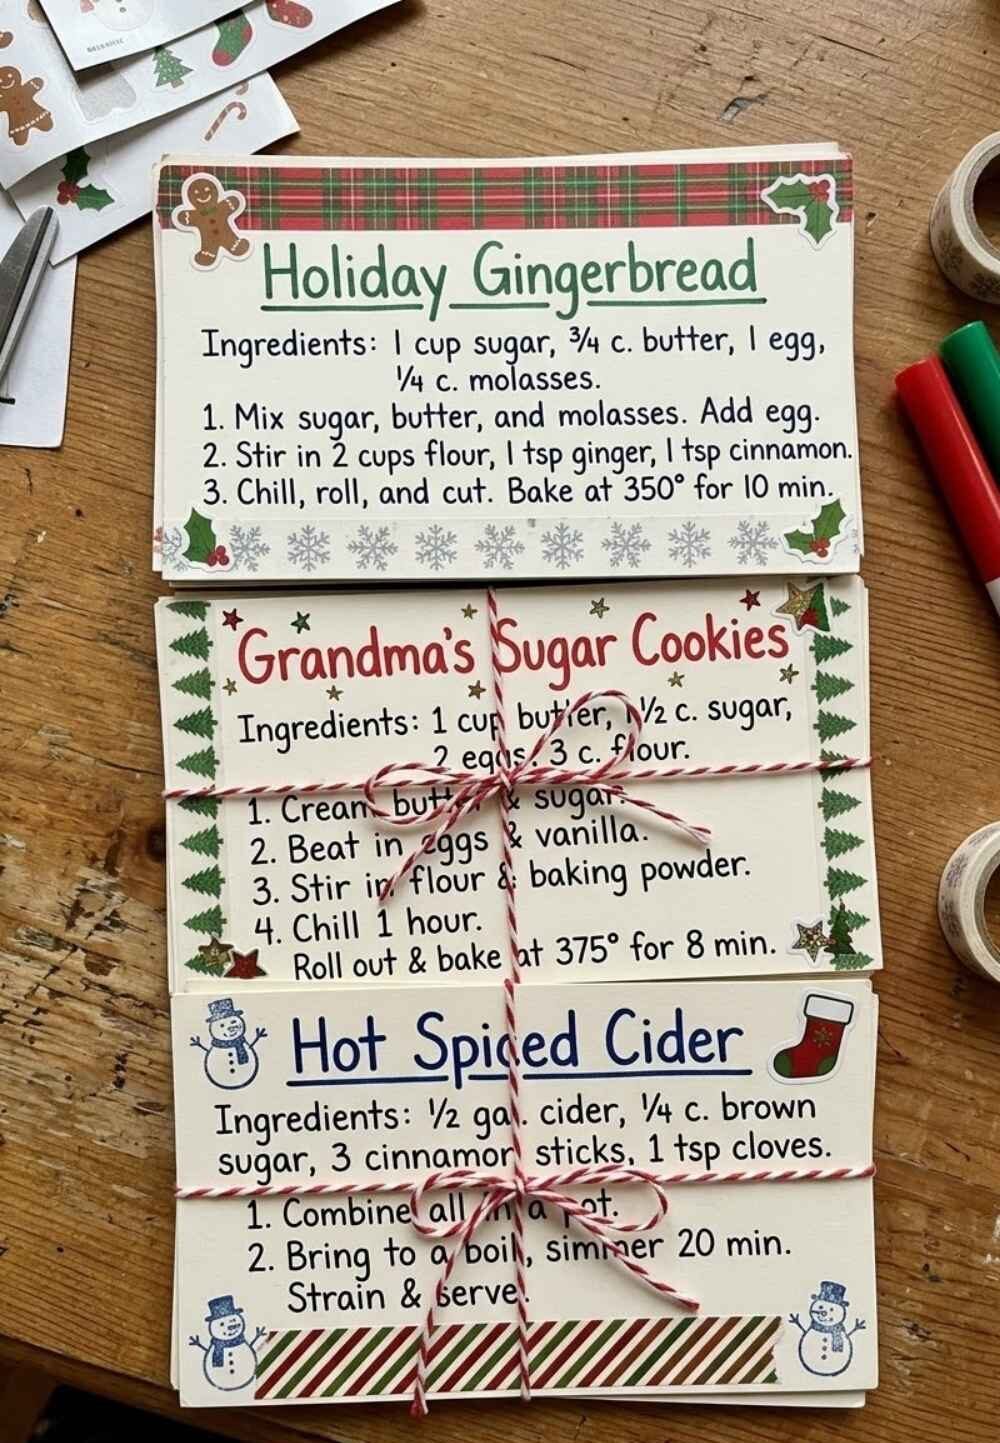 A handwritten recipe feels very different from a printed one.
Decorated recipe cards turn a favorite dish into something that can be given, collected, or tucked into a kitchen drawer.
They also work well alongside a mug or a jar of baking mix.
For ideas on pairing them with gifts, 20 Christmas Mug Gift Ideas That Are Easy to Put Together may help.
What You’ll Need
- Blank index cards or white cardstock
- Fine-tip pens in two colors
- Christmas stickers or small stamps
- Washi tape
- A small box or clear card sleeves
How to Make It
- Choose three or four favorite recipes and copy each one neatly onto a card.
- Add a border with washi tape or a thin line of colored pen.
- Decorate the corners with stickers or small stamps.
- Stack the cards in a small box or slide them into clear sleeves to protect them.
Make It Easier
- Limited hand strength or arthritis: Use a thick, soft-grip pen, and write only the key steps instead of the whole recipe.
- Vision difficulties: Write in large, dark letters, and leave plenty of space between lines.
- Reduced dexterity: Print the recipe on a computer and use the cards just for decorating.
Why Seniors May Enjoy It
Writing out a dish you know by heart is a lovely way to share it. Recipes bring up stories, and those stories are often the real gift.
9. DIY Beaded Bag Charms
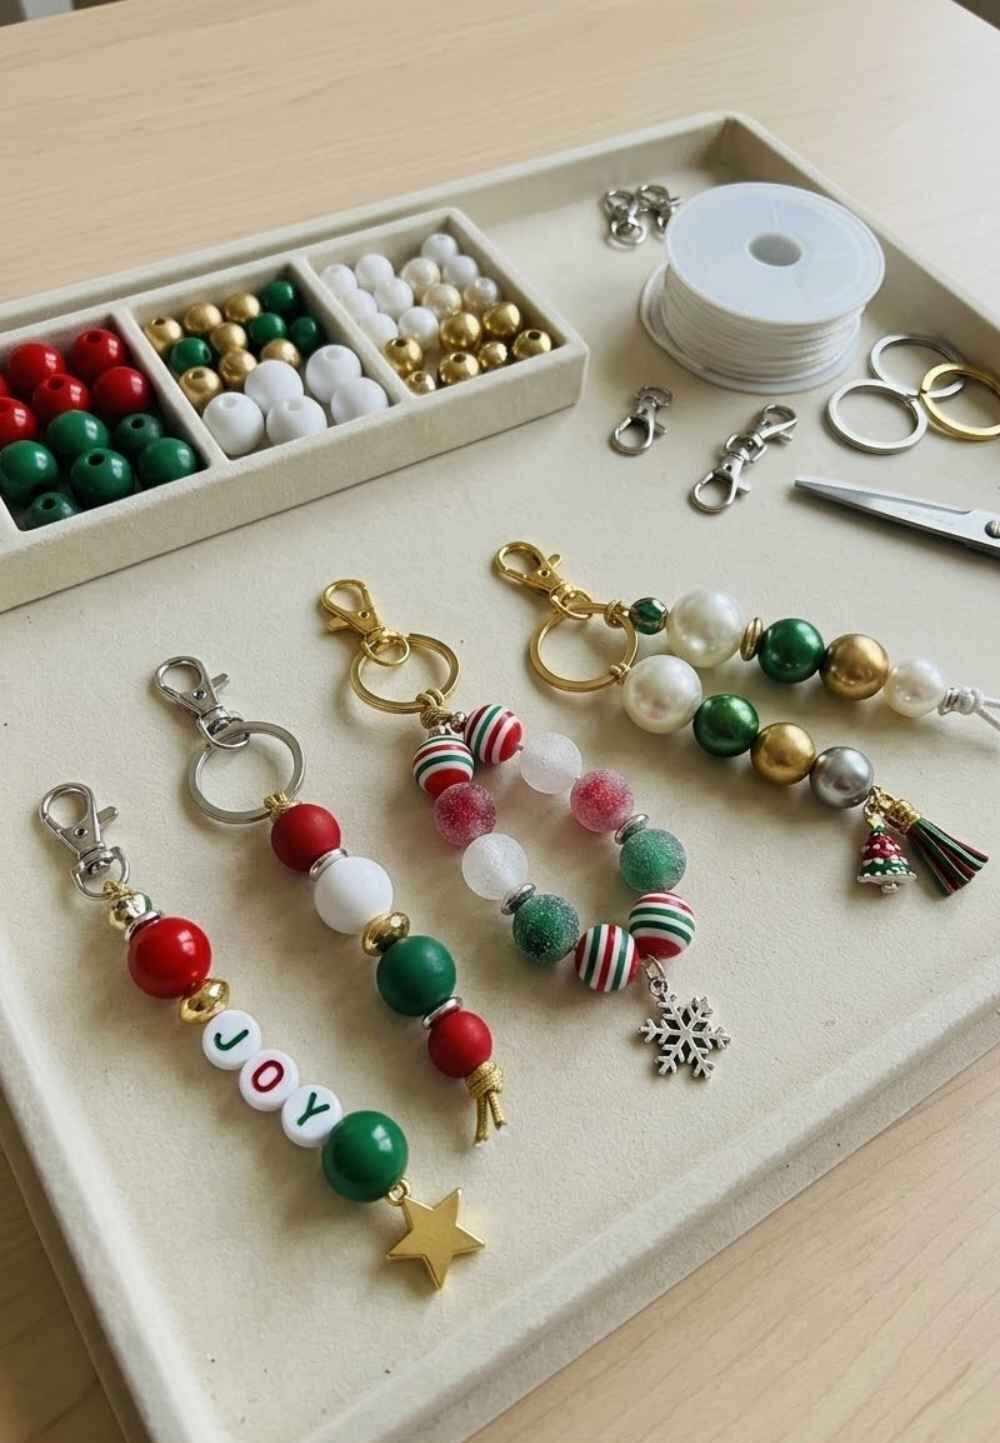 Beaded charms are small, colorful, and quick to make, so a handful of them can be finished in one afternoon.
Clipped to a purse, a zipper, or a set of keys, they add a bright touch to everyday things.
If you enjoy threading beads, you may also like 15 DIY Wood Bead Christmas Ornaments That Add a Cozy Handmade Touch to Your Holiday Decor.
What You’ll Need
- Large-hole beads in assorted colors
- Stretchy cord or thin elastic
- A lobster clasp or keyring
- Scissors
- A shallow tray to hold the beads
How to Make It
- Cut a piece of cord long enough to hold your beads with a little extra for knotting, then tie a knot at one end.
- Thread on the beads in a pattern you like, such as red, white, and green.
- Tie the ends together in a tight double knot and trim the extra cord.
- Attach the clasp or keyring through the loop.
Make It Easier
- Limited hand strength or arthritis: Choose larger beads, which are easier to pick up and hold.
- Vision difficulties: Work on a light tray or towel so the beads stand out and do not roll away.
- Reduced dexterity: Stiffen one end of the cord with a little tape to make a simple needle.
Why Seniors May Enjoy It
Threading beads is calming, repetitive work that is easy to pick up and put down. Each charm is small enough to finish quickly, which makes it very satisfying.
10. Personalized Notebook Covers
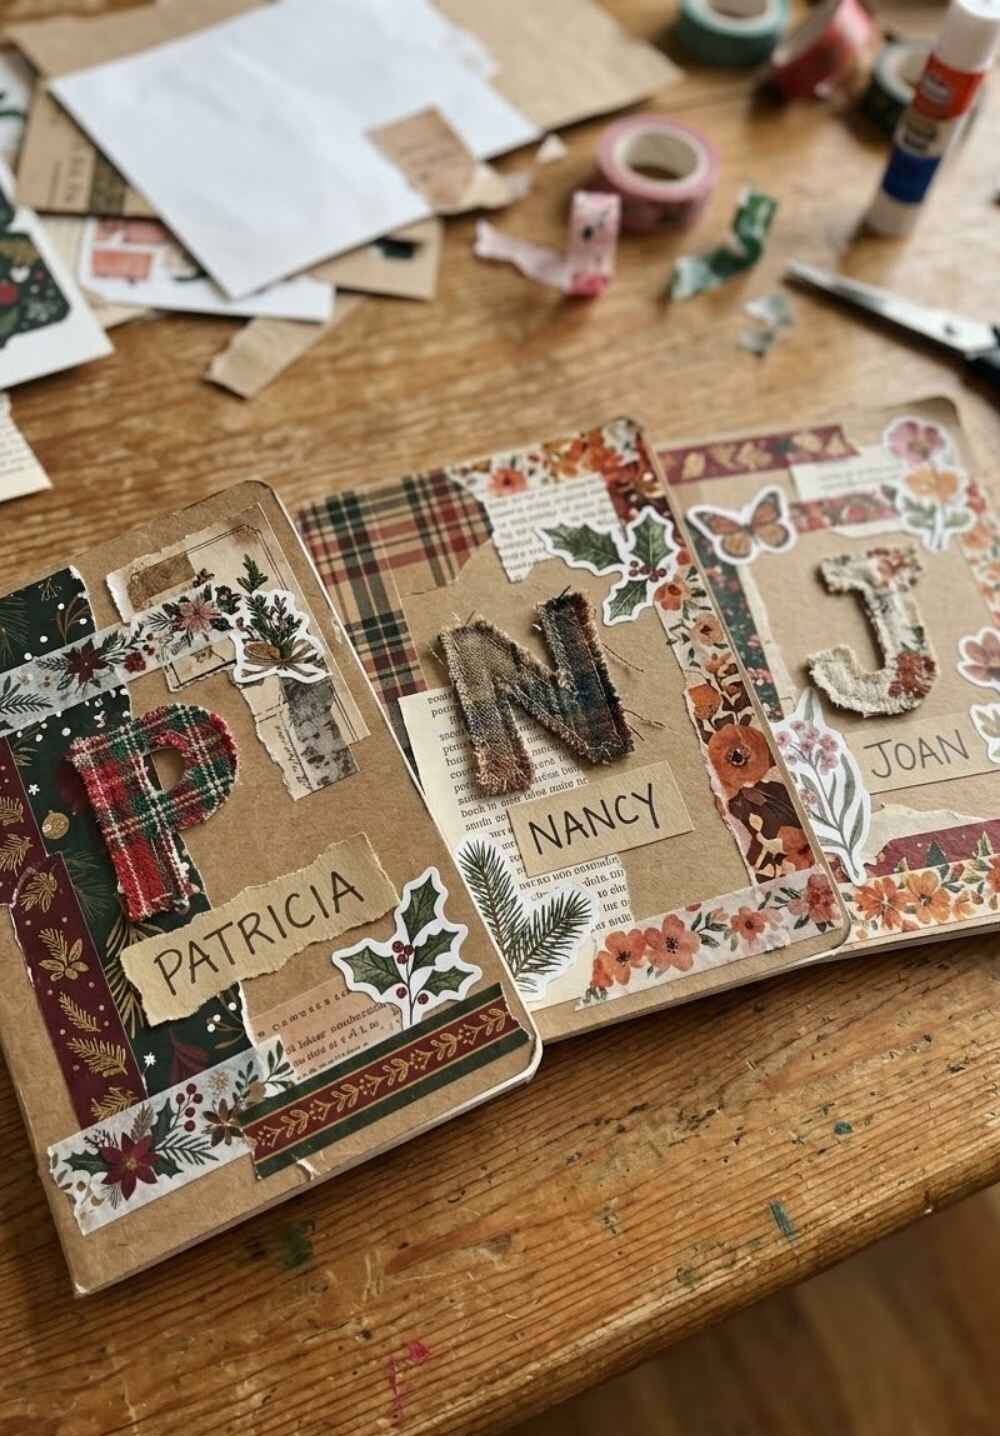 A plain notebook is easy to dress up, and it makes a useful gift for a friend, neighbor, or grandchild.
Patterned paper, fabric, and a few stickers are all you need to give it a personal look.
It is one of the easiest December crafts for seniors on this list, and it suits every skill level.
What You’ll Need
- Plain notebooks or journals
- Patterned paper, wrapping paper, or fabric
- A glue stick or fabric glue
- Stickers and washi tape
- A marker for the name or initial
How to Make It
- Cut the paper or fabric slightly larger than the front cover.
- Glue it to the cover and smooth out any wrinkles with your hand.
- Fold the extra edges over and glue them down neatly.
- Add stickers, washi tape, and an initial or short name.
Make It Easier
- Limited hand strength or arthritis: A glue stick is much easier to use than a squeeze bottle of glue.
- Vision difficulties: Choose a plain, bold paper and write the name in thick marker.
- Reduced dexterity: Use sticky-back paper or self-adhesive sheets so no glue is needed.
Why Seniors May Enjoy It
A favorite print on a plain notebook is a simple pleasure to see. Giving it to someone feels personal without taking much time.
Week 3 December: Festive and Cultural Crafting
This is the week when the festive feeling is at its strongest, and December crafts for seniors can reflect more than one tradition.
Dates for Hanukkah shift each year, so feel free to move those projects to whatever part of the month suits you.
For more Christmas-focused ideas, 15 Easy Christmas Craft Ideas for Seniors is a good companion to this section.
11. DIY Paper Lanterns
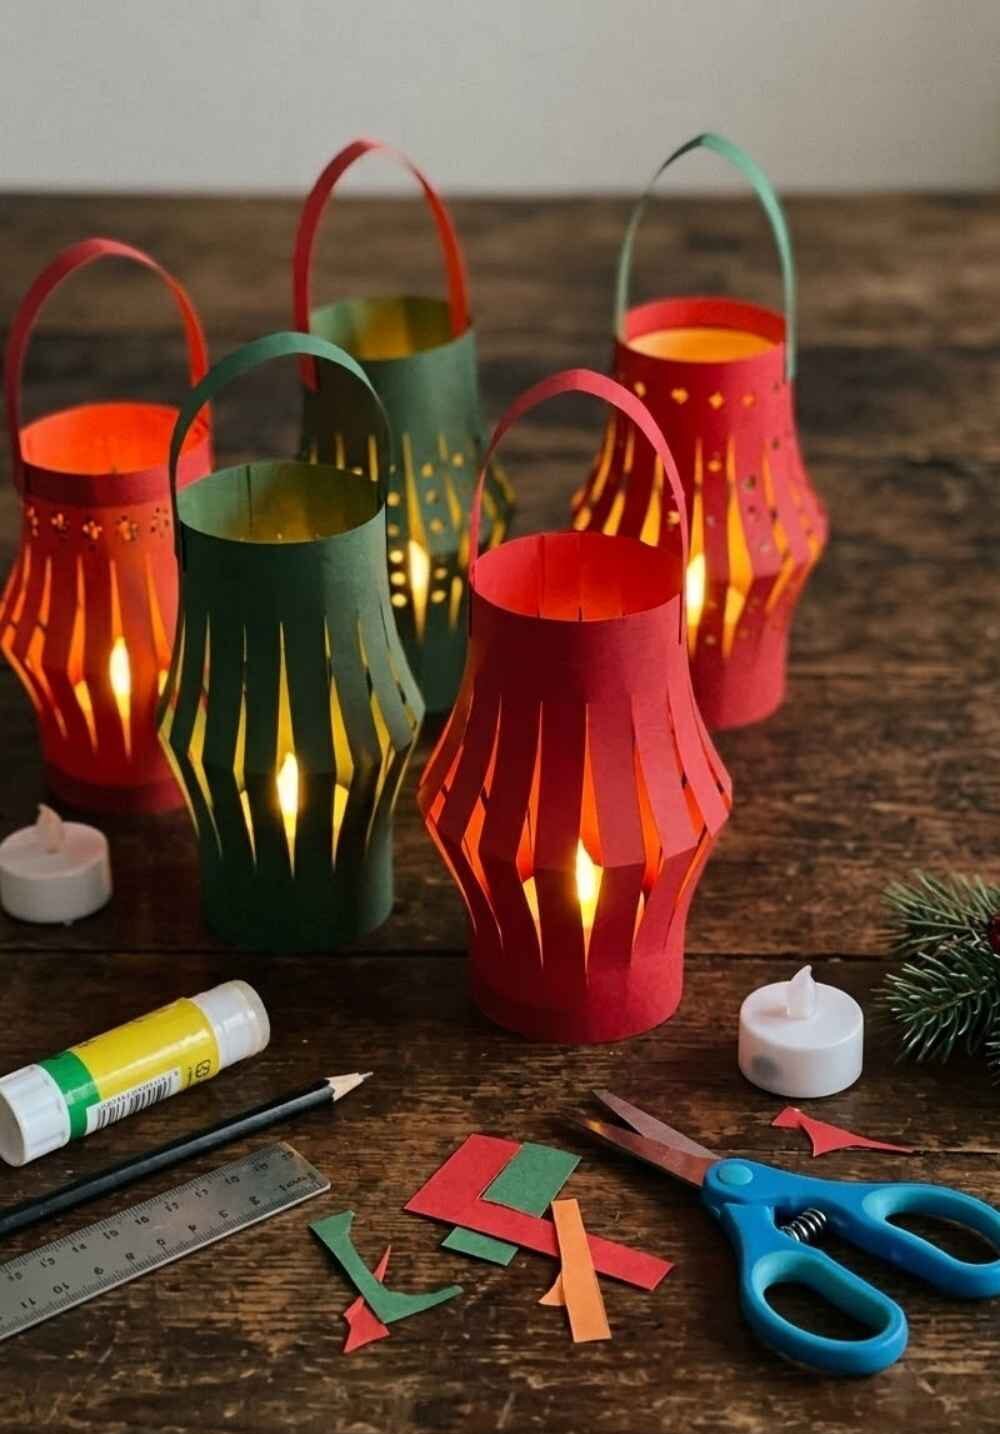 Paper lanterns glow softly, which is just what the shortest days of the year call for.
They are folded and cut from simple sheets of paper, and a small LED light turns them into a table decoration.
They look lovely on a windowsill or down the middle of a dinner table.
What You’ll Need
- Colored construction paper or cardstock
- Scissors
- A glue stick or double-sided tape
- A ruler and a pencil
- Battery-operated LED tea lights
How to Make It
- Fold a sheet of paper in half lengthwise so the long edges meet.
- Starting at the folded edge, cut straight lines toward the open edge, stopping before you reach it so the paper stays in one piece. Leave about a finger’s width between cuts.
- Unfold the paper, curl it into a tube with the cuts running up and down, and glue the short edges together. The cut strips will puff outward.
- Glue a long, thin strip of paper inside the top rim for a handle, then set the lantern over an LED tea light on a plate.
Make It Easier
- Limited hand strength or arthritis: Use spring-loaded scissors, and make fewer, wider cuts.
- Vision difficulties: Draw the cutting lines with a thick dark marker before you start.
- Reduced dexterity: Cut along a pre-folded sheet, or ask a helper to make the cuts while you handle the gluing.
Why Seniors May Enjoy It
The simple pleasure of lighting up something you made yourself is hard to beat. It is also a project that grows more beautiful the more of them you make.
12. Hanukkah-Inspired Paper Mosaic Art
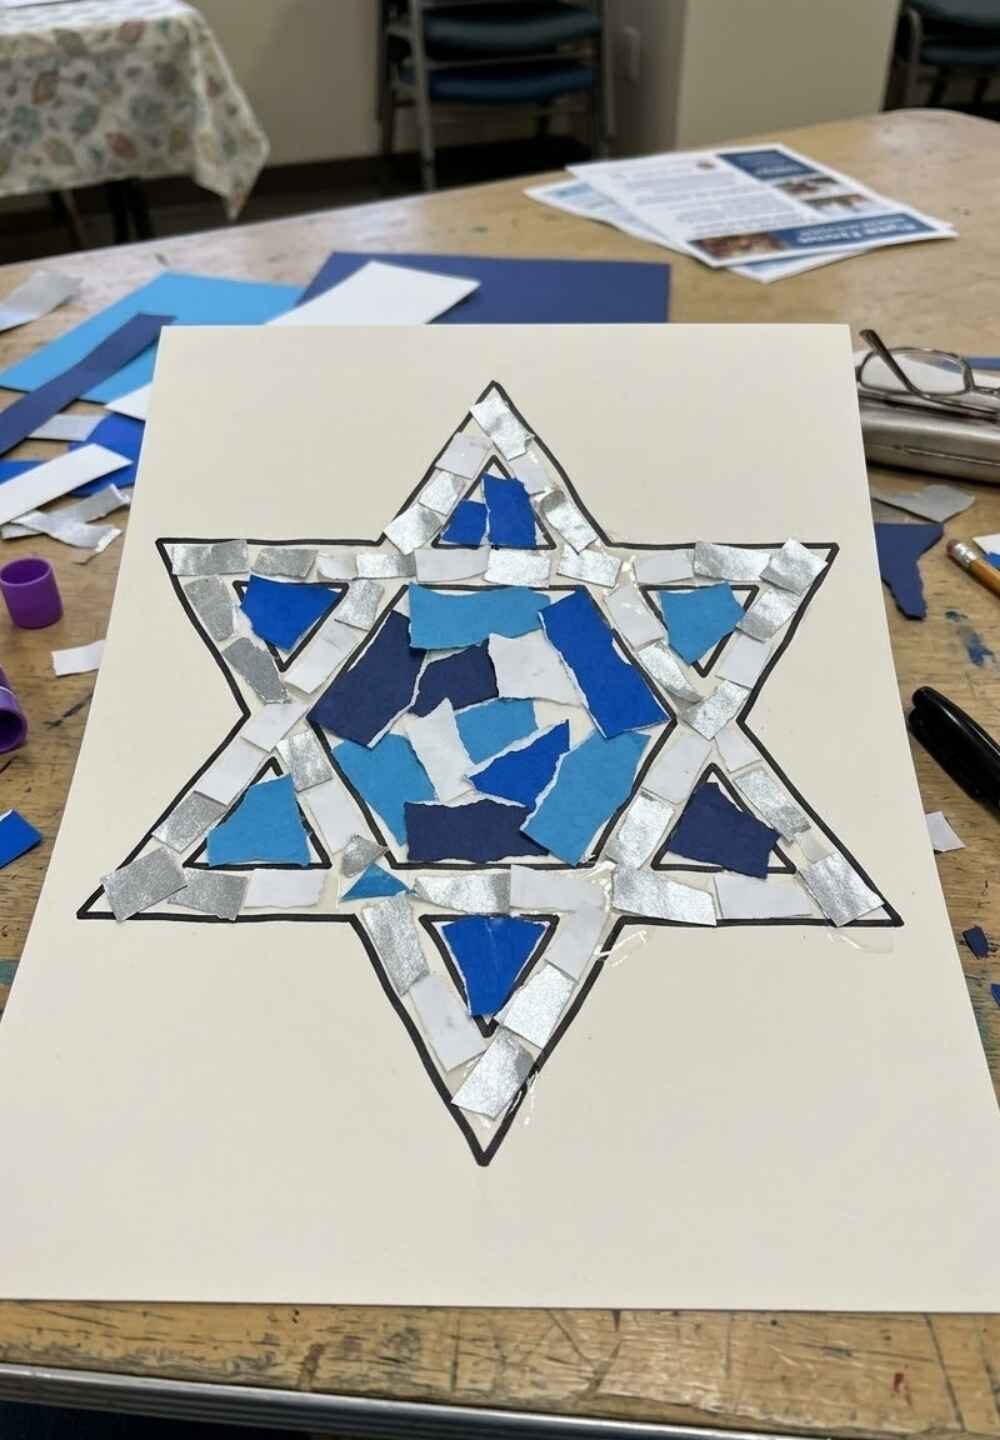 Paper mosaics are made from small torn or cut pieces, so there is no need to draw perfectly or cut in a straight line.
A simple menorah or Star of David in blue, white, and silver makes a lovely piece of festive art.
It is a gentle project that celebrates the season with care.
What You’ll Need
- Blue, white, and silver construction paper
- A sheet of cardstock for the base
- A glue stick
- A pencil
- Scissors, or just your fingers for tearing
How to Make It
- Lightly sketch a simple menorah or Star of David on the cardstock.
- Tear or cut the colored paper into small pieces.
- Glue the pieces inside the outline, leaving tiny gaps between them.
- Fill in the background with a different color, then let it dry.
Make It Easier
- Limited hand strength or arthritis: Tear the paper rather than cutting it, which needs less grip and force.
- Vision difficulties: Draw the outline with a thick marker so it is easy to follow.
- Reduced dexterity: Use larger paper pieces, which are easier to place.
Why Seniors May Enjoy It
Nobody needs to get it exactly right, which makes the whole afternoon relaxing. The finished mosaic is a meaningful piece to display in a window or on a wall.
13. Kwanzaa-Inspired Unity Artwork
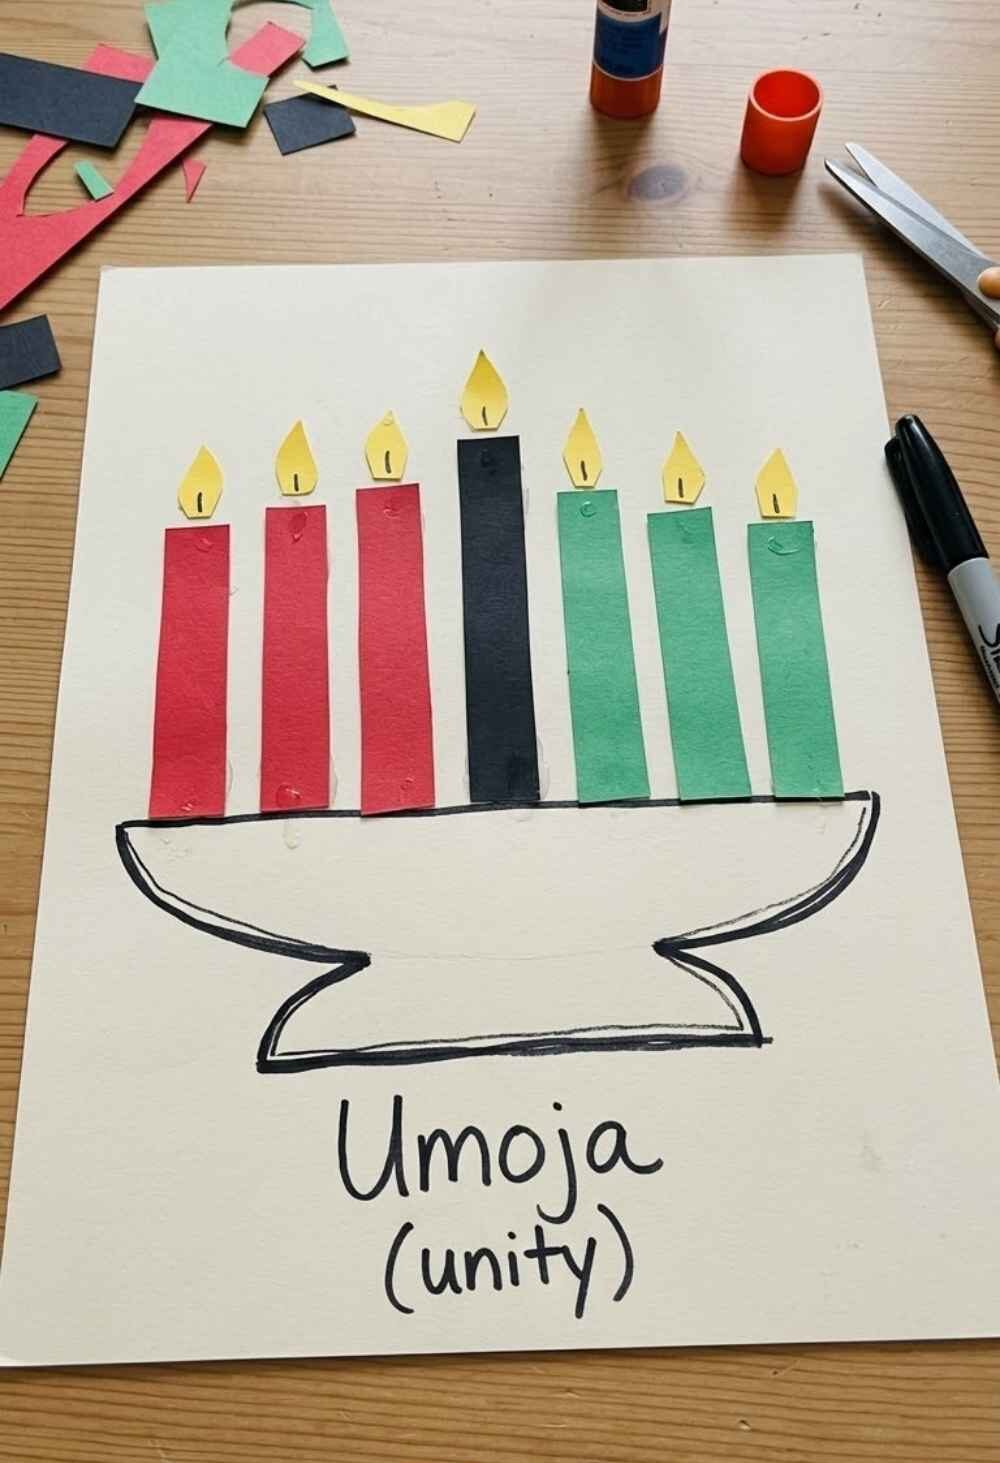 Kwanzaa begins on December 26 and centers on seven principles, with unity being the first.
This simple piece of art brings that idea to life using a kinara and its colors of red, black, and green.
Making it a few days ahead is a thoughtful way to prepare.
What You’ll Need
- A sheet of white or cream cardstock
- Red, black, and green construction paper
- Yellow paper for the flames
- A glue stick and scissors
- A black marker
How to Make It
- Cut one candle shape and use it as a pattern to cut six more the same size: three red, three green, and one black.
- Glue the black candle in the center, with the three red candles on the left and the three green on the right.
- Draw a simple kinara base beneath them with the marker.
- Add a small yellow flame above each candle and write the word “Umoja” (unity) underneath.
Make It Easier
- Limited hand strength or arthritis: Tear the candles from paper instead of cutting them.
- Vision difficulties: Choose strong, dark colors and use a thick marker for the base and the word.
- Reduced dexterity: Use pre-cut paper strips for the candles, which only need to be glued down.
Why Seniors May Enjoy It
This is a quiet project that invites conversation about togetherness. The finished piece is easy to share with family.
14. DIY Festive Table Place Cards
Place cards add a thoughtful touch to a holiday meal, and they take only a few minutes each to make. A folded card, a small decoration, and a name are all you need. Guests tend to notice, and they often keep them.
What You’ll Need
- Cardstock cut into small rectangles
- Fine-tip markers or a gold pen
- Small stickers or faux greenery sprigs
- Glue dots or a glue stick
- A pencil for writing names lightly first
How to Make It
- Fold each piece of cardstock in half so it stands up like a tent.
- Add a sticker, a small drawing, or a sprig of greenery on one corner.
- Write each guest’s name in the center, pencil first, then pen.
- Set one at each place on the table.
Make It Easier
- Limited hand strength or arthritis: Use stickers and glue dots instead of drawing or cutting.
- Vision difficulties: Write the names in large, dark letters on light paper.
- Reduced dexterity: Use pre-folded blank place cards and just add the names and decorations.
Why Seniors May Enjoy It
A few minutes of work make the whole table feel more special. Writing each name is a gentle way of thinking about everyone coming to dinner.
15. Handmade Paper Star Garlands
A garland of paper stars is easy to make, and it adds a warm, simple sparkle to a mantel, window, or doorway.
Choose patterned, metallic, or plain paper, and you can make as many or as few as you like.
It is a good project to do while chatting or listening to music.
What You’ll Need
- Patterned or metallic paper
- A star-shaped cookie cutter or a cardboard template
- A pencil and scissors
- A hole punch
- Twine or thin ribbon, a little longer than the space you want to fill
How to Make It
- Trace the star shape onto the paper as many times as you like and cut each one out.
- Punch a hole near the top of every star.
- Cut a length of twine a little longer than the space you want to fill, then thread each star onto it with a little room between them.
- Hang the garland across a mantel, window, or doorway.
Make It Easier
- Limited hand strength or arthritis: Use a star-shaped punch or pre-cut stars to avoid tracing and cutting.
- Vision difficulties: Trace with a dark pencil on light paper so the lines are easy to follow.
- Reduced dexterity: Tape the stars to the twine instead of threading them through holes.
Why Seniors May Enjoy It
Seeing the garland grow star by star is oddly satisfying. Hanging it up at the end makes the whole room feel more festive.
Week 4 December: Family, Memories and Togetherness
Christmas week is all about the people you love, so these crafts are built around them.
Some are easy to make with family beside you, and others are quiet projects for the slower days after the big meal.
These are also the December crafts for seniors that last the longest, because they hold on to stories and photos.
For more ways to make the season feel meaningful, 21 Meaningful Winter Family Traditions pairs well with this whole section.
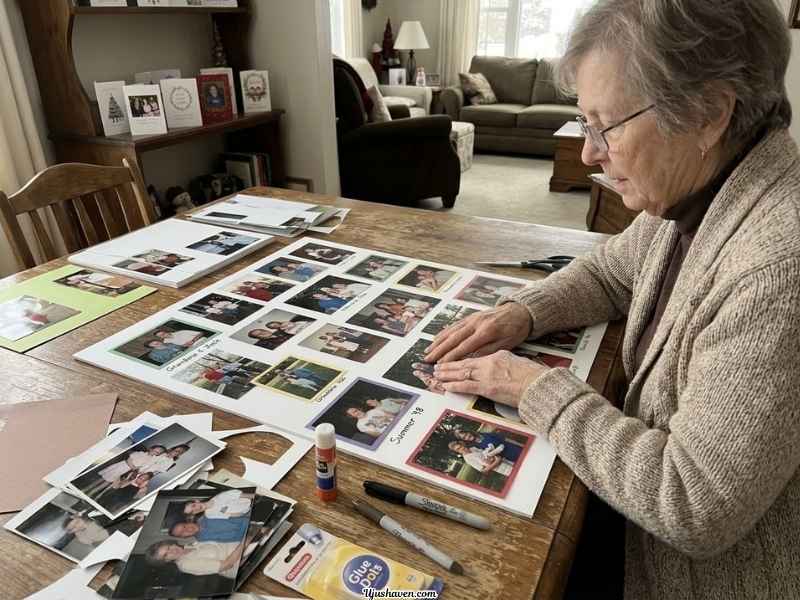
16. DIY Family Photo Collage
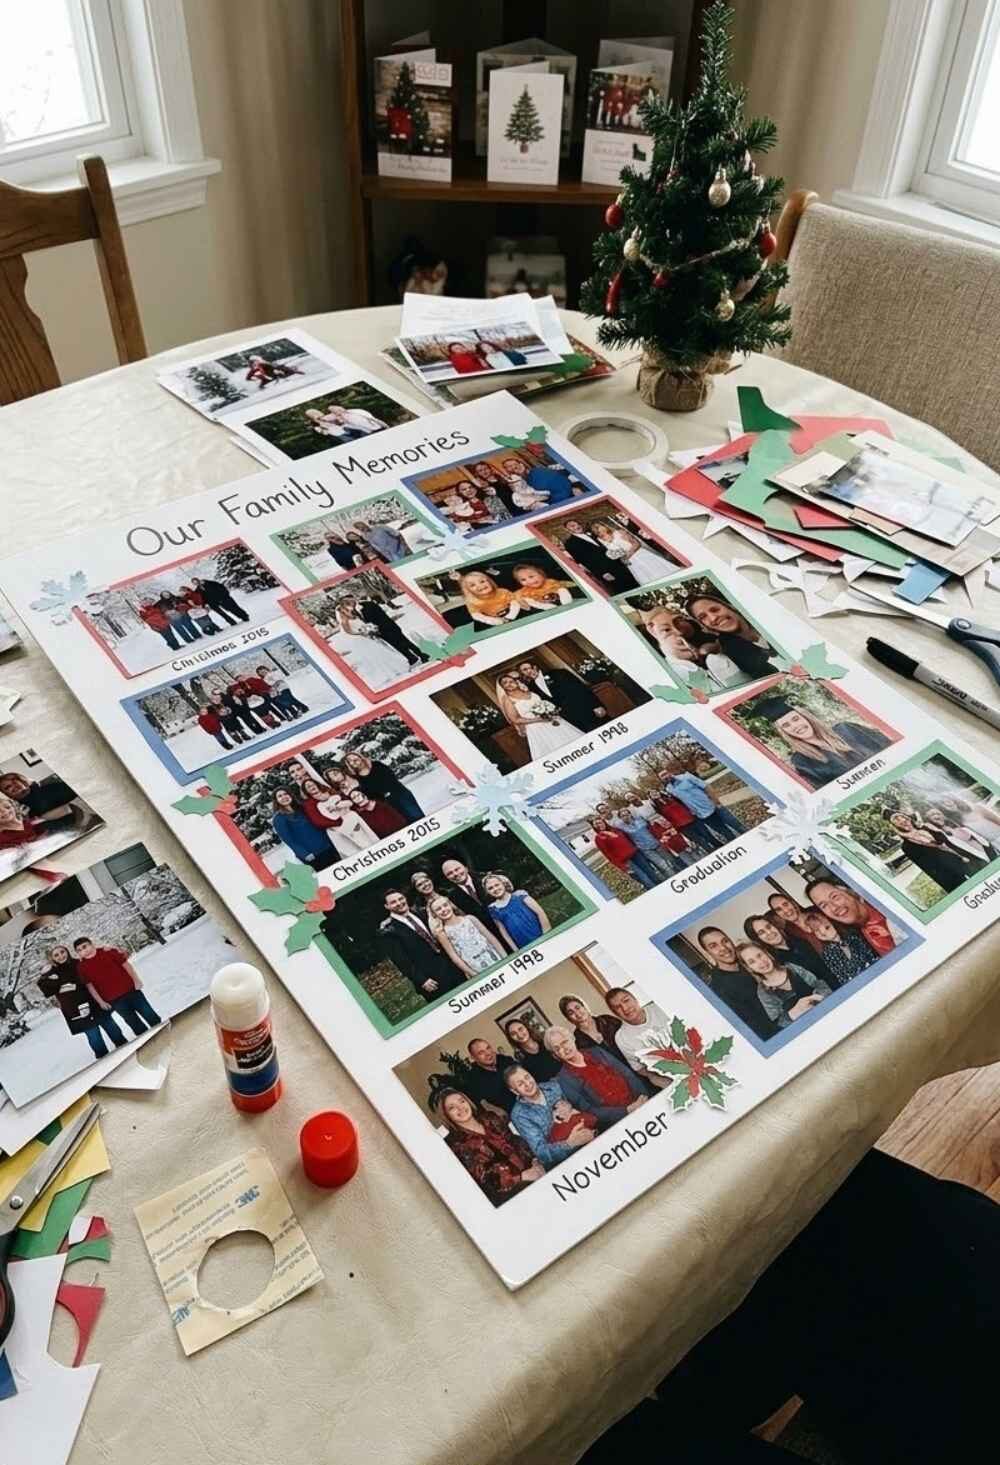 A photo collage brings a whole family onto one page, from the youngest baby to the oldest relative.
Made in the days around Christmas, when everyone is close by, it captures the season as well as the years behind it.
It is as much about looking and remembering as it is about gluing.
What You’ll Need
- A handful of printed photos (copies, not originals)
- Poster board or a large frame with a mat
- A glue stick or photo-safe adhesive
- Scissors
- A fine marker for captions
- Colored paper for borders
How to Make It
- Spread the photos out on a table and choose your favorites.
- Arrange them on the board without gluing, moving them around until the layout feels right.
- Glue each photo down, starting from the center and working outward.
- Add short captions with names or years, then frame or hang the collage.
Make It Easier
- Limited hand strength or arthritis: Use double-sided tape squares or glue dots instead of squeezing a bottle.
- Vision difficulties: Print fewer, larger photos, and write captions in thick, dark marker.
- Reduced dexterity: Skip the trimming and let the photos overlap slightly.
Why Seniors May Enjoy It
Sorting through the photos is half the pleasure, and it often leads to a good story or two. The finished collage becomes a gift the whole family can enjoy.
17. Handmade Family Memory Book
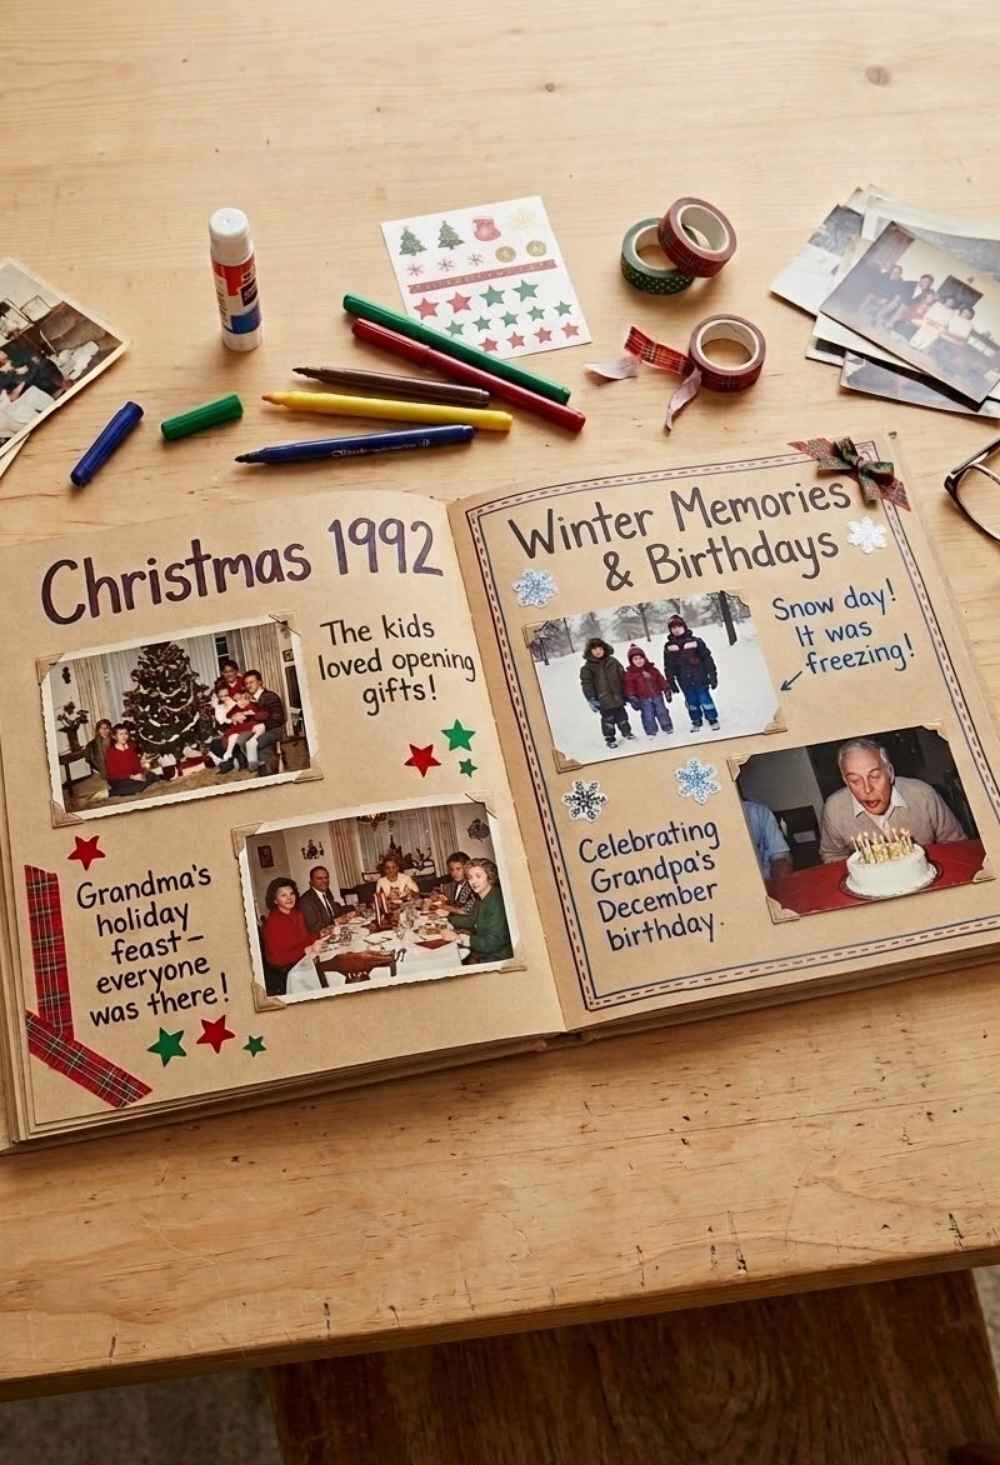 A memory book gathers photos, short stories, and small keepsakes in one place.
Of all the December crafts for seniors in this post, it is one of the kindest for the week after Christmas, when new pictures have just been taken and the old ones are fresh in mind.
For page ideas, you could add one page for each tradition in 21 Meaningful Winter Family Traditions.
What You’ll Need
- A scrapbook or blank album with thick pages
- Printed photos
- A glue stick or photo corners
- Pens in a few colors
- Stickers or washi tape
- A few ribbon scraps
How to Make It
- Choose one theme per page, such as holidays, birthdays, or a favorite place.
- Glue the photos in place or slip them into photo corners.
- Write a short note beside each photo with who, where, and one thing you remember.
- Add stickers, a ticket stub, or a pressed leaf to finish the page.
Make It Easier
- Limited hand strength or arthritis: Use an album with self-adhesive pages, so there is no glue to handle.
- Vision difficulties: Write in large letters with a dark pen, and keep one or two photos per page.
- Reduced dexterity: Do just one page per sitting, and let a helper do the cutting.
Why Seniors May Enjoy It
Every page is a small trip back in time. It also becomes a keepsake that younger family members will treasure for years.
18. Decorative Memory Box
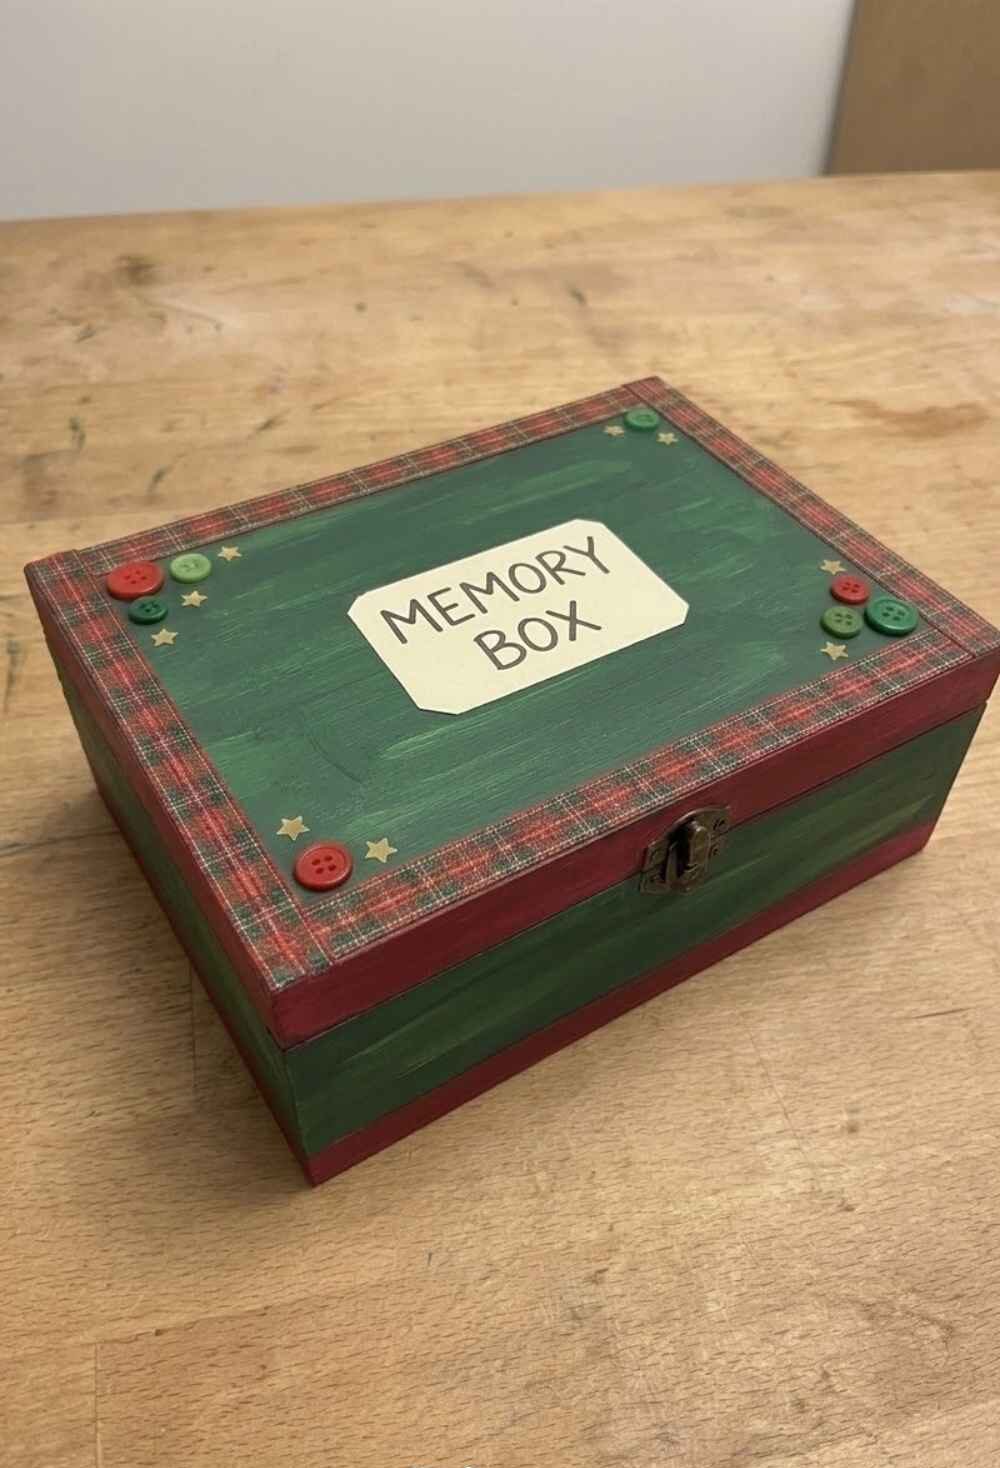 A memory box is a lovely place to keep letters, cards, and small treasures.
Painted or covered in pretty paper, it looks good on a shelf and feels special to open.
It is a calm project for the days after Christmas, when new cards and keepsakes need a home.
What You’ll Need
- A plain wooden or sturdy cardboard box with a lid
- Acrylic paint or decorative paper
- Craft glue or decoupage glue
- A foam brush
- Ribbon
- Small embellishments like buttons or stickers
How to Make It
- Paint the outside of the box in a color you love, or cover it with decorative paper.
- Brush a thin layer of glue over the paper and smooth out any bubbles.
- Let everything dry fully, then add a ribbon around the lid and a label with a name or year.
- Fill the box with cards, photos, and small mementos from the season.
Make It Easier
- Limited hand strength or arthritis: Use a wide foam brush, and choose self-adhesive paper to avoid gluing.
- Vision difficulties: Pick a bold paper or a paint color that contrasts with the table.
- Reduced dexterity: Cover the box with large pieces of paper instead of small cut shapes.
Why Seniors May Enjoy It
Precious things finally get a proper home. Opening the box later feels like opening a small gift to yourself.
19. DIY Gratitude and Memories Cards
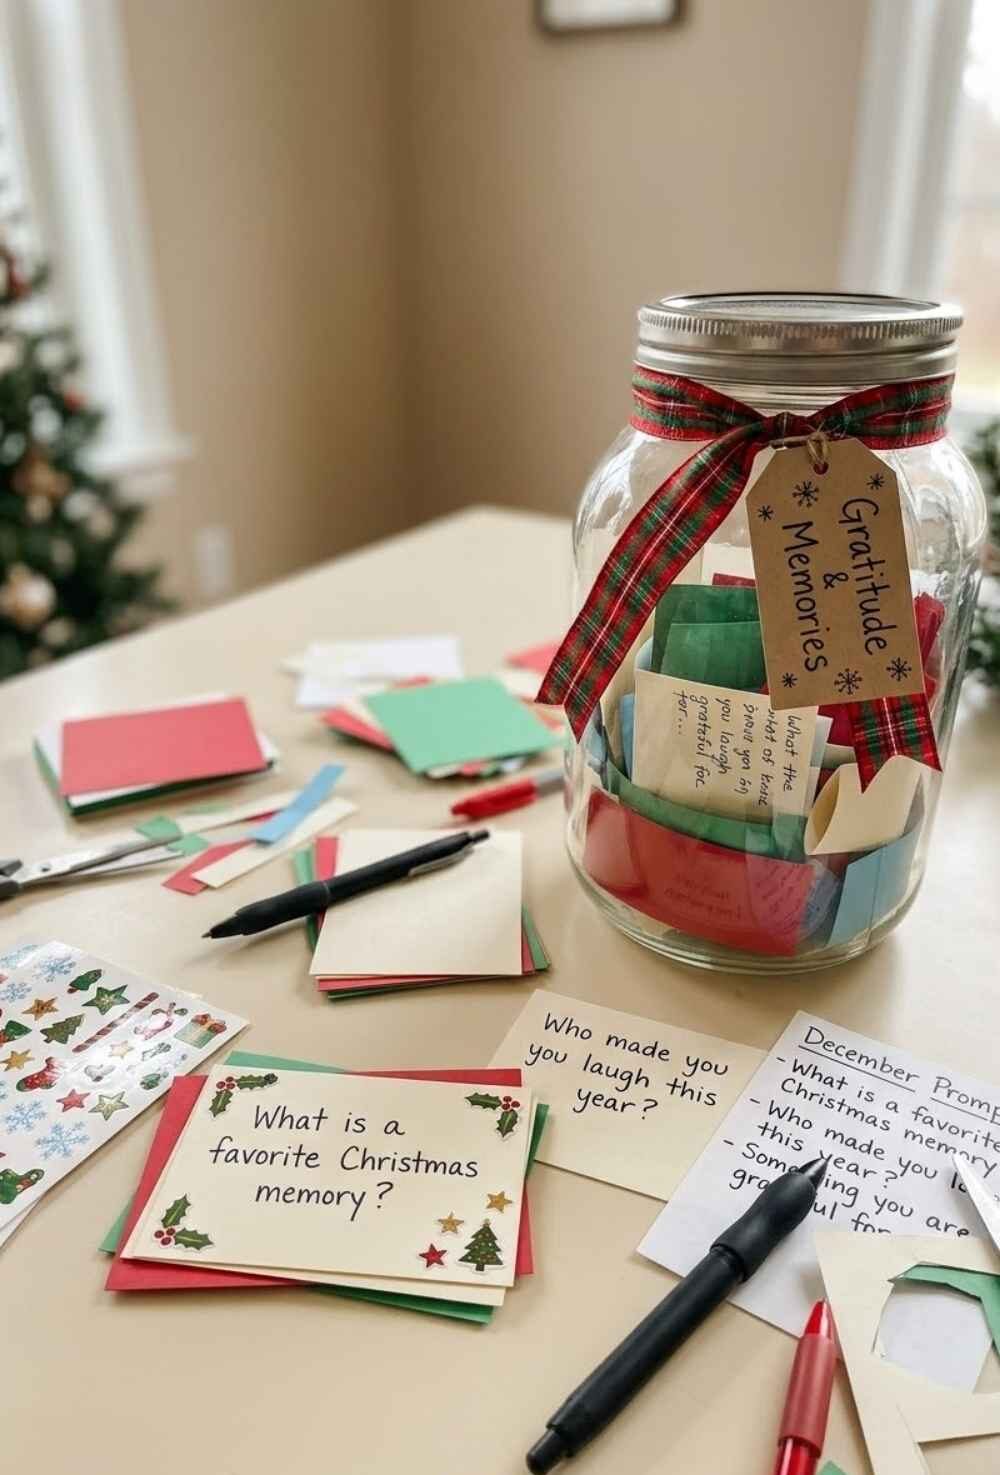 These little cards turn a quiet moment into a shared one.
Everyone writes a favorite memory or something they are thankful for, drops it in a jar, and reads them aloud together.
They work well on Christmas night or any evening that week.
What You’ll Need
- Cardstock cut into small cards
- Pens in a few colors
- Stickers
- A jar or small basket
- Ribbon
- A short list of prompts
How to Make It
- Cut the cardstock into small cards and decorate the edges with stickers.
- Write a prompt on a few of them, such as What is a favorite Christmas memory? or Who made you laugh this year?
- Set the cards, pens, and jar on the table where everyone can reach them.
- Let each person write one, fold it, and drop it in the jar, then read them aloud together.
Make It Easier
- Limited hand strength or arthritis: Use a thick, soft-grip pen, and keep each note to a single line.
- Vision difficulties: Use white or cream cards with a bold black pen.
- Reduced dexterity: Precut the cards and let family members write for one another if needed.
Why Seniors May Enjoy It
Busy weeks rarely leave room for this kind of conversation, and the cards create it. Hearing what others remember is often the best part.
20. Handmade Family Recipe Keepsake
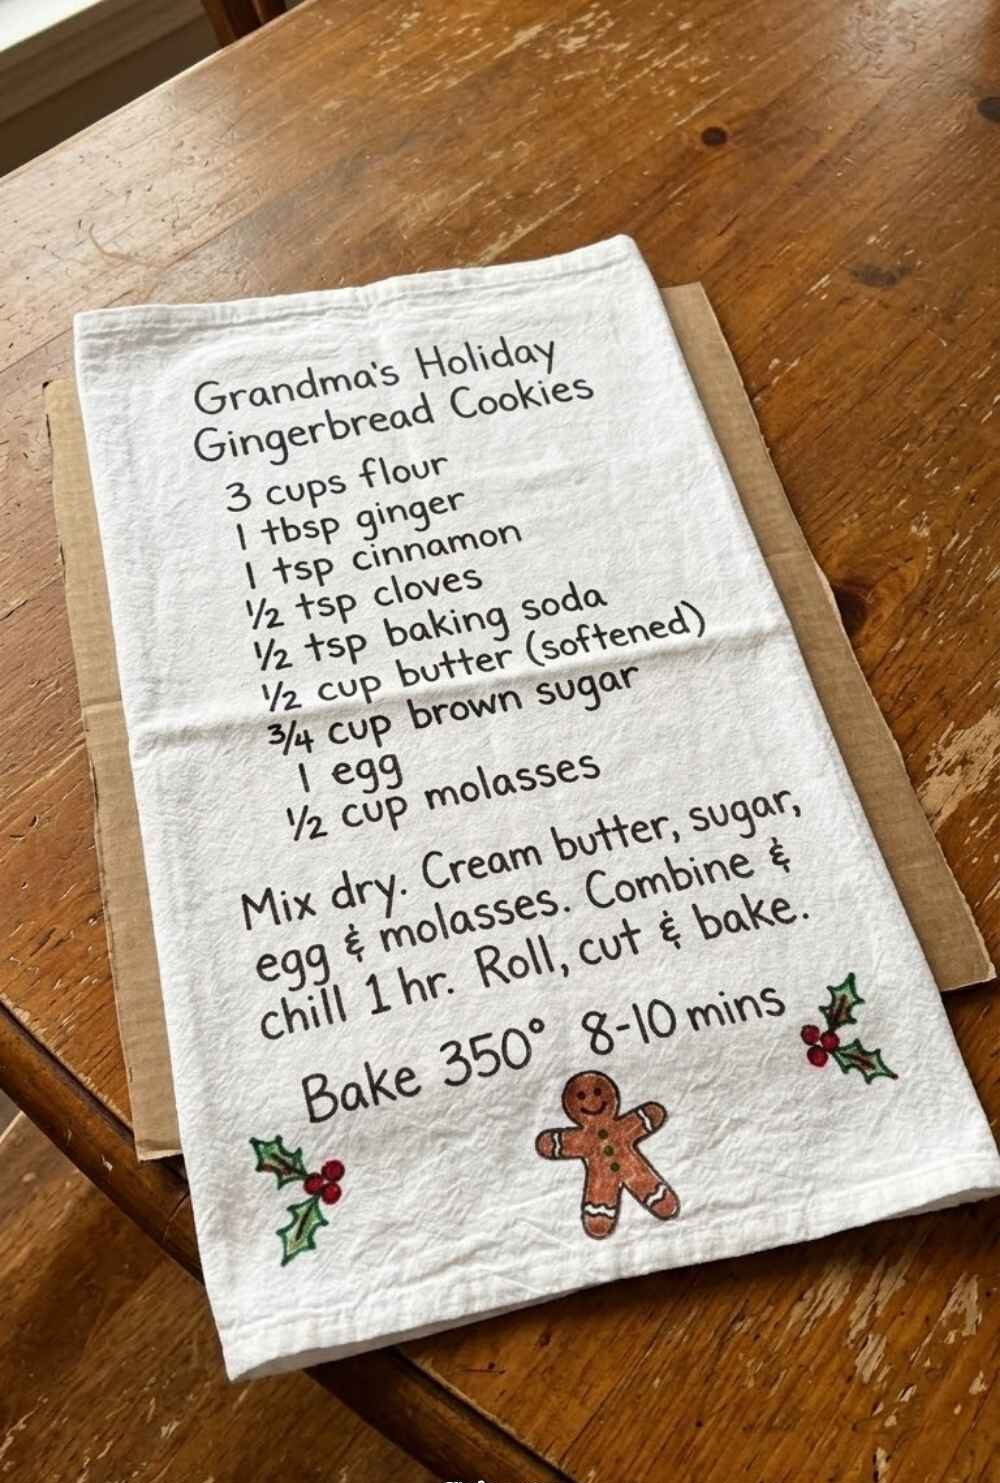 A recipe in a loved one’s own handwriting is something many families hold onto.
Copied onto a cotton tea towel with fabric markers, it becomes a keepsake that is also useful in the kitchen.
It makes a thoughtful gift for the people who have enjoyed that dish for years.
What You’ll Need
- A plain cotton flour-sack tea towel
- Fabric markers
- A pencil
- A piece of cardboard
- A copy of the recipe
- An iron for setting the ink
How to Make It
- Wash and iron the towel, then slip the cardboard inside to keep the ink from bleeding through.
- Lightly write the recipe in pencil, leaving a margin around the edges.
- Trace over the pencil with a fabric marker, then add a small border or drawing.
- Let the ink dry fully, then heat-set it with an iron, following the marker’s directions.
Make It Easier
- Limited hand strength or arthritis: Choose fabric markers with thick, soft tips, and keep the recipe short.
- Vision difficulties: Write in big letters, and use a dark marker on a light towel.
- Reduced dexterity: Use letter stickers or an iron-on transfer sheet printed with the recipe.
Why Seniors May Enjoy It
A favorite recipe becomes something you can hold, use, and give away. The story behind the dish is usually part of the gift.
Week 5 (December 29 to 31): New Year and a Fresh Start
The last three days of the year are slow and thoughtful.
The rush is over, and there is time to look back and look ahead.
These projects are gentle and hopeful, and they make a fine ending to a month full of December crafts for seniors.
If the quiet days after Christmas stretch on, 20 Winter Boredom Busters for Adults has more to keep you busy.
21. New Year Memory Jar
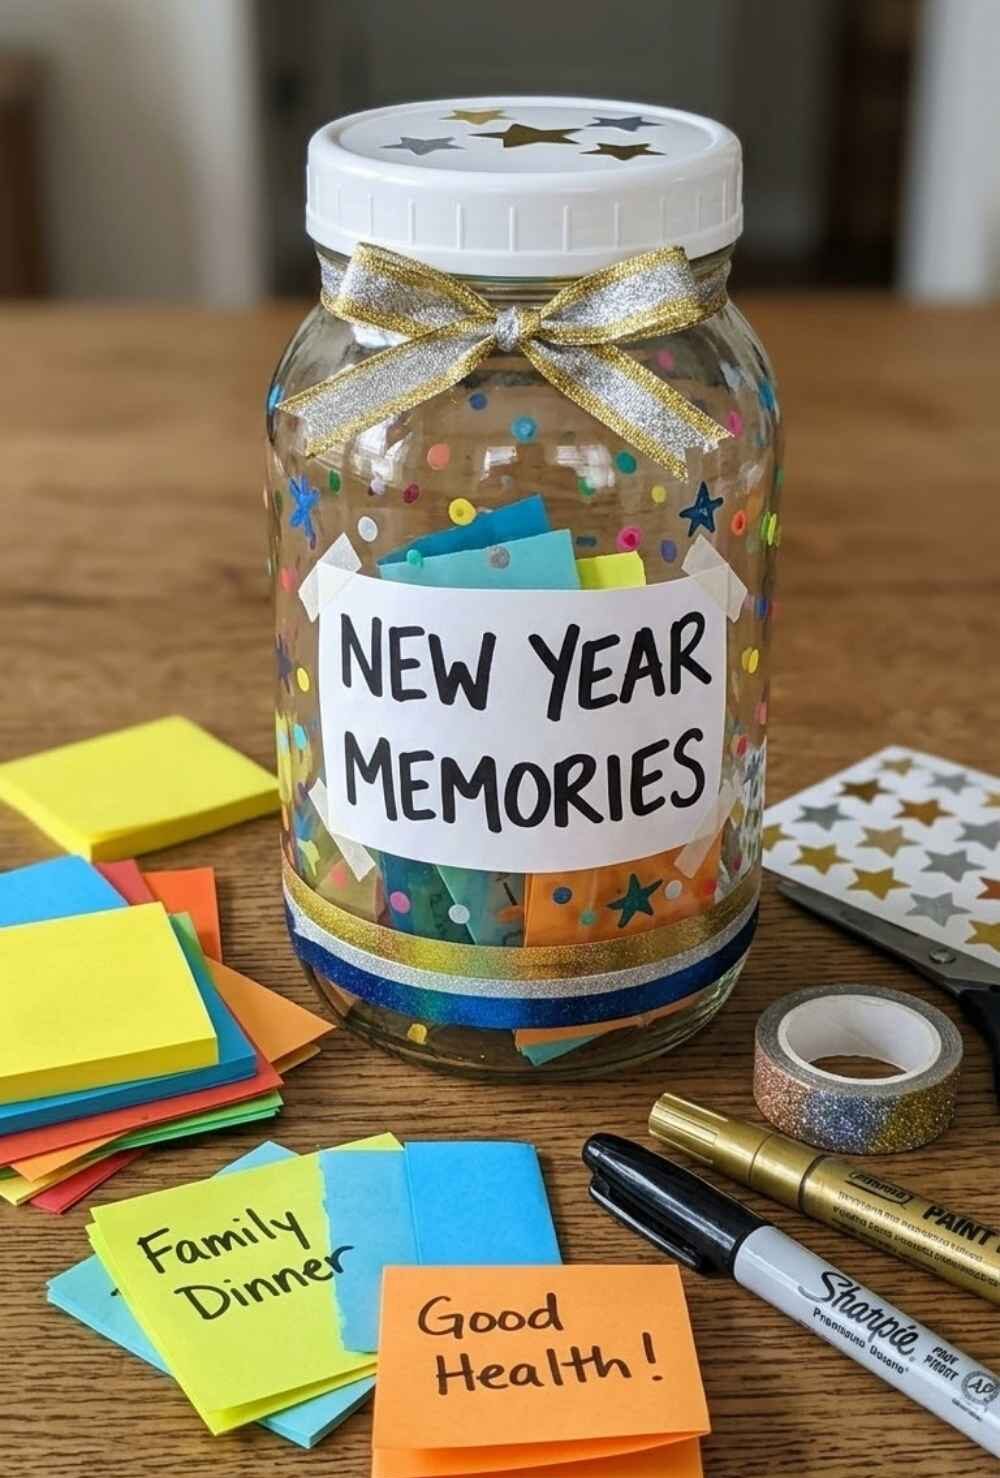 A memory jar is a simple way to collect good moments all year long.
Set one up on December 29, and by next December you will have a jar full of small, happy notes.
It is an easy project that gives the new year a kind start.
What You’ll Need
- A large, clean glass jar with a lid
- Paper slips or sticky notes
- A pen
- Ribbon or washi tape
- A paint pen or sticker for the label
How to Make It
- Decorate the jar with ribbon, washi tape, or paint-pen dots.
- Add a label with the new year, such as New Year Memories.
- Place a small stack of paper slips and a pen beside the jar.
- Whenever something good happens, write the date and one line, then drop it in. Open the jar next New Year’s Eve and read them aloud.
Make It Easier
- Limited hand strength or arthritis: Choose a wide-mouthed jar with a lid that is easy to twist, or use a basket with no lid.
- Vision difficulties: Use brightly colored paper and a thick marker for writing.
- Reduced dexterity: Use a plain jar with a stick-on label, and keep each note short.
Why Seniors May Enjoy It
Ordinary little moments become worth keeping. Reading the notes a year later is a very happy way to end the next December.
22. DIY New Year Vision Board
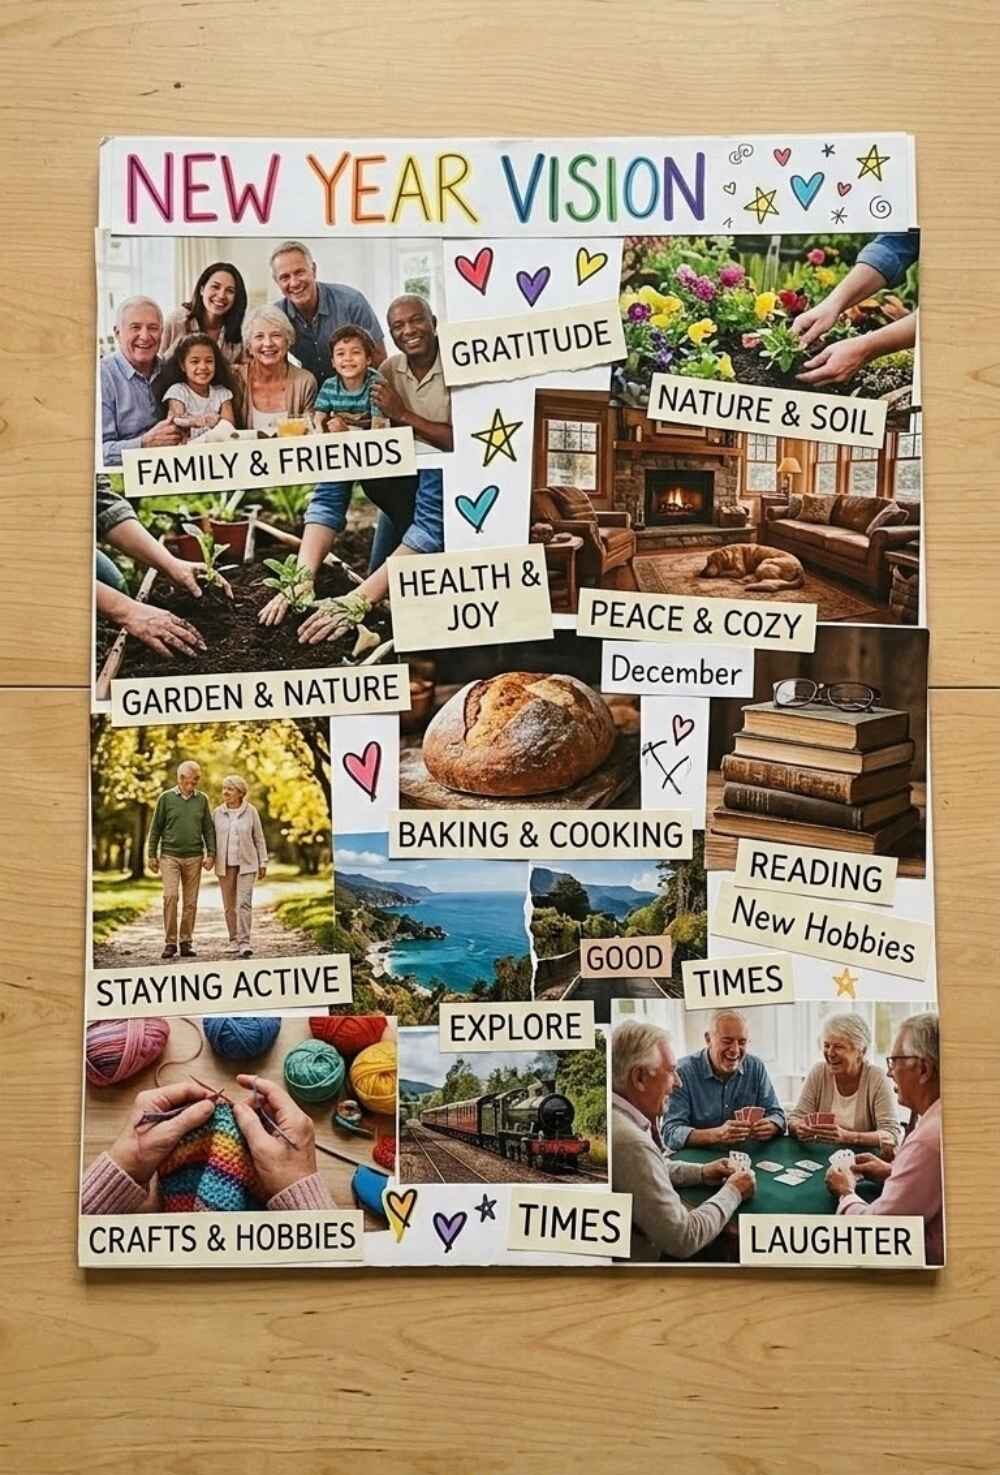 A vision board is a collage of the things you would like to do, see, or enjoy in the coming year.
It does not need to be ambitious, and it can include simple pleasures like a garden, a trip to see family, or a weekly lunch with friends.
It is a hopeful way to turn the page on the old year.
What You’ll Need
- A poster board or cork board
- Old magazines or printed pictures
- Scissors
- A glue stick
- Markers
- A few favorite photos
How to Make It
- Flip through the magazines and tear out pictures and words that feel hopeful.
- Sort them into groups, such as family, hobbies, places, and health.
- Arrange the pieces on the board before gluing anything down.
- Glue everything in place and write the year across the top.
Make It Easier
- Limited hand strength or arthritis: Tear the pictures out instead of cutting them, and use a glue stick.
- Vision difficulties: Choose large, clear pictures and fewer pieces.
- Reduced dexterity: Use sticky notes or adhesive photo squares that need no glue.
Why Seniors May Enjoy It
Thinking about the year ahead can feel lighter when you do it with scissors and pictures.
The finished board is a cheerful reminder of what you are looking forward to.
23. Handmade New Year Greeting Cards
 A New Year card feels different from a Christmas card.
It is a message of hope, and it often arrives when the mailbox is quiet.
A few stamps, a bit of shine, and a short note are all it takes.
What You’ll Need
- Blank cards or folded cardstock
- Rubber stamps and an ink pad
- A gold or silver pen
- Foam star stickers
- Envelopes
How to Make It
- Stamp a simple design on the front of each card, such as stars or the year.
- Let the ink dry, then add shine with a metallic pen or foam star stickers.
- Write a short, warm message inside, such as Wishing you a bright and happy new year.
- Sign each card, slip it into an envelope, and address it.
Make It Easier
- Limited hand strength or arthritis: Choose stamps with a big handle and press with the palm of your hand.
- Vision difficulties: Use dark ink on pale cardstock, and write the message in thick pen.
- Reduced dexterity: Use pre-folded cards and stickers instead of stamps.
Why Seniors May Enjoy It
A handmade card is a small way to reach out to friends and family. Finding one in the mailbox is a lovely surprise for the person on the other end.
24. Hope and Gratitude Paper Garland
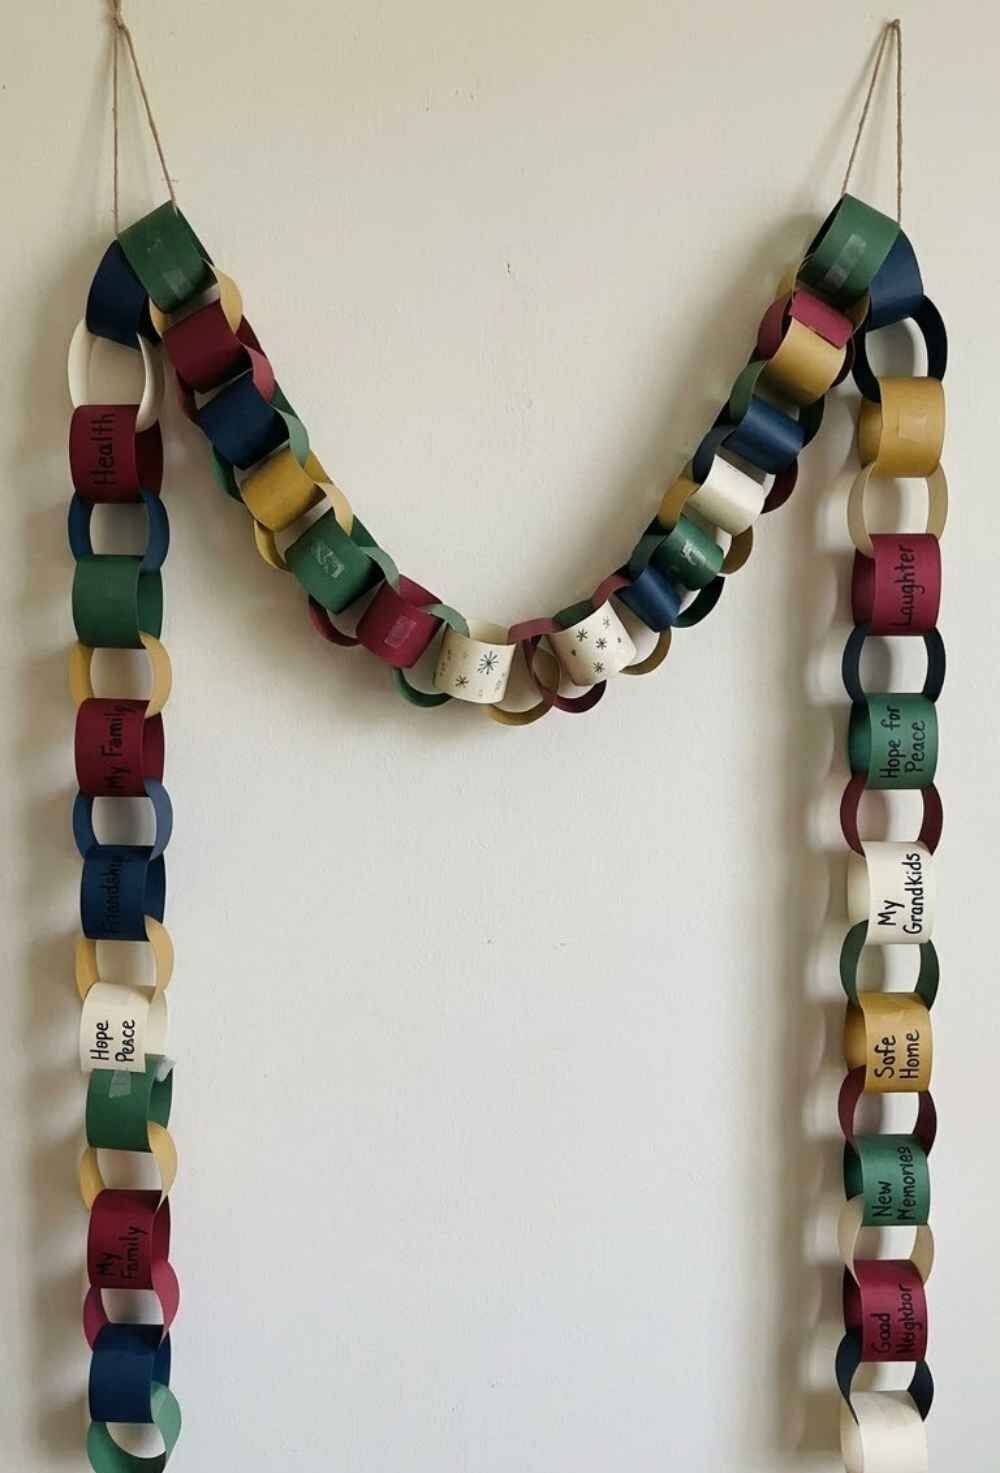 This paper chain carries a short hope or thank-you on every link.
Made on the last days of December, it is a gentle way to say goodbye to the old year and welcome the next.
Hang it across a window or doorway and read the links aloud on New Year’s Eve.
What You’ll Need
- Colored paper cut into long, narrow strips
- Pens or markers
- A glue stick or tape
- Twine or ribbon for hanging
How to Make It
- Write one hope for the new year, or one thing you are thankful for, on each strip.
- Curl the first strip into a loop with the writing facing out, and glue the ends together.
- Thread the next strip through the loop, close it, and glue the ends.
- Continue until the garland is long enough, then tie ribbon to each end and hang it up.
Make It Easier
- Limited hand strength or arthritis: Use tape instead of glue, which needs no squeezing.
- Vision difficulties: Write in large letters on pale paper using a dark marker.
- Reduced dexterity: Use self-adhesive paper strips, or staple the links with a helper.
Why Seniors May Enjoy It
Writing a hope down makes it feel a little more real. Watching the chain grow longer is a quiet pleasure.
25. DIY Celebration Table Decorations
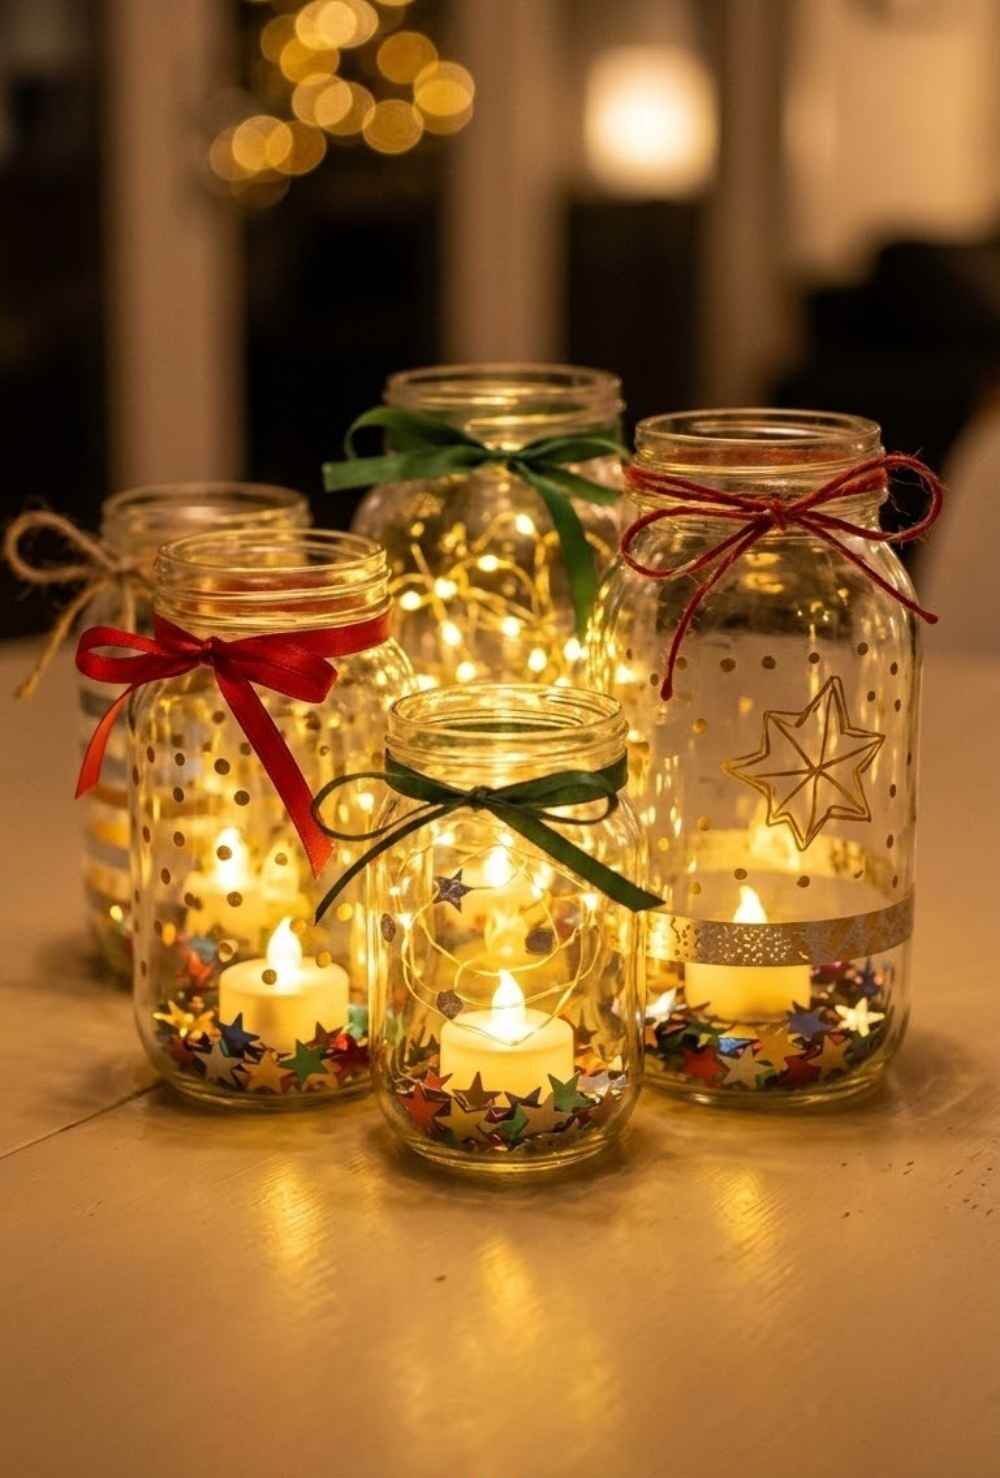 To finish the month, a few glowing jars can make a New Year’s table feel like a celebration.
Decorated glass jars with a soft LED light inside look warm and festive without any fuss.
These December Crafts for Seniors are also a pleasant way to close out the last craft of the month.
What You’ll Need
- Clean glass jars in different sizes
- Gold and silver paint pens, or tissue paper and glue
- Battery-operated LED tea lights
- Ribbon
- Confetti or small paper stars
How to Make It
- Decorate each jar with paint-pen dots and stripes, or glue on small squares of tissue paper.
- Let the jars dry, then tie a ribbon around the neck of each one.
- Drop a handful of confetti into the base and set an LED light on top.
- Group the jars in the center of the table.
Make It Easier
- Limited hand strength or arthritis: Use paint pens, which need a lighter touch than a brush, and choose a jar that is easy to hold.
- Vision difficulties: Choose metallic pens that show up clearly on glass, and work on a dark cloth.
- Reduced dexterity: Use stickers or washi tape to decorate the jars.
Why Seniors May Enjoy It
A table lit by your own handiwork looks cheerful and feels special. It makes a bright last project for the end of the year.
How to Make December Crafts for Seniors Easier
The best December crafts for seniors are the ones that feel comfortable from the first minute. A few small changes to the setup can make every project in this post easier and more enjoyable.
- Pick a good spot: Choose a table with bright, even light, and a sturdy chair with back support. A comfortable height matters more than people expect.
- Use a tray or a mat: A baking sheet or non-slip mat keeps beads, paper pieces, and paint pots from rolling away.
- Choose easy-grip tools: Foam grips, spring-loaded scissors, thick brushes, and glue sticks all take the strain out of crafting.
- Work in short stages: Split a project into two sittings and let paint or glue dry in between. Nothing needs to be finished in one go.
- Choose washable, low-mess supplies: Washable paint, glue sticks, and non-toxic markers make cleanup simple.
- Pre-cut when it helps: A helper can cut strips, shapes, or fabric ahead of time so the craft is all about the fun parts.
- Take breaks: Stretch your hands, sip some tea, and enjoy the music. Crafting should feel relaxing.
With these small adjustments, December crafts for seniors are easy for almost anyone to enjoy, at any skill level.
How to Turn December Crafts for Seniors Into Meaningful Activities
A craft is nice on its own, but it becomes something special when it is shared. Here are a few simple ways to turn December crafts for seniors into moments people remember.
- Craft with grandchildren: Many of these projects work well with little hands too, and the kids can help with cutting, sticking, and decorating. For more ideas to make together, try 20 Easy Christmas Snowman Crafts For Kids.
- Start a weekly craft hour: Pick a time each week, put on some music, and make a pot of tea. It works just as well with friends, neighbors, or a community group.
- Tell stories while you work: Recipe cards, photo collages, and memory books naturally bring up old stories. Let the conversation flow.
- Give what you make: Share your finished crafts with neighbors, friends, and family. For more gift ideas, see 20 Easy Christmas Crafts for Adults.
- Keep a record: Take a photo of each finished craft and slip it into the memory book from Week 4.
- Start a tradition: Choose one or two favorites to repeat every December, and see how the collection grows. 21 Meaningful Winter Family Traditions has more ideas for building traditions that last.
Your December Craft Plan, Ready When You Are
That is 25 December Crafts for Seniors, five for every stage of the month, from a gentle first week to a hopeful New Year.
Every craft was chosen to be simple, comfortable, and worth the time, and you do not need to make all of them.
One a week is plenty, and even a single craft is a good start. If you only have time for a few December crafts for seniors, begin with the countdown calendar and the recipe cards.
Save this post for the next time you need a December idea, grab a few supplies, and pick whichever one feels right today.
However you choose to spend the month, I hope these December crafts for seniors make it a little more creative, cozy, and enjoyable from beginning to end.