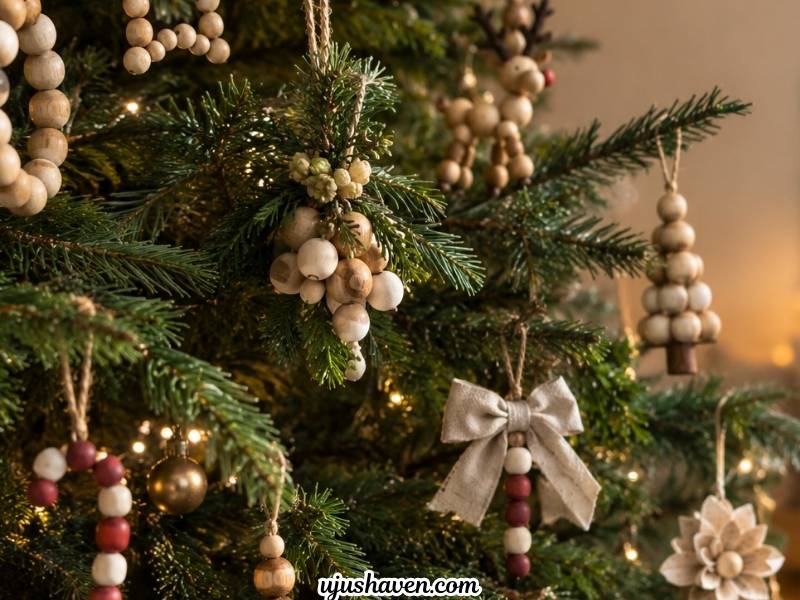
DIY Wood Bead Christmas Ornaments are a great place to start when you want handmade Christmas decor without taking on a project that needs a long supply list or a whole afternoon to finish.
You might have a few quiet minutes to make something, but the last thing you want is to pull out paint, glue, ribbons, and ten other supplies for one small ornament.
That is where simple wood bead projects make so much sense.
The beads already have a warm, natural look, so you don’t need to do much to make them feel finished.
A little twine, ribbon, greenery, or paint can completely change the look without making the project complicated.
And handmade doesn’t have to mean rustic or overly crafty.
Some designs can feel soft and neutral, others can lean farmhouse or traditional, and a few can be playful enough to make with the kids.
The projects here keep things simple while still giving you plenty of room to choose a style that fits your Christmas decor.
You’ll find easy designs, small variations, and thoughtful details that make each one feel a little different.
So grab a handful of wood beads and start with the design that feels most like you.
Why DIY Wood Bead Christmas Ornaments Are Worth Making

Store bought ornaments get the job done, but they rarely feel like they belong to your tree the way a handmade one does. DIY Wood bead Christmas ornaments are worth the small effort for a few reasons.
The materials cost very little compared to most craft supplies
- The natural wood grain already looks warm and finished on its own
- Every design is easy to change with color, size, or shape
- They work with almost any Christmas decor style, from farmhouse to traditional to soft neutral
- Older kids can help with stringing and stacking, which makes it a good family project
- A few of these can turn into yearly keepsakes if you add a name or a date
- Most of them look far more expensive than the handful of supplies actually used
None of that requires a big time investment. A single afternoon can easily get you through several of the ideas on this list.
A Few Tips for Making Wood Bead Christmas Ornaments Look Beautiful
Before jumping into the fifteen ideas, a few small choices make a real difference in how finished your wood bead ornaments end up looking.
Choose the Right Wood Bead Size
Larger beads read as bold and rustic, while smaller beads give you a more delicate, detailed look.
Mixing a few sizes together, instead of using one size throughout, usually gives the most interesting result.
Mix Natural Wood With One or Two Christmas Colors
Sticking to natural wood plus one or two colors, like red or deep green, keeps an ornament looking pulled together.
Too many colors on one small piece can start to look busy fast.
Pay Attention to Texture and Shape
Round beads, oval beads, and slightly irregular shapes all catch the light a little differently.
Combining a couple of shapes on the same ornament adds visual interest without adding extra work.
Keep the Finishing Details Simple
Twine, thin ribbon, a small greenery sprig, a bell, or a tiny tag are usually enough.
One well placed detail almost always looks better than several competing for attention.
Make the Ornament Feel Like It Belongs on Your Tree
Repeating a material or color across a few ornaments, even in small amounts, makes a handful of different designs feel like they were made as a set instead of random pieces.
One small thing that trips people up: wood beads sometimes carry a light layer of dust or manufacturing residue straight out of the bag. A quick wipe with a dry cloth before you start gluing or painting helps both hold better and dry cleaner.
15 DIY Wood Bead Christmas Ornaments for Your Christmas Tree
Every idea below is meant to hang right on your tree, not just sit on a shelf. Once you’ve made a few favorites, the styling section further down shows you how to work them into the rest of your holiday decor.
1. Classic Wood Bead Garland Ornament

Picture a small loop of natural wood beads hanging quietly among your other ornaments, simple enough to disappear into the tree yet warm enough to stand out up close.
Nothing about this one requires much shaping or planning, just beads and twine tied into a loop, which makes it the easiest entry point into DIY Wood Bead Christmas Ornaments.
What you’ll need
- 8 to 10 wood beads, any size you like
- Jute twine or thin cord, cut long enough to tie a comfortable loop with a little extra to spare
- Scissors
How to make it
- Thread 8 to 10 beads onto the twine, sliding them toward the center
- Bring both ends of the twine together and tie a firm double knot to form a loop
- Slide the beads around the loop until they sit evenly spaced, with no large gaps
- Trim the loose twine ends short and add a small knot or dab of glue at the tips so they don’t fray
- Tug gently on the loop to check the knot holds before hanging
Mix in one or two darker wood tones for a little contrast instead of using beads that all match exactly.
Hang a few of these together in a cluster near the top of the tree for a soft, layered look.
From here, the next couple of ideas move from a simple loop into beads shaped around wire, which opens up a few more design options.
2. Wood Bead Star Ornament
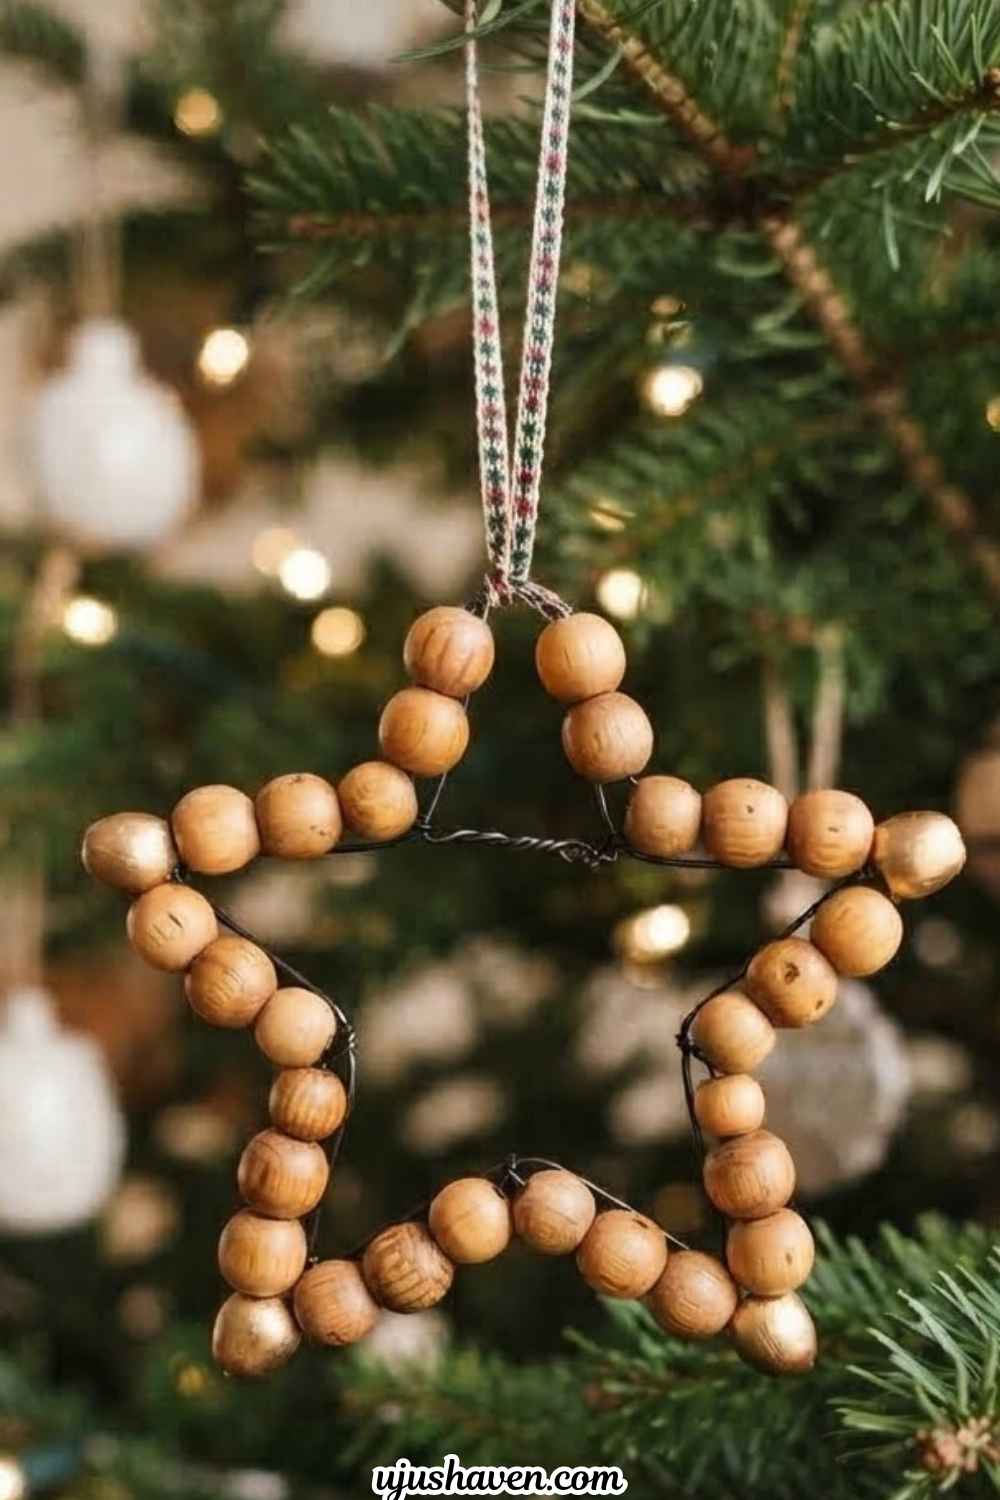
A small star shape made entirely of beads looks handmade in the best way, catching the eye without needing anything flashy.
Wood bead ornaments shaped like a star give you more structure than a simple loop, which makes this one feel like a step up while still staying easy to finish in one sitting.
What you’ll need
- Craft wire that is easy to bend by hand but firm enough to hold its shape once bent
- 15 to 20 small wood beads
- Wire cutters and needle nose pliers
- Ribbon for hanging
How to make it
- Before touching the wire, draw a five point star on paper without lifting your pen, the kind most people can already doodle from memory, and keep this drawing next to you as a guide
- Lay your wire along the first line of the drawing and begin threading beads onto it as you follow that same line
- When the drawn line changes direction at a point, bend the wire with your pliers to match that angle, then continue threading beads along the next line
- Keep following the drawing this way, bending and beading line by line, until the wire has traced the whole star and lands back where it started
- Twist the two ends together at the point where they meet to close the star, tuck the twisted tail flat against the back, and tie a ribbon loop through the top point
Try painting just the tips of the star gold or white for a subtle metallic touch.
Its shape reads best near the front of the tree, where it can actually be seen.
3. Wood Bead Snowflake Ornament

A light, airy snowflake shape made of thin wire and a handful of beads looks delicate against the deeper greens of a Christmas tree.
This design works well if your Christmas decor leans soft and neutral, since the open shape reads as elegant rather than busy.
What you’ll need
- Thin, flexible craft wire, enough to cut six equal-length spoke wires plus one short piece for the center
- 12 to 15 small wood beads
- Wire cutters
- Hot glue gun
How to make it
- Cut six spoke wires of equal length, each long enough to hold a few beads with extra length left over to fold at the end, then cut one shorter piece of wire to use for the center
- Thread two to three beads onto each of the six spoke wires, sliding them toward the center point of each length
- Lay the six beaded spoke wires on a flat surface and arrange them evenly around a center point, the way hands would sit on a clock face if you spaced them out equally
- Gather all six spoke wires at that center point and wrap the short center wire tightly around them a few times to hold them together, then add a small dot of hot glue over the wrapped center for extra hold
- Bend the wire ends slightly outward past the last bead on each spoke so nothing pokes through, then trim any excess
No two of these ever turn out exactly alike, so making a small batch actually works in your favor.
Cluster a few different sizes together for a snowfall effect on one section of the tree.
Next up, a few designs shift into something more playful, good for stacking, gluing, and roping in little hands to help.
4. Wood Bead Snowman Ornament

Three simple beads, stacked and glued, turn into a tiny snowman that looks more detailed than the effort it actually takes.
Kids especially love this one, since stacking the beads themselves feels like the fun part, which makes it a good pick for a relaxed afternoon together.
What you’ll need
- 3 wood beads in graduated sizes
- A small fabric scrap, big enough to wrap around the neck area
- Fine tip marker
- Hot glue gun
How to make it
- Stack the three beads in a line from largest at the bottom to smallest at the top
- Run a small line of hot glue between each bead as you stack them, holding until each one sets in place
- Wrap the fabric scrap around the neck area, just below the smallest bead, and tie a small knot or secure it with a dab of glue
- Use the marker to draw two dot eyes and a row of small dots for buttons directly onto the beads
- Add a small loop of twine to the back of the top bead for hanging
Use a patterned fabric scrap for the scarf to tie it into your existing color scheme.
Hang a few side by side near eye level so their little faces actually get noticed.
5. Wood Bead Reindeer Ornament

A single larger bead with tiny twig antlers glued on top looks surprisingly like a reindeer face the moment it comes together.
Small twigs left over from another project turn into fun antlers here, so this one barely adds anything new to your supply list.
What you’ll need
- 1 larger wood bead
- 2 small twigs
- 2 tiny beads for the eyes and 1 small red bead for the nose
- Hot glue gun
- Twine
How to make it
- Hold the two twigs against the top of the large bead in a V shape to check placement before gluing
- Add a small dot of hot glue to the base of each twig and press firmly onto the top of the bead, holding until secure
- Glue the two tiny eye beads onto the upper front of the large bead, spaced evenly apart
- Glue the red bead just below and between the eyes to form the nose
- Attach a small loop of twine to the back of the bead, just above the antlers, for hanging
Use a slightly larger red bead for the nose to give it a little extra personality.
Tuck a few toward the front of the tree, where their little antlers can peek out.
6. DIY Wood Bead Christmas Tree Ornaments

Stacked beads that shrink in size from bottom to top instantly read as a tiny Christmas tree, and it is one of the more charming shapes on this whole list.
The graduated stack does most of the visual work here, which is what makes it feel more playful than most other designs on this list, and a good one to let kids help build.
What you’ll need
- 5 to 6 wood beads in graduated sizes, from your largest down to your smallest
- A wooden skewer
- A small bead or bell for the top
- Hot glue gun
- Twine, or a small screw eye if you have one on hand
How to make it
- Trim the wooden skewer down with a craft knife or a small saw so it is only slightly longer than your stacked beads will be, then trim the sharp pointed tip flat so it isn’t exposed at the top. If you would rather skip cutting wood yourself, ask someone to trim it to length for you before you start assembling
- Sort your beads from largest to smallest and thread the largest bead onto the skewer first, followed by each bead in decreasing size, adding a small dot of hot glue between beads as you go if any feel loose
- Once stacked, glue a small bead or bell to the flattened top of the skewer as a topper and hold until it sets
- For the hanging loop, either tie a length of twine tightly around the skewer just below the top bead and secure the knot with a dab of glue so it can’t slide, or twist a small screw eye into the top of the skewer before adding the topper bead for a sturdier hang point
- Add a small dot of glue to the cut bottom tip of the skewer to seal it, then let everything dry before hanging
Swap in a single red bead partway up the stack to look like a tiny ornament on the tree itself.
These look great grouped in threes at slightly different heights for a mini forest effect.
Now for one that turns any of these into something with a name on it.
7. Wood Bead Initial Ornament

A single letter, shaped from wire and lined with beads, turns into a small personalized ornament that feels a little more special than the rest.
A little more meaning comes into play here, since this one can double as a gift tag for someone in the family.
What you’ll need
- Craft wire, enough length to shape your chosen letter with a bit extra to spare
- 10 to 15 small wood beads
- A printed or hand drawn letter at the size you want the finished ornament to be
- Wire cutters and pliers
- Ribbon
How to make it
- Print or draw the chosen letter on paper at the size you want the ornament to end up, then tape a sheet of wax paper over it so the wire won’t stick to the glue or ink underneath
- Lay the wire directly over the printed letter and use your pliers to bend it to follow the outline, checking your progress against the paper underneath as you go
- Slide beads onto the wire as you shape it, adjusting spacing so beads sit close together without overcrowding tight corners or curves
- Once the letter is fully beaded and matches the shape underneath, twist or hook the two wire ends together at the back where they won’t be visible
- Peel the finished letter away from the paper template and attach a small ribbon loop to the top for hanging
Use a different bead color for each family member’s initial to keep them easy to tell apart.
Clip a few onto wrapped gifts as tags, or keep them near the front of the tree where the names are easy to spot.
The next two DIY Wood Bead Christmas Ornaments bring in a bit more texture, through color and movement instead of shape.
8. Painted Wood Bead Ornament
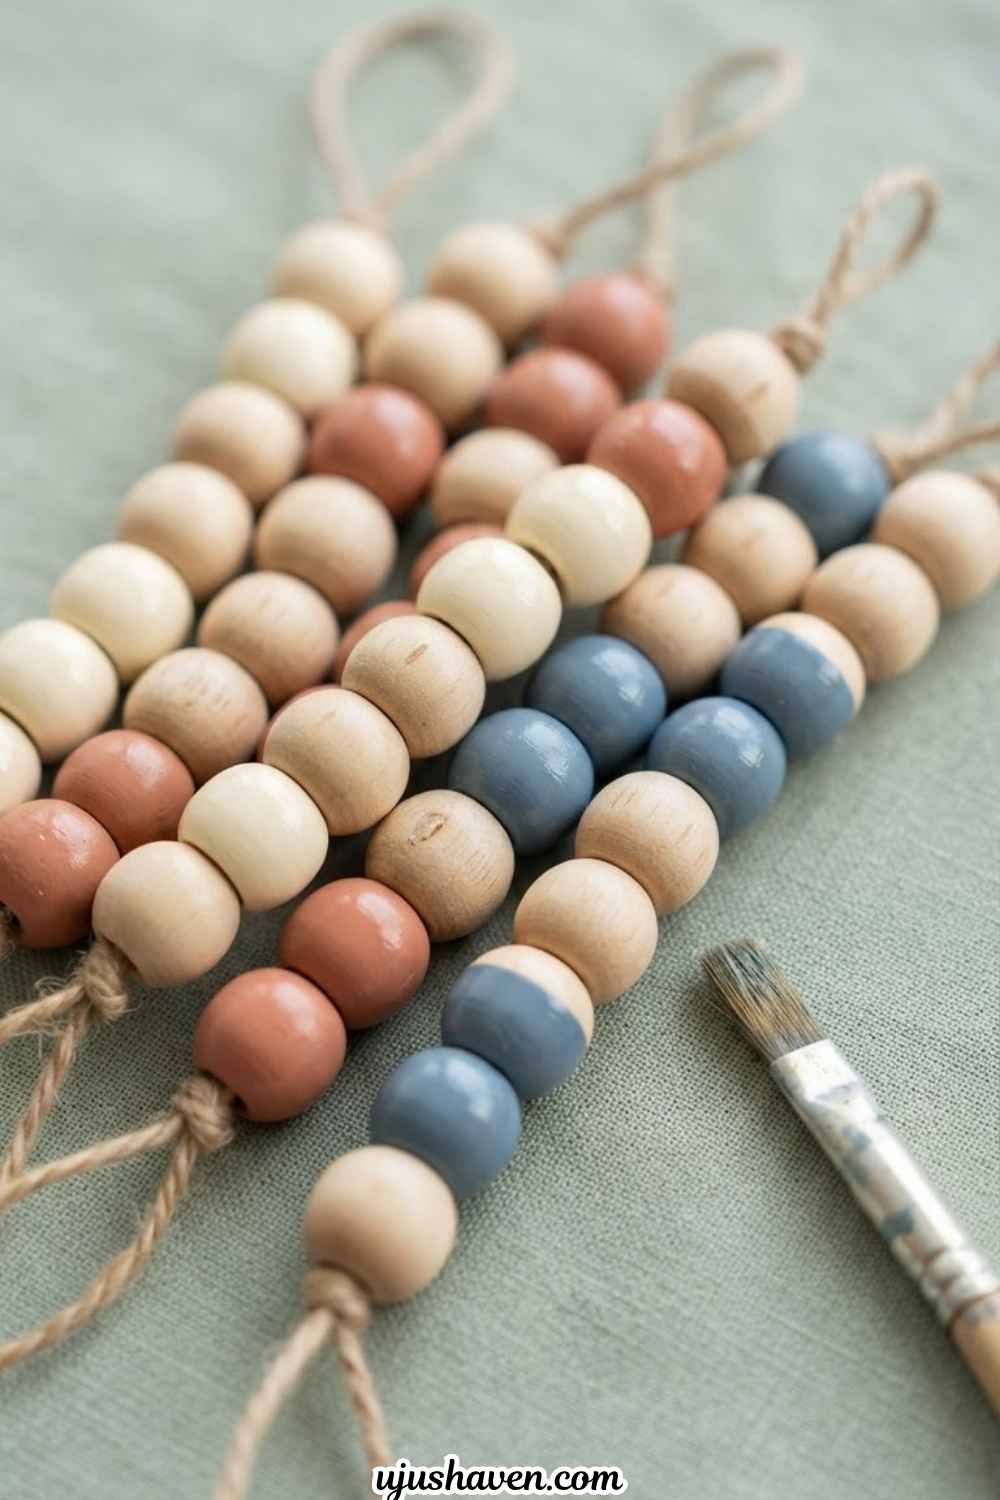
Half dipped beads in a soft white or cream shade add a hint of color without covering the natural wood completely.
Soft, muted Christmas decor benefits from this one especially, since the painted sections add just enough contrast to keep the arrangement from looking flat.
What you’ll need
- 8 to 10 wood beads
- Acrylic paint in your chosen color
- Small paintbrush or a shallow dish for dipping
- Twine or ribbon
How to make it
- Hold each bead by the unpainted end and dip roughly half of it into the paint, or brush the paint on by hand for more control
- Set each dipped bead on wax paper or a scrap of cardboard to dry, painted side up, and let it dry completely before touching it, checking your paint’s label for the expected drying time since this can vary by brand
- Once fully dry, thread the beads onto twine or ribbon, alternating painted and natural beads
- Adjust spacing so the painted sections face outward and are easy to see
- Tie off both ends of the twine securely
Try two different paint colors on separate batches of beads for more variety along one strand.
Space these evenly among plain wood ornaments so the painted ones stand out instead of blending in.
9. Wood Bead Tassel Ornament

Pairing a couple of beads with a small fabric or yarn tassel adds movement that most plain ornaments simply do not have.
Leftover yarn scraps finally get a use here, and the added texture makes this one feel a little more elevated than the designs before it.
What you’ll need
- 2 to 3 wood beads
- A small amount of yarn or fabric scraps
- Twine
- Scissors
How to make it
- Wrap yarn around three fingers, enough times to build up a tassel that looks full but not bulky, then slide it off your fingers carefully
- Tie a short piece of yarn tightly around the top of the wrapped loops to gather them together
- Cut through the bottom loops of the tassel and trim the ends so they hang evenly
- Thread two to three beads onto a length of twine, then tie the twine directly to the top loop of the tassel
- Add a loop at the top of the twine for hanging
Match the tassel color to your ribbon or ornament theme for a more coordinated tree.
The tassel’s movement is what photographs especially well, so give each one a little room to swing.
The last few ideas here lean into a more traditional look before ending on a couple of unexpected shapes.
10. Wood Bead Bow Ornament
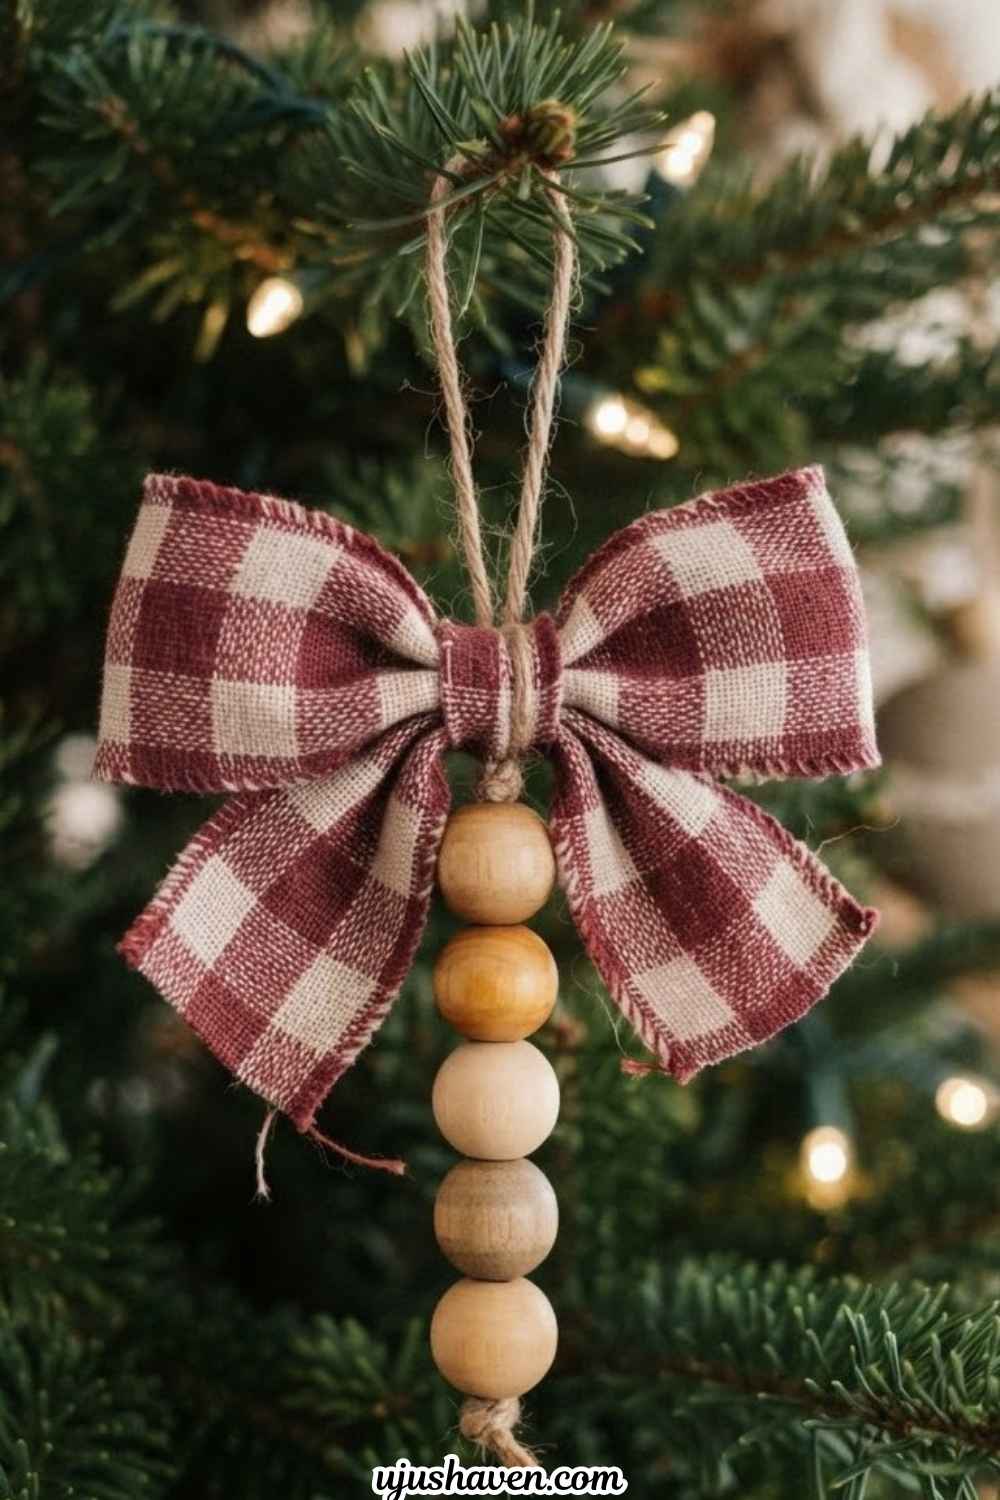
A small cluster of beads paired with a soft fabric or ribbon bow leans a little more traditional than some of the other designs here.
Fabric or ribbon bows lean more traditional, and pairing one with beads lets the bow take center stage while the beads simply anchor it.
What you’ll need
- 3 to 5 wood beads
- Ribbon or a fabric scrap, enough to fold into a bow
- Twine
- Hot glue gun
How to make it
- Thread three to five beads onto a length of twine and tie a knot below the last bead so they stay grouped
- Fold the ribbon or fabric into a simple bow shape, pinching the center between your fingers
- Wrap a small piece of wire or thread tightly around the pinched center to hold the bow shape
- Glue the bow just above the knotted beads, holding until it feels secure
- Add a loop of twine or ribbon at the very top for hanging
Try a plaid or velvet ribbon for a warmer, more traditional finish.
These sit nicely toward the middle of the tree where the bow has room to be seen.
11. Wood Bead Candy Cane Ornament

Alternating red and white beads along a curved wire instantly forms a tiny candy cane shape, familiar enough to feel nostalgic.
Bringing a classic Christmas symbol into your DIY Wood Bead Christmas Ornaments lineup doesn’t take any painting at all if you buy pre colored beads, which is what makes this one so easy.
What you’ll need
- Craft wire, sturdy enough to hold a curved shape once bent
- 10 to 12 red and white wood beads
- Wire cutters and pliers
- Ribbon or twine
How to make it
- Using pliers, bend the top portion of the wire into a gentle curve to form the candy cane hook
- Thread beads onto the straight section of wire, alternating one red and one white as you go
- Continue until beads reach close to the bottom of the wire, leaving a small gap at the end
- Bend the very bottom of the wire into a small loop or fold it back on itself so beads can’t slide off
- Tie a small piece of ribbon or twine near the curved top for hanging
Add a tiny bell at the curved end for a little extra detail.
These pair well near classic red and white decor pieces elsewhere on the tree.
12. Wood Bead and Greenery Sprig Ornament
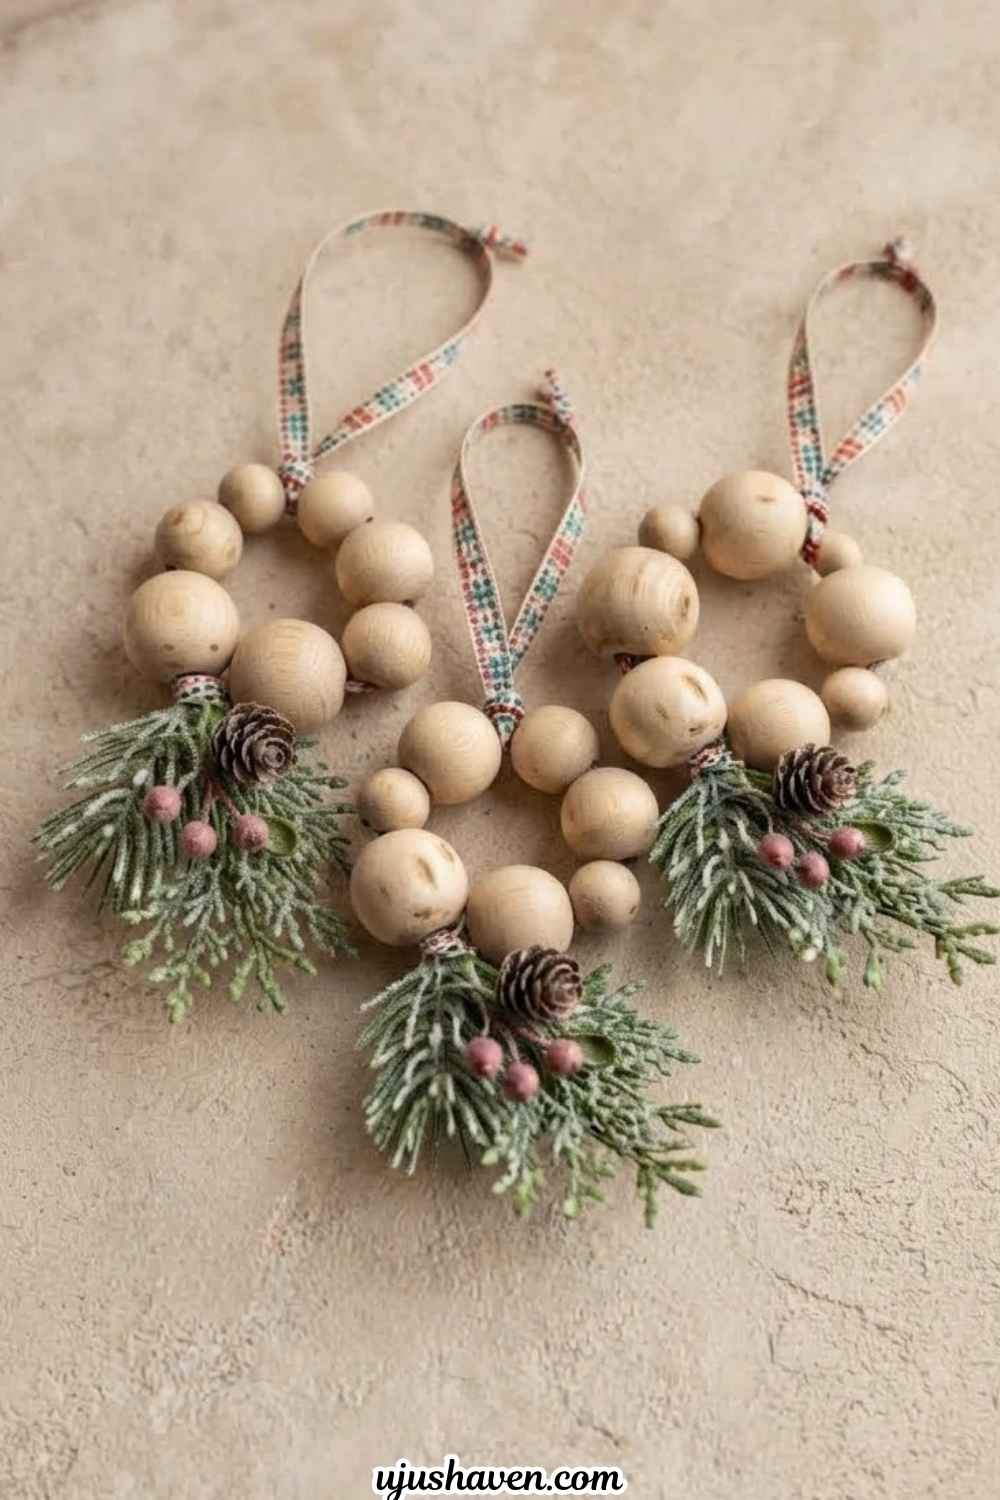
A small cluster of beads paired with a faux greenery sprig looks like a miniature centerpiece hanging right on the branch.
Trees with a natural, greenery heavy theme call for exactly this kind of ornament, since it echoes what’s already growing on the branches.
What you’ll need
- 4 to 6 wood beads
- A small faux greenery sprig
- A tiny berry pick
- Twine
- Hot glue gun
How to make it
- Thread four to six beads onto a length of twine and tie a knot below the beads to hold them together
- Trim the greenery sprig so its size stays in proportion to the beads, rather than overwhelming them
- Glue the base of the greenery sprig directly against the knot beneath the beads
- Tuck the tiny berry pick into the greenery and secure with a small dot of glue
- Let everything dry fully before adding a loop for hanging
Swap the berry pick for a small pinecone if you want a slightly different texture.
Nestle these a little deeper into the tree, closer to the branches themselves, so the greenery blends in naturally.
The last three DIY Wood Bead Christmas Ornaments take a different shape entirely, worth trying once you’ve gotten comfortable with the basics above.
13. Wood Bead Mason Jar Lid Ornament
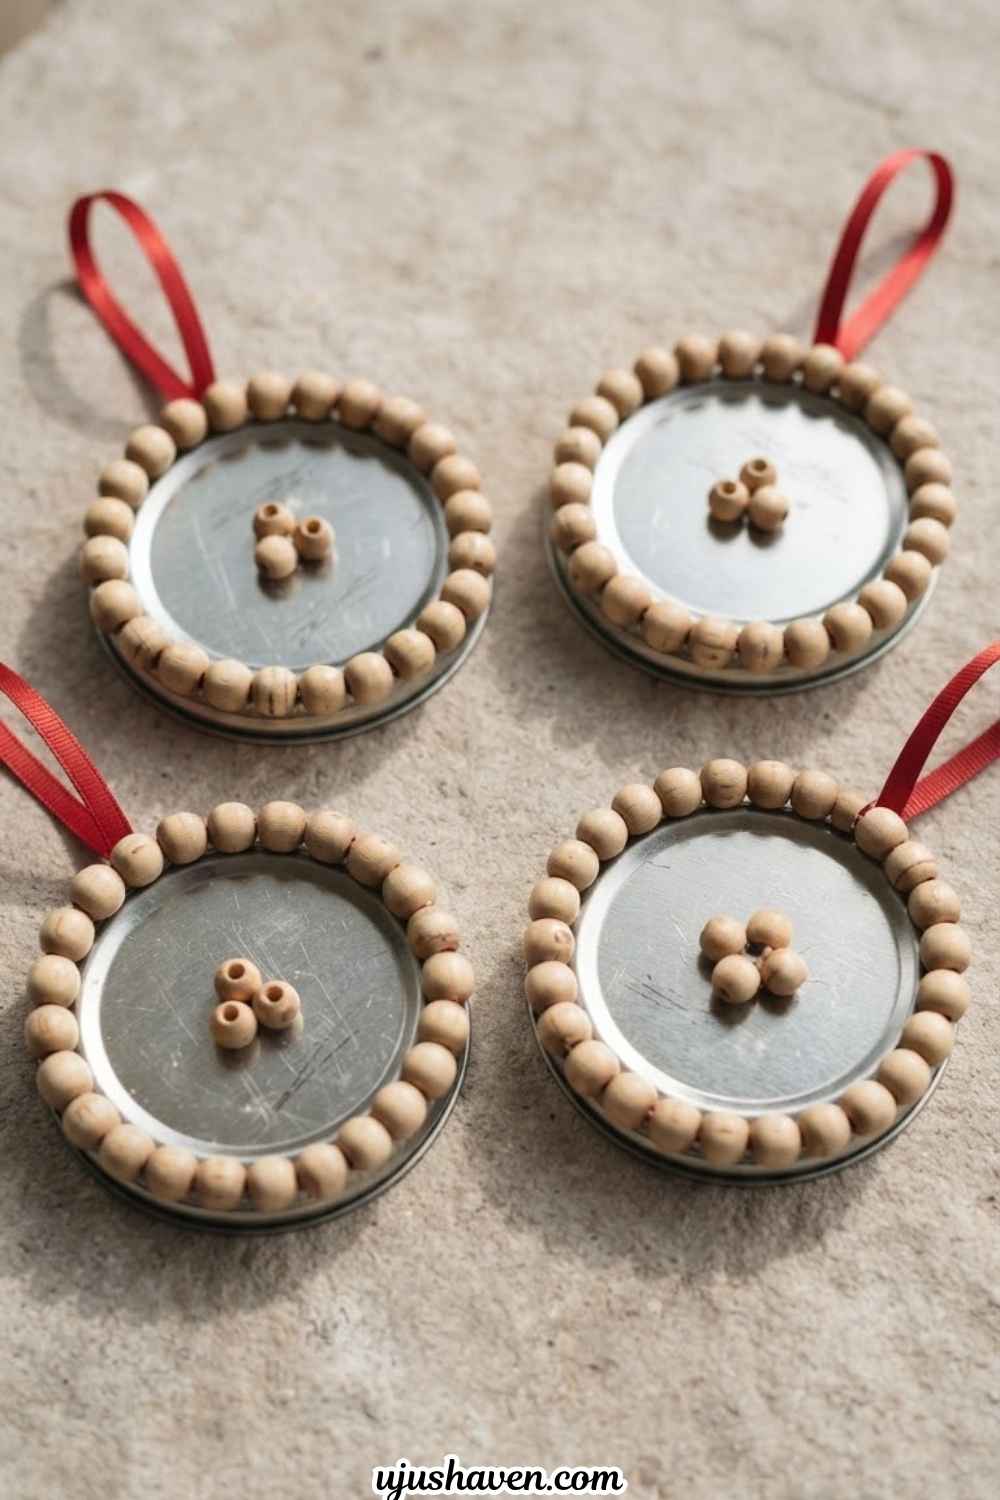
A ring of beads glued around a mason jar lid turns a simple, flat surface into something textured and rustic.
If you already have leftover mason jar lids from another project, this is a good way to put them to use, and it pairs naturally with the same relaxed style covered in Mason Jar Lid Craft: Easy Last-minute DIY That Instantly Warms Your Space.
A quick note before you start: a two piece mason jar lid has two parts, the flat lid insert and the outer metal screw band.
For this project you only need the flat lid insert, not the screw band.
What you’ll need
- 1 flat mason jar lid insert
- Small wood beads, enough to circle the edge
- Twine or ribbon
- Hot glue gun
How to make it
- Working in small sections, run a thin line of hot glue around the edge of the flat lid insert
- Press beads into the glue one at a time, following the curve of the edge until the full circle is covered
- Once the outer ring is complete, decide on a center detail such as a small greenery sprig, a name written in marker, or a few extra beads glued in a cluster
- Add the chosen center detail and let the whole piece dry flat before handling it again
- Since the flat lid insert has no hole of its own, glue a small loop of twine or ribbon flat against the back and let it dry fully before hanging
Paint the edge of the lid before adding beads for a bit more color contrast.
Mixed in among smaller ornaments, this larger piece works well as an accent.
14. Wood Bead Icicle Ornament
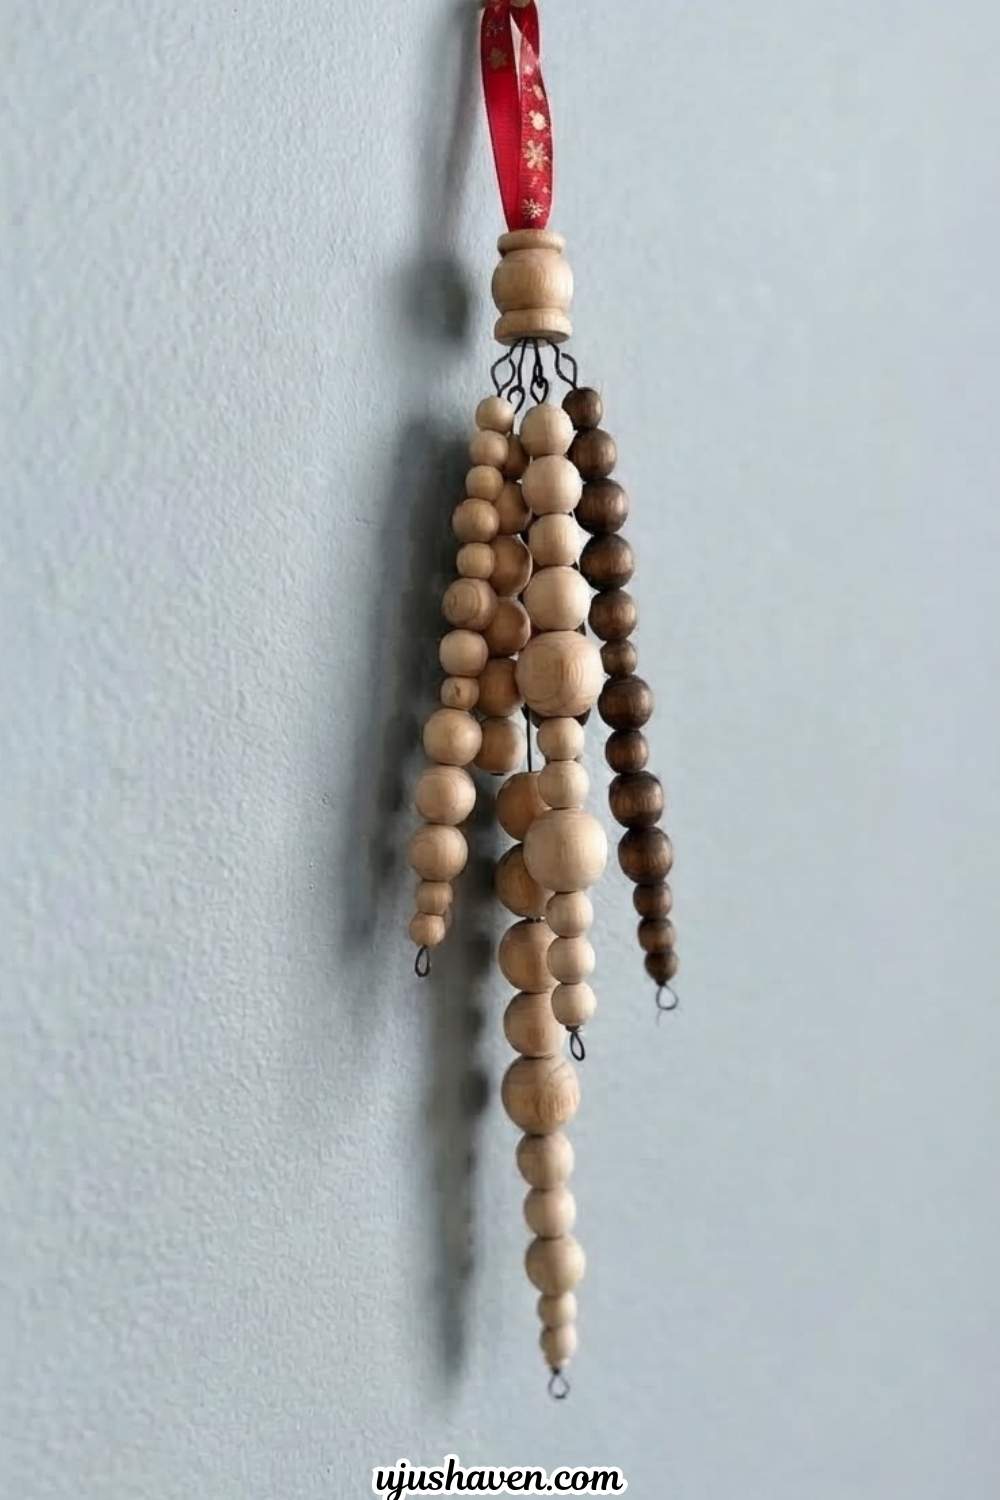
Long, graduated strands of beads hanging together create the look of a tiny icicle catching the light.
Height and a little shimmer come easily here, without much more effort than the strands you’ve already been tying throughout this list.
What you’ll need
- Wood beads in graduated sizes, from your smallest up to your largest
- Thin wire or twine
- A small top piece or bead cap
- Wire cutters
How to make it
- Cut three or four strands of thin wire or twine, long enough to show a clear size progression once beaded
- On each strand, thread beads starting with the smallest at the top and increasing in size going down
- Knot or bend the wire at the bottom of each strand so beads can’t slide off
- Gather the tops of all strands together and attach them to one small top piece or bead cap, securing with glue or a twist of wire
- Add a loop above the top piece for hanging
Use a slightly different bead tone on one strand so the icicle catches the eye from different angles.
Hang a few of these DIY Wood Bead Christmas Ornaments together for a cascading effect along one branch.
15. Wood Bead and Paper Flower Cluster Ornament

Instead of a single strand, this one gathers several short beaded strands into a small rounded bundle, like a tiny bouquet, with a paper flower tucked into the center where everything meets.
Dimension is what sets this one apart from the rest of the list, since a small bundle catches the eye differently than a flat strand.
It pairs nicely with the ideas covered in DIY Paper Flowers for Home Decor: Easy Designs That Instantly Elevate Your Space.
What you’ll need
- 3 to 4 short lengths of twine or ribbon
- Wood beads, enough to fill each strand
- 1 small paper flower
- Hot glue gun
How to make it
- Thread a few beads onto each of the three or four strands, leaving bare twine at the top of each one
- Gather the bare tops of all the strands together and tie them tightly with an extra piece of twine to bunch them into a small rounded cluster
- Gently fan the beaded strands out so they fall at slightly different lengths, giving the cluster some fullness
- Glue the paper flower directly over the tied point at the top, covering the knot
- Add a loop above the flower for hanging
Try a paper flower in a color that echoes something else already on your tree.
Give each one a little breathing room rather than clustering them together, since the added dimension deserves to be seen.
How to Mix Wood Bead Ornaments on Your Christmas Tree
Fifteen different designs can start to feel like too much at once if they go on the tree without any plan. A little structure keeps everything looking intentional.
Start With One Main Color Palette
Pick one or two colors to run through most of the ornaments, whether that is natural wood and red, or wood and soft cream. This keeps the tree feeling cohesive even with several different designs mixed in.
Repeat Materials Throughout the Tree
Using the same twine, ribbon, or greenery across multiple ornaments ties everything together, even when the shapes themselves are all different.
Mix Homemade and Store-Bought Ornaments
A tree does not need to be entirely handmade to feel special. Let your wood bead ornaments sit alongside a few existing pieces instead of trying to replace everything at once.
Vary the Size and Placement
Larger ornaments tend to look better placed deeper into the tree, while smaller, more delicate pieces work well toward the outer branches where they can be seen up close. If a design turns out heavier than expected, like the mason jar lid ornament, test it on a sturdier inner branch first rather than assuming every branch can hold the same weight.
Leave Some Breathing Room
Not every branch needs something hanging from it. A little empty space between ornaments actually helps each one stand out instead of competing for attention.
FAQs About DIY Wood Bead Christmas Ornaments
What kind of wood beads are best for Christmas ornaments?
Natural, unfinished wood beads work best for most of these projects since they take paint and stain well and already have a warm look on their own.
What size wood beads should I use for ornaments?
A mix of sizes works better than sticking to just one. Smaller beads suit delicate designs like the snowflake, while larger beads work well for bolder pieces like the snowman or reindeer.
Can I paint wood beads for Christmas ornaments?
Yes, acrylic paint works well on wood beads. Let each bead dry completely before stringing it with others to avoid smudging, and check your paint’s label for expected drying time since this varies by brand.
What can I use instead of ornament hooks?
Twine, thin ribbon, or even a small loop of embroidery thread all work fine in place of traditional metal hooks.
How should I store wood bead Christmas ornaments after Christmas?
Store them in a soft lined box or wrap each one individually in tissue paper to prevent beads from chipping or ribbon from crushing between seasons.
Do wood bead ornaments need a protective coating?
Not usually. Untreated wood beads hold up fine through one season indoors. If you want an ornament to last several years without the finish dulling, a thin coat of clear sealant after any painting is a simple way to protect it.
Give Your Christmas Tree a Little Handmade Magic
Christmas decorating does not need a big budget to feel warm and put together.
A handful of wood beads, some twine, and a little bit of time are really all it takes to add something genuinely handmade to your tree.
Even choosing just a few favorites from this list can shift the whole feel of your tree, adding those small, warm details that store bought ornaments rarely have. If you want more low effort ideas to round out your holiday crafting list, 20 Easy Christmas Crafts for Adults: Simple DIY Gifts Everyone Will Love is a good next stop.
Let your ornaments be a little imperfect rather than aiming for anything too polished.
Those small, handmade details are exactly what make a tree feel like yours.
This year, let a few simple wood beads bring a little extra warmth to your holiday season.