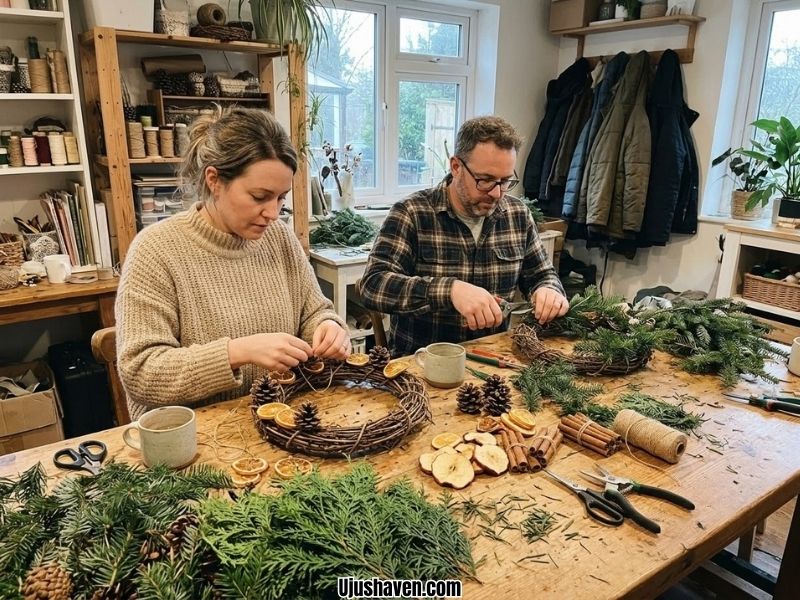
Cold winter air, crunchy leaves underfoot, and the fresh scent of evergreen branches can make an ordinary walk feel a little different, and winter nature crafts for adults offer a lovely way to bring some of that outdoors feeling inside.
Pinecones gathered along the way, small twigs, dried orange slices, and evergreen sprigs can become simple decorations without spending much money on supplies.
Winter days can feel slow, especially when you want something peaceful to do with your hands instead of repeating the same routine.
Working with natural materials gives you a reason to slow down and make something useful or beautiful at your own pace.
If you need more ways to fill those quiet hours, my list of winter boredom busters for adults has plenty of other ideas to try.
These 15 projects use materials that are free, inexpensive, or easy to find, so you don’t need a special trip to the craft store or any previous crafting experience.
You’ll also find safety notes for projects involving candles or heat, so you can work comfortably and carefully.
Let’s start with what to gather before you begin.
What to Know Before Starting Your Winter Nature Crafts
Winter nature crafts for adults ask for very little, so a few basics are enough to get you started with confidence.
- Where to find materials: Check under pine and spruce trees for pinecones, look along fence lines and trails for fallen twigs, and ask a local tree lot for their trimmed evergreen branches. Oranges and cinnamon sticks come from your kitchen.
- How to clean and dry them: Brush off dirt, shake out any loose debris, and let everything dry completely indoors before you glue or paint. You’ll find the full steps in the section on preparing natural materials further down.
- Tools to keep nearby: Most projects need only a hot glue gun, pruning snips or sturdy scissors, natural twine, floral wire, a small paintbrush, and a baking sheet with parchment.
- How to pick a project: Short on time? Start with the snowy pinecone ornaments, the twig stars, or the painted stones. Have a slow weekend? The pressed leaf art, the clay ring dish, and the moss terrarium are worth the extra time.
If you want something calm to do with your hands, any of these will fit, and my relaxing crafts for adults has more in the same calm style.
Many of the projects here also work well with older family members who like clear, simple steps, and my Christmas craft ideas for seniors pair nicely with this list.
Now for the projects themselves.
15 Winter Nature Crafts For Adults
1. Winter Pinecone Candle Holder
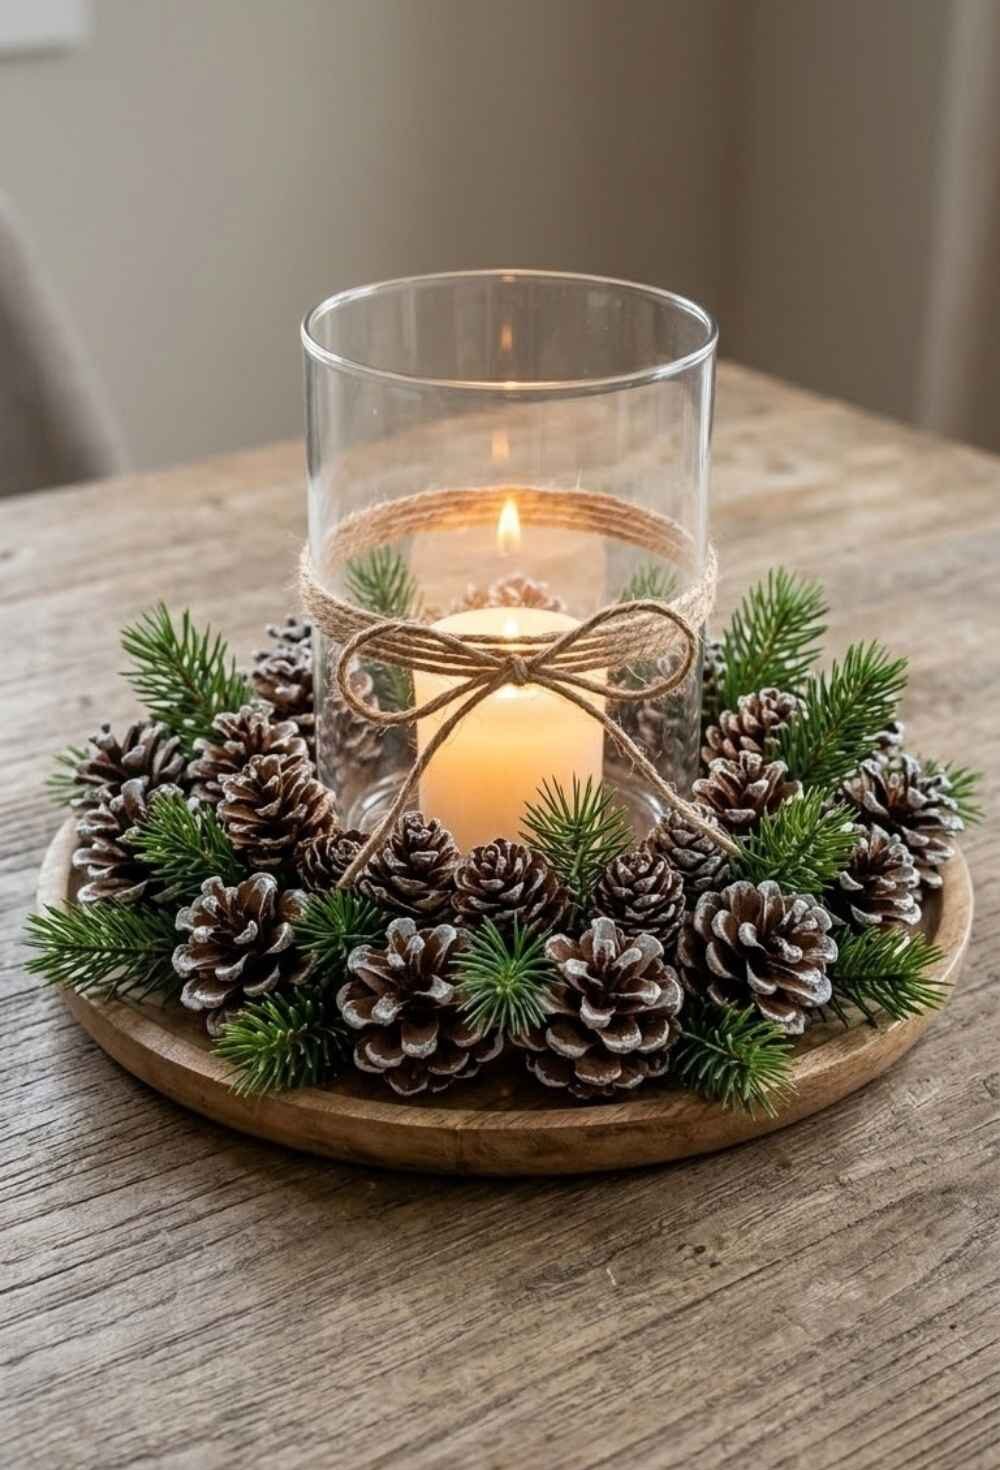
Want a centerpiece that looks like it came straight off the forest floor, without any of the fire risk?
This one wraps a glass cylinder in a ring of pinecones and evergreen, with a flameless candle glowing inside.
It sits well on a mantel, a windowsill, or the middle of the dinner table, and the pinecones cost you nothing.
What You’ll Need
- Natural materials: Small to medium dry pinecones, enough to circle the glass, and a handful of evergreen sprigs
- Supplies: 1 clear glass cylinder vase or wide jar, 1 flameless LED pillar candle or tea light, 1 round wooden tray or plate, hot glue gun and glue sticks, twine
- Substitute: Use a wide jar if you don’t have a cylinder vase.
How to Make It
- Set the glass cylinder in the center of your tray or plate.
- Lay evergreen sprigs around the glass so they fan outward like a bed, and glue the stem ends to the tray.
- Glue the pinecones on top of the evergreen in a ring, snug against the glass, with larger ones at the back and smaller ones in front.
- Wrap twine twice around the glass and tie it in a simple bow.
- Place the flameless candle inside and switch it on.
Safety note: Use flameless candles only for this one. Dry pinecones and evergreen needles catch fire quickly, so they should never sit near an open flame.
Finishing Touch
Brush a little white paint onto the tips of the pinecones for a frosted look, then let it dry before you place the candle.
2. Dried Orange Slice Garland

Few things make a kitchen smell like winter as quickly as oranges drying in the oven.
Once the slices turn golden and crisp, you can thread them into a garland for a mantel, a window frame, or a bare branch by the door.
Oranges are cheap, so the whole thing costs very little.
What You’ll Need
- Natural materials: Several oranges, a few cinnamon sticks (optional)
- Supplies: Sharp knife, baking sheet, parchment paper, natural twine, large blunt needle, small wooden beads (optional)
- A few cinnamon sticks and bay leaves (optional).
How to Make It
- Heat your oven to its lowest setting and line a baking sheet with parchment.
- Slice the oranges thin and even, then pat each slice dry with a paper towel.
- Lay the slices flat and bake slowly, flipping them now and then and checking often, until they feel dry and a little stiff. This takes a few hours, and they crisp up more as they cool.
- Let the slices cool completely, then thread your needle with a long piece of twine.
- Pass the needle through the center of each slice, tying a knot on either side to hold it in place. Space them evenly along the twine.
- Leave a loop of twine at each end for hanging.
Finishing Touch
Slide a bay leaf, a cinnamon stick, or a wooden bead between the slices for extra texture.
If you enjoy the look, my DIY wood bead Christmas ornaments use the same natural, handmade feel, and this garland also sits happily beside the ideas in my easy Christmas crafts for adults.
3. Snowy Pinecone Ornaments
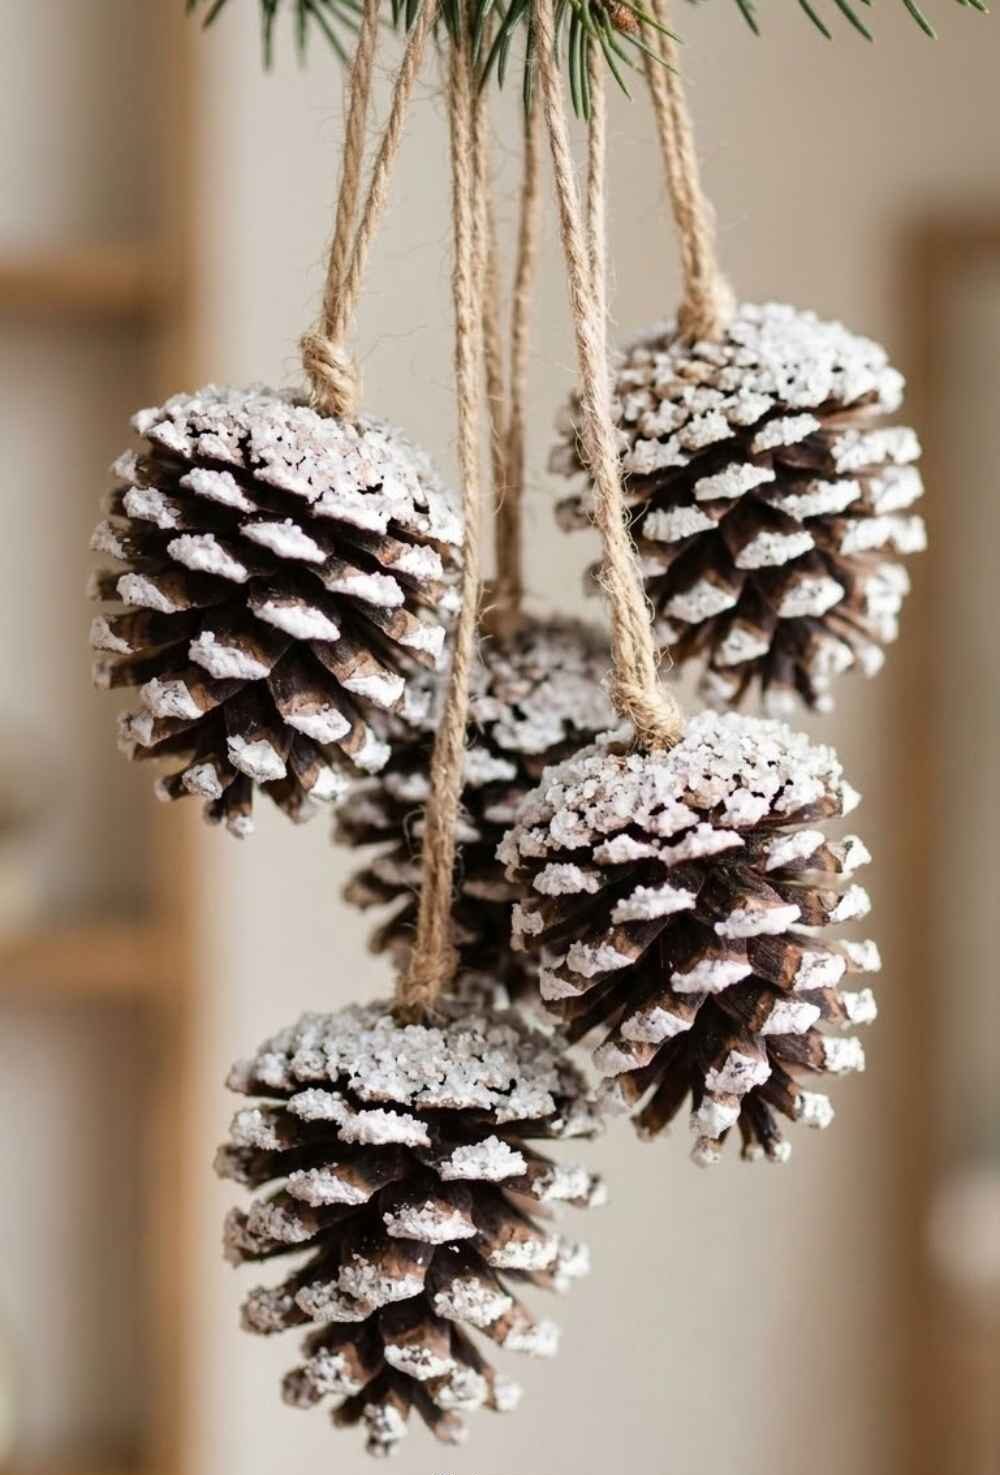
Pinecones look almost plain until you give their tips a little snow.
This is one of the easiest winter nature crafts for adults to start with, and it needs very little hands-on time.
Hang the finished pinecones on a tree, a branch in a vase, or a loop of twine across a window.
What You’ll Need
- Natural materials: Several dry pinecones with open scales
- Supplies: White acrylic paint, small flat paintbrush, Epsom salt or coarse salt, natural twine or thin ribbon, scissors
How to Make It
- Tie a short piece of twine around the top scales of each pinecone and knot it into a loop.
- Dip your brush in white paint and dab it lightly onto the outer tips of the scales. Work your way around the whole cone.
- While the paint is still wet, sprinkle Epsom salt over the tips for a sparkly, frosty look.
- Stand the pinecones upright on parchment or hang them up, and let the paint dry completely.
- Shake off any loose salt before hanging.
Finishing Touch
Group three or five snowy pinecones at different heights on one branch. Odd numbers look more natural than pairs.
4. Twig Star Ornaments
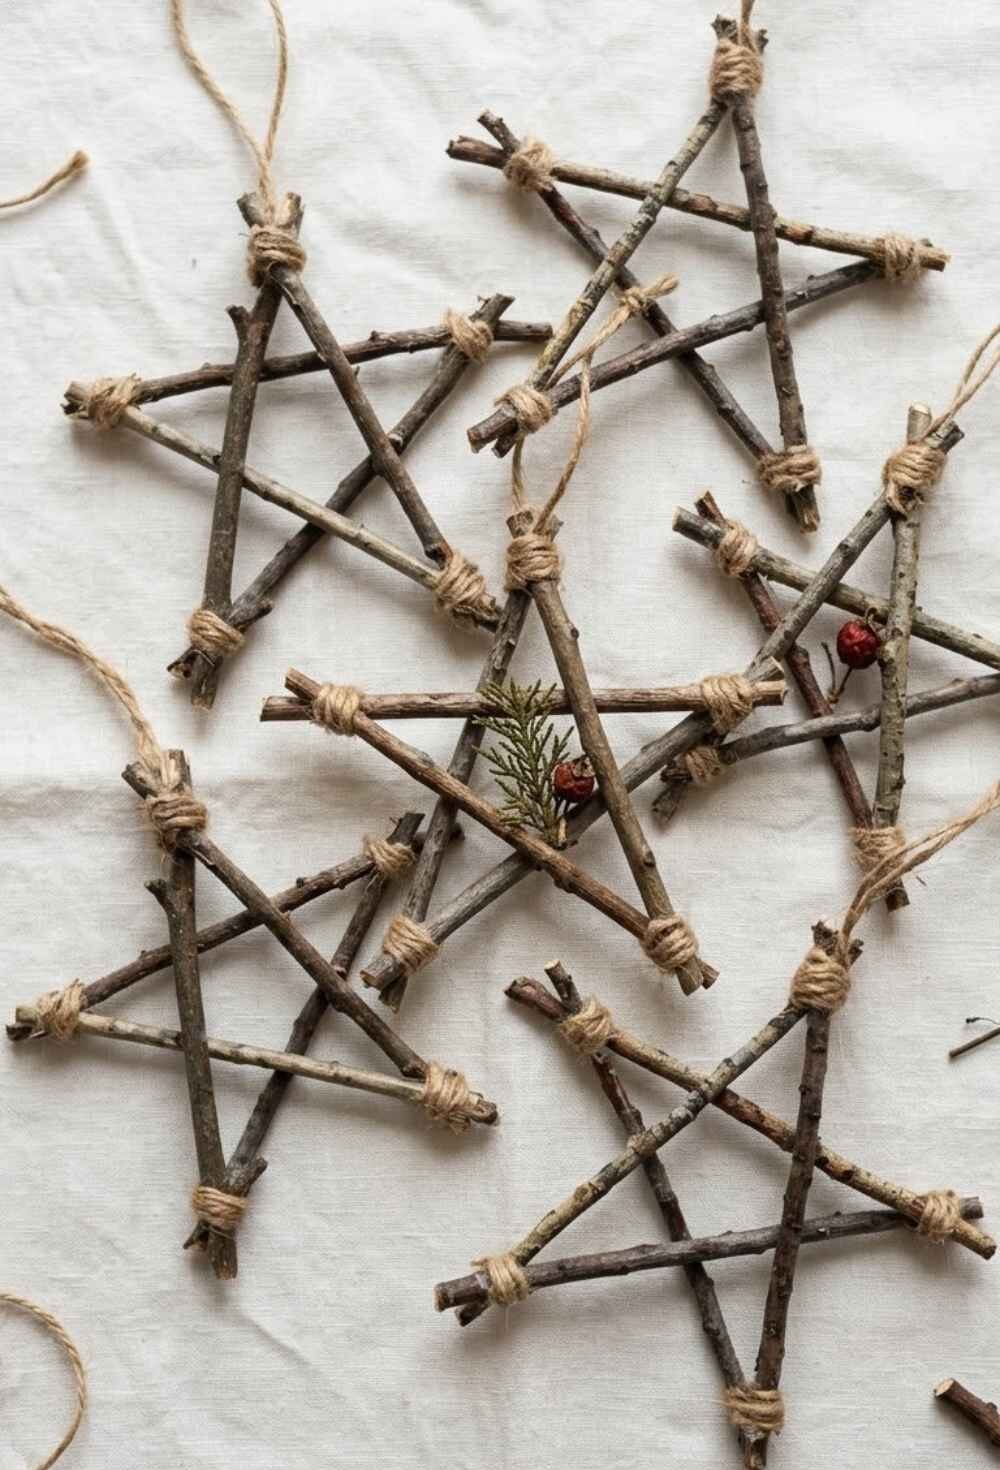
Straight twigs and a spool of twine are enough to build a star.
These ornaments have a simple, handmade look that suits a tree, a gift tag, or a row of hooks in the hallway.
They also make good use of the fallen branches that collect in the yard after a windy week.
What You’ll Need
- Natural materials: 5 straight twigs for each star, about as thick as a pencil
- Supplies: Pruning snips, natural twine or jute, hot glue gun (optional), ruler
How to Make It
- Cut 5 twigs to the same length. About the length of your hand makes a nice ornament size.
- Lay the twigs on a flat surface in the shape of a star, as if you were drawing one with five straight lines. Each twig should cross two others, close to its ends.
- Add a small dot of hot glue at each crossing to hold the shape, or skip the glue and go straight to wrapping.
- Wrap twine around each crossing a few times and tie it off on the back.
- Tie a loop of twine to one point for hanging, and trim any loose ends.
Finishing Touch
Tie a tiny evergreen sprig or a dried berry at the center where the twigs meet to give the star a pretty center.
5. Mini Evergreen Wreath

You do not need a front door for this one.
Small wreaths look just as good on a cabinet knob, around a candle tray, on a mirror, or hung from a window latch.
It smells like the outdoors for as long as it stays fresh, and the evergreen clippings are often free from a tree lot.
What You’ll Need
- Natural materials: Plenty of short evergreen sprigs (pine, fir, cedar, or boxwood)
- Supplies: small wire wreath form, green floral wire, wire snips, ribbon
- Substitute: Use a grapevine ring if you prefer a more rustic base.
How to Make It
- Cut your sprigs to similar lengths and group them into small bundles of a few sprigs each.
- Attach the first bundle to the wire form with floral wire, wrapping it tightly a few times.
- Lay the next bundle so its tips cover the stems of the first, and wire it down. Repeat all the way around the ring.
- Tuck the last bundle under the tips of the first so the join disappears.
- Add a ribbon loop at the back for hanging, then trim any stray needles.
Finishing Touch
Glue a dried orange slice or two small pinecones to the front for a simple pop of color.
6. Pressed Leaf Framed Art
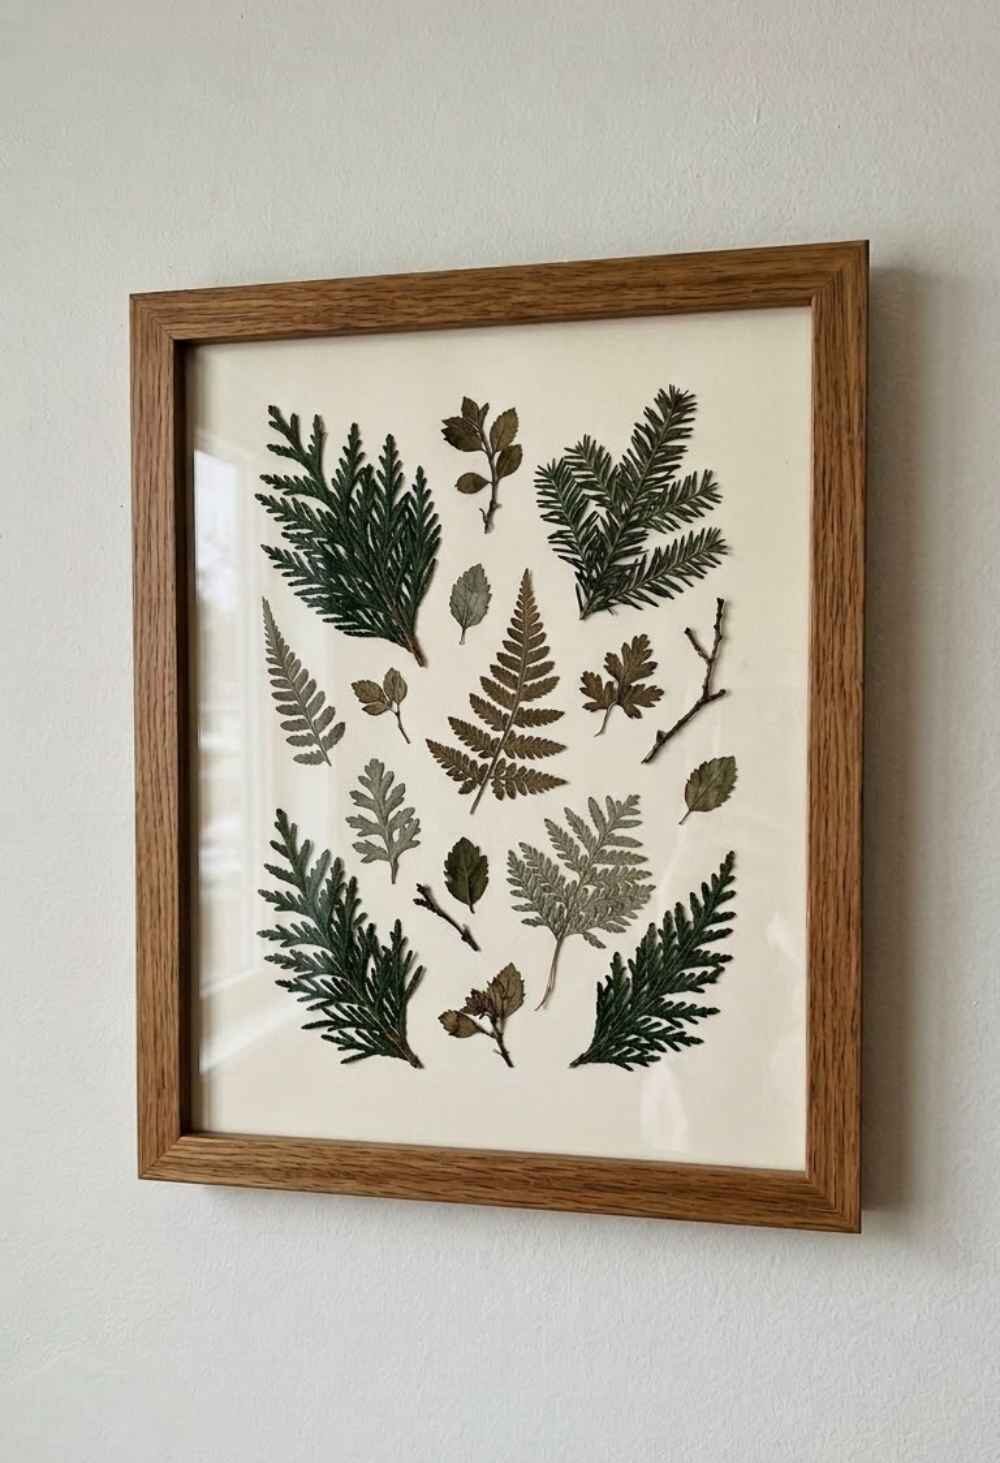
The leaves you saved from autumn deserve better than a coat pocket.
Pressed flat and framed on cream paper, they turn into quiet wall art that suits a hallway, a desk, or a shelf by the window.
Among winter nature crafts for adults, this is one of the few that stays on the wall long after the season ends.
What You’ll Need
- Natural materials: Several small leaves, small ferns, or flat evergreen tips
- Supplies: Heavy books, parchment or wax paper, a frame with glass, cream or kraft cardstock cut to fit, tweezers, clear craft glue or small pieces of tape
How to Make It
- Place the leaves between two sheets of parchment and close them inside a heavy book. Stack more books on top.
- Leave them for a week or more, until completely flat and dry. In a hurry, press them with a warm, dry iron on low heat between the parchment sheets, checking often so they don’t scorch.
- Cut the cardstock to fit your frame and lay the leaves on it, moving them around until the spacing looks even.
- Use tweezers to lift each leaf and add a tiny dot of glue to its center, then press it down gently.
- Let the glue dry fully, then slip the card into the frame.
Finishing Touch
Write where and when you found the leaves in small pencil letters along the bottom edge. The slow, careful arranging is the kind of calm I describe in my mindfulness crafts for adults
7. Pinecone Bird Feeders
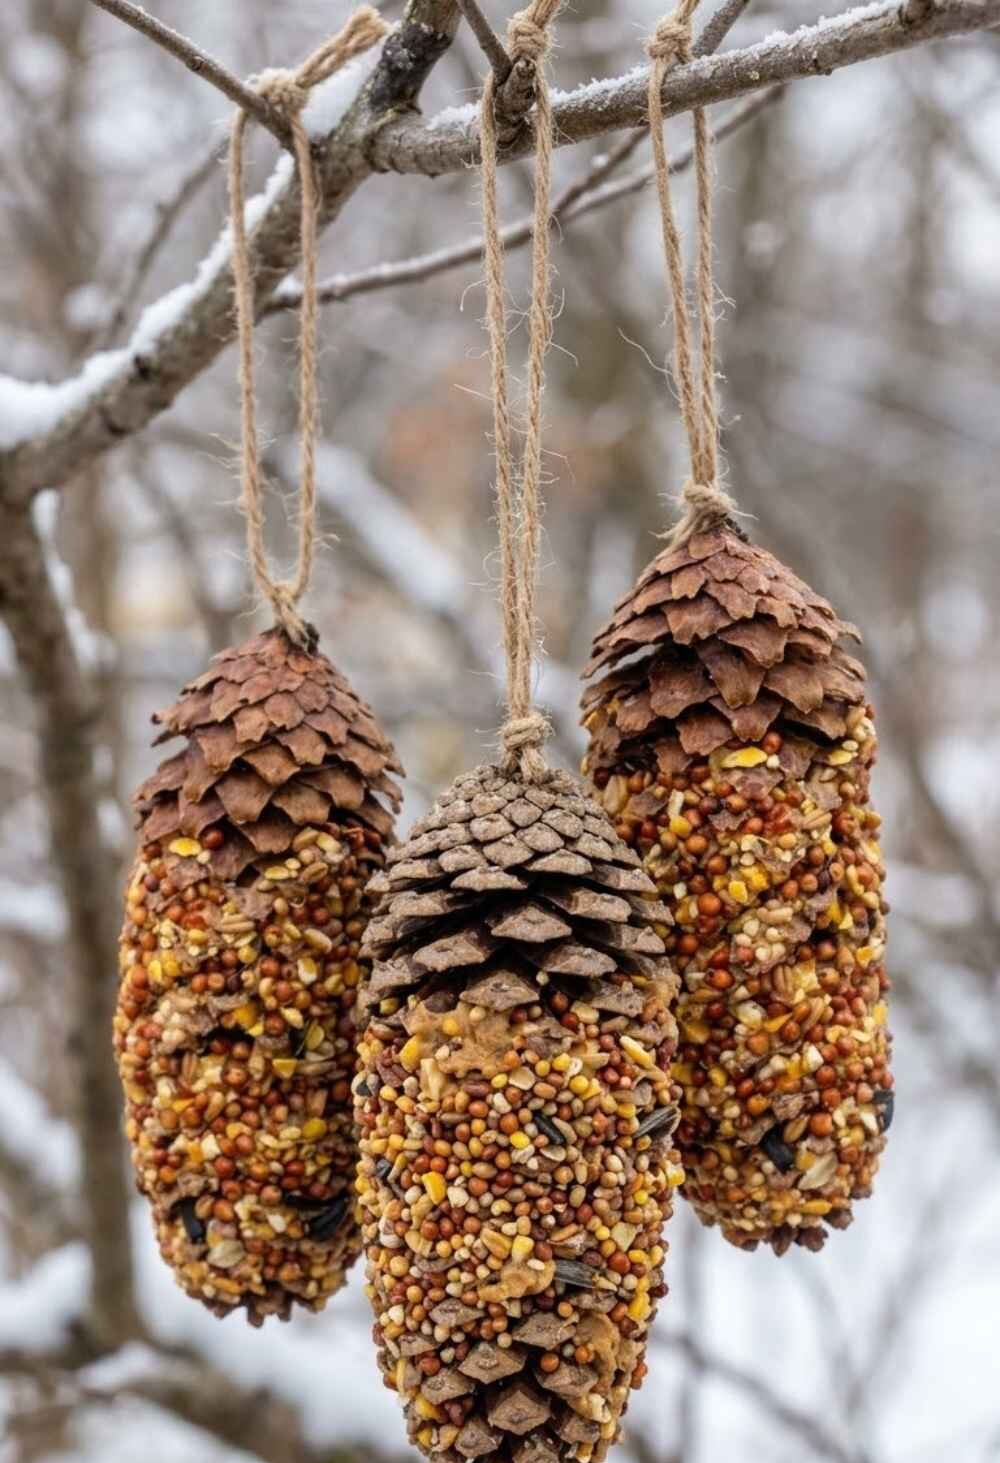
Bare branches look better the moment a chickadee lands on one.
These feeders turn a pinecone into a seed covered treat you can hang from a tree or a balcony rail, and they are easy to make in batches.
You get the pleasure of making something, and the birds get a meal on cold mornings.
What You’ll Need
- Natural materials: Several large, open pinecones
- Supplies: Plain unsalted peanut butter or vegetable shortening, birdseed, string, butter knife, shallow plate, scissors
- Substitute: Use shortening in place of peanut butter if anyone in your home has a nut allergy.
How to Make It
- Tie a long piece of string around the top scales of each pinecone and knot it firmly.
- Pour birdseed onto a plate in an even layer.
- Spread peanut butter or shortening over the scales with a butter knife, pushing it into the gaps.
- Roll the pinecone in the birdseed, pressing gently so the seeds stick.
- Chill the feeders in the fridge until the coating feels firm, then hang them from a branch at a height you can see from a window.
Finishing Touch
Hang two or three feeders together near a spot where you sit often. Feeding the birds can easily become a small family habit, and my list of winter family traditions has more ideas like it.
8. Jar Lantern Wrapped in Twigs
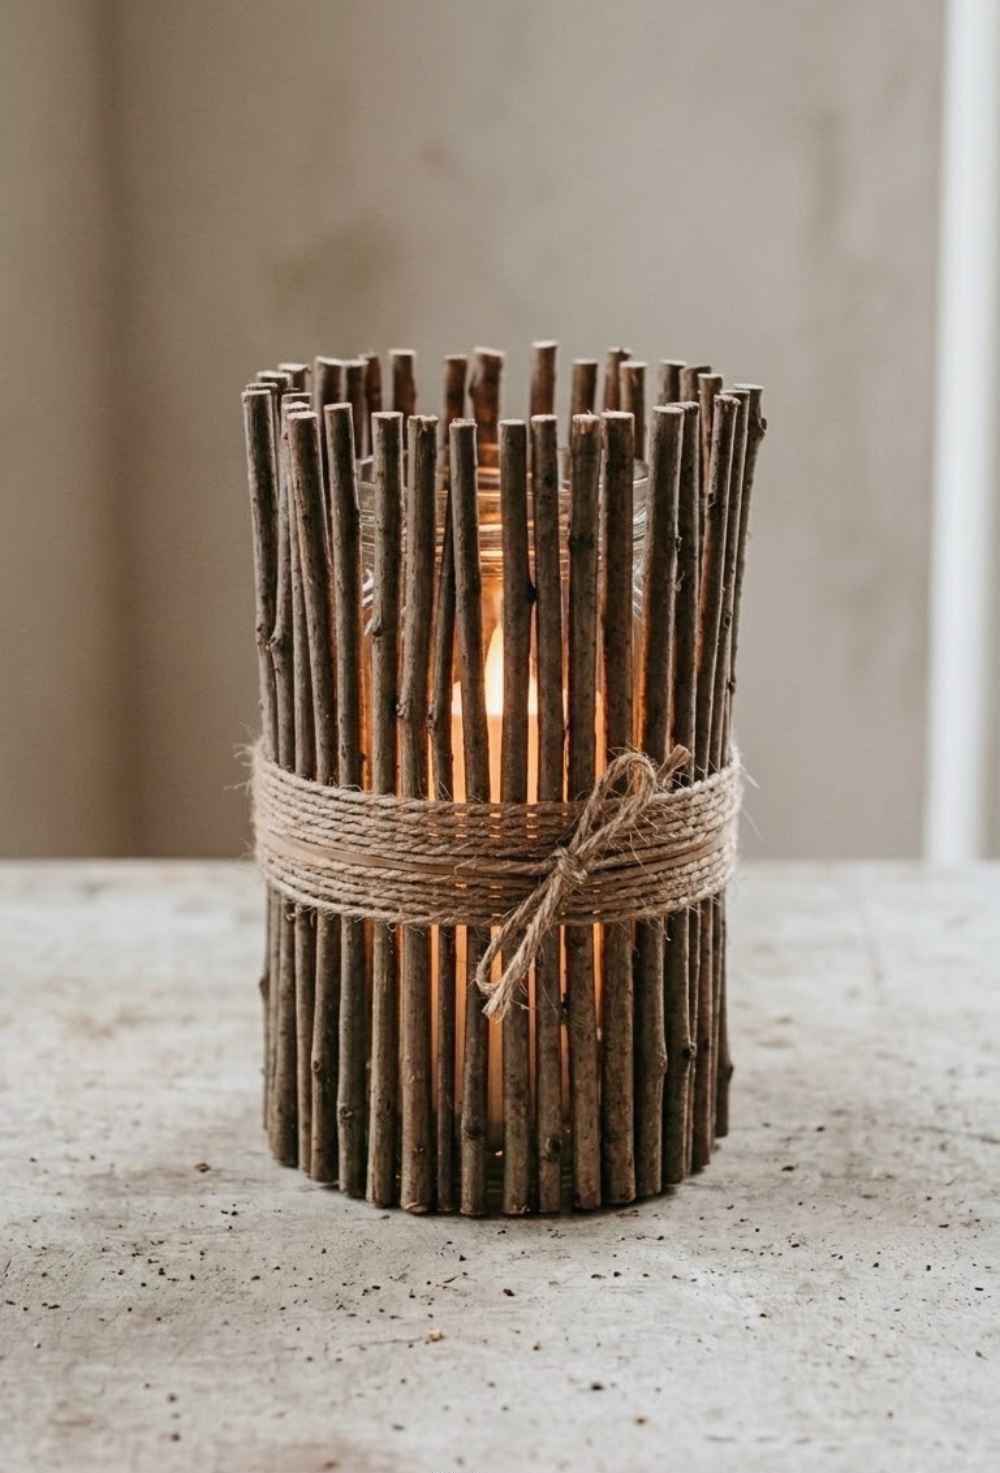
Dark evenings arrive early in winter, so a little warm light goes a long way.
This lantern wraps a plain glass jar in straight twigs and holds a flameless light inside.
It looks right on a porch table, a shelf, or the center of a dinner table.
What You’ll Need
- Natural materials: Enough straight twigs to circle the jar, all roughly the same thickness
- Supplies: 1 clean glass jar of medium size, 1 wide rubber band, natural twine, pruning snips, flameless tea light or battery fairy lights
How to Make It
- Cut your twigs to the same height as the jar, or just a little taller.
- Slip the rubber band around the middle of the jar.
- Tuck the twigs under the band one at a time, side by side, until the jar is covered all the way around.
- Wrap twine over the rubber band to hide it and tie it off with a knot or a small bow.
- Place the flameless light inside the jar.
Safety note: Dry twigs burn easily, so use flameless lights only, and never place a real candle inside this lantern.
Finishing Touch
Slide a small evergreen sprig under the twine at the front for a bit of green against the brown.
9. Leaf Imprint Clay Ring Dish
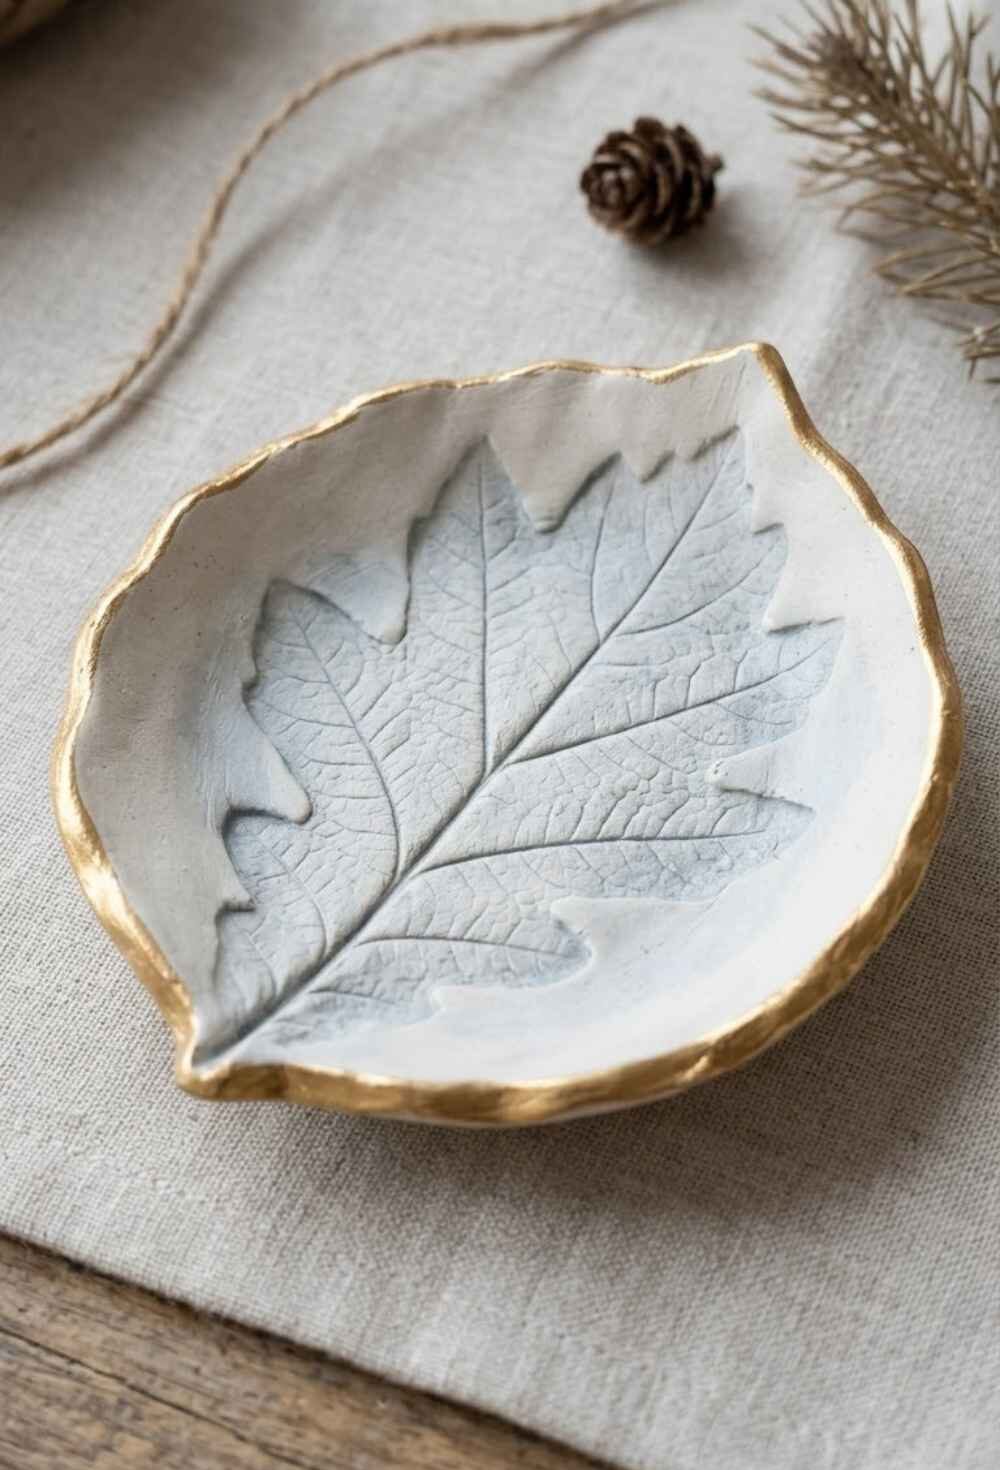
Press a real leaf into soft clay and the veins stay behind for good.
The finished dish holds rings, earrings, or loose change on a dresser or bedside table, and it looks like it came from a craft market.
All you need is one packet of air dry clay and a handful of sturdy leaves.
What You’ll Need
- Natural materials: A few leaves with strong veins (maple, oak, or fern work well)
- Supplies: Air dry white clay, rolling pin, small bowl lined with plastic wrap, craft knife or butter knife, fine sandpaper, acrylic paint (gold or white), small brush, clear sealer
How to Make It
- Roll out a piece of clay until it is smooth, even, and not too thin.
- Lay a leaf vein side down on the clay and roll over it firmly so the pattern presses in. Peel the leaf away slowly.
- Cut around the leaf shape with a knife, leaving a small border.
- Lay the clay inside the lined bowl so the edges curve up, then leave it to dry until completely hard, following the clay packet.
- Sand any rough edges, paint the rim with gold or white acrylic, and finish with a coat of clear sealer.
Finishing Touch
Wrap the dish in tissue and tie it with twine for a handmade gift. This dish is for jewelry and small items only, not for food.
10. Winter Table Centerpiece

Some winter nature crafts for adults need no glue, no scissors, and no plan, and this centerpiece is one of them.
You collect what caught your eye on a walk, then arrange it all on one tray.
It comes together quickly and looks different every time.
What You’ll Need
- Natural materials: Pinecones, evergreen sprigs, a few bare birch or dogwood branches, acorns, dried orange slices
- Supplies: 1 long wooden tray or shallow dish, sheet moss or a linen runner (optional), 1 or 2 flameless pillar candles (optional)
How to Make It
- Set the tray in the center of your table and lay a base of moss, or evergreen sprigs, along its length.
- Group the pinecones in clusters of 3 near the middle and at one end.
- Tuck the branches in at the back so they rise gently above the rest.
- Fill the gaps with acorns and dried orange slices.
- Add flameless candles if you like a little glow, then step back and adjust anything that feels crowded.
Finishing Touch
Scatter a few cinnamon sticks along the edge of the tray so the table smells like winter as soon as people sit down.
11. Cinnamon and Evergreen Simmer Pot Jar
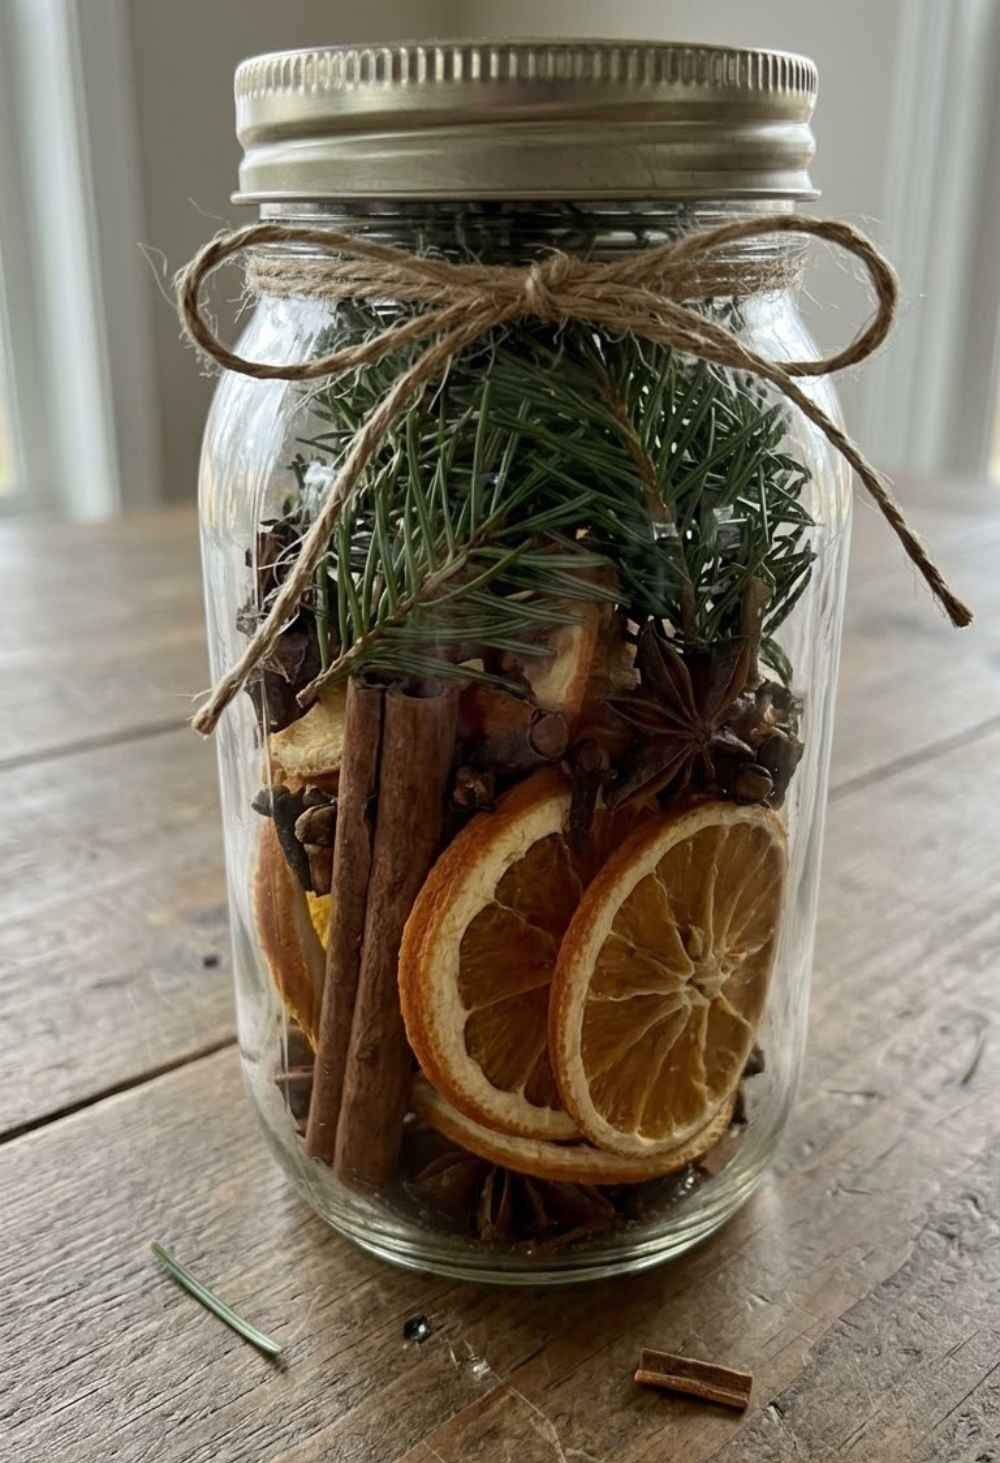
Scent is half of what makes a room feel like winter.
This jar holds dried orange slices, cinnamon, cloves, and evergreen in layers, so it looks pretty on the counter and turns into a sweet smelling simmer pot whenever you want one.
Make one for yourself and a few more to give away.
What You’ll Need
- Natural materials: A few dried orange slices (see craft 2 for how to dry them), a couple of cinnamon sticks, a couple of small evergreen sprigs
- Supplies: 1 clean glass jar with a lid, a spoonful of whole cloves, a few star anise (optional), paper tag, twine, pen
- Substitute: Fresh rosemary works well if you can’t find fir or pine.
How to Make It
- Make sure the jar is clean and completely dry, with the evergreen sprigs patted dry too.
- Layer the orange slices against the glass first so they show from the outside.
- Add the cinnamon sticks, cloves, and star anise in the middle.
- Tuck the evergreen sprigs in at the top, then seal the lid.
- Write the simmering instructions on a tag: tip the jar into a small pot, cover with water, and simmer gently on low, adding water as it goes down.
- Tie the tag to the jar with twine.
Safety note: Never leave a simmer pot unattended, and keep the water level topped up so the pot does not boil dry. Stick to fir, pine, cedar, or rosemary, and keep yew out of the mix because it is toxic.
Finishing Touch
Set one jar inside a favorite mug along with a tea bag or two for a handmade gift. My Christmas mug gift ideas have more ways to pull that together.
12. Pinecone Fire Starters
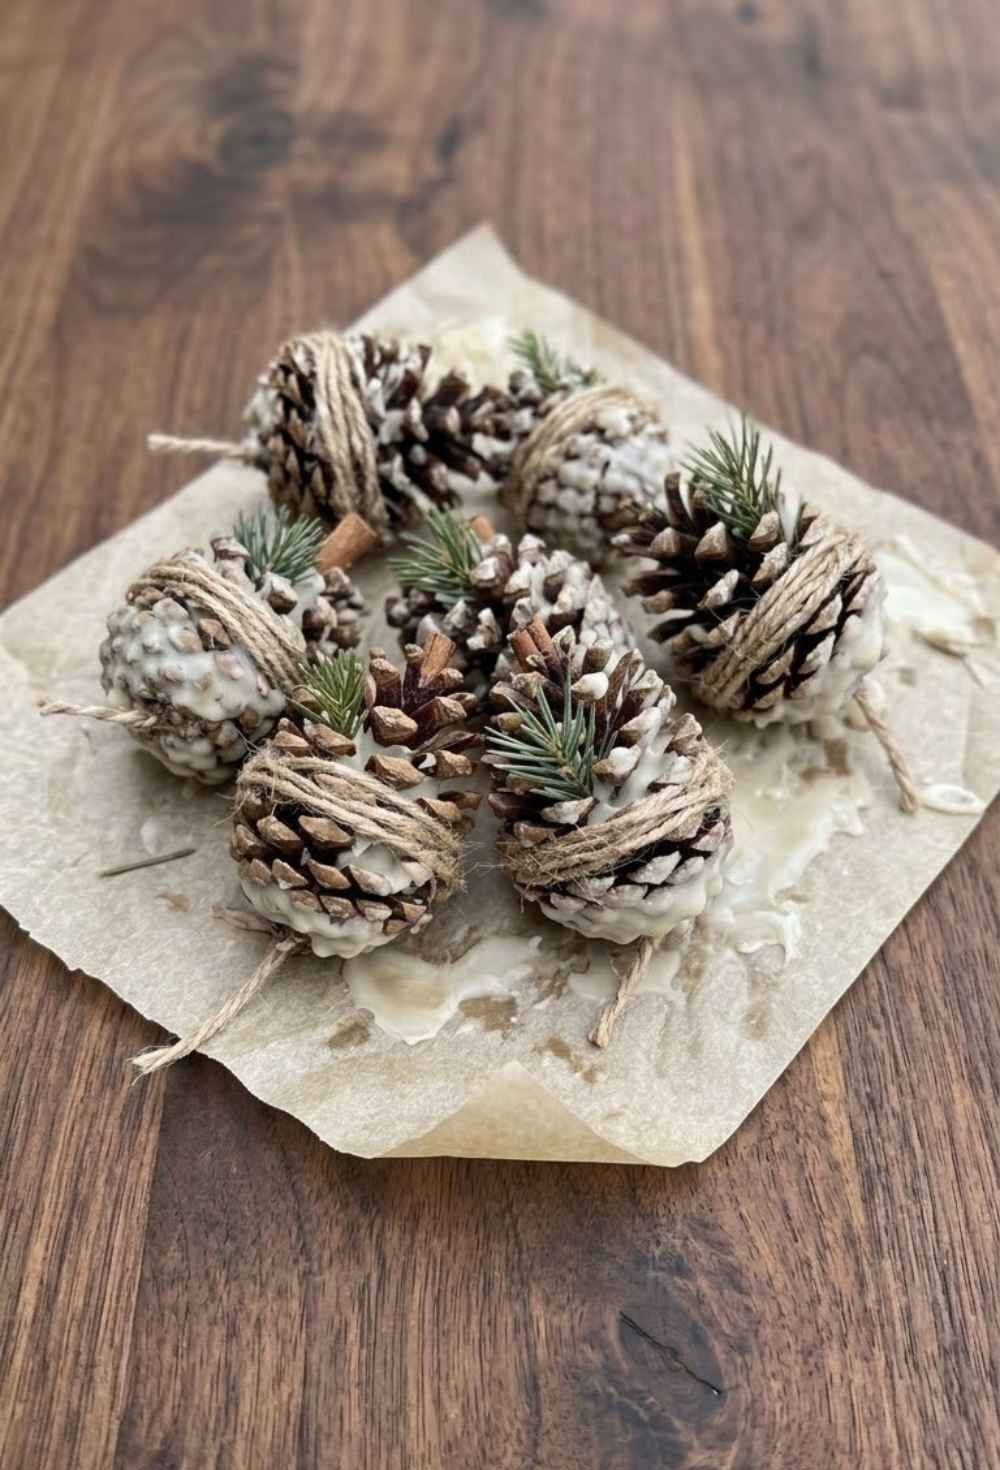
Have you ever tried to light a fire on a damp evening and wished you had a head start?
Wax coated pinecones catch quickly and burn steadily, which makes them useful beside a fireplace, a wood stove, or an outdoor fire pit.
They also happen to be one of the more practical winter nature crafts for adults to give as presents.
What You’ll Need
- Natural materials: Several dry pinecones
- Supplies: Old candle stubs or soy wax chunks, 1 empty metal can, 1 saucepan with a little water, tongs, parchment paper, natural twine (optional)
How to Make It
- Check that the pinecones are completely dry, then set them on parchment.
- Fill the metal can about halfway with wax and set the can in the saucepan of water. Heat on low until the wax melts. This double boiler setup keeps the wax from overheating.
- Holding a pinecone with tongs, dip it into the wax for a few seconds, then lift it out and let the extra drip off.
- Set the pinecone on the parchment and repeat with the others.
- Once the first coat hardens, give each pinecone a second dip for a thicker layer.
Safety note: Melted wax is flammable. Never melt it over direct heat, never leave it unattended, and keep a pot lid close by to cover and put out any flame. Do not pour water on burning wax. Use these only in a fireplace, wood stove, or outdoor fire pit, and store them away from heat.
Finishing Touch
Pack three or four fire starters into a paper bag tied with twine and add a handwritten tag. For more handmade presents, my December crafts to make and give are worth a look.
13. Painted Winter Stones

Smooth stones cost nothing, and they hold paint better than you might expect.
Painted stones with tiny pine trees, snowflakes, or mountain peaks look lovely in a shallow bowl, on a windowsill, or as paperweights on a desk.
Each one takes little time, so it is easy to do a few in an evening.
What You’ll Need
- Natural materials: A few smooth, flat stones
- Supplies: Dish soap and a scrub brush, white and blue acrylic paint, a fine detail brush, toothpick or dotting tool, matte sealer spray, newspaper
How to Make It
- Scrub the stones with warm soapy water and let them dry completely.
- Paint each stone with two thin coats of white or pale blue, letting the first coat dry before adding the second.
- With your fine brush, paint a simple design on each one, such as a snow capped pine, a crescent moon, or a mountain line.
- Use a toothpick to add dots of white snow, working slowly so they stay neat.
- Spray with matte sealer in a ventilated space and let the stones dry fully.
Finishing Touch
Use a paint pen to write one quiet word on the back of each stone, such as rest or hush. Small, slow painting like this fits right in with the ideas in my relaxing crafts for adults
14. Twig and Grass Wall Hanging
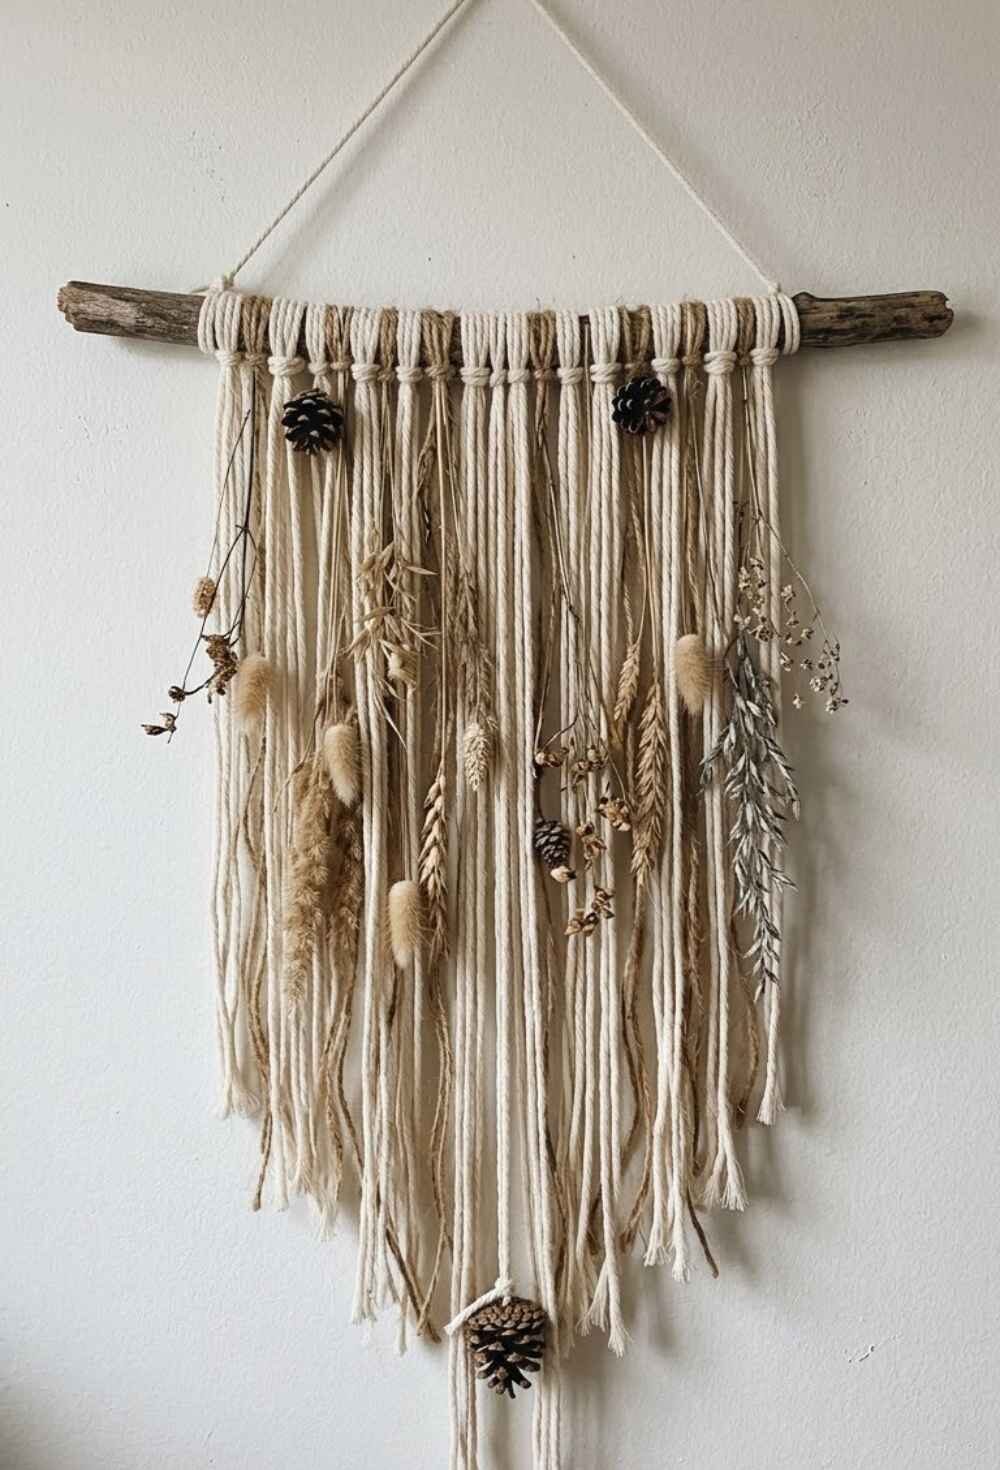
Dried grasses and bare twigs do not look like much on their own, but hung together they make a soft, neutral piece for a wall.
This wall hanging fits a bedroom, an entryway, or a quiet corner, and it is one of the lighter winter nature crafts for adults when you want something that feels airy instead of heavy.
The materials can come straight from the edge of a field.
What You’ll Need
- Natural materials: 1 sturdy twig or branch, long enough to look balanced on your wall, dried grasses or seed heads, a few small pinecones (optional)
- Supplies: Cream cotton yarn or jute, scissors, hot glue gun
How to Make It
- Cut one long piece of yarn and tie each end to the ends of the branch to make a hanger.
- Cut plenty of yarn pieces in different lengths, some short and some long.
- Fold each piece in half, loop it over the branch, and pull the ends through the loop to make a snug knot. Repeat across the branch.
- Trim the bottom edge into a gentle angle or leave it uneven for a relaxed look.
- Tuck dried grasses between the strands and add a small dot of hot glue where each stem meets the yarn to hold it in place.
Finishing Touch
Glue a small pinecone at the bottom of the longest strand to add a little weight and a nice finish.
15. Woodland Moss Terrarium
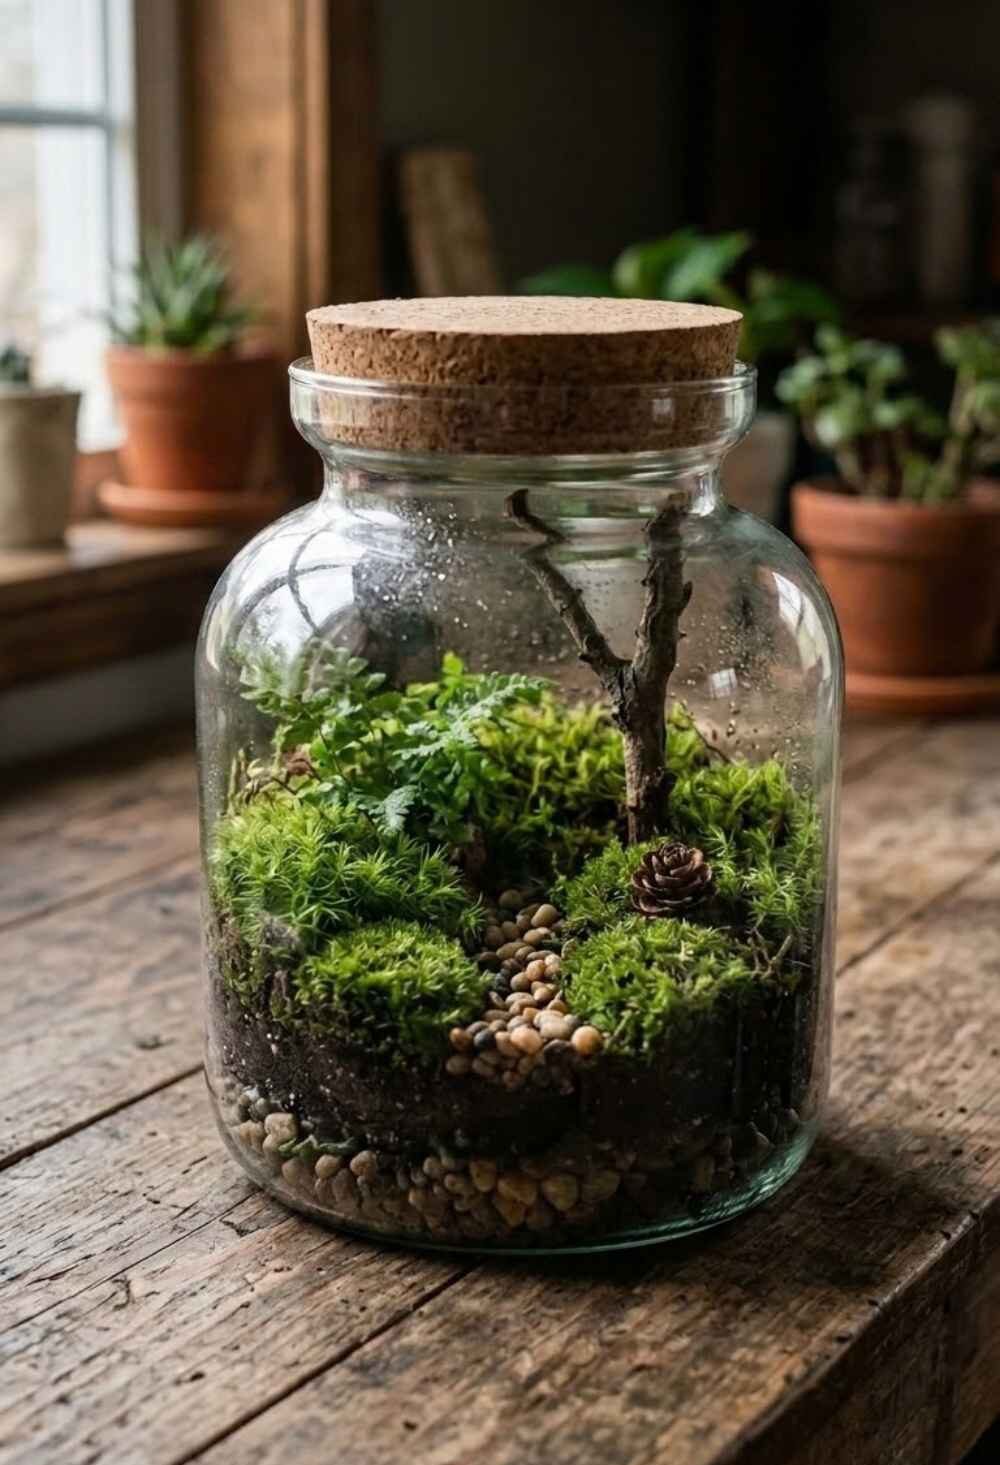
Green is hard to find in January, which is exactly why this craft works so well.
Moss, a twig, and a pinecone fit inside a small jar to make a tiny forest scene that sits well on a desk or a bookshelf.
It needs only a little water now and then, and it gives you something living to look at all winter.
What You’ll Need
- Natural materials: A few handfuls of live moss, 1 small twig, 1 small pinecone
- Supplies: Clear glass jar or bowl with a wide mouth, small pebbles, potting soil, activated charcoal (optional), spray bottle with water
How to Make It
- Spread a thin layer of pebbles across the bottom of the jar for drainage.
- Add a thin sprinkle of activated charcoal if you have it, then cover with a layer of potting soil deep enough for the moss to sit in.
- Press the moss onto the soil, tucking it into the edges so no soil shows.
- Stand the twig and pinecone in the moss to make a small woodland scene.
- Mist lightly with water and set the jar in bright, indirect light.
Finishing Touch
Mist the moss only when it looks dry, and open the lid now and then to let the air move through. If you love woodland scenes, my mushroom crafts for adults have small mushroom pieces that would suit this jar well.
If you gather moss yourself, take only a small patch from a spot where collecting is allowed. When in doubt, buy a small pack from a garden shop instead.
How to Collect and Prepare Natural Materials for Winter Crafts
Good preparation helps a craft last instead of going moldy in a drawer.
Gathering materials for winter nature crafts for adults is also a nice reason to head outside, and it can become part of a slow winter routine, much like the habits in my winter family traditions
Where to Find Natural Materials
- Pinecones: Look under pine, spruce, and fir trees, and choose cones that are intact and fully open.
- Twigs and branches: Pick up fallen ones after wind or snow. Straight, pencil thick twigs are the most useful.
- Leaves: Collect flat, undamaged leaves on a dry day and press them soon after, before they curl.
- Evergreen sprigs: Ask a local tree lot for trimmed branches, or prune your own yard trees lightly.
- Kitchen finds: Oranges, cinnamon sticks, and whole cloves come from the grocery store.
How to Clean and Dry Them
- Pinecones: Brush off loose dirt, then soak them in a sink of cold water with a splash of white vinegar for a short while to remove bugs. Spread them on a foil lined baking sheet and bake on the lowest oven setting, checking often, until the scales open. Let them cool completely before using them.
- Twigs: Wipe off dirt with a damp cloth and let them dry indoors for several days. Dry twigs snap cleanly instead of bending.
- Leaves: Shake off dust, pat them dry, and press them flat between paper in a heavy book.
- Evergreen sprigs: Shake off debris, trim the cut ends at an angle, and keep them in a jar of water until you use them.
How to Store Leftover Materials
Keep everything dry. Store pinecones in paper bags or open baskets, because sealed plastic traps moisture and can cause mold.
Bundle twigs upright in a bucket or box.
Keep pressed leaves flat between sheets of paper in a folder, and store dried orange slices in a jar with a silica gel packet.
Label each container to save time when you start your next project.
Collect Responsibly
Only gather materials where it is allowed.
National and state parks, nature reserves, and protected areas often ban collecting anything, even fallen pinecones.
On private land, ask first. Take only what has already fallen, leave plenty behind for wildlife, and never strip living branches or dig up moss from sensitive areas.
When you are unsure of the rules, check the local park website or buy small amounts from a garden shop.
How to Make Your Winter Nature Crafts Last Longer
Natural materials need a little care, and most winter nature crafts for adults will last for years once you protect them from moisture, direct sun, and rough handling.
Keep Finished Crafts Dry
Damp air is the biggest threat to pinecones, dried citrus, and pressed leaves.
Keep them away from bathrooms, kitchen steam, and drafty windowsills.
Add a light coat of clear matte sealer to pinecones, twigs, and clay pieces to help them stay dry.
Protect Delicate and Fragile Pieces
- Pressed leaves: Keep the frame out of direct sunlight, which fades color quickly.
- Dried orange slices: Handle them by the edges and store them flat or hanging, never in a pile.
- Evergreen wreaths and sprigs: Keep them away from heaters and fireplaces. Fresh evergreen only lasts a short while indoors, so replace it once the needles begin dropping.
- Twig stars and wall hangings: Hang them where nobody will brush against them, since dried twigs snap easily.
Store Seasonal Decorations Between Winters
Wrap fragile items in acid free tissue or plain paper, then place them in a sturdy cardboard box.
Skip sealed plastic bags and avoid damp basements or hot attics.
Tuck a silica gel packet into each box, and label it with the date and contents so you can find everything next December.
Indoor or Outdoor Display
| Where it goes | Crafts that suit it |
|---|---|
| Indoors only | Pressed leaf art, orange slice garland, clay ring dish, moss terrarium, simmer pot jar, wall hanging, centerpiece, candle holder |
| Covered porch or sheltered spot | Mini evergreen wreath, twig stars, snowy pinecones, jar lantern (flameless light only) |
| Fully outdoors | Pinecone bird feeders, painted stones (sealed) |
Frequently Asked Questions On Winter Nature Crafts For Adults
What natural materials can you use for winter crafts?
Pinecones, fallen twigs, leaves, evergreen sprigs, acorns, dried grasses, and smooth stones all work well. Oranges and cinnamon sticks from your kitchen add color and scent. Collect only what has already fallen, and only in places where gathering is allowed.
How do you dry natural materials for crafting?
Bake pinecones on the lowest oven setting until the scales open. Let twigs and seed heads air dry indoors for several days. Press leaves in a heavy book for a week or more. Slice citrus thin and bake it low and slow until crisp.
Can you make winter nature crafts for adults without spending much money?
Yes. Most projects use free materials like pinecones, twigs, and leaves, plus basics such as twine, glue, and paint. Hot glue and pruning snips cover most of the list, so a whole season of crafting costs very little.
How do you preserve natural materials for future crafts?
Keep them completely dry and store them in paper bags, cardboard boxes, or open baskets, never sealed plastic. Press leaves flat between sheets of paper, and keep dried citrus in a jar with a silica gel packet. Choose a cool, dry spot away from sunlight.
Pick One and Begin
You do not need expensive supplies or advanced skills to make something lovely from what winter leaves lying outside your door. Pinecones, a few twigs, and an hour of quiet are plenty to begin.
Winter nature crafts for adults work best when you let the materials guide you, so choose the project that suits your home and whatever you have gathered.
When you are ready for more ideas, my winter boredom busters for adults and relaxing crafts for adults are good places to go next.