Finding a craft that feels fun without sending you on a hunt for hard-to-find supplies isn’t always as easy as it sounds. If you’ve been looking for a Paper Plate Peacock Craft, you’ve probably come across beautiful ideas that call for feathers, specialty materials, or a craft drawer that’s far more stocked than most homes.
That’s when it becomes clear that simple materials can still create something children are genuinely excited to make.
This version keeps things easy by turning an ordinary paper plate into a colorful peacock, with fluffy pom-pom eyes, painted details, and plenty of room for kids to choose their own colors. The finished craft feels bright and playful without relying on real feathers or complicated steps.
Gather a few basic supplies, enjoy the creative process together, and by the end you’ll have a handmade peacock that’s just as fun to display as it was to create.
What Makes This Paper Plate Peacock Craft Special?
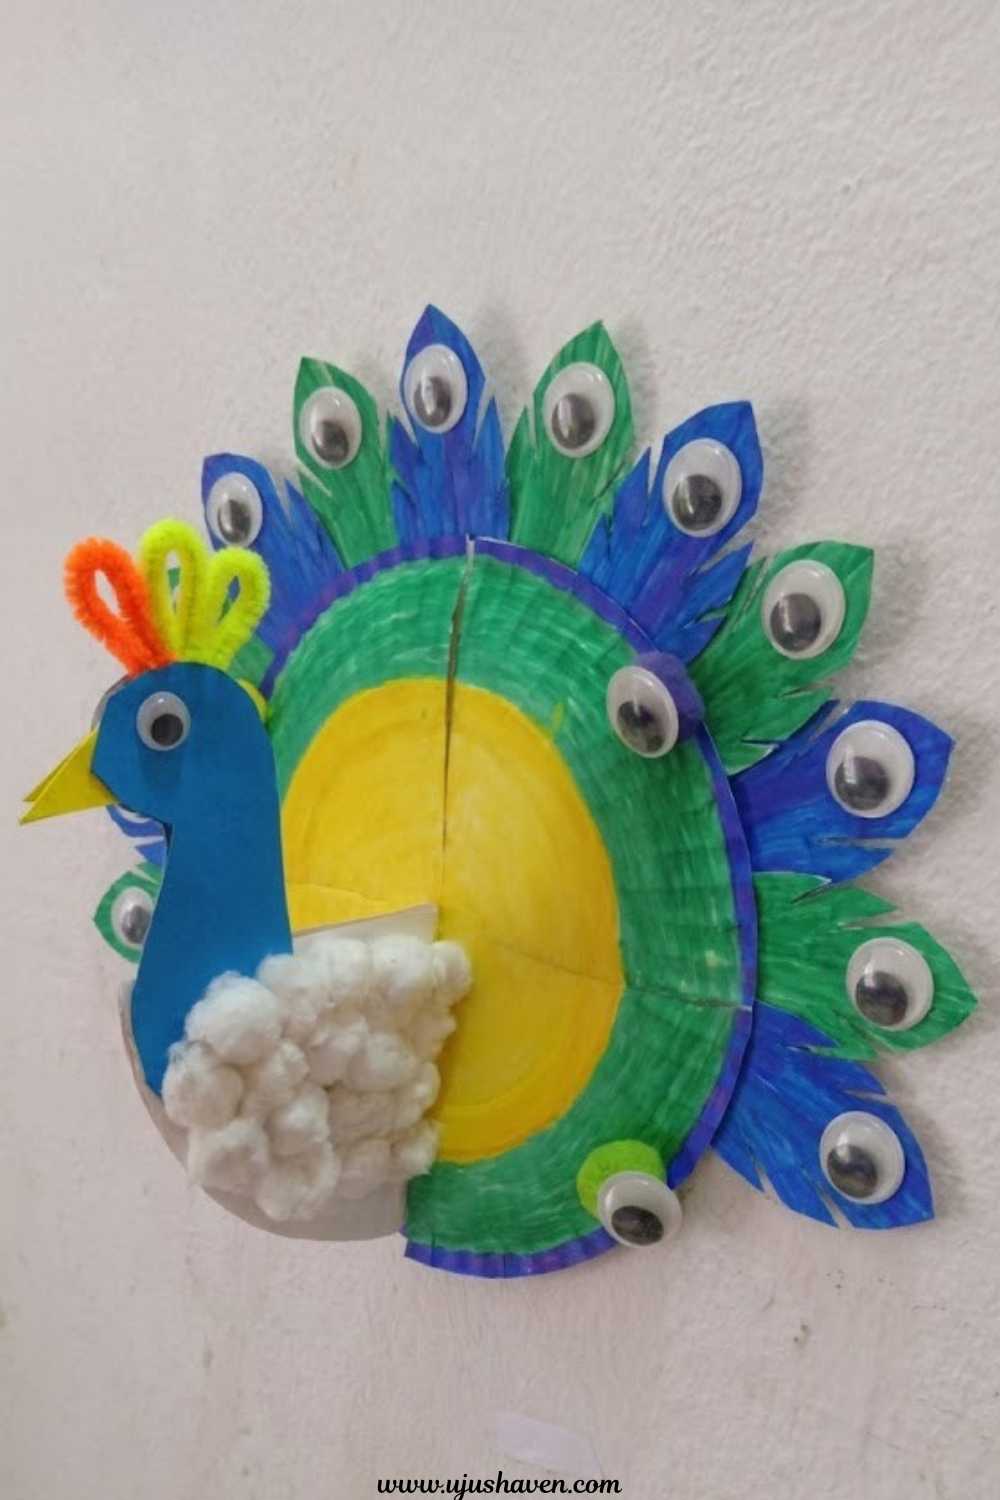
This isn’t a flat, one-dimensional peacock.
The layered feathers give it real texture, and the mix of bright blues, greens, and yellows makes it pop the moment it’s finished.
Every pom-pom eye and painted feather adds a little more personality, and kids get to choose their own color combinations along the way, so no two peacocks turn out quite the same.
It’s simple enough for preschoolers to help with the painting and gluing, but detailed enough that older kids stay engaged the whole way through.
Once it’s done, this paper plate peacock craft doubles easily as room décor, a bedroom wall piece, or a proud little display on a shelf.
Supplies You’ll Need For Paper Plate Peacock Craft
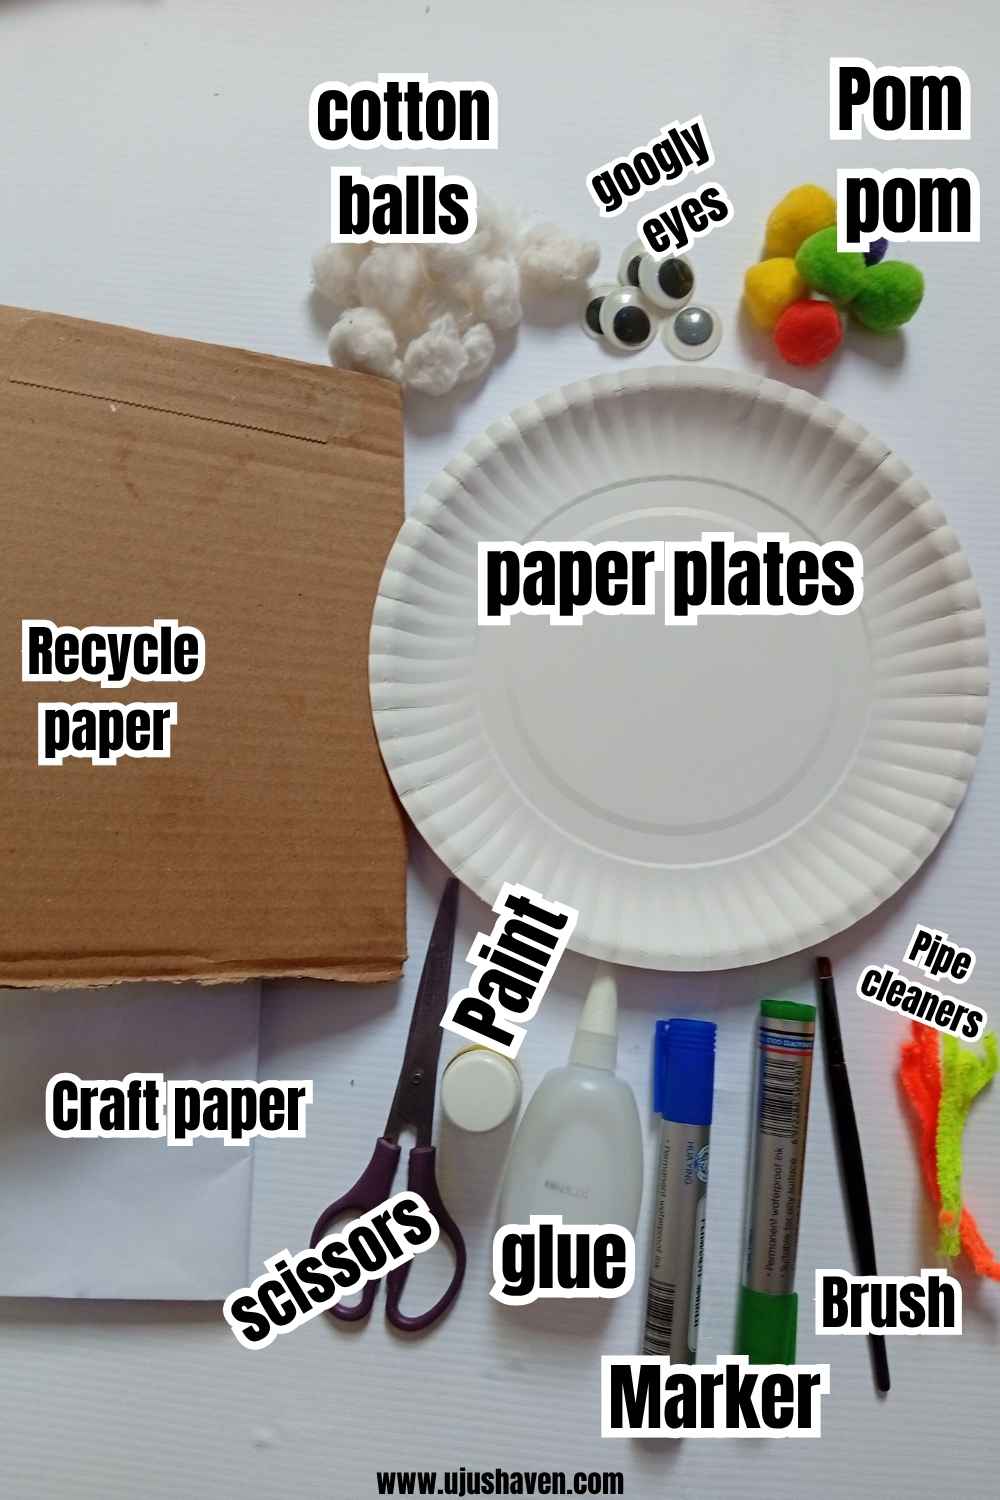
A quick look through your supplies before you start makes the whole process smoother. Here’s what this paper plate peacock craft calls for:
Main supplies:
- 2 paper plates (one for the tail base, one for the head and neck)
- A piece of cardboard or a recycled carton (for the head shape)
- A sheet of white craft paper (for the feather shapes)
- Scissors
- Glue (a stronger glue works best for pom poms and cardboard)
- A paintbrush
Decor and details:
- Paint or markers in blue, green, and yellow
- Googly eyes (a mix of sizes works well)
- Pom poms (a few different colors, like red, yellow, green, and purple)
- Cotton balls
- Pipe cleaners (2 colors give the crest more personality, like orange and yellow-green)
Before You Start
A few small habits make this paper plate peacock craft go a lot smoother, especially with kids helping out:
- Paint everything first before you start gluing anything down.
- Let each painted piece dry completely before moving to the next step.
- Cut all your feather shapes ahead of time so you’re not stopping mid-project to cut more.
- Lay your feathers out around the plate without glue first, just to see the arrangement you like.
- Keep a damp wipe nearby for paint-covered little hands.
How to Make a Paper Plate Peacock Craft
Step 1: Color Your Paper Plate Base
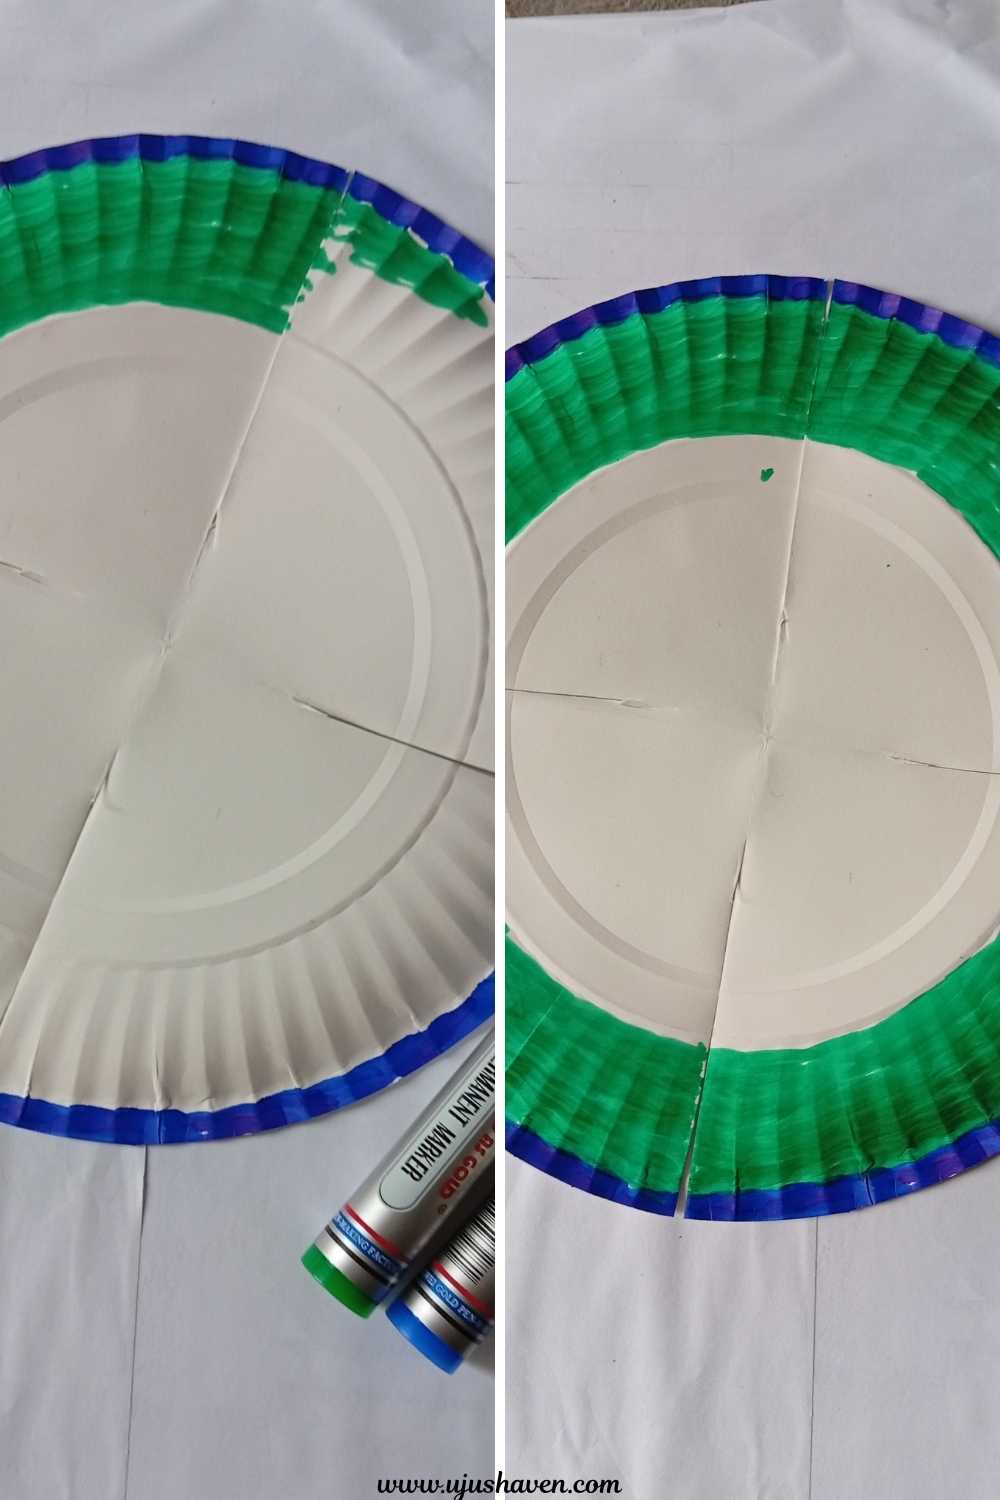
Take your first paper plate and cut it into 4 sections, cutting from the outer edge inward and stopping about an inch before the center, so the middle stays intact and holds everything together.
Paint it in rings, working from the outer edge in. Blue on the outside, green in the middle, and yellow filling the center circle.
Let it dry fully before touching it again. This ringed plate becomes the base your whole peacock builds around.
Step 2: Cut and Paint the Feather Shapes
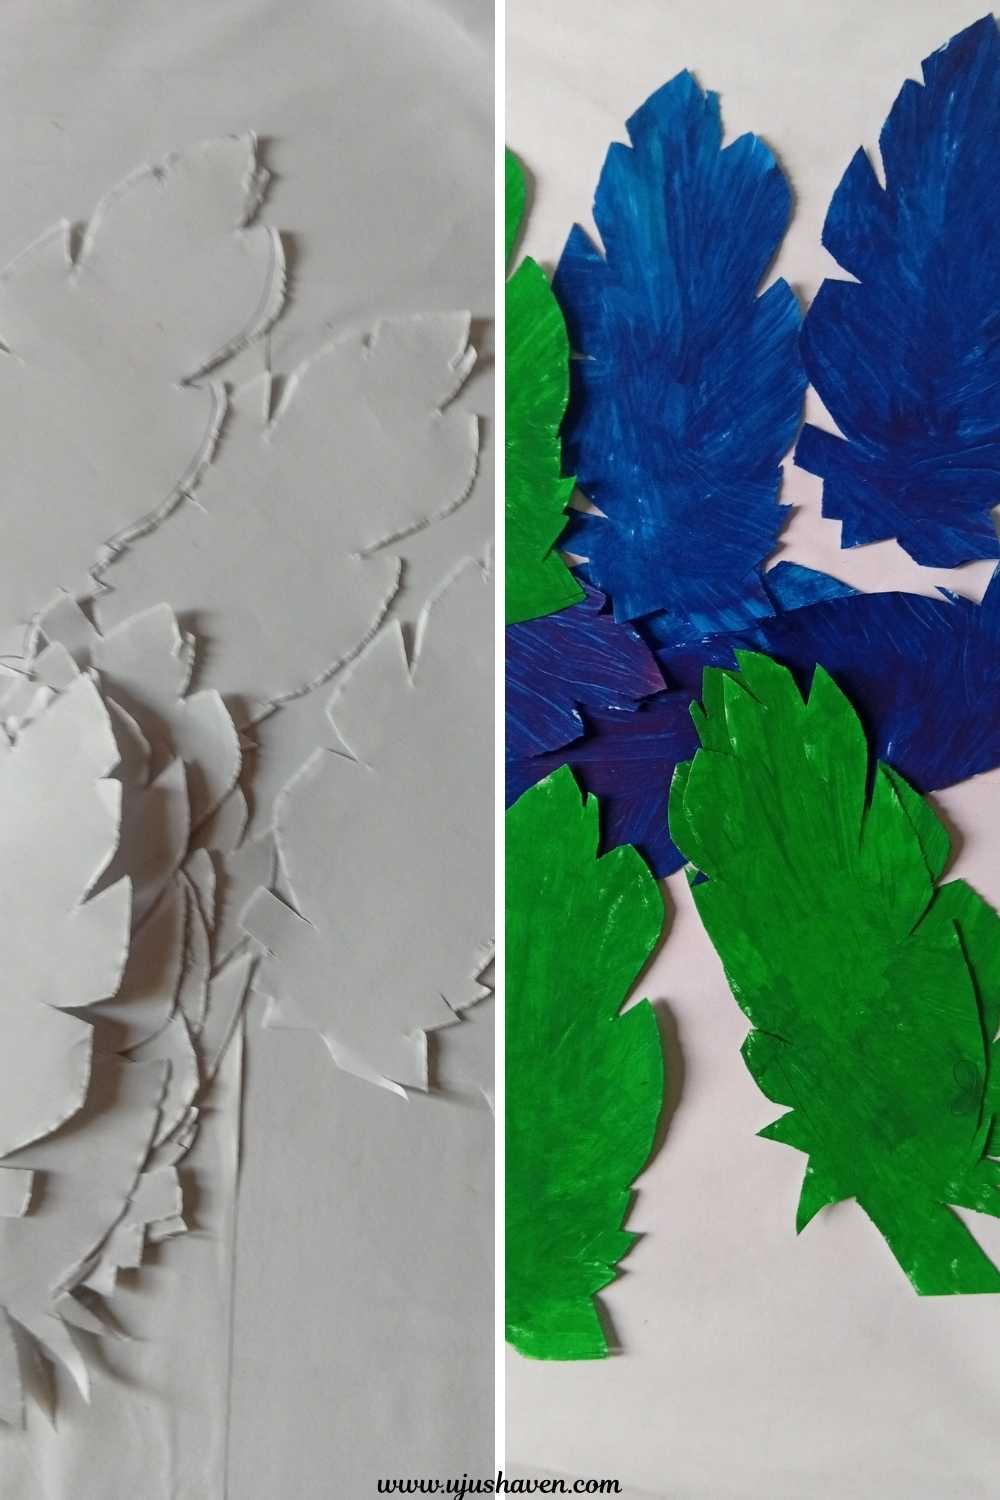
On a sheet of craft paper, draw and cut out simple leaf-shaped feathers. You don’t need them perfect.
Once you have a small pile cut out, paint each one in blue or green and set them aside to dry.
These hand-cut feathers are what give this paper plate peacock craft its layered, textured look, instead of relying on the plate’s scalloped edge alone.
Step 3: Build the Tail
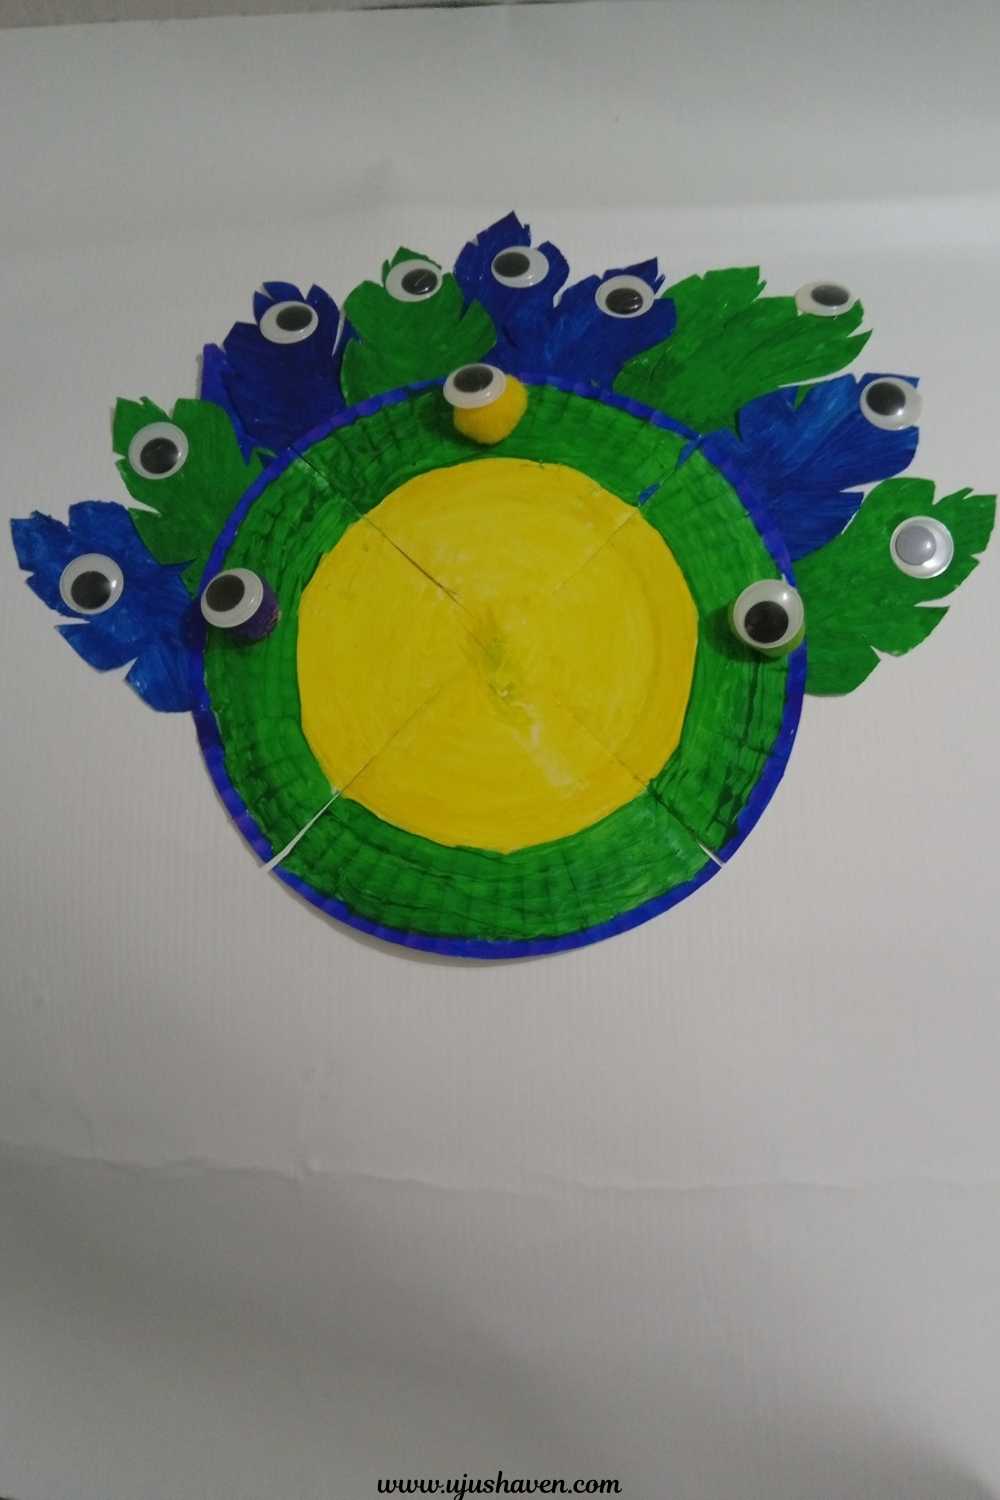
Once your feathers are dry, glue them around the outer edge of your colored plate, letting them fan outward like a peacock’s real tail.
Glue a googly eye to the tip of each feather.
Then, at the four points where the plate was originally sectioned, tuck in a pom pom and add its own googly eye.
The mix of painted feathers and fluffy pom-pom eyes is what makes this tail feel full and dimensional rather than flat.
Step 4: Shape the Head
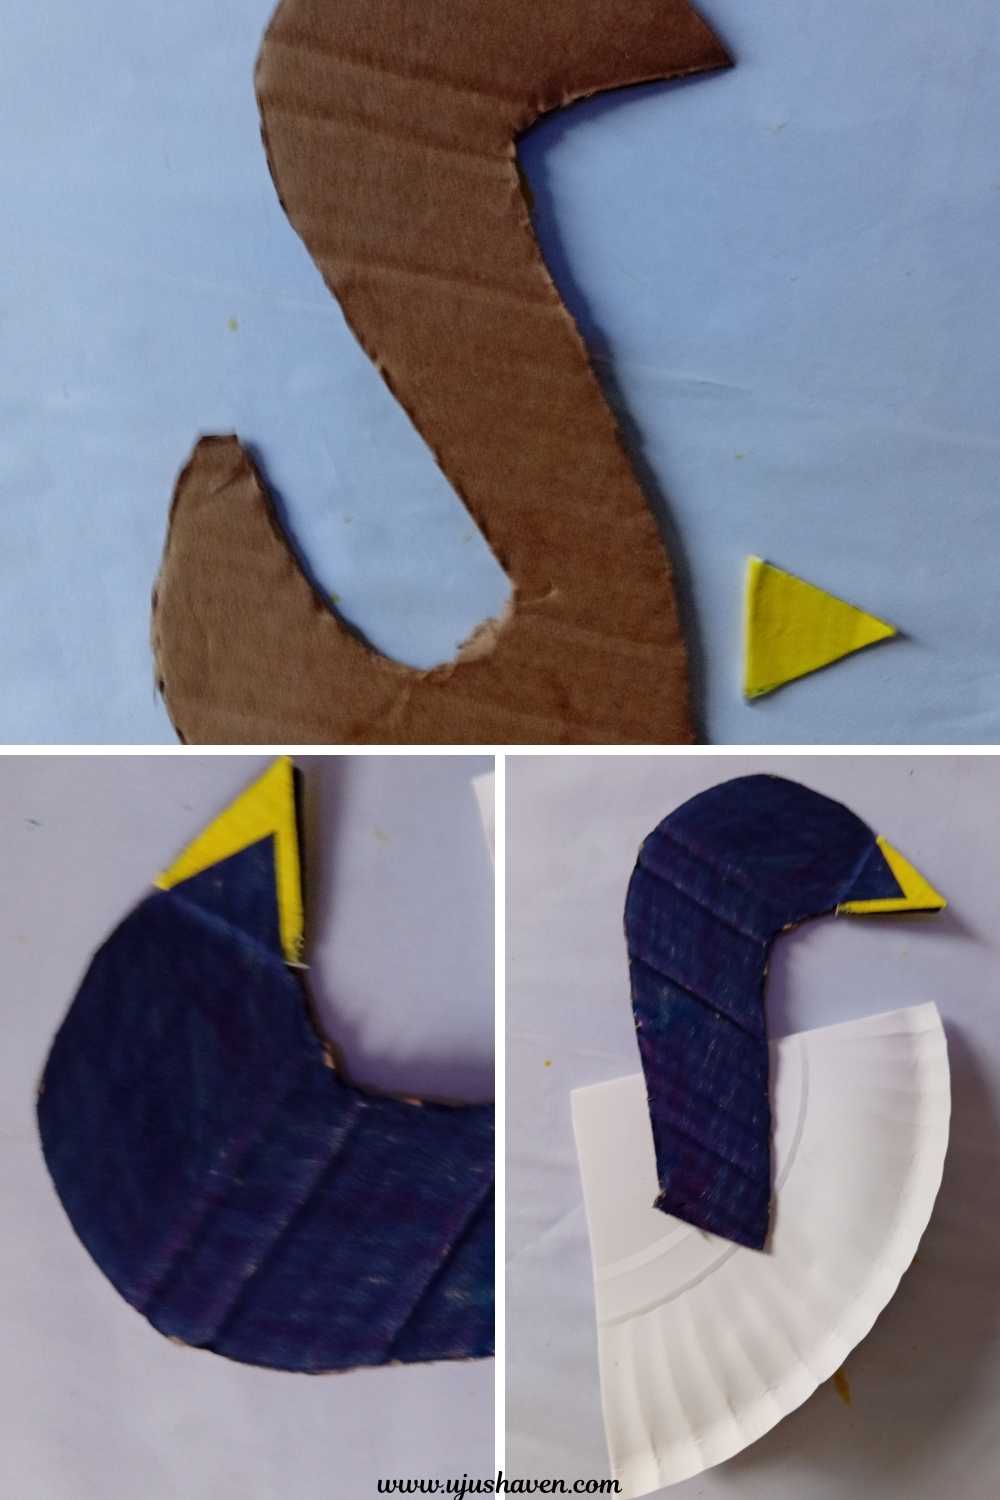
For the head and neck, fold your second paper plate in half to give it a curved shape.
Cut an S-shaped curve out of cardboard or a recycled carton, then cut that cardboard shape in half.
Glue one half directly onto the curved surface of the folded plate, matching the curve so it sits flush against it.
This combination is what gives the head and neck that rounded, curvy belly shape rather than a flat piece. Paint the whole shape a dark color.
Separately, cut and paint a small triangle for the beak, then glue it onto the head once both pieces are dry.
Paint the whole shape a dark color. Separately, cut and paint a small triangle for the beak, then glue it onto the head once both pieces are dry.
Step 5: Add the Face and Crest
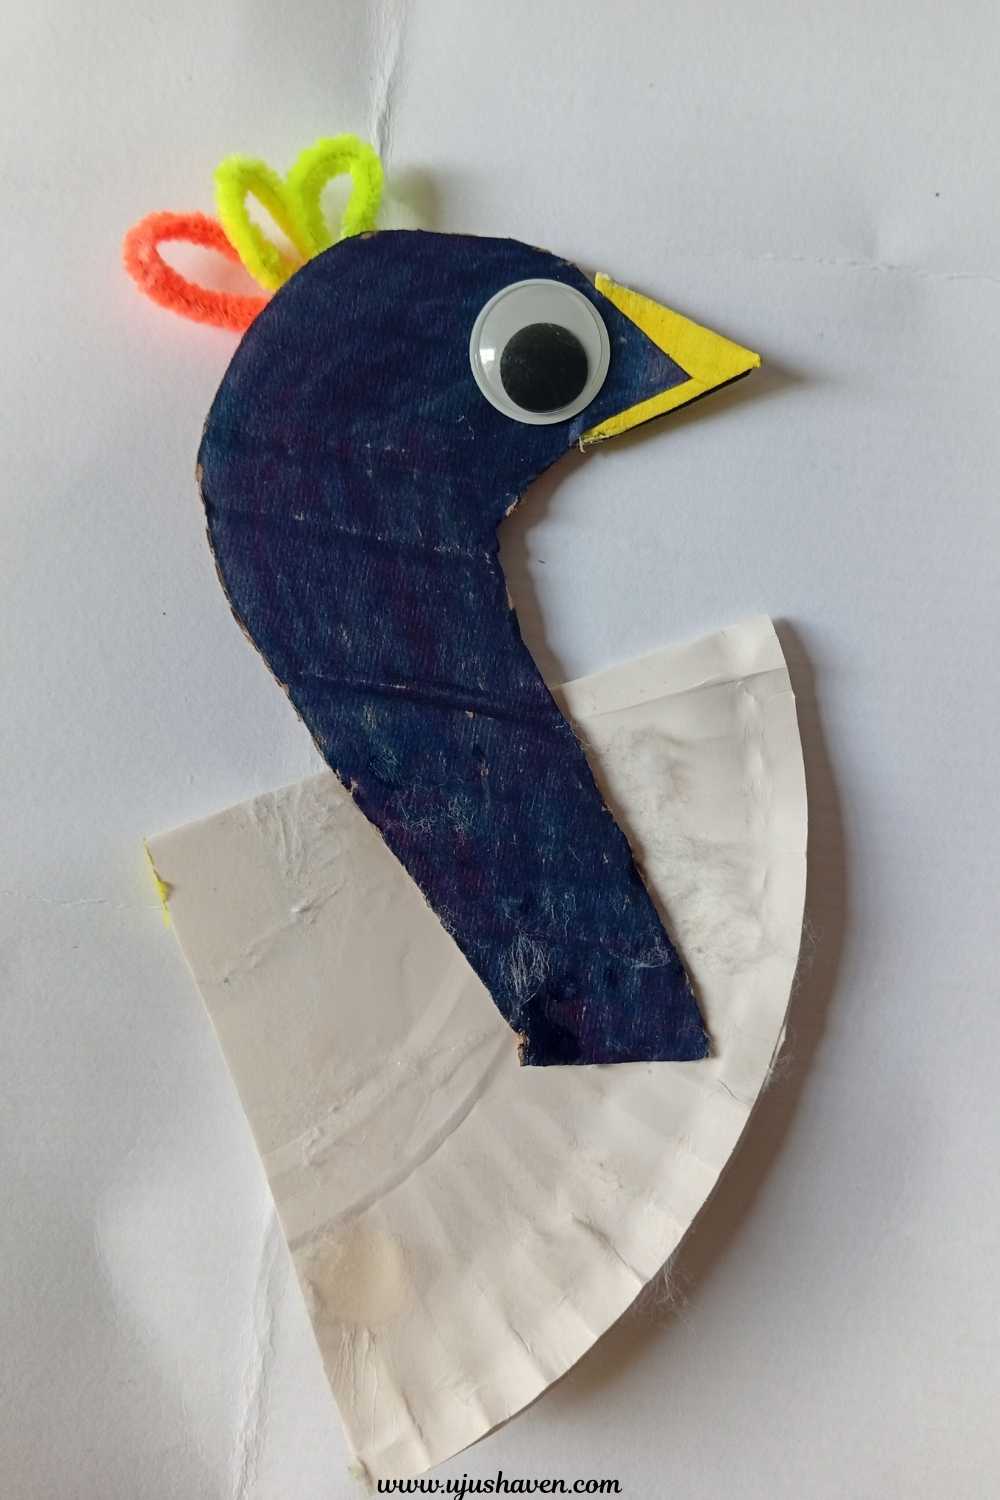
Glue a googly eye onto the head.
For the crest, take two pipe cleaners in different colors, curl the tips, and glue them standing upright at the top of the head.
This little burst of color at the top is a small detail, but it’s what makes the finished craft instantly recognizable as a peacock.
Step 6: Add the Chest Texture
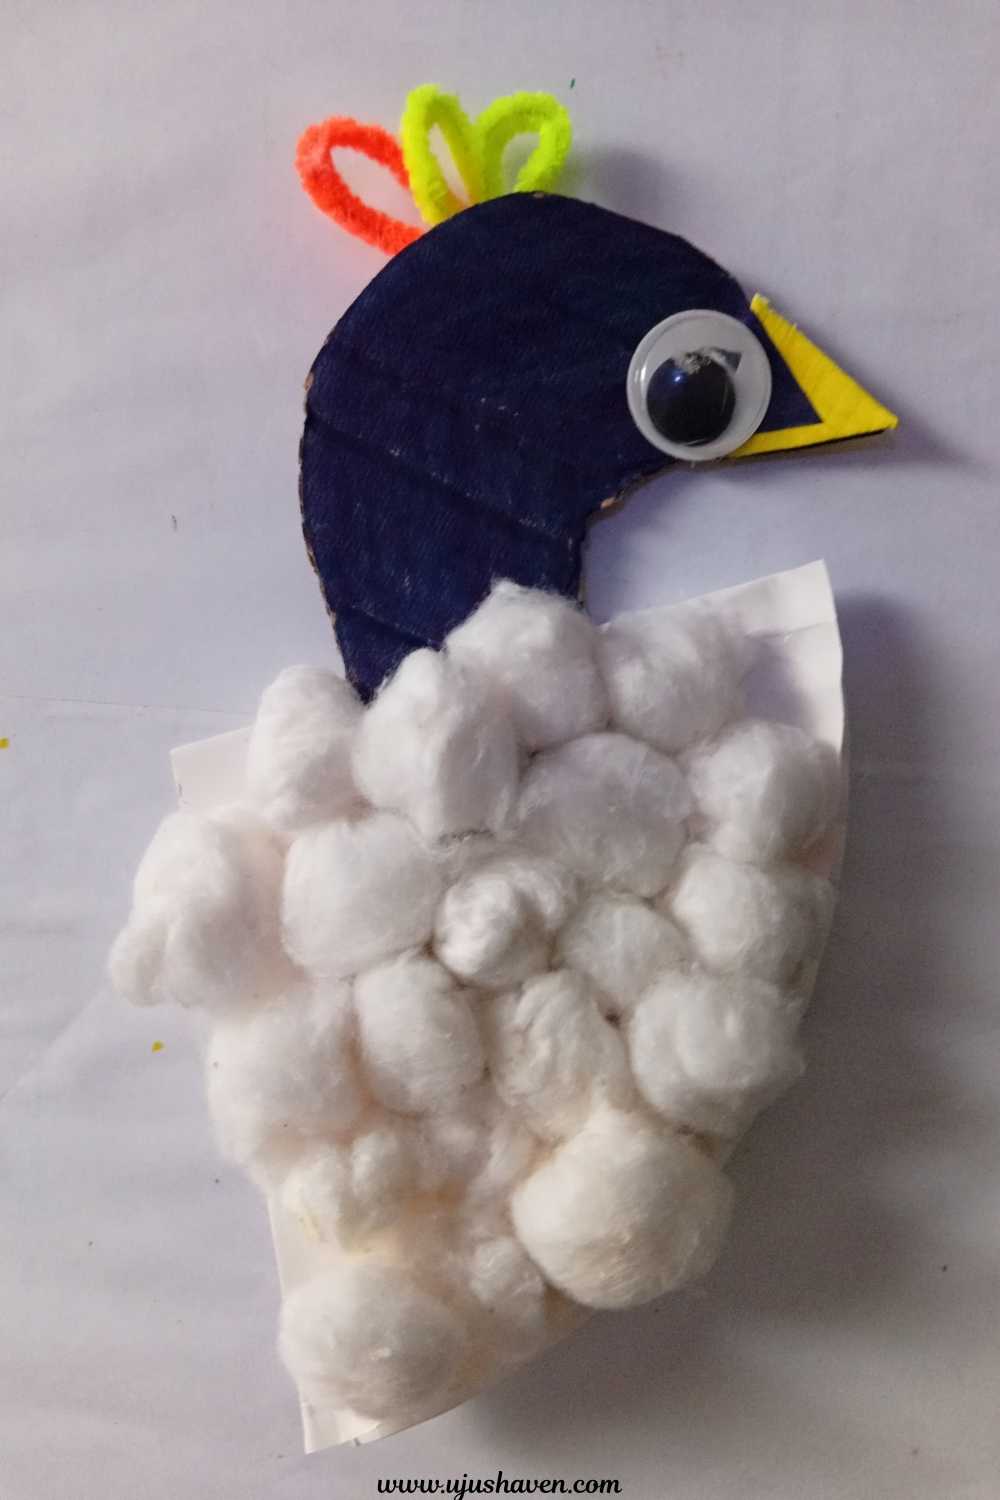
On the lower portion of the head and neck piece, glue on a cluster of cotton balls.
Overlap them slightly as you go so there are no gaps, building up a soft, feathery texture across the chest.
Step 7: Bring It All Together
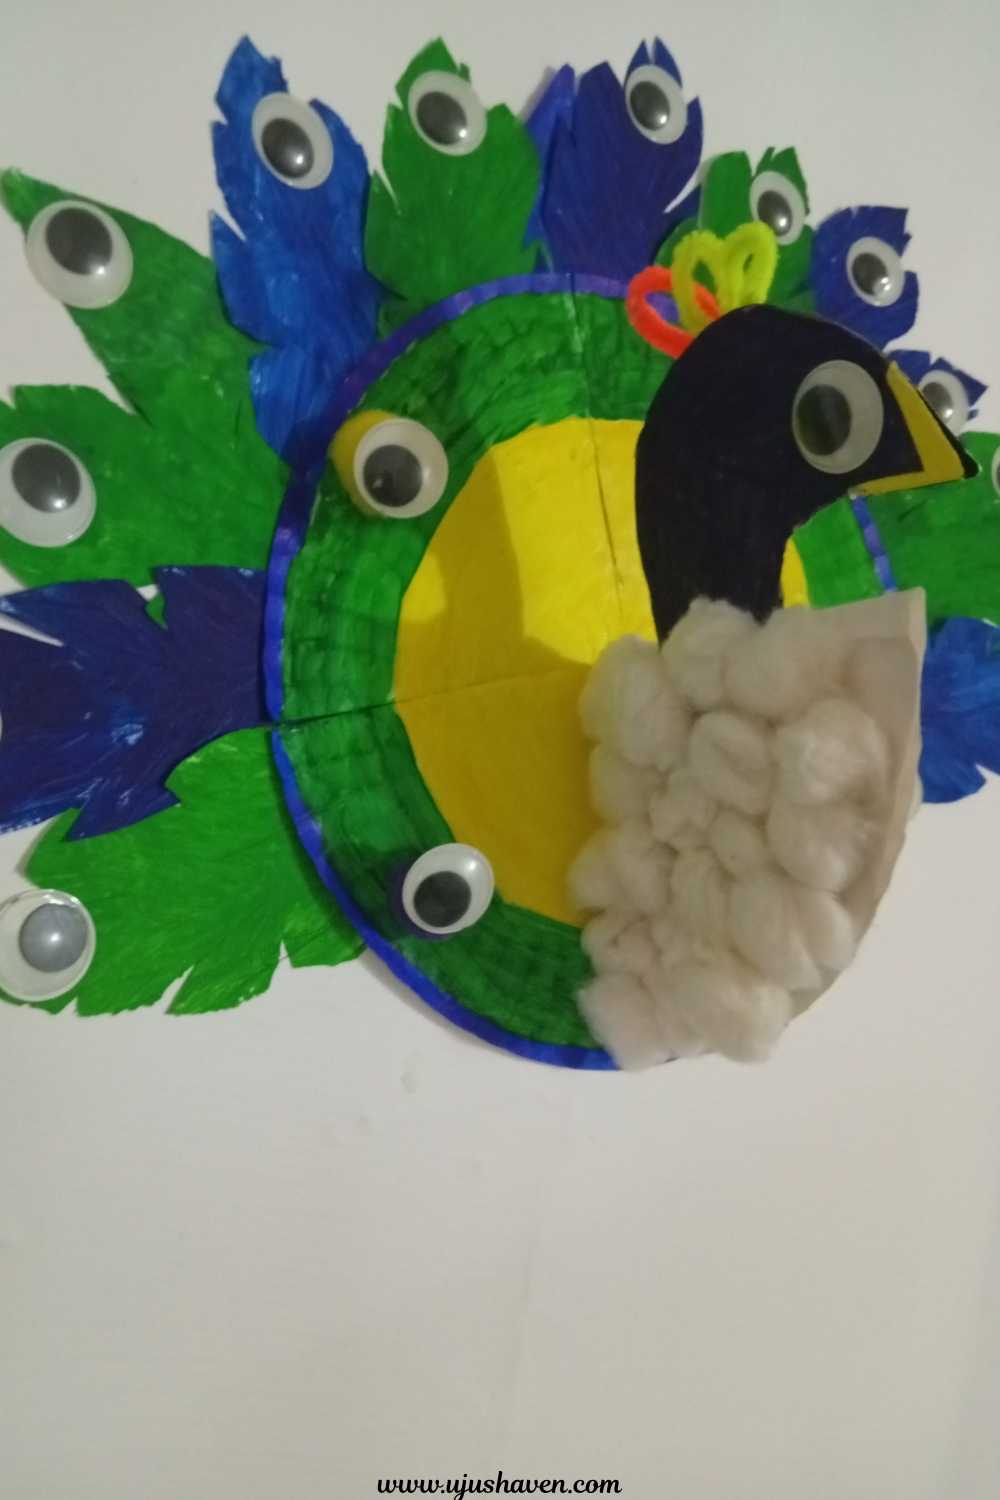
Once every piece is dry, glue the finished head onto the colored tail base.
Adjust the angle until it sits the way you like, and let everything set before moving or displaying it.
And that’s it. A full paper plate peacock craft, built entirely from basic supplies most homes already have on hand.
If your kids enjoyed the layering and gluing in this one, they’ll likely have just as much fun with this Paper Plate Sheep Craft for Kids, which uses a similar building-block approach with a totally different animal.
Easy Ways to Personalize It
- Swap the blue and green color scheme for bold, non-traditional colors like pink and purple.
- Use mismatched pom pom colors on each feather tip for a playful, less uniform look.
- Add glitter accents between the feathers for extra shine.
- Let kids choose their own crest colors instead of sticking to two.
Common Mistakes to Avoid
- Gluing feathers on before the paint has fully dried, which can smudge the colors.
- Overloading one section with cotton balls or pom poms, which can throw off the balance of the finished piece.
- Rushing the head-to-tail gluing step before both pieces are completely dry, which can cause the head to slide out of place.
Where Kids Can Display Their Peacock
Once finished, this paper plate peacock craft looks great propped on a bookshelf, taped to a bedroom door, or added to a small gallery wall of other finished craft projects.
It also makes a sweet handmade gift for grandparents or a colorful addition to a classroom display table.
If your kids are building up a little collection of finished projects to display, this Paper Plate Watermelon Craft for Kids and this Paper Plate Ice Cream Craft For Kids pair nicely alongside it for a bright, summery shelf display.
More Paper Plate Craft Ideas to Try Next
If this paper plate peacock craft was a hit in your house, it’s worth keeping a small rotation of paper plate projects on hand for rainy days or slow weekends.
They’re budget-friendly, easy to prep ahead of time, and give kids that same satisfying feeling of turning something plain into a finished character or scene.
Pairing this one with a few other simple builds, like the animal and food-shaped crafts already on the blog, makes it easy to keep the momentum going without needing a whole new supply list each time.
Frequently Asked Questions on Paper Plate Peacock Craft
Do I need real feathers for this craft?
No. This entire paper plate peacock craft is built using paper, paint, pom poms, and cardboard.
No real feathers required, and honestly, the painted paper feathers hold up better over time than real ones would on a kid’s craft project.
What age group is this craft best for?
It works well for preschoolers with some help, especially with the painting and gluing, and independently for elementary-age kids who can manage the cutting and layering steps on their own.
Older kids also enjoy the personalization part, like picking their own feather colors or crest combinations.
Can I use markers instead of paint?
Yes, either works well for coloring the base plate and feathers.
Markers tend to dry faster, which is helpful if you’re working with less patience in the room, while paint gives a slightly richer, more blended color once it dries.
How long does this craft take to complete?
Plan for two shorter sessions rather than one long one, since the paint and glue need time to dry between steps.
Trying to rush through drying time is usually where things go wrong, so spacing it out actually makes the whole project smoother.
Can I skip the cardboard head and use another paper plate instead?
Yes, though the cardboard gives the head a bit more sturdiness once it’s fully assembled.
If cardboard isn’t available, a folded paper plate on its own can still work, just handle it a little more gently while the glue sets.
What if my paint colors don’t match a real peacock?
That’s completely fine. Some of the best versions of this paper plate peacock craft come from kids picking their own color combinations instead of sticking to blue and green.
The goal is a craft they’re proud of, not a textbook-accurate bird.
Do I need a hot glue gun for this project?
Not necessarily. A regular craft glue or strong liquid glue works fine for paper and pom poms, though a hot glue gun (used by an adult) can speed up the cardboard and cotton ball steps if you have one on hand.
Can this craft be made without cotton balls?
Yes. If you don’t have cotton balls, small pieces of white paper scrunched up loosely can create a similar textured effect on the chest area.
How do I store the finished craft without damaging the feathers?
Once fully dry, storing it flat or propped upright in an open space works best. Stacking it with other items can flatten the pom poms and bend the feather tips.
Final Thoughts
This paper plate peacock craft is proof that a beautiful, textured project doesn’t need a long supply list or hard-to-find materials.
With a little paint, some paper, and a handful of pom poms, kids can build something colorful and genuinely their own, one layered feather at a time.
If you’re looking for more budget-friendly, kid-approved projects, don’t miss this roundup of 15 Easy Popsicle Stick Crafts For Kids They’ll Love Making, which uses many of the same simple supplies already sitting in your craft box.