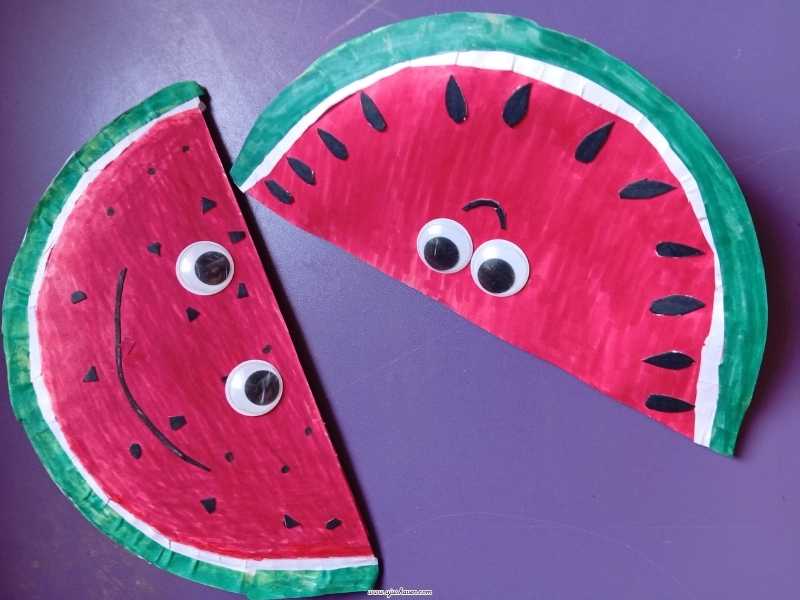
This paper plate watermelon craft for kids is one of those activities that looks impressive but is honestly so much easier than you’d think
Some of the best summer memories happen right at the kitchen table no fancy supplies, no expensive kits, just a little creativity and whatever you have on hand.
That’s exactly how this craft came to life in our home.
We grabbed a paper plate, some cardboard scraps, and a few markers, and before we knew it, we had the cutest little watermelon slice sitting right in front of us.
And honestly? It was easier than I expected.
If you’ve been looking for a fun, low-stress activity to do with your little ones this summer, you’re in the right place.
This paper plate watermelon craft for kids doesn’t require a craft store run or a big budget just simple materials you probably already have at home.
It’s the kind of project that keeps little hands busy, sparks creativity, and ends with something every kid will be proud to show off.
If you’re a seasoned crafter or a complete beginner, this step-by-step tutorial walks you through everything no guesswork, no overwhelm.
Just good, simple fun.
Ready to make the cutest paper plate watermelon craft for kids together? Let’s get into it.
Why Kids Love This Craft

This paper plate watermelon craft for kids hits a sweet spot that not every craft activity manages to find.
It’s quick enough to hold a young child’s attention from start to finish no long waiting periods, no complicated techniques.
But it’s also layered enough to feel genuinely rewarding when it’s done.
Kids can see it building step by step, and that progression keeps them engaged the whole way through.
It’s also wonderfully versatile.
Make it as a summer activity at home. Bring it into a classroom.
Use it for a backyard party craft table. Set it up at a playdate.
It works for toddlers with a little help, and just as well for older kids working independently.
And because the materials are so simple and affordable, it’s a craft you can come back to again and again without any stress about cost or supplies.
And on days when the weather doesn’t cooperate, these simple rainy day crafts for toddlers are just as easy to pull together with things you already have at home.”
This Craft Is Easier Than It Looks
Let’s be honest for a second.
You’ve probably seen cute craft tutorials online, clicked in excited, and then quietly closed the tab because the steps felt overwhelming or the materials list was a mile long.
Maybe you thought, “That’s for people who actually know how to craft.”
This is not that kind of tutorial.
This watermelon craft was made with real, everyday materials cardboard scraps, a glue stick, markers, and a paper plate.
That’s it. No specialty supplies.
No craft room full of gadgets. Just what you have at home right now and a little willingness to try.
Here’s the thing about this project it builds as you go.
At first it looks like a plain paper plate.
Then a pink semicircle.
And then the moment those little black seeds go on it suddenly, completely, unmistakably looks like a watermelon.
That transformation is so satisfying.
For you and especially for your kids.
Every step in this post is broken down clearly so you always know exactly what you’re doing and what the result should look like.
No step assumes you already know something. No step skips ahead.
So if you were about to click away stay.
This one is genuinely doable.
Even on your very first try.
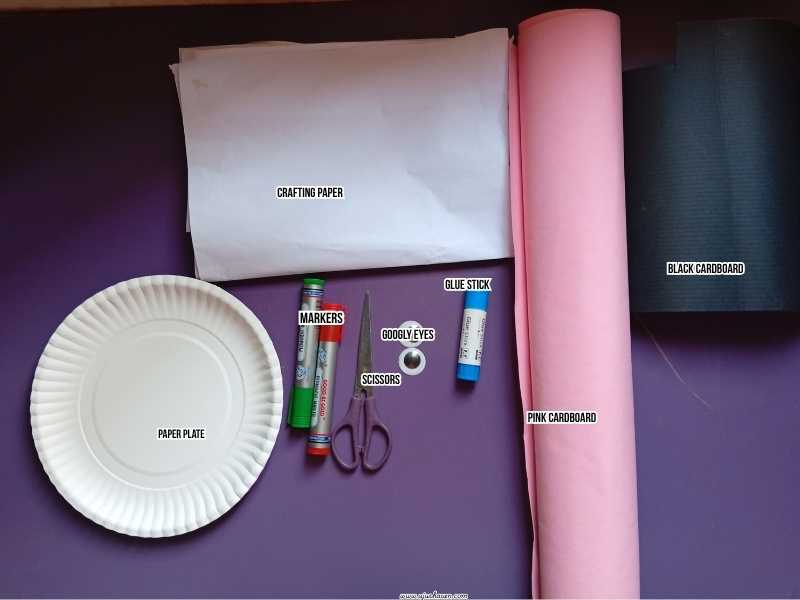
What You’ll Need
One of the best things about this paper plate watermelon craft for kids is that you don’t need to break the bank.
Gather these simple materials before you start:
1 paper plate – standard size works perfectly
Red/Pink cardboard – this becomes the juicy watermelon flesh; Just one of the two can serve the same purpose
Red marker – for deepening the pink into a richer watermelon red (more on this in the steps!)
Black cardboard – for cutting out the seeds
White cardboard or white crafting paper – for the thin inner rind layer
Green marker – to color the outer rind strip
Glue stick
Scissors
Optional: glitter paper adds a sparkly, googly eyes fun touch that younger kids especially love
A helpful note before you start:
Don’t stress if you don’t have every single item on this list.
We didn’t have red cardboard only pink. So we grabbed a red marker and colored right over the pink cardboard instead.
It worked out beautifully. Creativity and improvisation are half the fun of crafting with kids, so work with what you’ve got.
How to Make a Paper Plate Watermelon Craft for Kids: Step-by-Step
Step 1: Fold the Paper Plate in Half
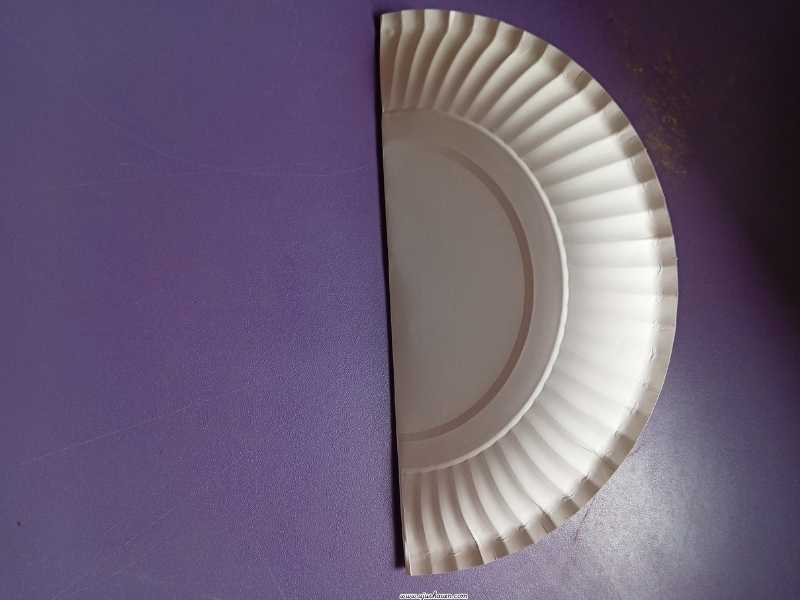
Start simple. Take your paper plate and fold it right down the middle flat side facing up, curved side forming the dome shape you’d expect from a watermelon slice.
Press firmly along the fold so the crease is sharp and clean.
A flat, well-creased plate makes gluing the layers on much easier in the steps ahead.
What it should look like at this point:
A neat, even semicircle like a little dome or half-moon shape sitting on your table.
Kid involvement tip:
Let your little one help with the folding and pressing.
It’s simple enough for small hands and gets them excited right from the very beginning.
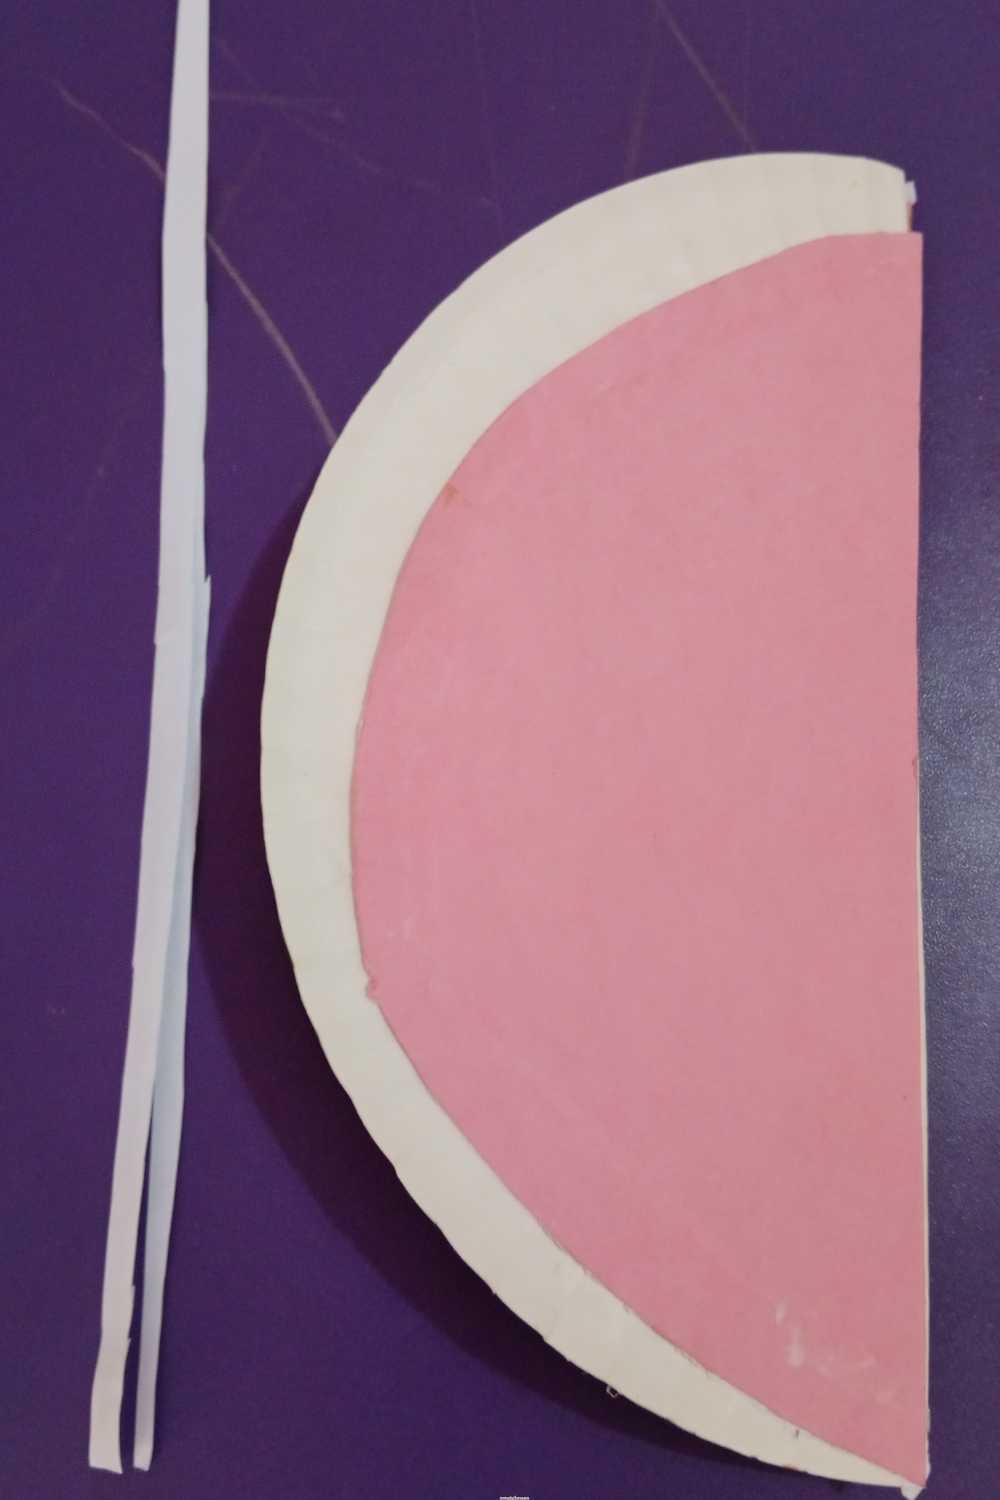
Step 2: Trace and Cut the Watermelon Flesh from Pink Cardboard
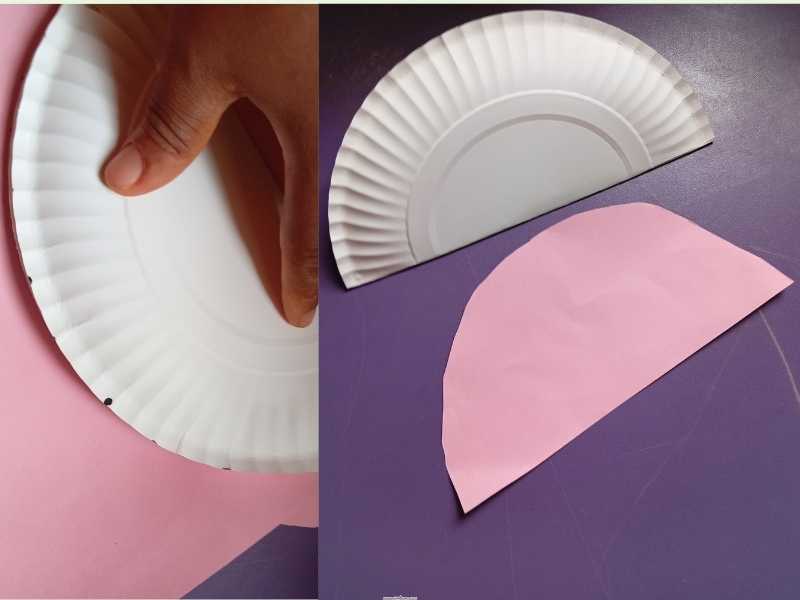
Place your folded paper plate on top of the pink cardboard.
Using a pencil or light marker, trace around the curved inner section of the plate just the dome part, not the wavy ridged border.
Now cut the pink shape out but cut it slightly smaller than your traced line.
You want a small visible border of the white paper plate showing around the edges.
That white border is going to become part of the rind in a later step, so don’t skip this part.
Once it’s cut, glue the pink semicircle flat onto the folded face of the paper plate.
What it should look like at this point:
A pink dome shape sitting neatly centered inside the plate, with a small white border of the plate visible all the way around it.
Don’t worry if the pink looks too soft or too pastel right now.
That’s completely normal at this stage and exactly what the next step is for.
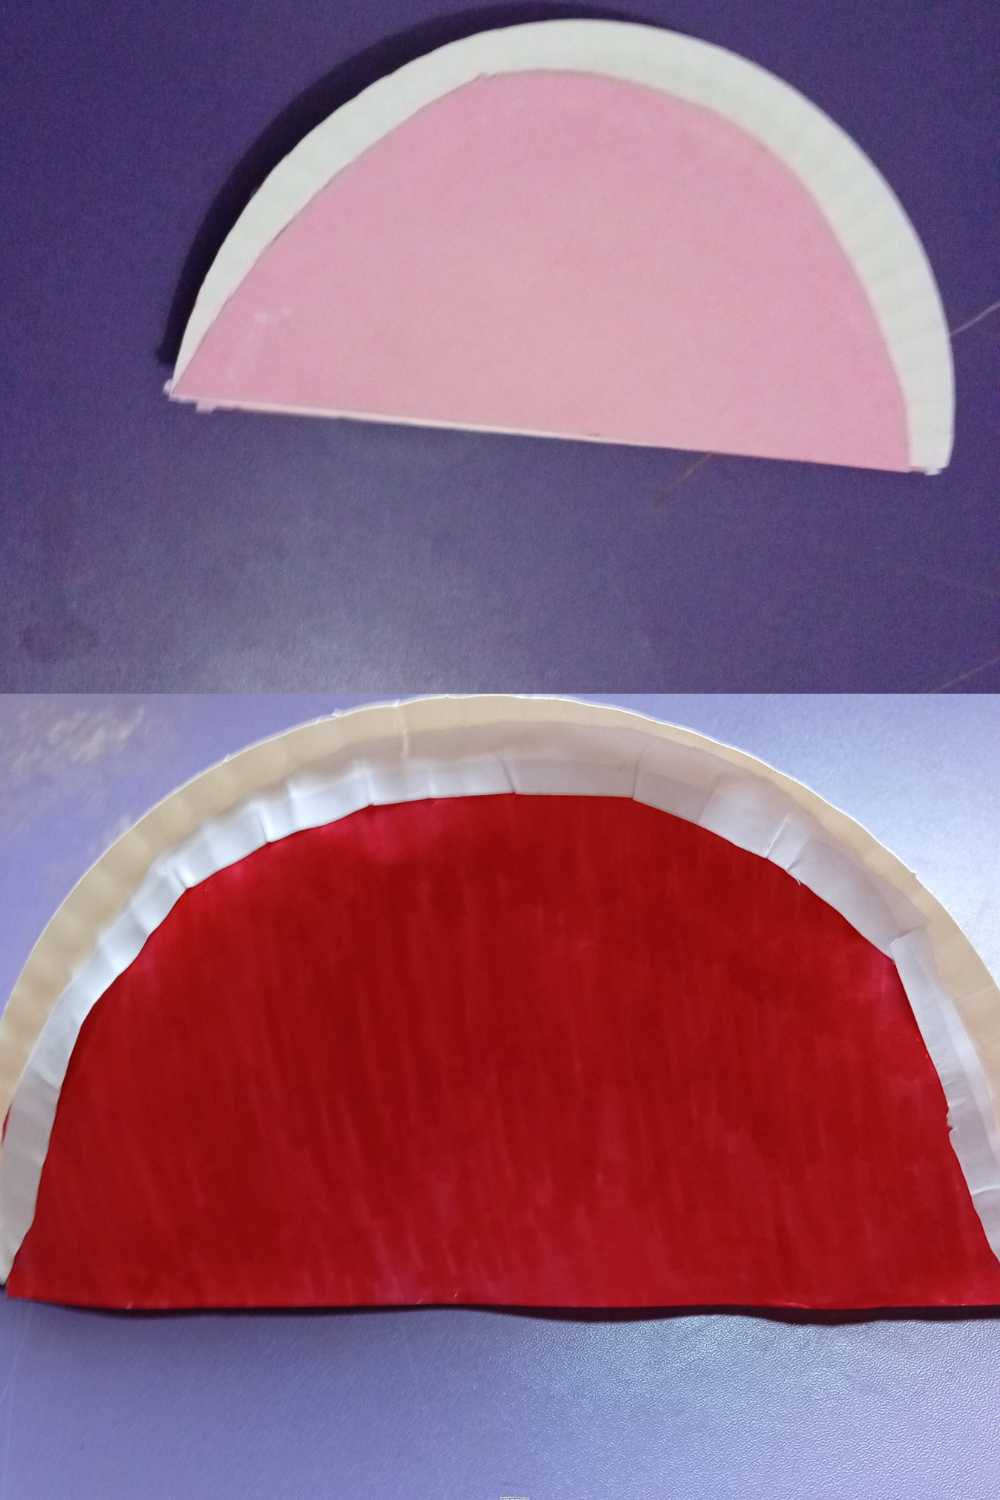
But if you’re working with pink cardboard like we were, here’s the easy fix:
grab a red marker and lightly color over the pink surface.
This is what transforms a soft pastel pink into that rich, juicy watermelon red color that makes the whole craft pop.
The key is to go gently.
Here’s how:
Color in one direction long, smooth, even strokes
Slowly overlap each stroke so the coverage builds up gradually
Leave a few tiny lighter patches here and there this actually makes it look more natural, like real watermelon flesh
Let it sit for a minute or two before moving on so the marker can dry properly.
What it should look like at this point:
A deeper, richer watermelon red not neon, not pastel.
Something warm and juicy-looking right in the middle.
Step 3: Cut and Add the Thin White Inner Rind Strip
This step is what starts giving your paper plate watermelon craft for kids that signature layered look of a real watermelon slice.
Cut a long, gently curved strip from your white cardboard or white crafting paper.
This strip is going to sit along the curved bottom edge of the pink/red section right between the red flesh and the outer edge of the plate.
Keep this strip thin.
Think of it as the white pith layer you see on a real slice of watermelon just a slim little sliver.
If the strip is too wide, it takes up too much space and shrinks the red area, throwing off the whole look of the craft.
Carefully glue the white strip along the curved bottom edge of your red section.
What it should look like at this point:
A clean, thin white curve running along the bottom of the watermelon like the inside of a real rind.
Quick fix tip:
If your strip curves unevenly or gaps a little, just trim it with scissors once the glue dries. Easy.
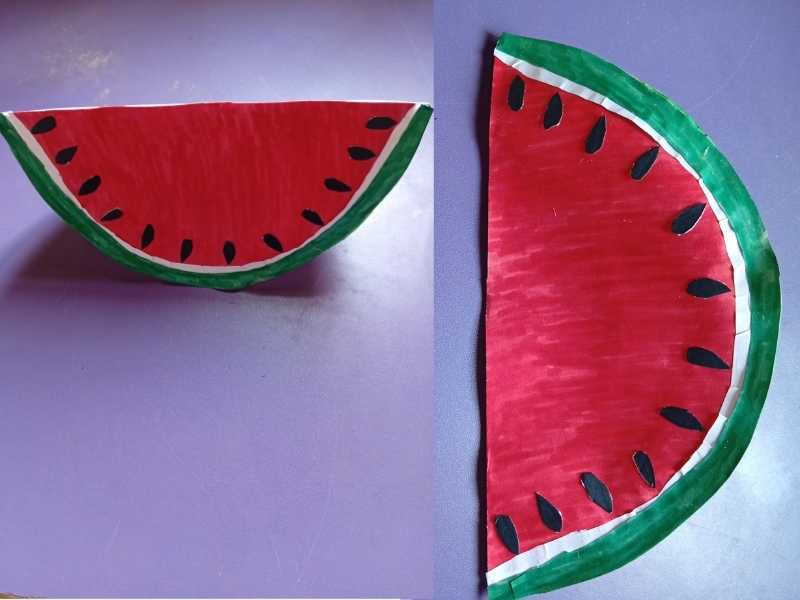
Step 4: Make the Green Outer Rind
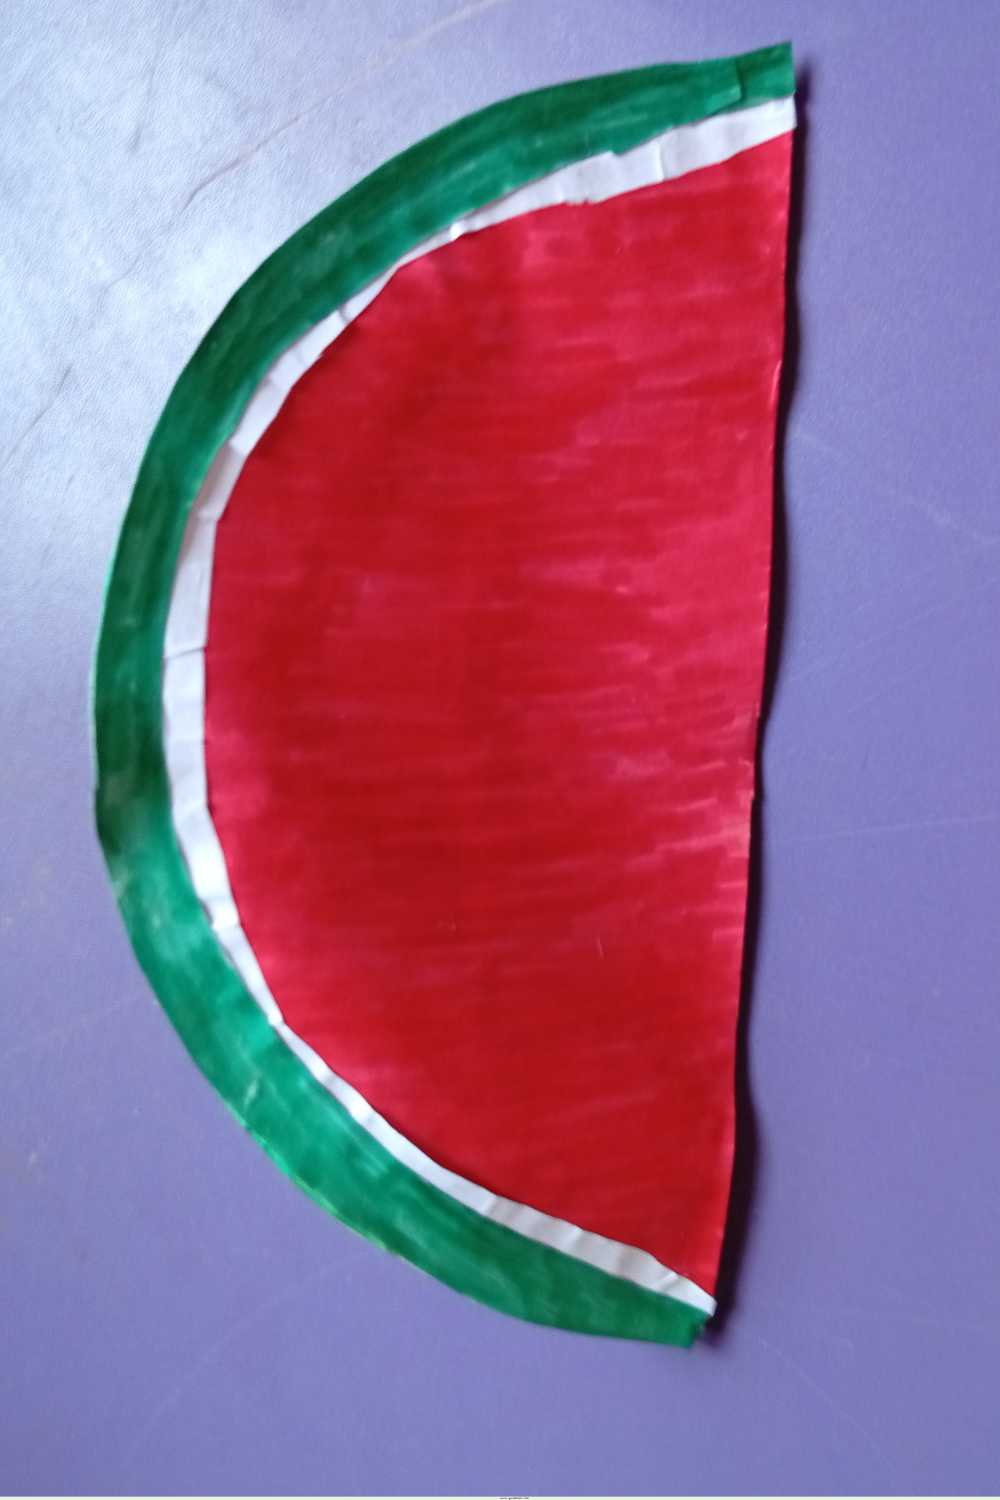
Cut a slightly wider curved strip from any spare cardboard or thick paper you have available.
This one is going to be the outermost green rind layer.
Color it green with your marker color firmly and evenly so it looks solid and consistent.
Take your time here.
Streaky green tends to show more at this layer since it’s on the outer edge.
Glue this green strip along the very outer curved rim of the paper plate sitting just below the white strip and hugging the outer edge of the plate.
Once the glue is dry, trim any bits that stick out past the edge of the plate so everything looks neat and tidy.
This is the step that ties everything together.
The moment you add the green, the three-layer effect red flesh, thin white pith, green rind suddenly makes the whole thing unmistakably look like a watermelon slice.
It’s such a satisfying moment.
What it should look like at this point:
Three clean, distinct layers from the inside out red, then white, then green. Just like the real thing.
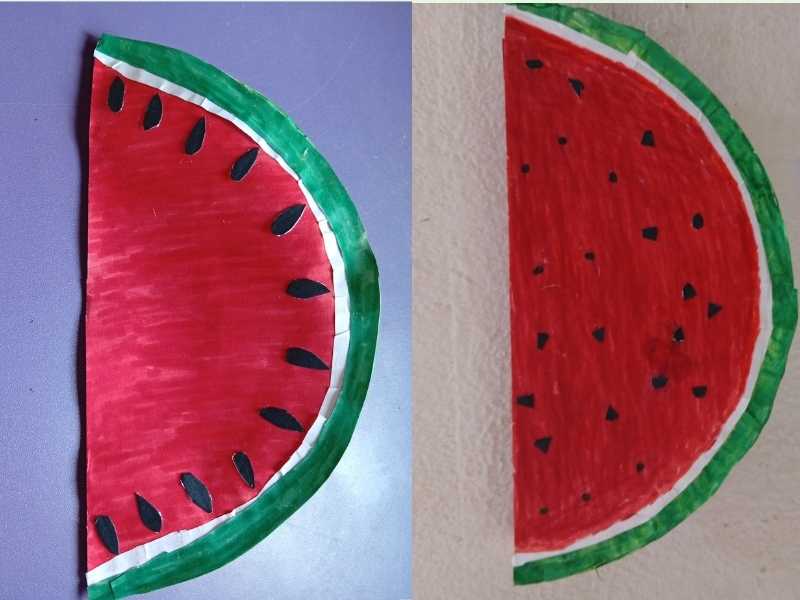
Step 5: Cut Out the Watermelon Seeds
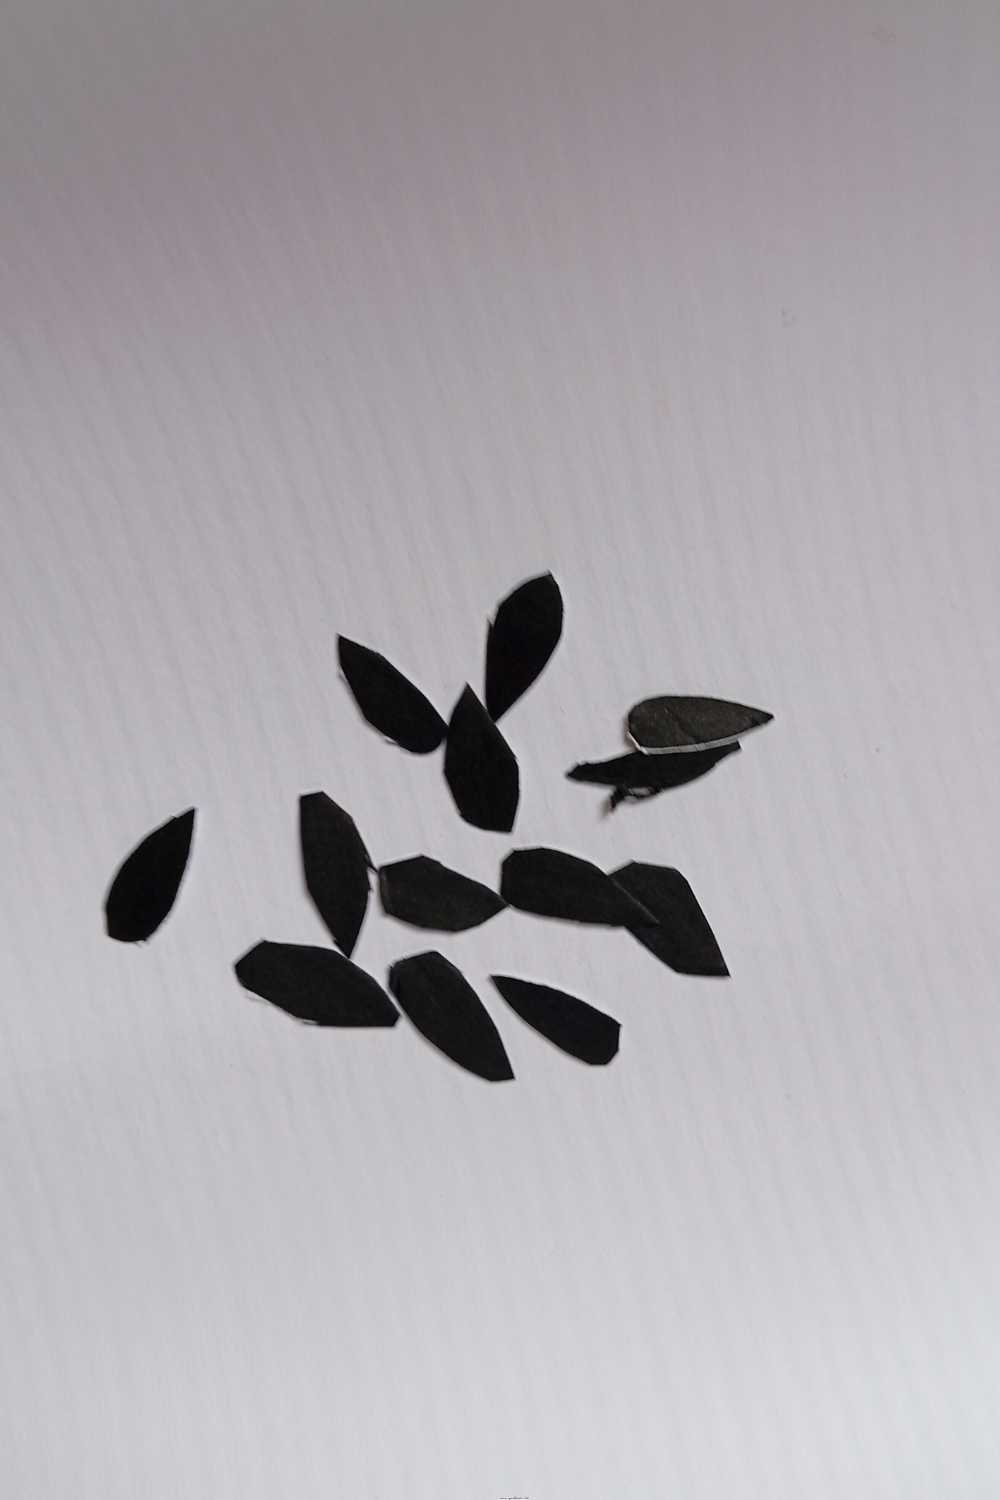
Now for the most exciting part of this whole paper plate watermelon craft for kids.
Take your black cardboard and cut out small teardrop shapes for the seeds. Think fingertip size small enough to look like seeds, big enough to actually be visible against the red.
Aim for somewhere between 8 and 15 seeds, depending on the size of your paper plate.
And here’s the little detail that makes a big difference make them slightly different sizes.
Some a little bigger, some a little smaller. Real watermelon seeds aren’t all identical, and that small variation makes the craft look so much more natural.
Fun activity for kids:
Draw the teardrop shapes onto the back of the black cardboard first, then let your little ones cut them out themselves.
It’s wonderful for building scissor skills and fine motor control and they’ll love feeling like they made the seeds all on their own.
Step 6: Glue the Seeds Onto the Watermelon
Scatter your black seeds across the red section of the watermelon and glue them down one by one.
The important word here is scattered. Don’t line them up in neat rows.
Don’t space them out perfectly.
Let them fall randomly some closer together, some further apart, tilted at slightly different angles.
That natural randomness is exactly what makes the craft look realistic and playful at the same time.
Press each seed firmly with the glue stick and let everything dry completely before moving the craft around.
This is the moment everything clicks into place.
One second it’s a red semicircle.
The next with those seeds on it’s a watermelon.
A real, recognizable, adorable little watermelon.
Kids absolutely beam when they see it come together like this.
Step 7: Optional Give Your Watermelon a Cute Face
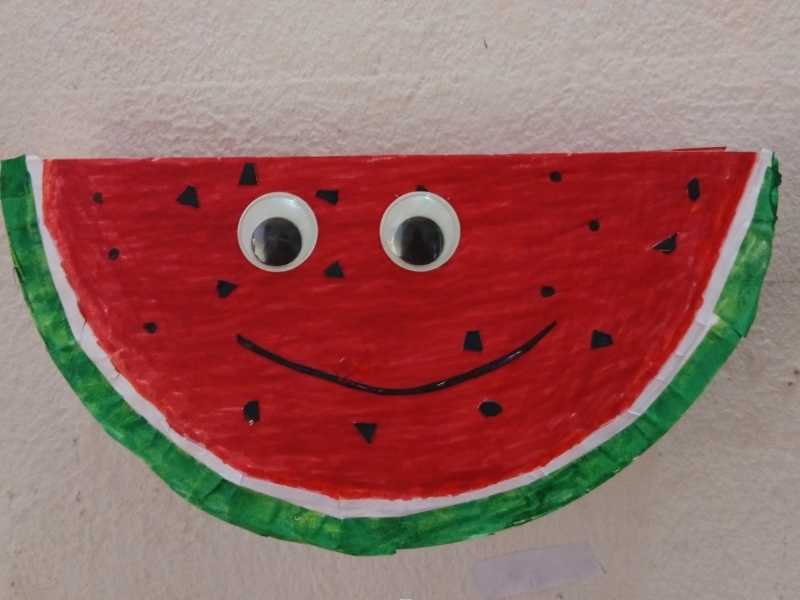
This step is completely optional but if you’re making this craft with toddlers or preschoolers, it tends to be their absolute favorite part.
Glue two googly eyes onto the upper part of the red section.
Then draw a little curved smile just below them with a black marker.
Suddenly your watermelon slice has a personality a happy, cheerful little face that kids will giggle at every single time they look at it.
This version works especially well for summer parties, classroom activities, or daycare crafts.
Little ones go wild for a craft that smiles back at them.
Step 8: Let It Dry and Admire Your Work
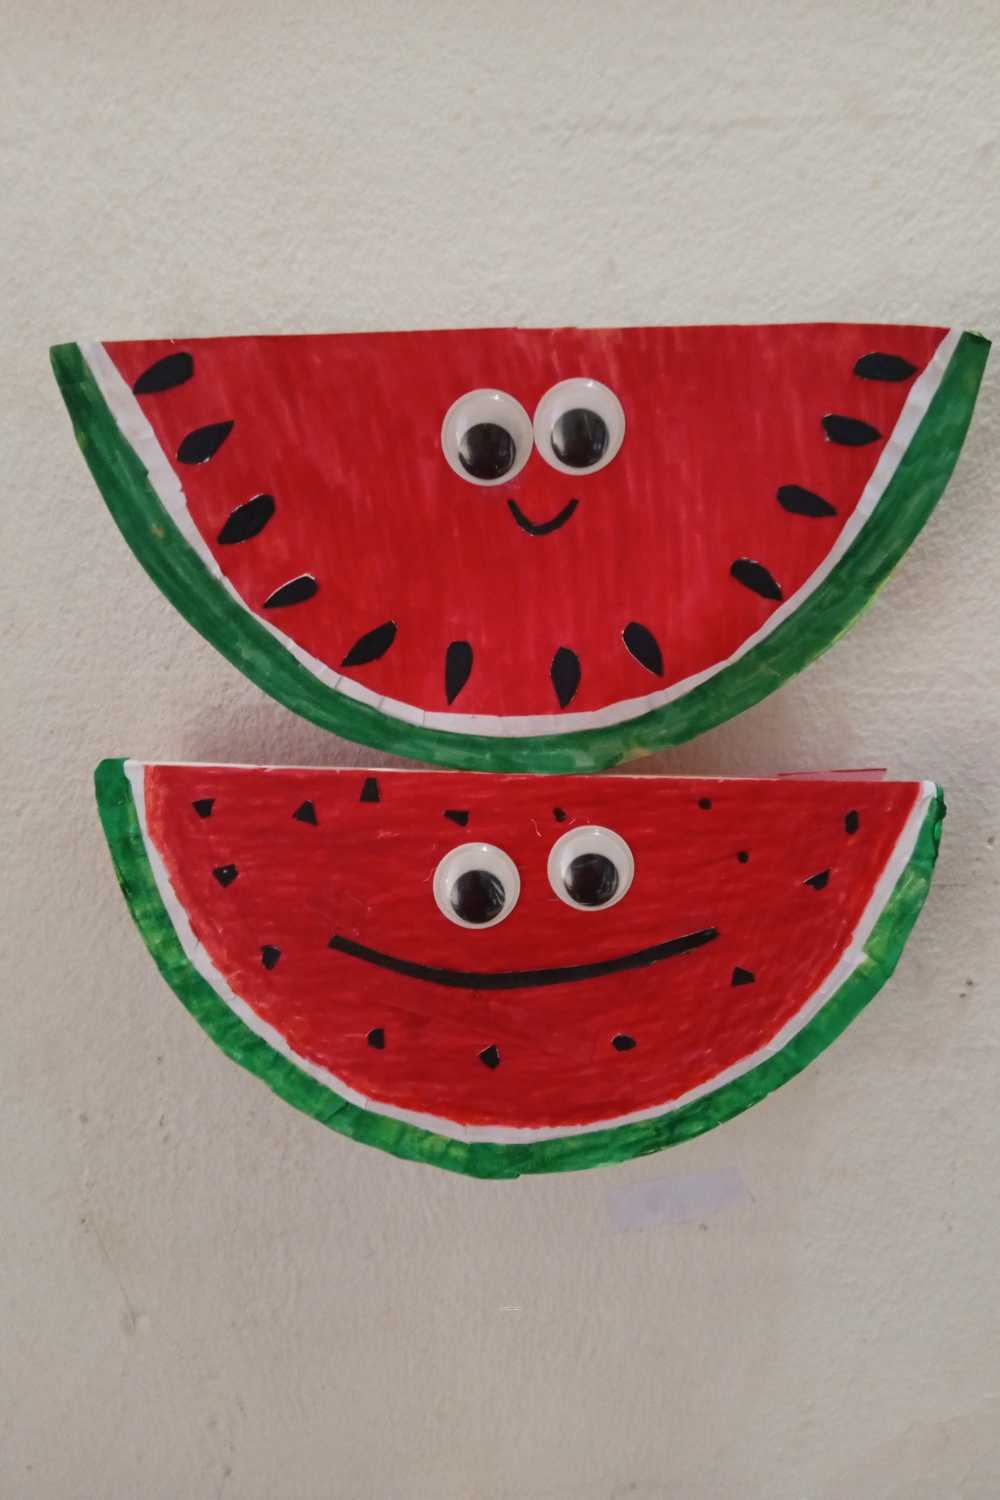
Once everything is glued and in place, set your paper plate watermelon craft for kids aside and let it dry fully usually about 10 to 15 minutes is enough.
While you wait, do a quick check:
Gently press down any seeds or strips that might be lifting at the edges
Trim any white or green strips that look uneven with a small pair of scissors
Wipe away any visible glue strings with a dry finger
And that’s it. Done.
You just made a paper plate watermelon craft for kids from scratch, with simple materials, step by step.
If your little one loved this, you might also want to check out this seashell craft for preschool it’s just as quick and just as fun.
Helpful Tips on Paper Plate Watermelon Craft for kids for a Great Result
These small things make a noticeable difference in how the finished craft looks:
Keep the white strip thin.
It’s tempting to make it wide, but a thick white strip visually shrinks the red area.
Thin is always better here just like on a real watermelon slice.
Vary your seed sizes.
Uniform seeds look a little stiff. Mix up the sizes slightly for a more natural, playful feel.
Go easy with the red marker.
Long, light strokes in one direction give a much smoother finish than pressing hard and scribbling.
Build the color up slowly.
Trim the green rind edges clean.
A neat edge on the outer rind makes the whole craft look polished and put-together worth the extra thirty seconds.
Let each layer dry before adding the next.
Especially the marker over pink cardboard if it’s still wet when you glue the white strip, things can smear or slide around.
Looking for more cute crafts to try next? These butterfly crafts for kids are another favourite and they double as the sweetest little keepsakes too.”
Frequently Asked Questions About Paper Plate Watermelon Craft for Kids
What is a simple paper plate watermelon craft for kids?
A paper plate watermelon craft for kids is one of the simplest summer crafts you can make at home.
All you need is a paper plate, some cardboard, markers, and a glue stick.
Fold the plate in half, add layers of red, white, and green and finish with black seeds.
That’s it. No complicated steps, no expensive supplies.
Is this an easy paper plate watermelon craft for kids to make at home?
Absolutely. This is one of those easy paper plate watermelon craft for kids projects that works even when you don’t have every material on the list.
No red cardboard? Use a red marker over pink. No glitter paper? Skip it.
The craft is flexible, forgiving, and totally beginner-friendly.
What are some fun watermelon craft ideas for preschoolers?
This paper plate watermelon is one of the best watermelon craft ideas for preschoolers because the steps are short, the materials are safe, and little hands can genuinely help from folding the plate to gluing the seeds.
Adding googly eyes at the end makes it even more exciting for younger kids.
Can I do this paper plate watermelon craft for kids free without buying new supplies?
Yes and that’s honestly one of the best things about this craft.
Most families already have paper plates, cardboard scraps, markers, and a glue stick at home.
This paper plate watermelon craft for kids free of extra cost is completely doable with what you already have sitting in a drawer.
How long does this paper plate watermelon craft for kids take to make?
From start to finish, this craft takes about 20 to 30 minutes including drying time. It’s the perfect length for keeping kids engaged without anyone losing interest halfway through.
Short enough for a weekday afternoon, fun enough to feel like a real activity.
Wrapping It Up
A paper plate, some cardboard, a few markers, and a glue stick.
That’s really all it takes to make something that looks this good.
This paper plate watermelon craft for kids is proof that you don’t need a big budget, a fully stocked craft room, or years of experience to create something every kid will absolutely love.
You just need a little time, a willingness to try and a paper plate.
We hope this tutorial made the whole process feel easy, doable, and fun from start to finish.
Because that’s exactly what crafting with kids should always feel like.
Now go grab that paper plate your watermelon is waiting.