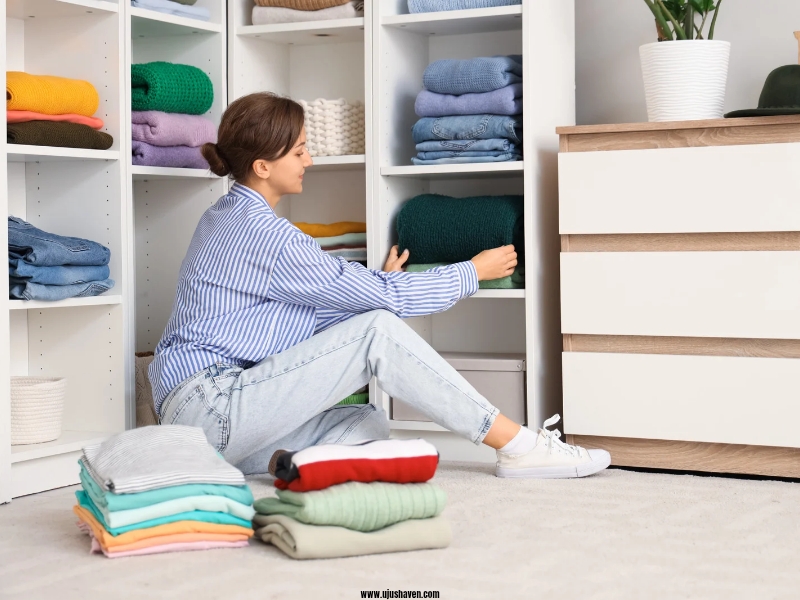
Craft supplies have a way of quietly becoming part of everyday life, and figuring out how to organize kids craft supplies is something most families think about more than once.
A few markers left on the table after a coloring session, construction paper tucked into a drawer, or a collection of stickers that seems to move from one spot to another.
It’s often these small moments that lead people to wonder the best to way organize them that feels simple and sustainable.
The challenge usually isn’t the supplies themselves.
It’s the time spent looking for things that should be easy to find or trying to put everything away without a clear system.
Little frustrations like these can make a space feel more cluttered than it really is and add extra steps to routines that are already busy enough.
Over time, it becomes clear that organization is about more than creating a tidy shelf or filling a few storage bins.
It can make everyday activities feel smoother, help creative projects come together more easily, and bring a greater sense of calm to the spaces where families spend time together.
That’s what this post is all about.
The ideas ahead are designed to help create a more functional and manageable way to store and organize craft supplies, without making things feel complicated.
If you’ve been looking for practical inspiration on how to organize kids craft supplies, you’ll find plenty of thoughtful ideas to draw inspiration from below.
Start by Decluttering Before You Organize Anything
Before thinking about bins, labels, or shelf arrangements, it helps to spend a little time with what’s actually there. Most craft collections grow quietly over time a few supplies from a school project, something picked up at a dollar store, things that were useful once and have been sitting in a drawer since.
Learning how to organize kids craft supplies becomes a much simpler process when it starts with going through everything first, because the only things getting a system are the ones that genuinely belong.
1. What to Toss Without Guilt
Some things are easy to identify straight away.
If it no longer works, it doesn’t need a home in the organized space.
Common things that can go:
- Dried-up markers and pens that no longer write cleanly
- Crayons worn down past the point of being useful
- Glue sticks that no longer twist up or have dried out completely
- Paint that has thickened and separated beyond saving
- Stickers that have lost their adhesive
- Paper that has been bent, water-damaged, or torn
- Scissors that no longer cut properly
Letting go of these things isn’t wasteful. It’s what makes everything else easier to find and easier to use.
2. What Is Worth Keeping
What stays is simpler to identify than it might seem at first.
A supply is worth keeping if:
- A child reaches for it regularly
- It’s in good working condition
- It still has a clear and practical use in the space
Specialty supplies bought for a specific project deserve a second look. Some will be useful again.
Others have simply run their course. The goal when figuring out how to organize kids craft supplies isn’t to keep everything or discard everything.
It’s to be intentional about what the space is actually being asked to hold.
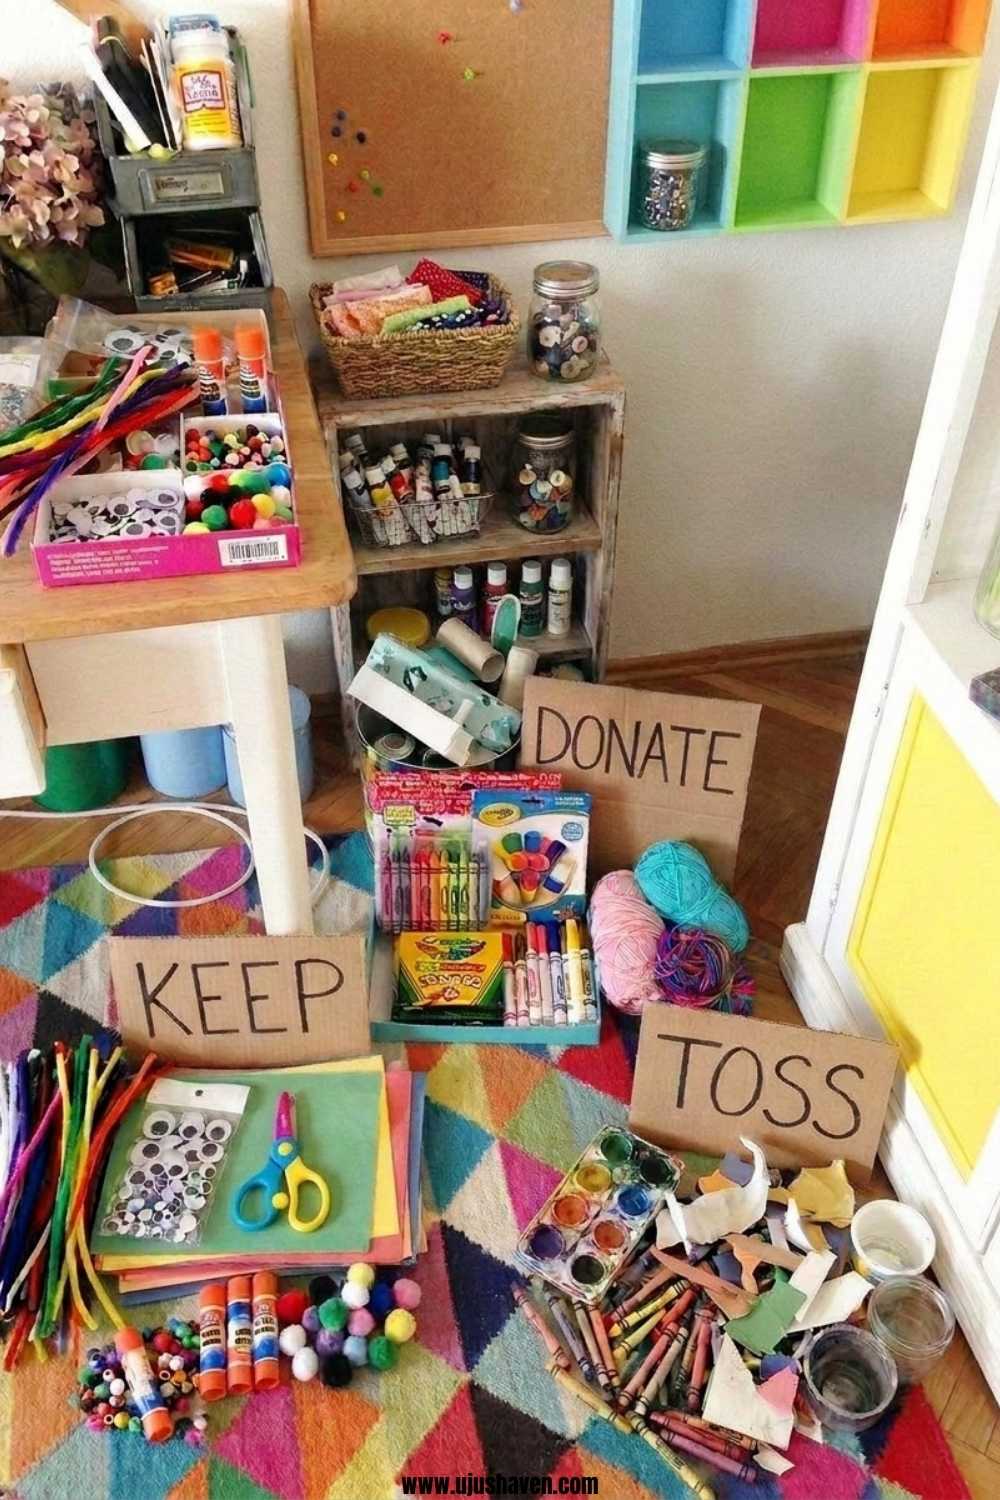
3. Create Simple Keep, Donate, and Trash Piles
Three loose piles are all that’s needed to work through a craft collection without overcomplicating the process.
How to work through it:
- Keep – anything in good condition that gets used regularly or will genuinely be used again
- Donate – supplies that are still usable but no longer needed, set aside for another family to put to good use
- Trash – anything broken, dried out, or past the point of being salvageable
Working through even a modest collection this way tends to make the space feel lighter before a single storage solution is introduced.
It’s a quiet reset, and it’s also what makes the next step, actually organizing kids craft supplies, feel considered and purposeful rather than like rearranging the same clutter in a different order.
Sort Craft Supplies Into Categories That Actually Make Sense
Once everything has been sorted through and only the useful things remain, the next step is figuring out where each item belongs.
This is where a lot of organizing attempts quietly fall apart.
Supplies get grouped by size or by container rather than by how they’re actually used, and within a few weeks everything drifts back to the same general pile.
Approaching how to organize kids craft supplies with a category-first mindset is what gives a system enough logic to feel natural and easy to maintain over time.
If you love how this craft system came together, these home organization ideas take that same thinking into every other room.
1. Group Similar Supplies Together
Markers with markers. Paper with paper. Glue, tape, and adhesives together in one place.
Why this step matters before buying anything:
- It shows exactly how much there is of each supply type
- It makes it easier to choose the right size and number of containers
- It reveals which categories need more space and which need less
- It makes tidying faster because everything has a logical home that makes sense at a glance
Grouping similar supplies together first gives a much clearer picture of what the space is actually working with, which makes every decision that follows feel more grounded.
2. Create Categories Based on How Your Kids Craft
The most useful categories are built around how a child actually works, not around what looks tidy on a shelf.
When thinking about how to organize kids craft supplies in a way that genuinely holds, paying attention to creative habits makes all the difference.
Questions worth asking before deciding on categories:
- Which supplies does this child reach for every single day?
- Are there supplies that always get used together during the same kind of project?
- Which materials come out occasionally rather than regularly?
Examples of habit-based groupings:
- A child who paints often: paints, brushes, palette, and a protective surface cover grouped together
- A child who makes cards: paper, scissors, stickers, and markers in one accessible spot
- A child who builds and crafts: tape, cardboard scraps, glue, and small embellishments together
When categories reflect real habits, supplies are easier to find, easier to return, and easier to actually use without interrupting the creative momentum.
3. Keep Everyday Supplies Separate From Special Supplies
Not everything needs to be equally accessible, and treating all supplies the same way is one of the quieter reasons systems stop working.
A simple way to think about it:
- Everyday supplies – crayons, markers, scissors, glue, and paper used regularly belong somewhere easy to reach without any effort
- Occasional supplies – specialty paper, seasonal materials, project kits, and things used once in a while can sit further back or higher up without creating inconvenience
Why this separation matters:
- It reduces visual noise in the space
- It makes the most-used supplies immediately findable
- It protects special materials from becoming part of the daily shuffle
- It keeps specialty supplies in better condition for longer
Thinking about frequency of use is one of the simplest ways to bring more order to how to organize kids craft supplies without overcomplicating the system or requiring more storage than the space can reasonably hold.
Best Kids Craft Station Ideas
Not every home has a dedicated craft room, and most families don’t need one.
What makes a craft station work isn’t the size of the space or how much was spent putting it together.
It’s whether the setup actually fits the way the family lives.
A well-thought-out kids craft station ideas doesn’t have to be elaborate to be effective.
It just needs to be consistent, accessible, and easy enough to maintain that it gets used the way it was intended.
Working with a small space? These room organization ideas make even the tightest corners feel surprisingly functional.
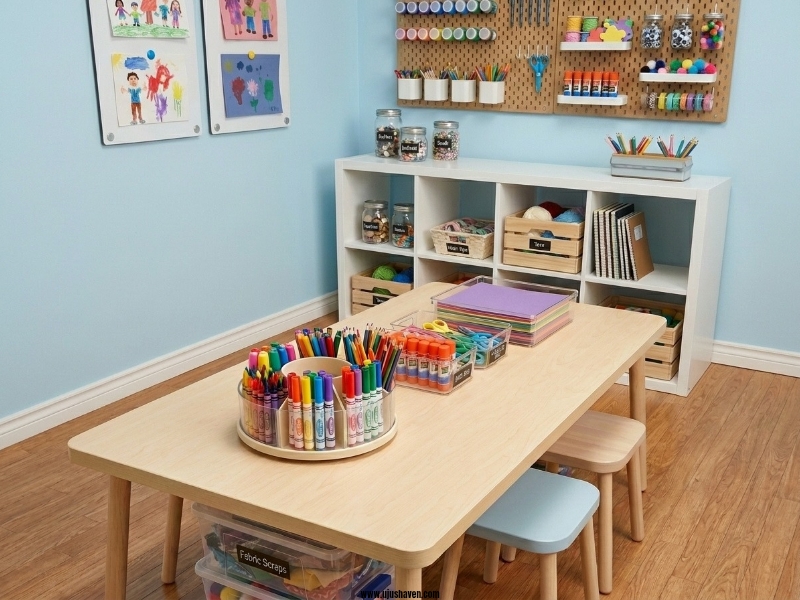
1. The Table-and-Basket Craft Station
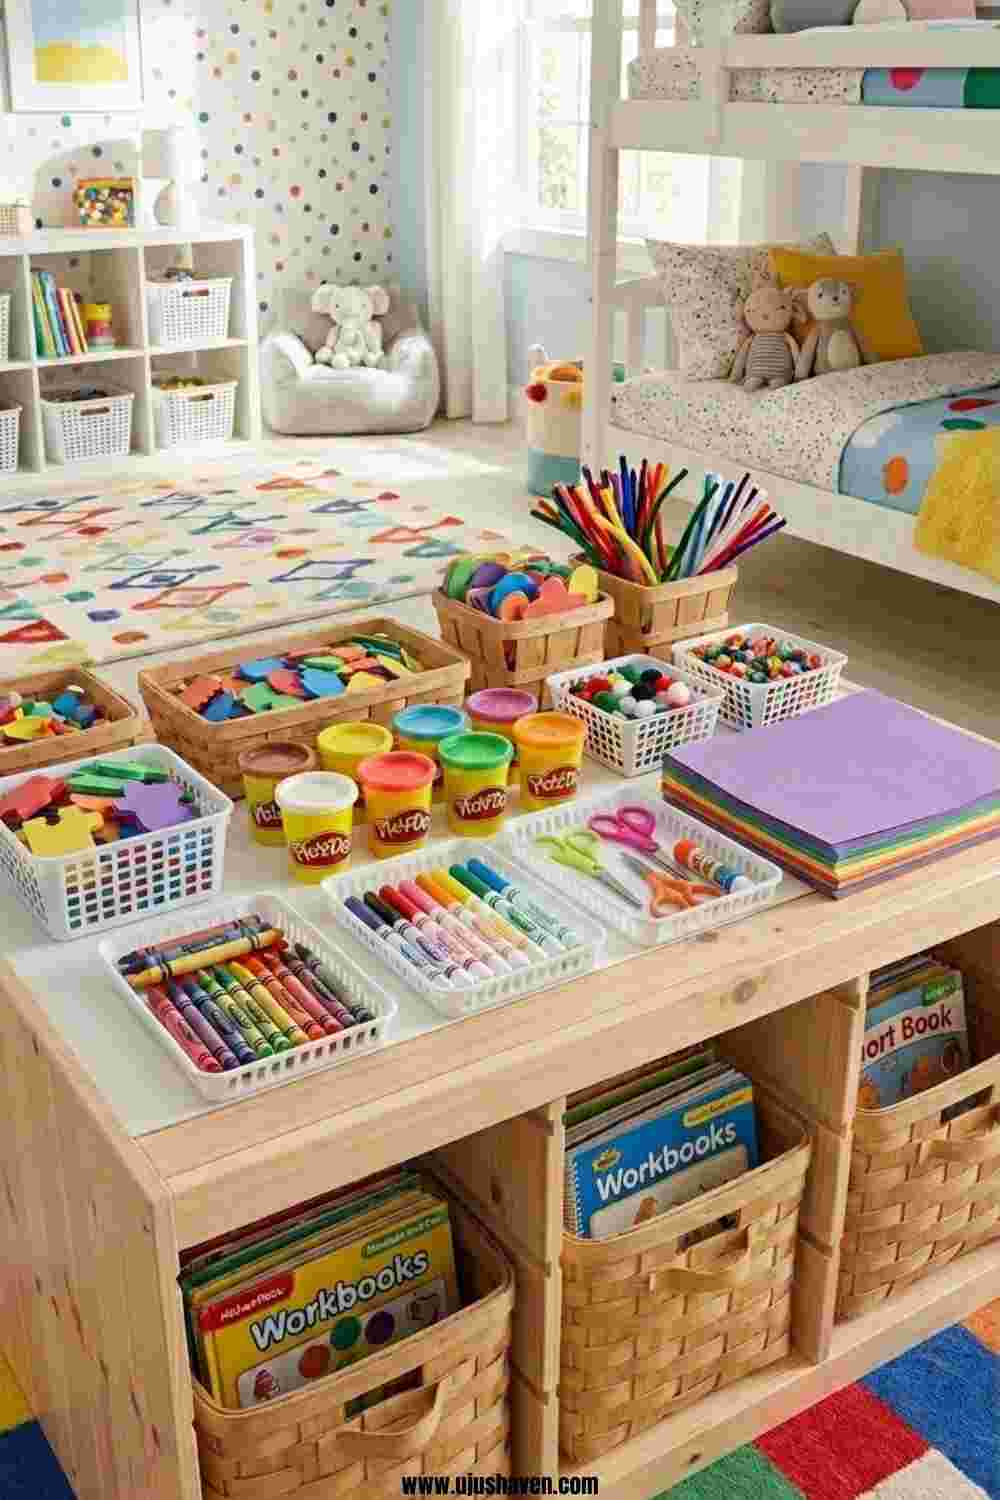
A small table paired with a few baskets or bins is one of the most straightforward ways to create a dedicated space for creative work.
The table gives children a surface that belongs to them, and the baskets hold the supplies they reach for most often.
This setup works particularly well in a bedroom, a playroom corner, or any area where a child tends to naturally settle in.
Keeping the baskets limited to everyday supplies means the table stays clear enough to actually work at, and tidying up at the end of a session is as simple as putting things back into the right basket.
It requires very little investment to set up and even less effort to maintain.
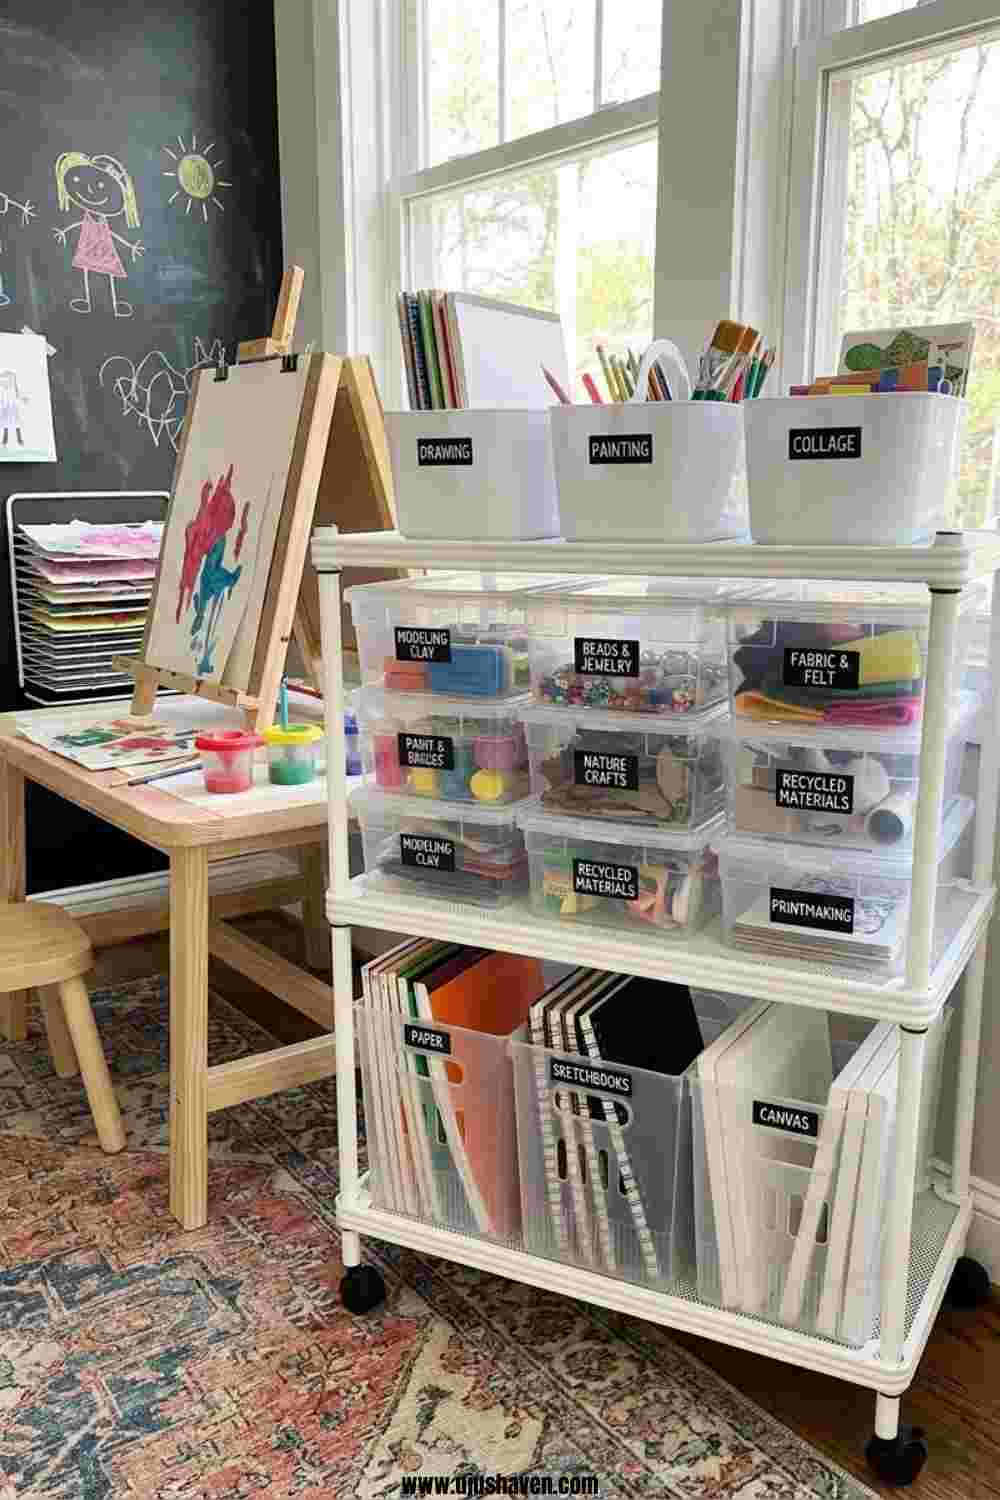
2. The Rolling Cart Craft Station
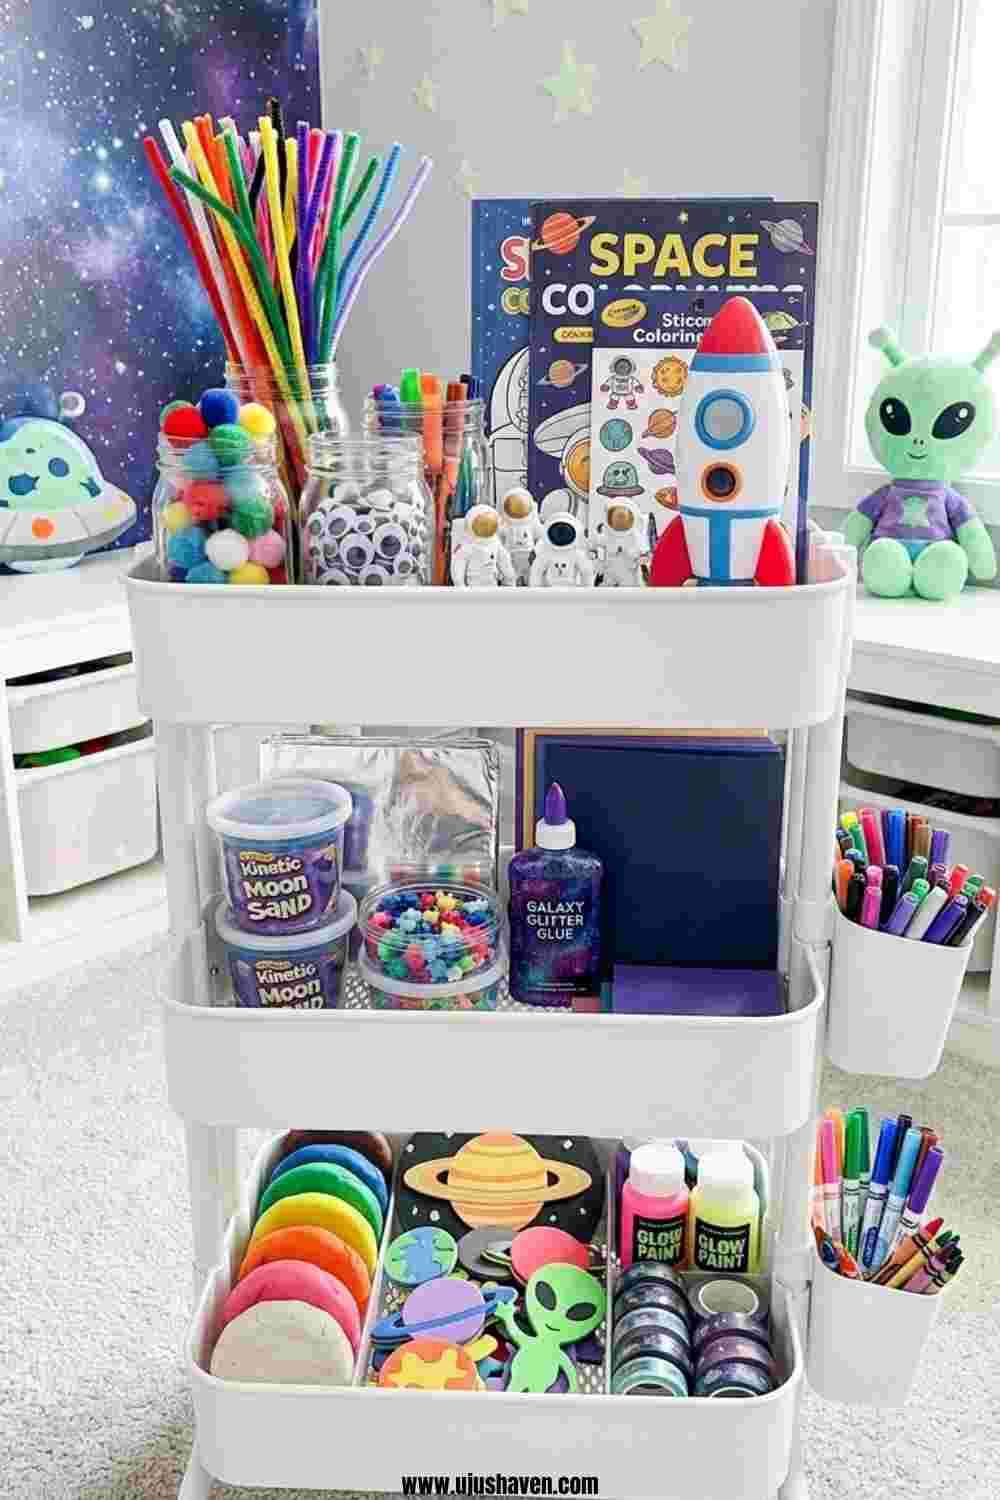
A rolling cart brings a quiet kind of flexibility that a fixed shelf cannot.
It can move from room to room, tuck beside a desk when it’s not in use, or roll out to the kitchen table when a project calls for more space.
Each drawer or tier can hold a different category of supplies, making it easy for children to find what they need without pulling everything out first.
As a DIY craft station for kids, a rolling cart is one of the most practical options available because it adapts to the space rather than requiring the space to adapt around it.
It works equally well in small apartments and larger homes.
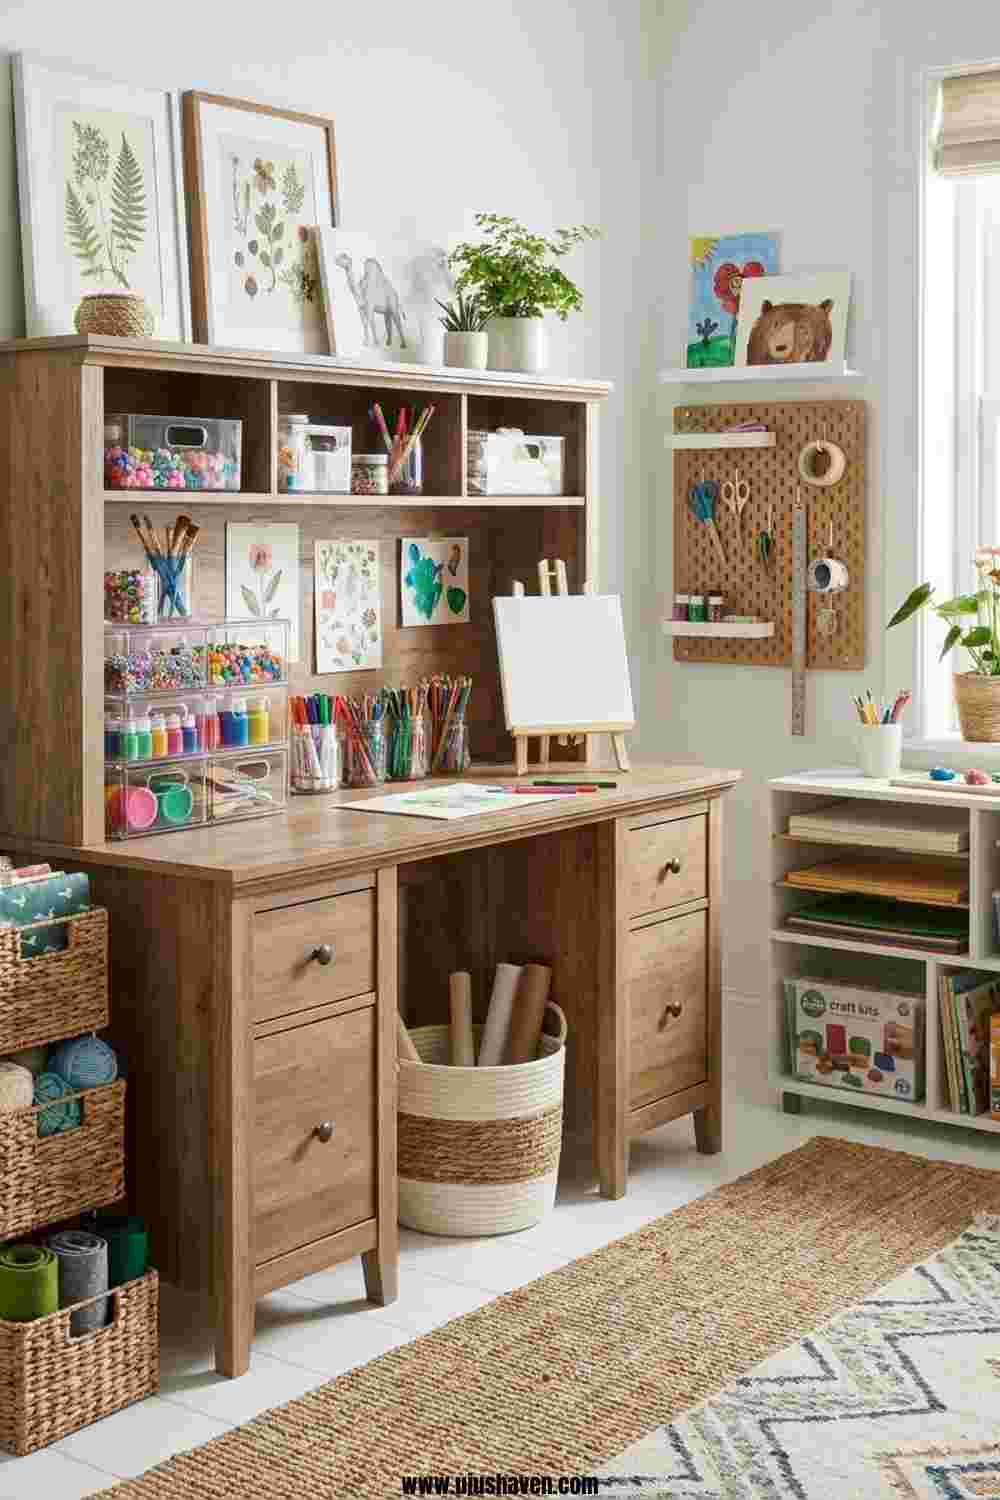
3. The Closet Craft Station
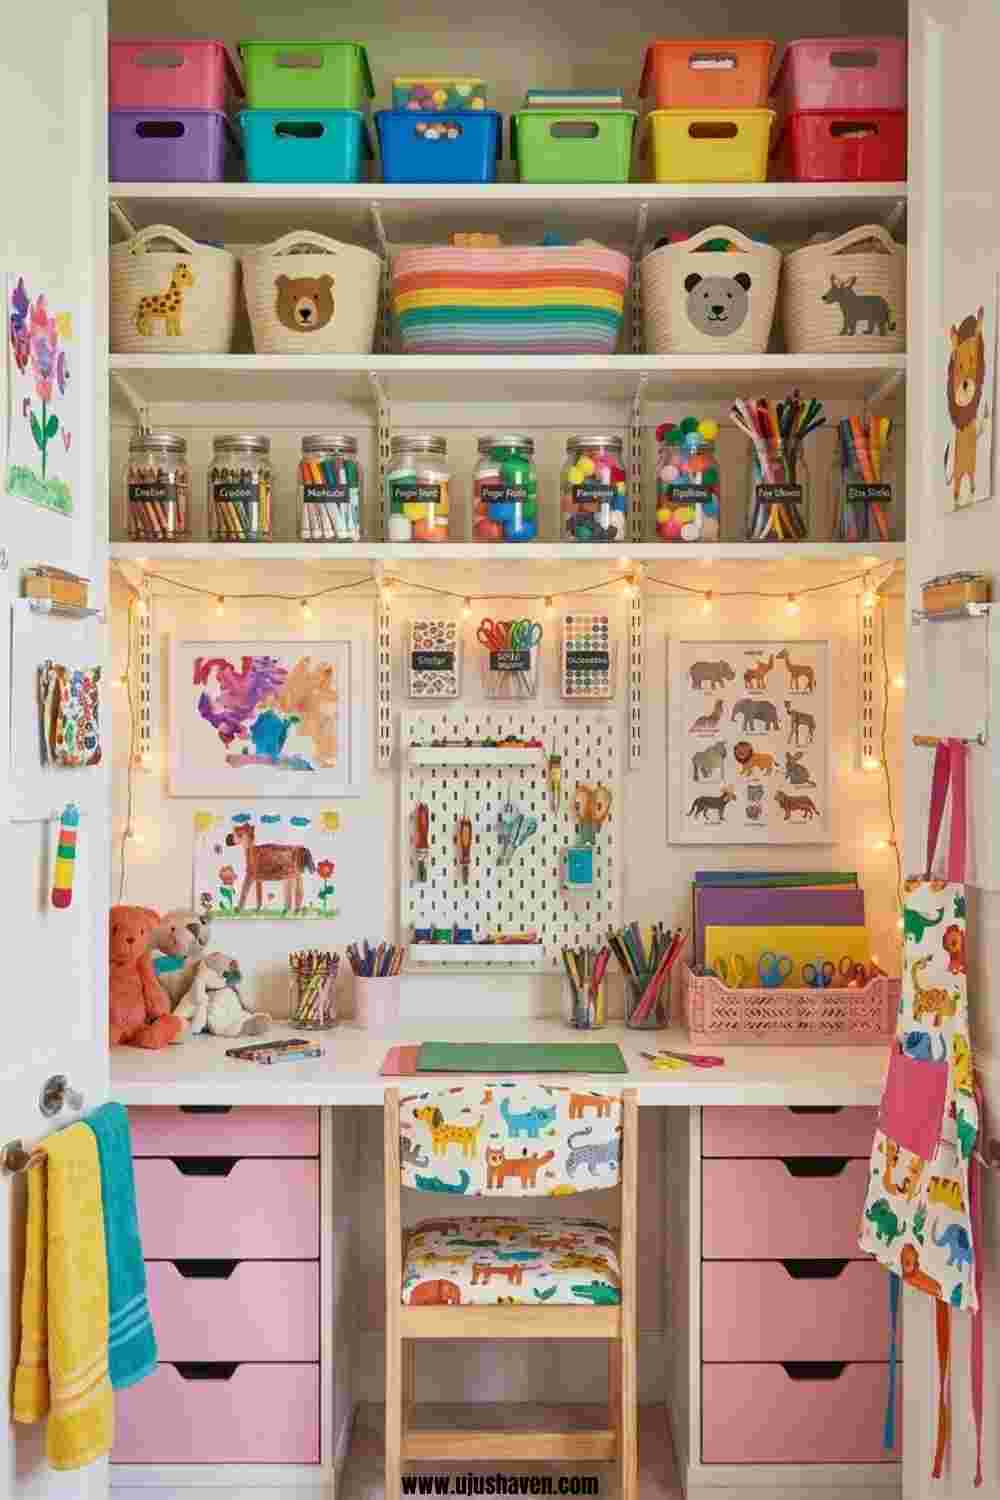
A closet that’s been cleared out and fitted with a few shelves becomes one of the most contained and functional kids arts and crafts station setups a home can have.
Supplies stay behind closed doors when not in use, which keeps the surrounding space feeling calm and uncluttered.
Open the doors and everything is visible, organized, and within reach.
Adding a small fold-down surface or a stool makes it possible to work directly from the closet without moving supplies elsewhere.
This kind of setup suits families who want creativity to have a clear home without it spilling into the rest of the living space.
4. The Shared Family Space Craft Station
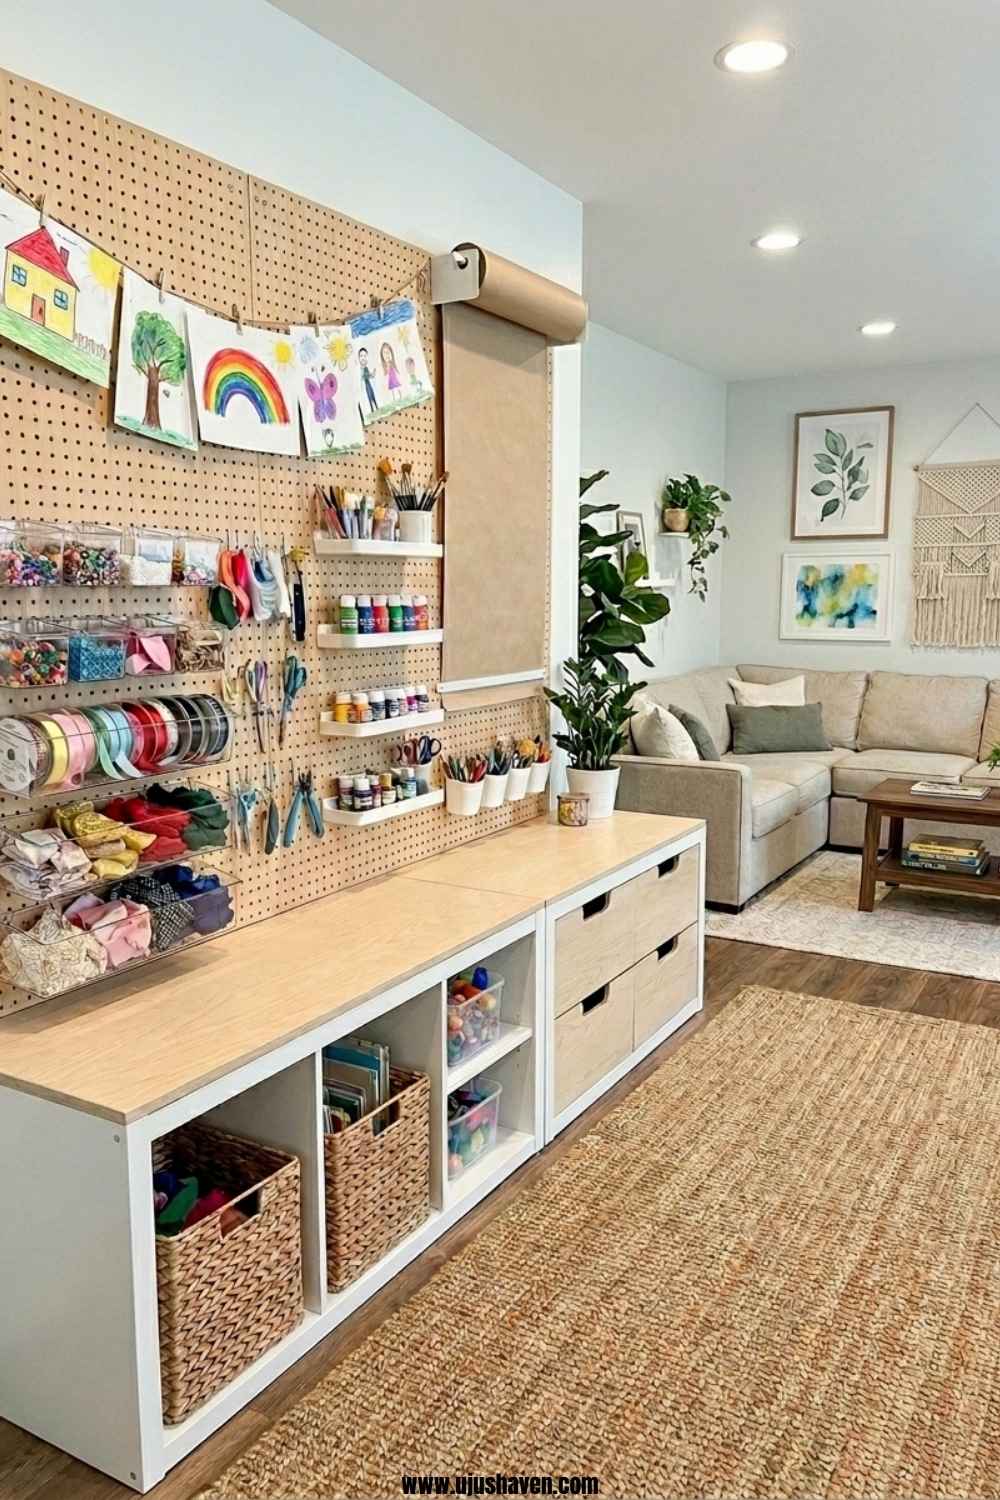
In many homes, crafting happens where the family gathers, at the kitchen table, in the living room, or wherever there’s room to spread out.
A home craft station for kids in a shared space works best when supplies are stored in a way that makes them easy to bring out and put away without disrupting the rest of the room.
A dedicated cabinet, a shelf with labeled bins, or a basket tucked into a corner can all serve this purpose without making the shared space feel taken over.
The key is creating a system that’s easy enough for children to manage independently, so the supplies come out and go back without the process becoming something that falls to one person every time.
How to Organize Arts and Crafts Supplies by Age Group
One of the quieter reasons organizing systems stop working is that they were built for the idea of a child rather than the actual child using them.
Age makes a real difference, not just in what supplies are appropriate, but in how a child interacts with a space, how independently they can find and return things, and what kind of projects they’re drawn to.
Thinking about organize arts and crafts supplies through the lens of age group brings a level of specificity that makes the system genuinely easier to maintain over time.
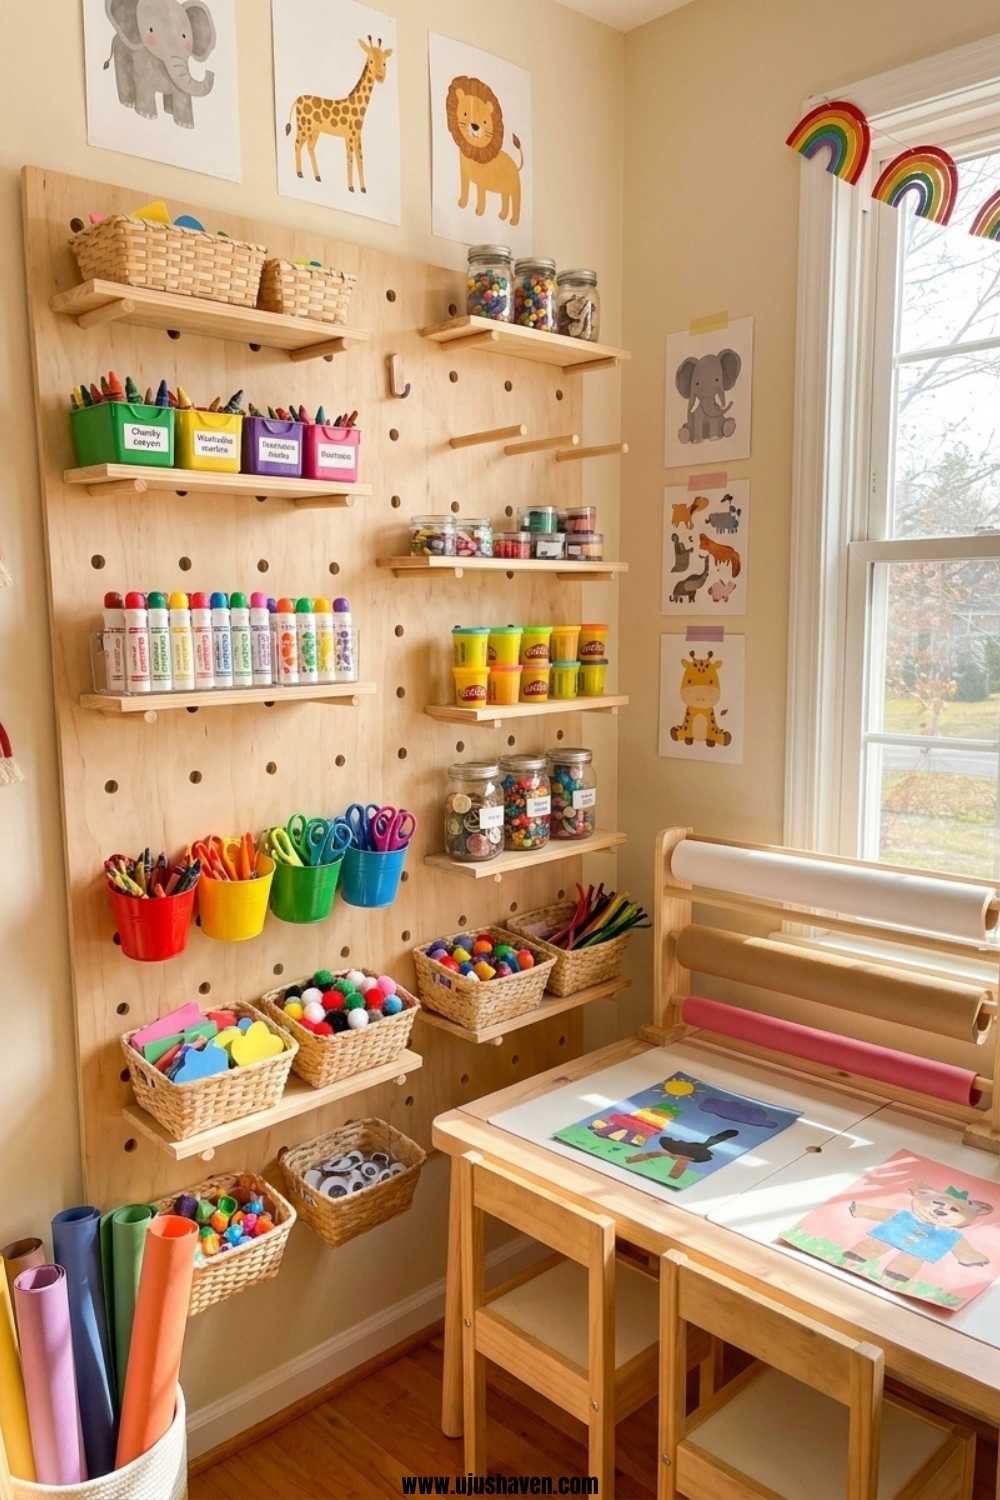
1. Toddlers and Preschoolers (Ages 2–5)
At this age, accessibility and simplicity are everything.
Young children are drawn to whatever they can see and reach, which means the storage system needs to work with that instinct rather than against it.
What works well:
- Open bins at floor or low shelf level for crayons, chunky markers, and washable paints
- A small number of clearly defined spots rather than many categories
- Washable supplies stored where they can be reached independently
- Everything else, including scissors, glue, and anything with small parts, stored higher up and brought out with adult involvement
The goal at this stage isn’t a perfectly curated kids art supply organization setup.
It’s a space that invites creativity without requiring a parent to retrieve every single item.
Keeping the accessible supplies limited to a small rotation also means less overwhelm for young children, who tend to engage more deeply when they’re not faced with too many choices at once.
Rotating supplies in and out every few weeks keeps things feeling fresh without adding more to the space.
Looking for a simple first project to try in the newly organized space? This watermelon craft is exactly the kind of easy win young kids love.
2. Elementary-Age Kids (Ages 6–10)
Children in this age group are ready for more independence, which means the organizing system can ask a little more of them.
They can follow labeled categories, return things to specific spots, and manage a wider range of supplies without as much adult oversight.
What works well:
- Labeled bins or drawers organized by supply type
- A dedicated spot for works in progress so unfinished projects don’t take over shared surfaces
- Scissors, tape, and glue stored at their level since they can use these responsibly
- A small supply of paper, notebooks, or sketchbooks within easy reach
Organizing art supplies for kids this age is also a good opportunity to involve them in the process.
When children help decide where things go, they’re more likely to return things to the right place because the system makes sense to them.
A simple label with a word and a small drawing or photo works well for kids who are still building their reading confidence.
Once the supplies are sorted and within reach, these popsicle stick crafts give kids a genuinely fun reason to use them.
3. Tweens and Older Kids (Ages 11+)
Older children often move into more project-focused creative work, which means their storage needs shift from general supply organization to something that supports longer, more involved creative sessions.
What works well:
- Supplies grouped by project type rather than just by item category
- A dedicated space for ongoing projects that can be left out safely
- Specialty supplies like acrylic paints, fine-tip pens, or craft tools stored separately from everyday basics
- A small personal space they feel ownership over, even if it’s just a shelf or a section of a shared area
Art and craft storage for kids this age works best when it’s built around their specific interests rather than a general template.
A child who draws constantly needs something different from one who builds models or works with fabric.
Letting their creative habits guide the system tends to produce something they’ll actually maintain.
4. Families With Multiple Age Groups
When children of different ages share the same supplies or the same space, the organizing system needs to account for more than one set of needs at once.
The most practical approach is to think in layers.
A simple layered approach:
- Lower, open storage for younger children with only safe, age-appropriate supplies
- Middle shelving for shared everyday supplies that all ages use
- Higher or closed storage for supplies that older children use independently but younger ones shouldn’t access unsupervised
This kind of setup makes it possible to organize kids craft supplies in a way that gives each child an appropriate level of access without creating separate systems for every age group.
It also tends to grow with the family naturally, since the layers can be adjusted as children get older without rebuilding the whole system from the beginning.
DIY Craft Station on Any Budget
A well-organized craft space doesn’t require a trip to a specialty store or a significant investment in matching containers.
Most of what’s needed to create a functional DIY craft station already exists in some form around the house, and what isn’t already available can usually be found inexpensively.
The pressure to buy a complete organizing system before getting started is one of the quieter reasons people put it off longer than necessary.
1. Organizing With What You Already Have
Before purchasing anything, it’s worth walking through the house with fresh eyes.
Storage solutions have a way of hiding in plain sight.
Things already at home that work well:
- Shoeboxes and lidded cardboard boxes for grouping supply categories
- Mason jars or tall drinking glasses for holding markers, brushes, and scissors upright
- Muffin tins for sorting small items like buttons, beads, or erasers
- Stackable food containers for paper scraps and leftover materials
- Baskets and tote bags for corralling supplies that need to move between rooms
Pulling these things together and assigning each one a category is often enough to create a basic DIY kids craft organization system that functions well from the first day.
Starting with what’s already available also gives a clearer sense of what’s genuinely missing before spending anything at all.
2. Budget-Friendly Dollar Store Solutions
Dollar stores carry a surprisingly useful range of storage options that work well for craft supply organization without the premium price attached to dedicated organizing products.
Worth looking for:
- Small plastic bins and baskets in uniform sizes that stack or sit neatly side by side
- Ziplock bags in various sizes for grouping smaller supplies by category
- Plastic drawer organizers that fit inside existing shelves or drawers
- Adhesive labels or blank sticker sheets for marking containers clearly
- Small buckets or cups that hold upright supplies like colored pencils and paintbrushes
Budget craft organization doesn’t mean settling for something that looks makeshift.
Dollar store bins lined up on a shelf with simple labels can look considered and function just as well as more expensive alternatives.
3. Simple Upcycling Ideas for Storage
Upcycling everyday items into storage is one of the most practical approaches to affordable craft storage ideas, and it tends to produce results that feel more personal than anything purchased ready-made.
Simple ideas that work:
- Empty coffee cans or large food tins wrapped in paper or fabric for holding bulkier supplies
- Glass jars of varying sizes grouped together on a tray for a collected, cohesive look
- Cereal boxes cut down and covered to create drawer dividers or open-top bins
- An old wooden crate stood upright and fitted with small containers inside
- A repurposed spice rack mounted low on a wall for small bottles of paint or glue
These kinds of solutions make it possible to put together a functional DIY craft storage setup with very little cost involved.
They also have a way of making the space feel a little more lived-in and considered, which is often more inviting for children than a perfectly matching set of store-bought containers.
The Craft Cupboard Setup
A cupboard dedicated to craft supplies has a way of becoming one of the most useful spaces in a home, or one of the most frustrating, depending entirely on how it’s set up.
The difference usually comes down to a few quiet decisions made at the beginning about what goes where and why.
When those decisions are made with intention, the cupboard starts to feel like a system rather than a place where things get put away and forgotten.
What Belongs on Top Shelves
Top shelves are best reserved for supplies that don’t need to be accessed often or that require adult involvement when they are.
Good candidates for higher storage:
- Specialty materials like glitter, sequins, and small embellishments that are better used with supervision
- Seasonal or holiday craft supplies that rotate in and out a few times a year
- Backup stock of everyday supplies like extra paper, additional paint sets, or spare glue sticks
- Anything with small parts that younger children in the home shouldn’t reach independently
Keeping these items higher up isn’t about restricting creativity.
It’s about making sure the supplies that need a little more care are used in a way that makes sense for the age and stage of the children using the space.
What Kids Should Reach Easily
The middle section of a cupboard is where the most-used supplies belong.
This is the zone that supports independent creative work, the supplies a child can find, use, and return without needing to ask for help.
What works well at eye and hand level:
- Everyday drawing supplies like crayons, markers, and colored pencils
- Child-safe scissors and glue sticks
- A small selection of paper in the colors and sizes used most often
- Sketchbooks or notebooks for ongoing creative work
- Basic painting supplies if painting is a regular activity
When children can access what they need without assistance, they’re more likely to tidy up after themselves as well.
The easier the system is to navigate, the more naturally it tends to be maintained.
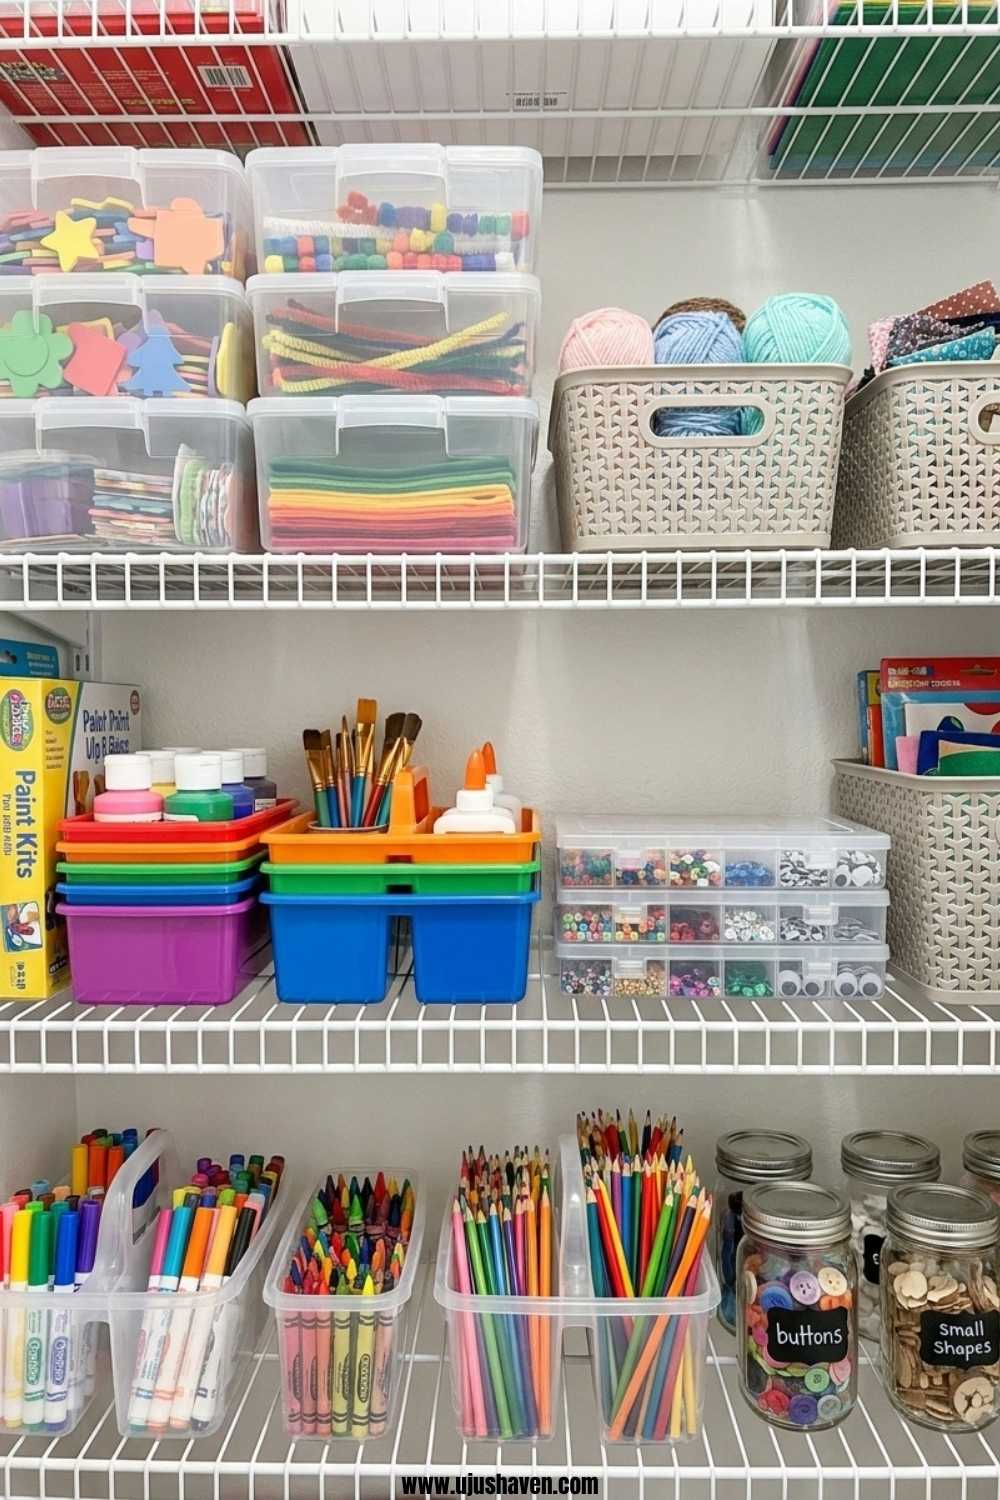
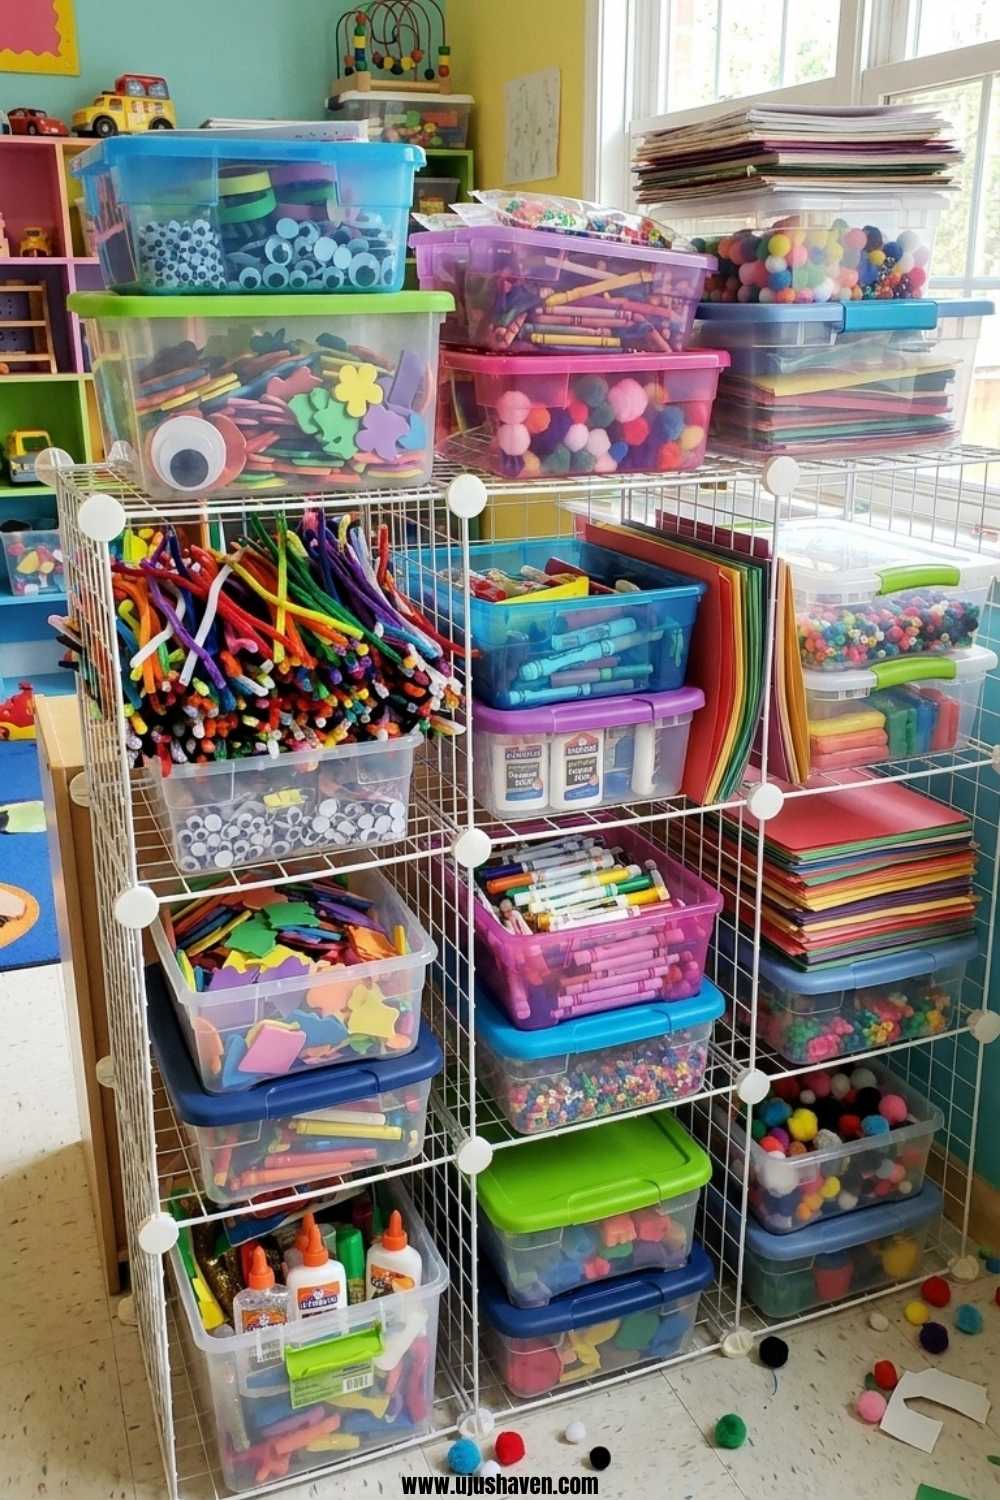
Using Clear Containers and Labels
Clear containers do quiet work inside a craft cupboard.
When supplies are visible without opening anything, children can find what they need quickly and return things to the right place without second-guessing.
This small detail makes a noticeable difference in how smoothly the space functions day to day.
Labels add another layer of clarity, particularly in homes with younger children or multiple people sharing the same space.
A label doesn’t have to be elaborate to be effective.
Simple labeling approaches that work:
- A printed or handwritten word on a piece of tape
- A word paired with a small drawing for children still building reading confidence
- Color-coded labels that correspond to different supply categories
- Photos of the contents attached to the front of opaque bins
Combining clear containers with simple labels is one of the most straightforward craft supply storage ideas available, and it tends to hold up over time because the logic is easy for everyone in the household to follow.
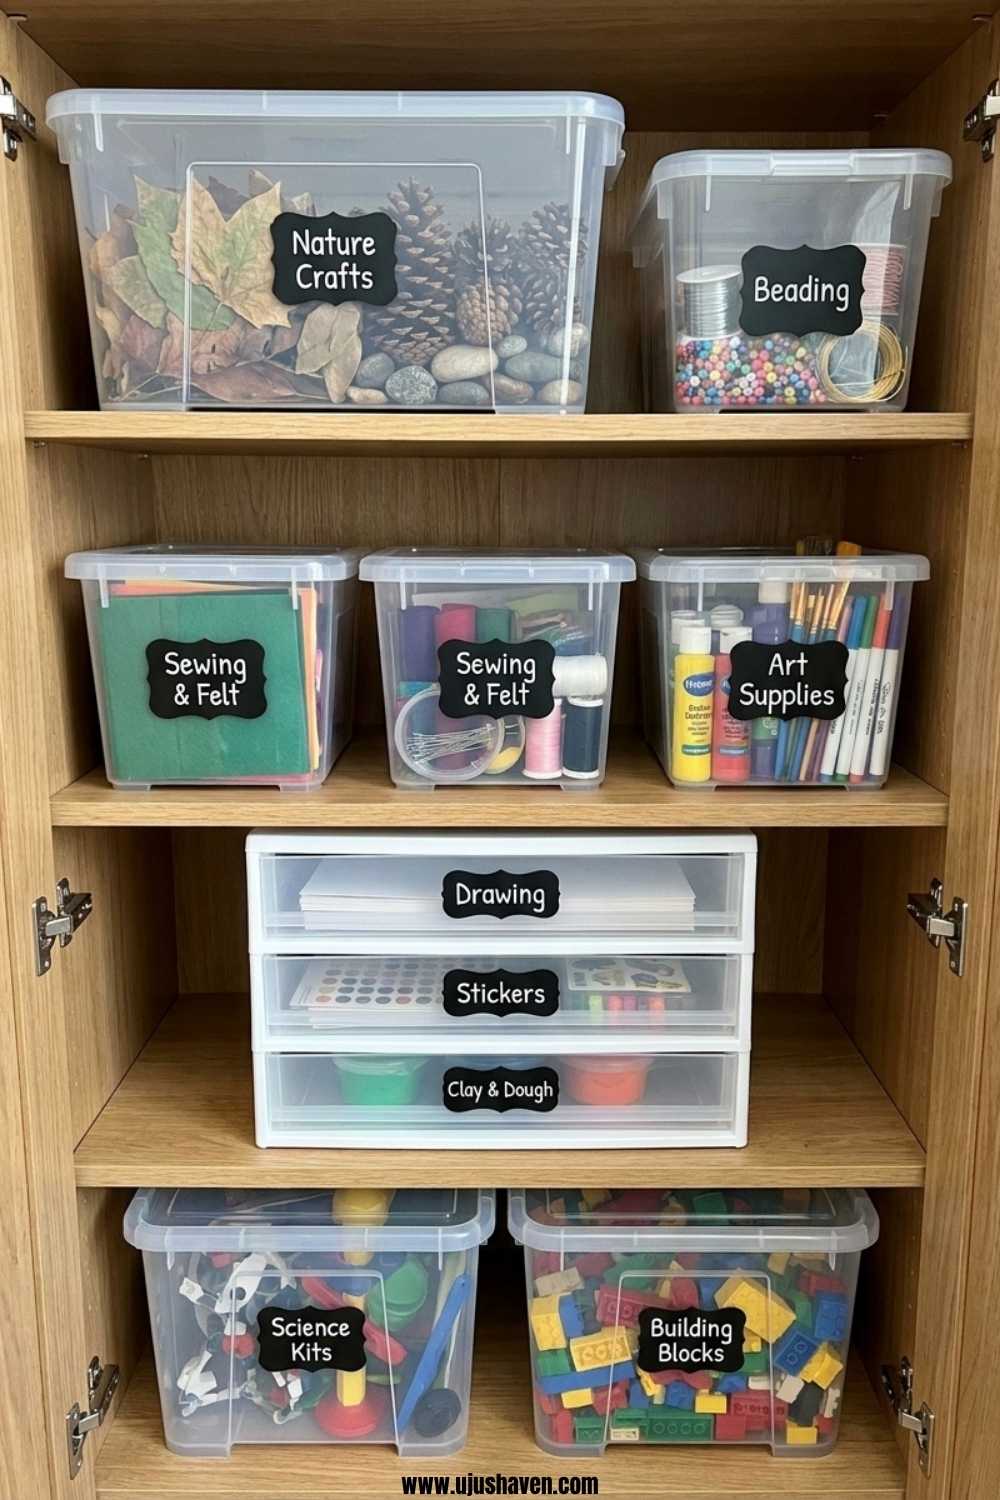
Creating Zones Inside the Cupboard
Zones turn a cupboard full of supplies into something that functions more like an organized craft supply storage system.
Each zone holds one category of supplies and stays dedicated to that category, which means everything has a place and putting things away becomes a matter of returning them to the right zone rather than finding somewhere they fit.
A simple zone breakdown for a standard cupboard:
- Drawing zone – markers, crayons, colored pencils, fine-tip pens
- Paper zone – construction paper, cardstock, notebooks, sketchbooks
- Adhesives zone – glue sticks, liquid glue, tape, double-sided tape
- Painting zone – paints, brushes, palettes, protective coverings
- Specialty zone – seasonal supplies, project kits, materials used occasionally
This kind of structure makes it genuinely easier to organize craft supplies in a way that stays manageable, because restocking, tidying, and finding things all follow the same simple logic.
When a zone starts to feel crowded, it’s also a natural signal that it’s time to reassess what’s being kept and whether everything in that category still belongs.
How to Keep It Organized After Day One
Getting everything sorted and put away feels good.
The harder part, and the part most organizing guides quietly skip over, is what happens the following week.
Knowing how to organize kids craft supplies is only useful if the system holds up past the first few days.
The good news is that maintaining a craft space doesn’t require a second big effort.
It requires a few small habits done consistently enough that they become part of how craft time naturally works in the home.
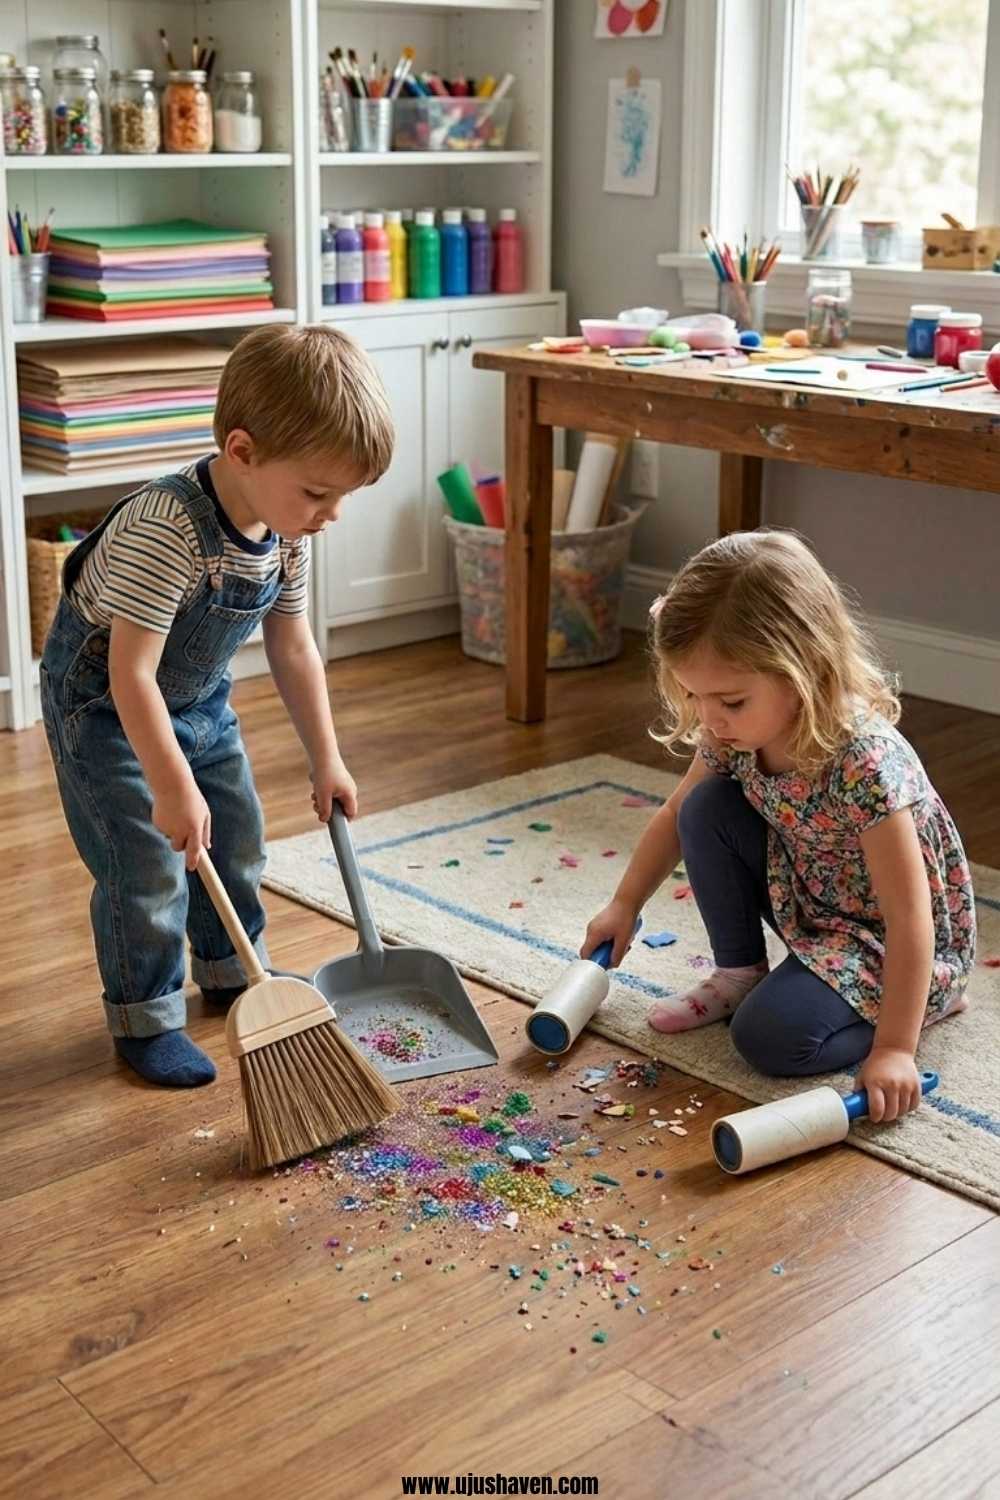
1. Build a Five-Minute Cleanup Routine
Five minutes at the end of a craft session is usually enough to return a space to a functional state, provided the system is simple enough to follow without much thinking.
What five minutes can cover:
- Caps back on markers and pens
- Scissors and glue returned to their designated spot
- Scraps sorted into the paper bin or discarded
- Brushes rinsed and laid flat if painting was involved
- Anything that drifted out of its zone returned to the right place
The routine works best when it happens at the same point every time, right at the end of craft time rather than later in the day when the moment has passed.
Children who know the routine is coming tend to move through it without much resistance, especially when it’s been part of the process from the beginning.
2. Make Cleanup Part of Craft Time
One of the quietest shifts that helps keep craft supplies organized over time is treating cleanup as the natural ending to a creative session rather than a separate task that follows it.
When tidying is framed as part of craft time rather than the thing that happens after, it tends to meet less resistance and take less effort.
Simple ways to build this in:
- Give a short heads-up a few minutes before craft time ends so the transition feels gradual
- Tidy together the first few times so children understand what returning things properly actually looks like
- Keep the system simple enough that a child can complete the cleanup independently without guidance every time
A craft organization system that children can manage on their own is one that tends to last.
When the steps are clear and the expectations are consistent, cleanup becomes something that happens rather than something that has to be negotiated.
3. Do a Monthly Supply Reset
Even a well-maintained space benefits from a brief reset once a month.
This doesn’t need to be a full reorganization.
It’s more of a quiet check-in to make sure the system is still working the way it was intended.
What a monthly reset might include:
- Checking for dried-up or depleted supplies that need to be replaced or removed
- Returning anything that has drifted into the wrong zone back to its place
- Reassessing whether the current categories still reflect how the space is being used
- Restocking everyday supplies before they run out completely
Organizing craft materials this way on a regular basis keeps small drift from turning into a bigger problem.
It also makes it much easier to how to organize kids craft supplies in a way that genuinely holds, because the system gets a little attention before it has a chance to quietly fall apart.
Common Kids Craft Organization Mistakes to Avoid
Most organizing attempts that don’t last can be traced back to a small number of patterns that are easy to fall into without realizing it.
Knowing what to watch for makes it easier to set up a system that actually holds from the beginning.
1. Buying Storage Before Decluttering
Purchasing bins, baskets, and containers before going through what’s actually there is one of the most common ways an organizing project stalls before it begins.
Storage solutions chosen before decluttering are often the wrong size, the wrong quantity, or simply unnecessary.
Going through everything first means the storage purchased is exactly what’s needed, nothing more.
2. Making the System Too Complicated
A system with too many categories, too many steps, or too many containers to manage becomes harder to maintain than no system at all.
When knowing how to organize kids craft supplies feels like a process that requires effort every single time, it quietly gets abandoned.
The simpler the system, the longer it lasts.
3. Storing Supplies Where Kids Cannot Reach Them
A craft space that requires adult involvement every time a child wants to create something tends to get used less over time.
Everyday supplies belong within reach of the children using them.
When kids can access what they need independently, they engage with the space more naturally and are far more likely to tidy up after themselves.
4. Forgetting About Maintenance
Setting up a system and never returning to it is what turns a organized space back into a cluttered one.
Small things drift, supplies run out, and categories slowly stop reflecting how the space is actually being used.
A brief check-in once a month is usually all it takes to keep everything functioning the way it was originally intended.
Creating a Craft Space That Works for Real Family Life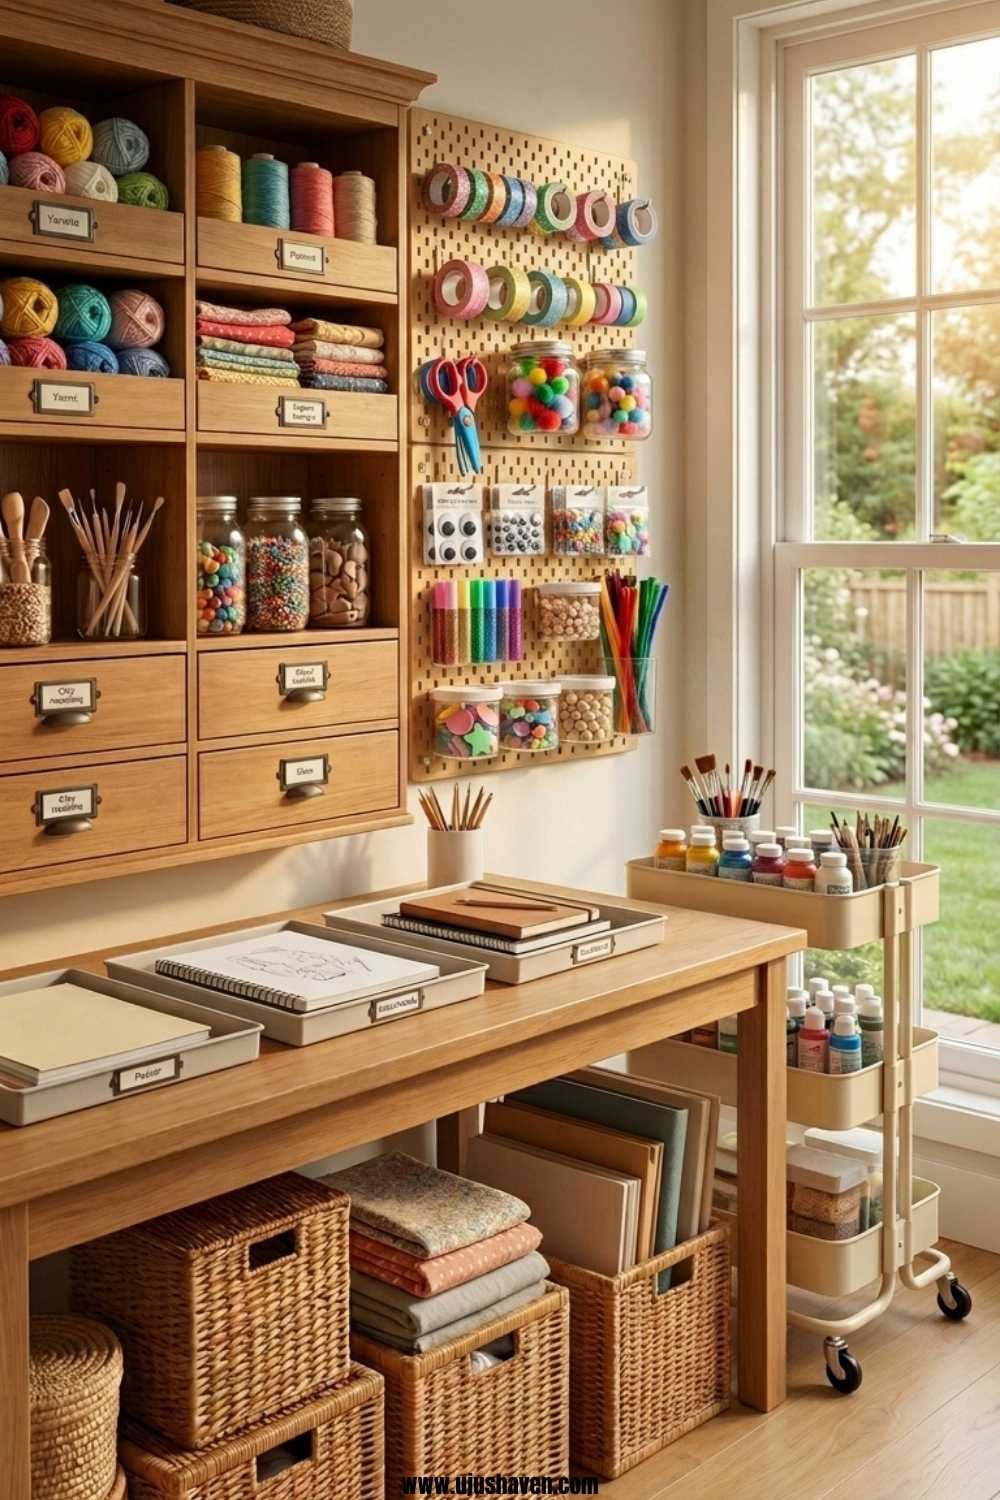
The most useful craft spaces are rarely the most elaborate ones.
They’re the ones that fit quietly into the rhythm of how a family actually lives, flexible enough to handle a busy Tuesday afternoon and simple enough that a child can navigate them without help.
That’s the kind of space worth building toward.
Focus on Function, Not Perfection
A craft space doesn’t need to look a certain way to work well.
What matters is whether supplies are easy to find, easy to use, and easy to put away.
When those three things are true, the space does what it’s supposed to do.
Knowing how to organize kids craft supplies in a way that prioritizes function over appearance takes some of the pressure out of the process and makes it easier to get started without waiting for the perfect moment or the perfect setup.
Let the System Evolve With Your Family
A system that works well today may need small adjustments in six months as children grow, interests shift, and the supplies in the space change.
That’s not a sign that something went wrong. It’s just how a living, functional space behaves over time.
The goal was never a permanent solution.
It was a starting point, something that makes daily life feel a little smoother and gives creativity a home it can reliably return to.
When how to organize kids craft supplies is approached that way, the system becomes something that grows with the family rather than something that has to be rebuilt from the beginning every time life changes.
How to Organize Kids Craft Supplies; Your Questions Answered
1. What is the best way to organize kids craft supplies at home?
Start by going through everything before introducing any storage.
Remove what’s dried up, broken, or no longer used, then group similar items together and create categories based on how children actually craft.
Simple, accessible storage that children can navigate independently is usually what holds up best over time.
2. How do I get my kids to help keep craft supplies organized?
Children maintain systems they had some part in creating.
Involving them in decisions about where things go, keeping categories simple enough to follow without much thought, and treating cleanup as a natural part of craft time rather than a separate task all make a quiet difference.
Clear labels and supplies stored within reach remove most of the friction.
3. How often should I reorganize kids craft supplies?
A full reorganization rarely needs to happen more than once or twice a year.
A brief monthly reset, checking for depleted supplies, returning anything that has drifted, and making small adjustments as children’s interests change is usually enough to keep everything functioning well between those moments.
4. What storage works best for small spaces?
Rolling carts, over-the-door organizers, and repurposed containers work well when space is limited.
Keeping only what’s genuinely used, thinking vertically, and maintaining a simple zone system can make even a modest corner feel functional without requiring a dedicated room.
5. Do I need to spend a lot of money to organize kids craft supplies well?
Spending a lot is rarely necessary.
Many functional systems are built from things already in the home, supplemented occasionally with inexpensive finds.
What makes a system hold up over time is the thinking behind it, how supplies are categorized, how accessible they are, and how simple cleanup is.
None of that requires a significant investment to get right.