Halloween chocolate bar ideas usually start with a handful of ordinary candy bars sitting in the shopping cart or leftover from an earlier trip to the store, waiting to become part of a party, classroom treat, or Halloween gift.
The only problem is that once they’re set out as they are, they can feel a little too familiar and easy to overlook.
It’s not that the chocolate is the issue.
Plain wrappers and simple packaging often get lost among all the colorful Halloween treats, making even favorite candy bars look less exciting than they really are.
The good news is that creating something memorable doesn’t mean spending hours crafting or buying expensive supplies.
A few thoughtful details can make an ordinary chocolate bar feel festive without adding extra stress to your Halloween plans.
The ideas ahead show simple ways to turn everyday candy bars into spooky treats that look fun on dessert tables, make great party favors, surprise trick-or-treaters, or add a creative touch to Halloween gift baskets.
Most come together in just a few minutes using easy-to-find supplies.
From playful designs for kids to dressed-up treats for parties and gifts, you’ll find plenty of inspiration to give ordinary chocolate bars a festive Halloween makeover.
Before You Grab the Candy Bowl, Know Which Bars Work Best
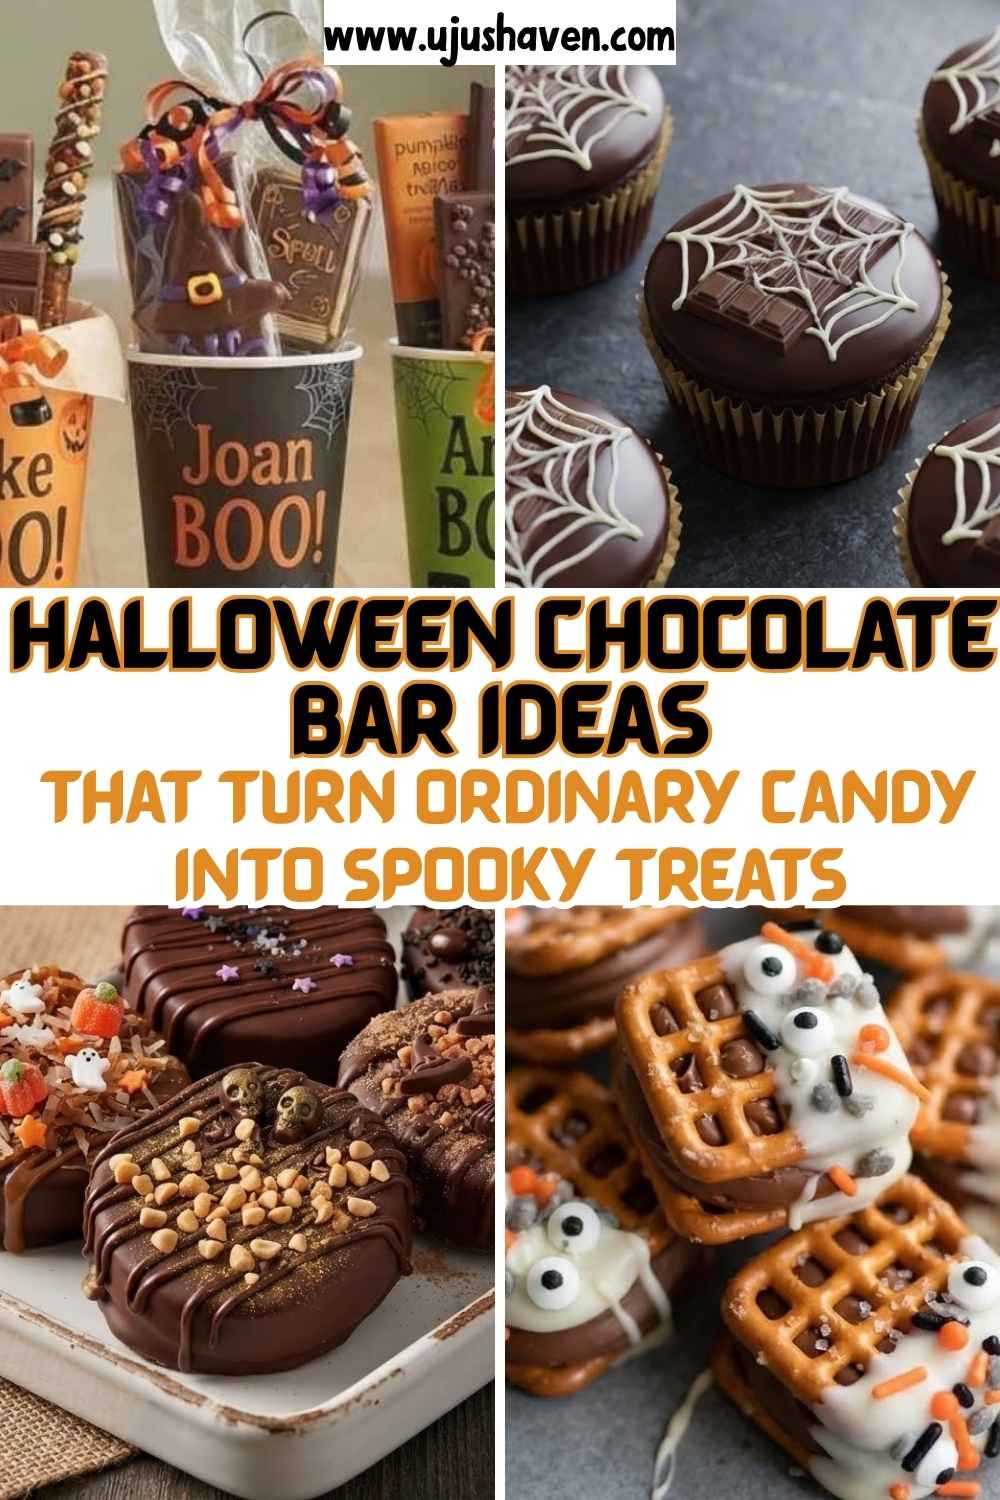
Not every chocolate bar takes decorating the same way, and that’s usually the first thing people run into once they start experimenting with Halloween chocolate bar ideas.
- Flat, rectangular bars (the classic full-size or fun-size candy bars) hold wrappers, stickers, and drizzle the easiest because they have a wide, even surface.
- Bars with a lot of texture on top, like ones with nuts or crisped rice, are harder to dip smoothly but great for drizzle designs since the bumps catch the chocolate in a natural, webbed way.
- Anything wrapped in foil peels and re-wraps more cleanly than plastic wrap, which matters if your idea involves removing the original packaging.
- Chocolate that’s been sitting in a warm car or a sunny kitchen counter should go in the fridge for ten minutes before you touch it. Soft chocolate smudges fingerprints and ruins clean lines fast.
If you’d rather keep the whole project budget-friendly, Easy Dollar Tree Halloween Crafts for Kids: Supplies and Steps for Each One cover supplies and steps for similar low-cost projects.
Once the bars are ready, the fun part is deciding how far you want to take it.
Some of these Halloween chocolate bar ideas take under five minutes.
Others are worth setting aside a quiet evening for, especially if kids want to help.
15 Halloween Chocolate Bar Ideas Worth Trying
1. Mummy-Wrapped Candy Bars
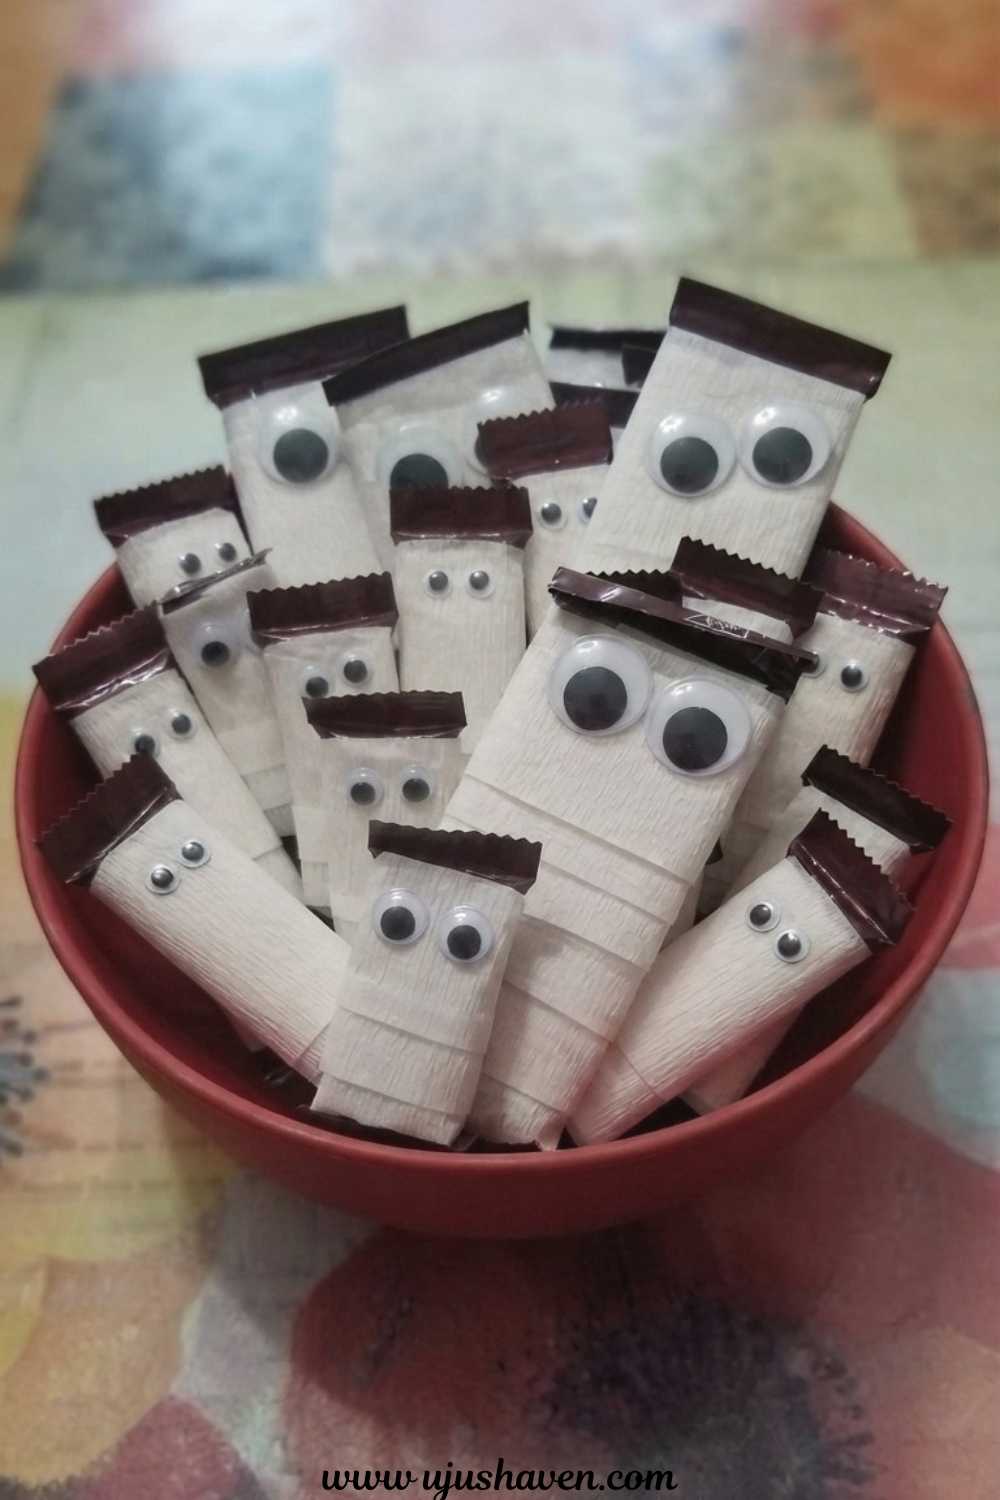
Cut thin strips of white crepe paper, gauze, or even white streamer paper and wind them around the candy bar, crossing the strips over each other so the original wrapper peeks through slightly at the top and bottom.
Glue on two googly eyes near the top, angled a little off-center, and the wrap does the rest.
This is one of the most requested Halloween chocolate bar ideas because it needs no melting, no drying time, and holds up well if the treats sit out for hours.
It’s also one of the easiest to hand off to kids, since winding paper strips is far more forgiving than working with chocolate.
Leave a few gaps uneven on purpose. Real mummy wrap is never perfectly neat, and the slightly messy look is what makes it convincing.
2. Ghost-Dipped Bars

Dip half or all of the bar into melted white chocolate, let it set on parchment paper, then add two small dots and an oval mouth with black gel icing once the coating firms up.
Kids tend to gravitate toward this one first because the shape reads instantly as a ghost, even from across a table.
If you’re short on time, dipping just the top half still gives the same effect and uses less chocolate.
3. Spiderweb Drizzle Bars

Drizzle white chocolate in a spiral over the bar, then drag a toothpick from the center outward in evenly spaced lines to pull the spiral into a web pattern.
Add a small plastic spider on top while the chocolate is still soft so it stays in place.
This idea works particularly well on bars with a smooth dark surface, since the contrast makes the web stand out more than it would on lighter packaging.
4. Black and Orange Washi Tape Wrap
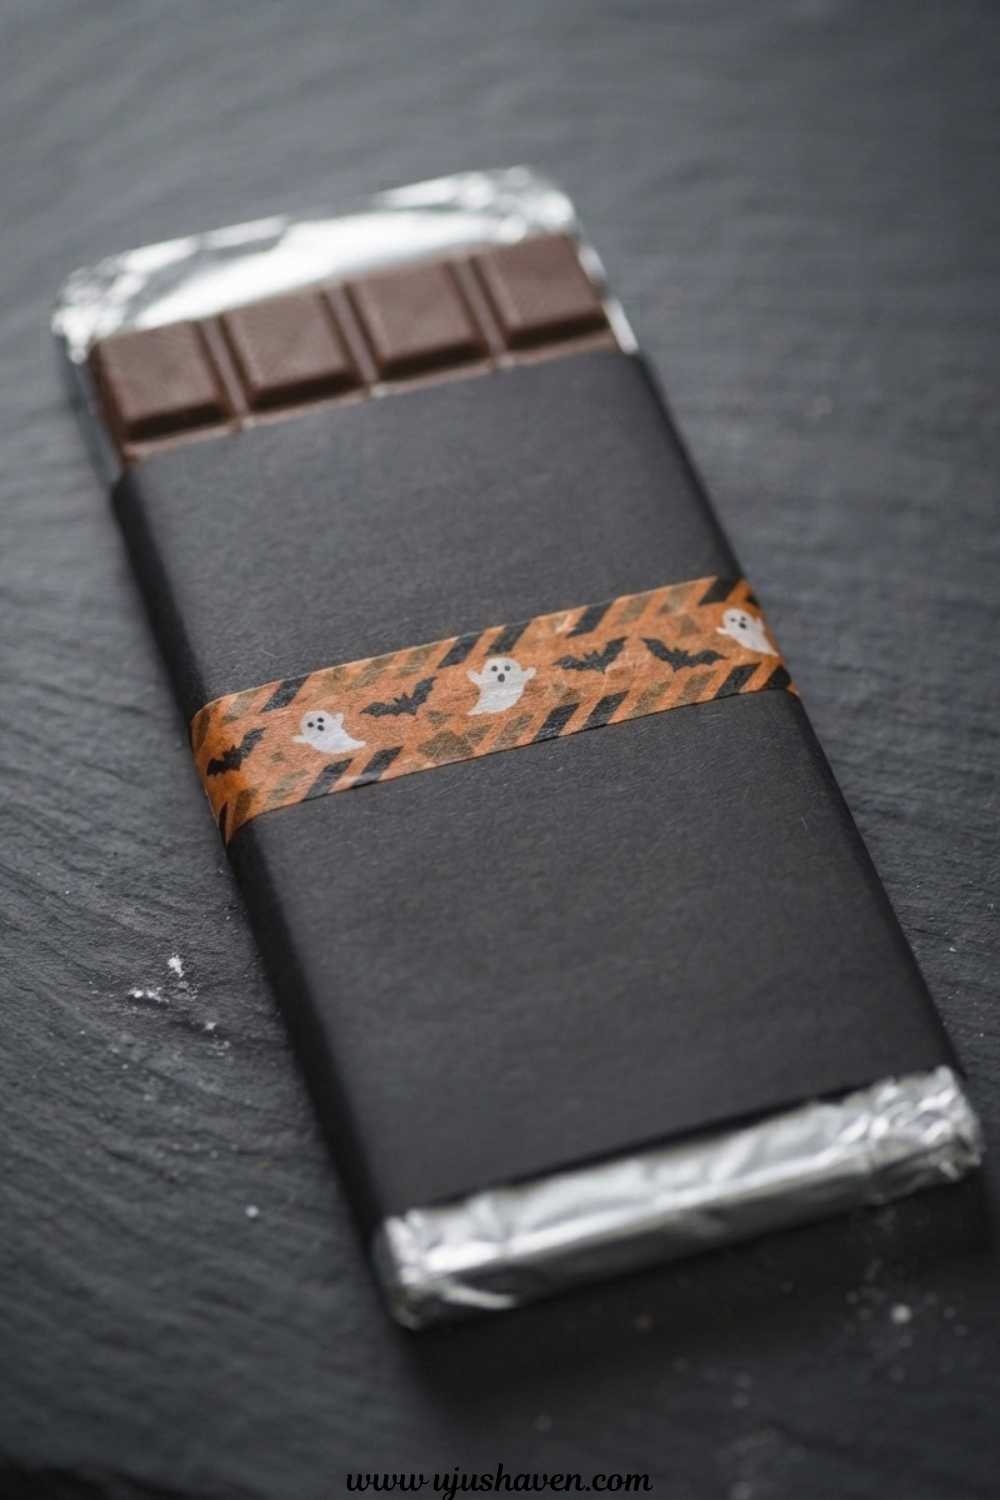
Wrap a strip of Halloween-themed washi tape around the middle of the bar’s original packaging.
No melting, no drying time, no mess.
It’s the fastest of all the Halloween chocolate bar ideas on this list, which makes it useful the night before a party when everything else has taken longer than planned.
Layer two different patterns, like stripes and polka dots, for a bar that looks intentionally styled rather than last-minute.
5. Jack-O’-Lantern Sticker Wrappers

Cover the original wrapper with a printed or store-bought pumpkin face sticker sized to fit.
This is one of the easiest wins for parents making treats with younger kids, since sticking a label on requires no fine motor skill and no risk of melted chocolate anywhere.
The second thought here is printing a few different pumpkin expressions instead of one repeated face.
A row of identical jack-o’-lanterns reads as mass-produced, while a mix of grins and surprised faces feels handmade even though it took the same five minutes.
The ideas people remember most from a treat table are usually the ones with small variation, not the ones where every single piece looks exactly alike.
6. Mini Boo Baskets
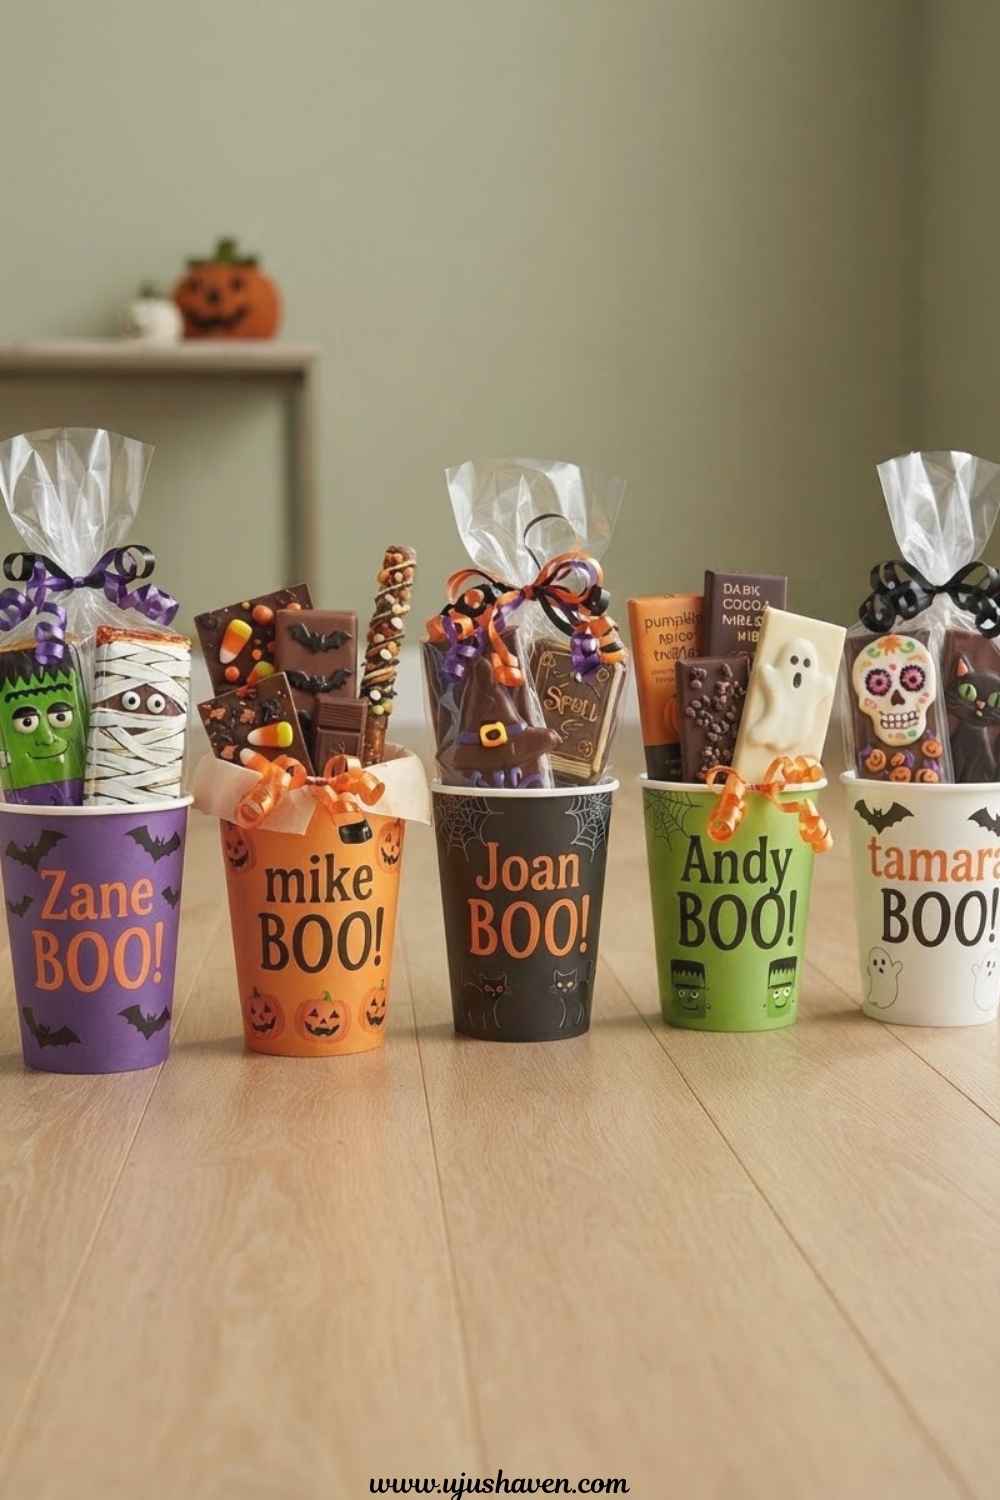
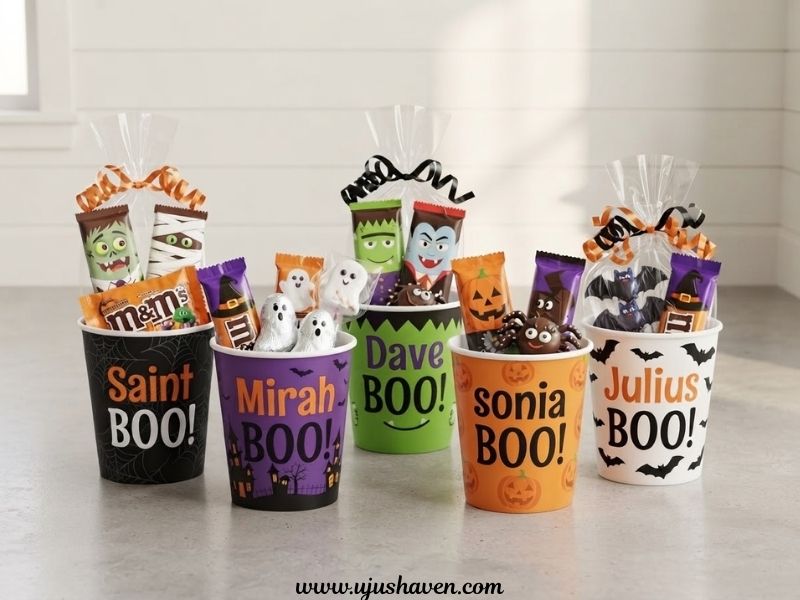
Tuck two or three decorated bars into a small cellophane bag or paper treat cup, gather the top, and tie it with orange or black curling ribbon.
This turns a plain candy bar into something that already looks like a finished gift, which matters if these are headed into Halloween gift baskets rather than a candy bowl.
Add a small tag with a name or a short note if the basket is for a specific person.
It’s a detail that takes seconds but makes the recipient feel like the treat was actually meant for them.
7. Monster Eye Bars

Stick two or three candy eyeballs directly onto the wrapper or onto a strip of melted chocolate along the top edge of the bar.
Uneven spacing and mismatched eye sizes actually make this look more like a friendly monster and less like a random craft, so there’s no need to measure anything.
This is a good one to hand off to kids at a party since the eyes are pre-made and very little can go wrong.
If your kids enjoy quick, low-mess crafts like this one, 20 Easy Pumpkin Painting Ideas for Kids They’ll Be Proud Of make a good pairing activity for the same afternoon.
8. Chocolate Bone Bars
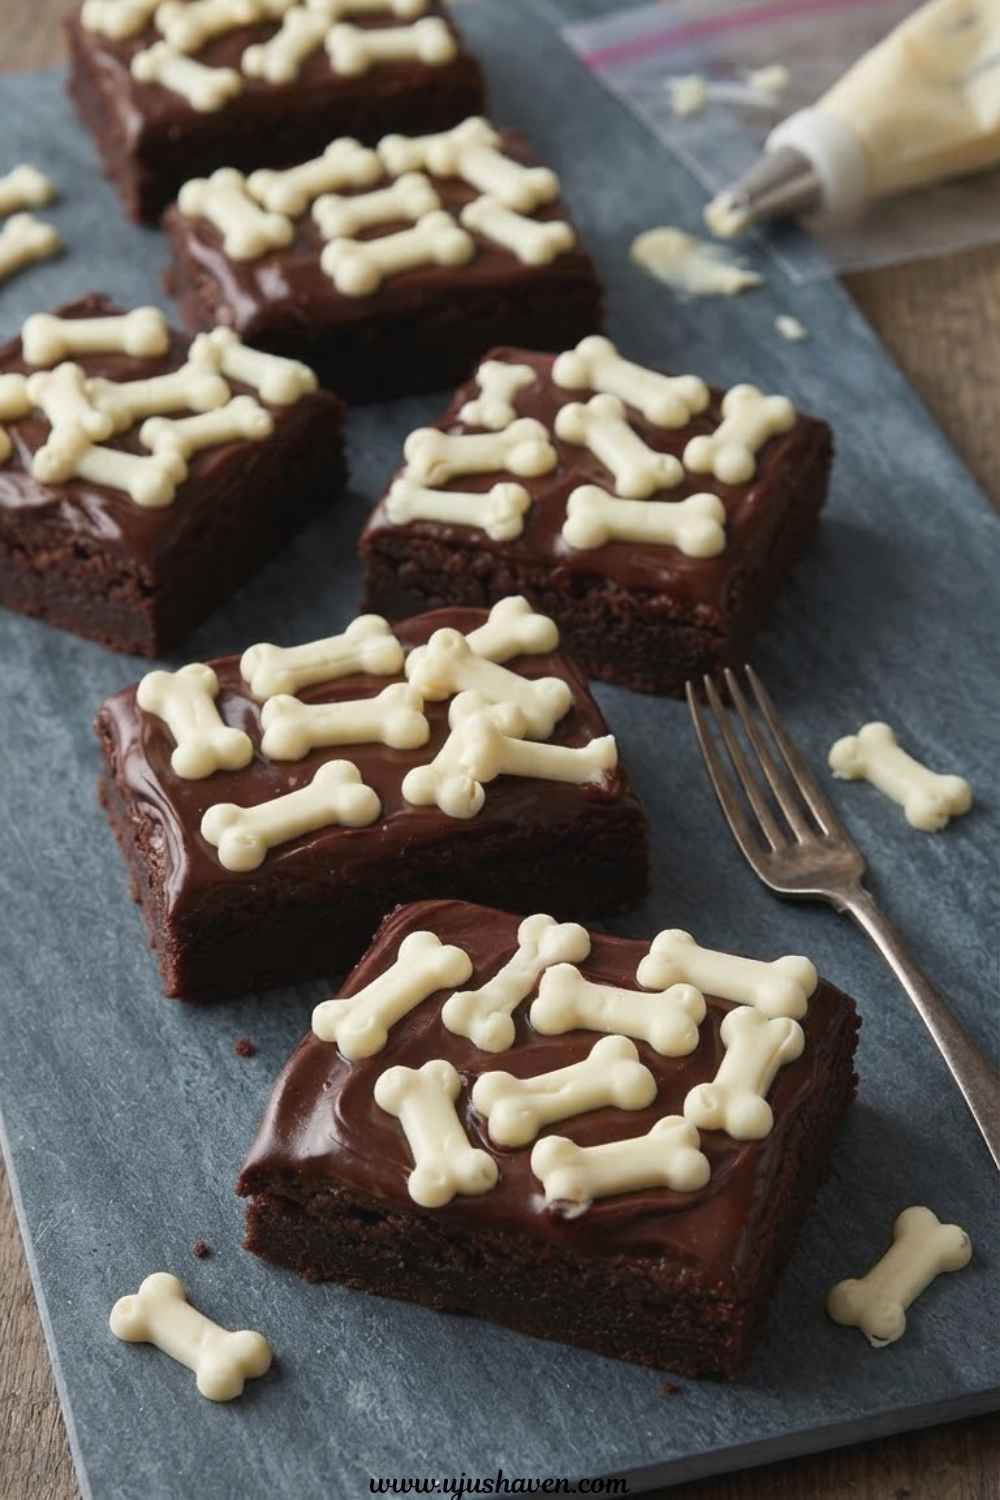
Pipe small white chocolate bone shapes across the top of a dark chocolate bar using a piping bag or a zip-top bag with the corner snipped off.
Let the shapes set for a few minutes before handling.
The practical upside here is shelf life. Unlike some Halloween chocolate bar ideas that involve soft icing, hardened white chocolate holds up well if the treats need to sit out for a few hours at a party without smudging.
9. Ribbon-Wrapped Bars for Gifting

Slide a chocolate bar into a strip of black or orange ribbon, cross it like wrapping paper, and finish with a small bow or a sprig of faux greenery for a slightly more grown-up look.
This idea leans toward adult Halloween gatherings, teacher gifts, or coworker treats rather than trick-or-treaters.
Skip the stickers and drizzle entirely here.
The ribbon alone does the work, and adding extra decoration on top usually makes it look cluttered instead of polished.
10. Personalized Halloween Labels

Design or print small labels with a punny Halloween phrase, like “you’re one in a melon” swapped for a Halloween-appropriate line, and wrap them around the center of the bar.
This is one of the more popular Halloween chocolate bar ideas for classroom parties because teachers can print a full sheet at once and cut them into strips in minutes.
Leave a small blank line on the label for a name if the bars are being handed out individually.
It turns a mass-produced batch into something that feels handed out one at a time.
11. Dipped and Sprinkled Bars

Dip one end of the bar into melted chocolate, then immediately roll the dipped edge in orange and black sprinkles before it sets.
The color contrast does most of the visual work here, so there’s no need for a steady hand or piping skills.
This is a good option if several kids want to help decorate at once, since dipping and rolling is fast and hard to get visibly wrong.
If the ideas so far feel like they lean toward kids’ parties, the next few shift toward a slightly more polished, adult-friendly look.
12. Witch Hat Toppers

Cut a small circle and cone from black cardstock, glue the cone onto the circle to form a mini witch hat, and tape or glue it to the top edge of the bar so it stands upright.
This one takes a little more patience than the others on this list, but it holds up well for centerpiece displays or as a standout piece in a gift basket.
Add a tiny strip of ribbon around the base of the cone for a buckle detail.
It’s a small touch that makes the hat look finished instead of like two shapes glued together.
13. Glow-in-the-Dark Wrap

Wrap the bar in a strip of glow-in-the-dark tape or paper, sized to cover just the middle section.
Charge it under a lamp for a few minutes before the party starts, and the bars will glow softly once the lights go down.
This works best for evening parties or outdoor trick-or-treat stations where the lighting is already low enough for the glow to actually show up.
In full daylight, this detail mostly disappears, so it’s worth saving for the right setting rather than using it on every bar.
14. Candy Bar Grazing Board

Arrange a mix of decorated and plain chocolate bars, cut into smaller pieces, on a wooden board or tray alongside pretzels, popcorn, and a few Halloween-themed candies.
This isn’t a single bar decorated on its own, but it’s one of the Halloween candy bar ideas that gets requested most for parties because it turns individual treats into a shareable centerpiece.
Group the darker and lighter chocolates in separate clusters rather than mixing them randomly.
The color blocking makes the board look styled instead of thrown together, even if it only took a few minutes to arrange.
15. Bat Silhouette Cutouts
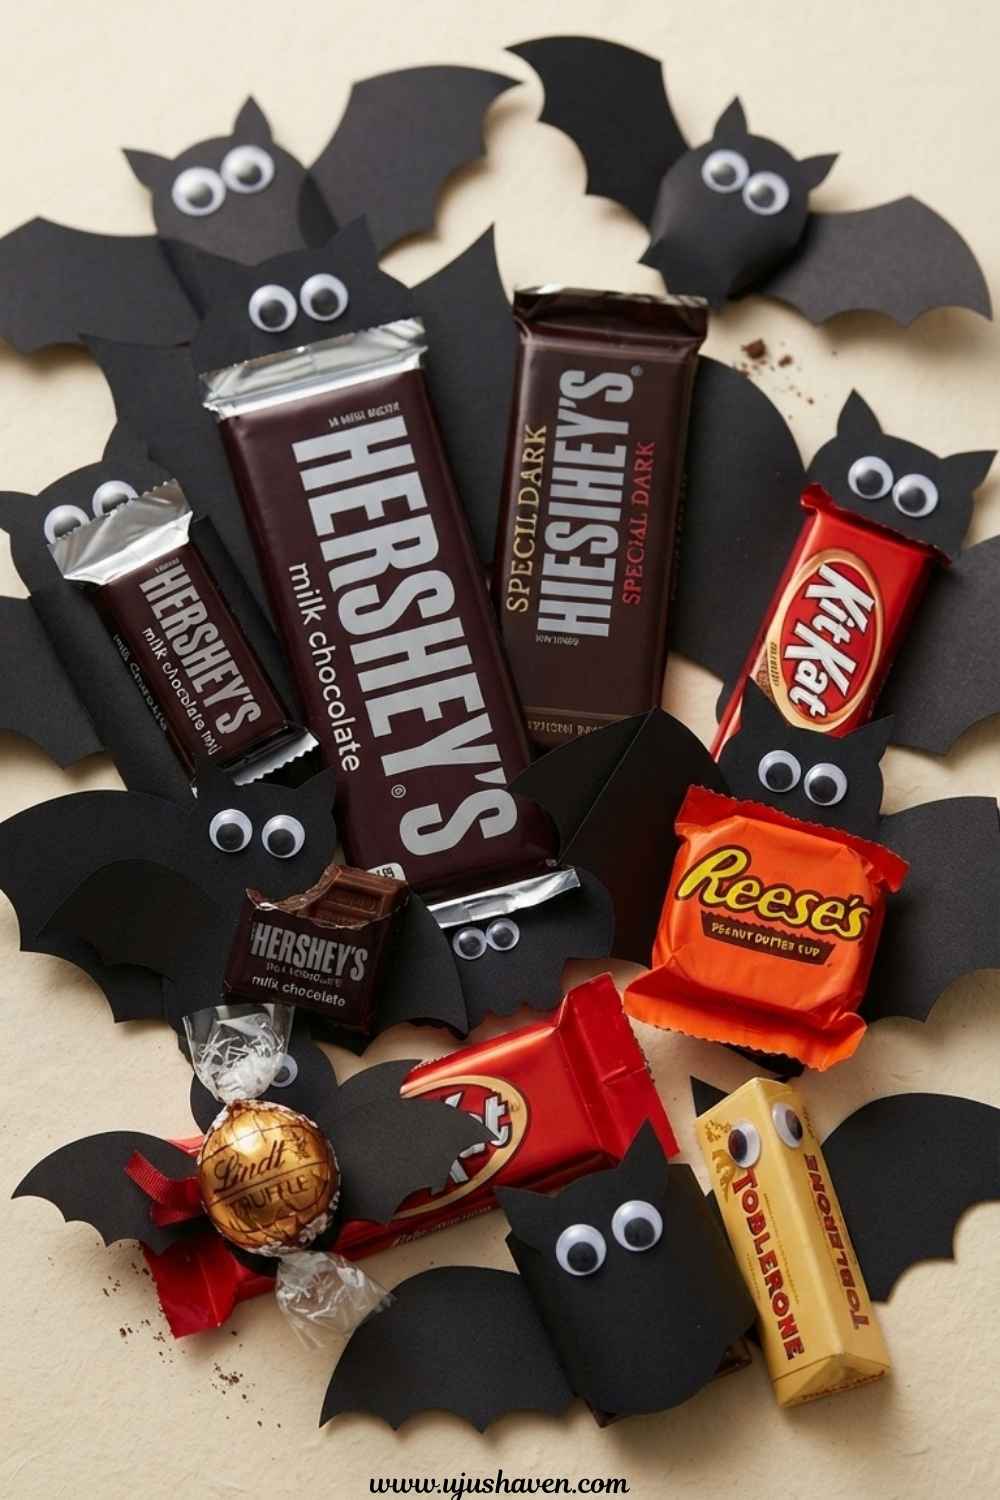
Cut small bat shapes out of black cardstock or use a bat-shaped hole punch, then tape one or two onto the front of the wrapper as if the bats are perched on the bar.
This is one of the simplest Halloween chocolate bar ideas to prep ahead of time, since the bats can be cut out in bulk days in advance and stored until you’re ready to assemble.
Angle the bats slightly instead of placing them perfectly straight.
A small tilt makes them look like they landed there rather than being stuck on with a ruler.
For more ideas that lean on supplies you likely already have on hand, Recycled Halloween Crafts for Kids Using Stuff You Already Have are worth a look too.
How to Keep Decorated Chocolate Bars From Melting or Smudging
Once the decorating is done, the next concern is usually how to keep everything looking as good as it did when it was finished.
- Store finished bars in a single layer in a shallow container rather than stacking them, since stacking is what usually smudges drizzle or icing details.
- Keep bars away from direct sunlight and heat vents, even indoors. A sunny windowsill can soften chocolate just as fast as a warm car.
- If bars need to travel to a party or classroom, a few minutes in the fridge right before you leave firms up any melted chocolate details so they survive the trip.
- For outdoor events, plan to bring bars out closer to the actual party time rather than setting them up hours in advance, especially if the weather is warm.
Quick Ways to Make Store-Bought Bars Look Handmade
If time is tight, a few small choices make a bigger visual difference than people expect.
Sticking with one or two colors across all the bars, rather than a random mix, makes even simple designs look intentional.
Grouping bars by decoration style when displaying them, instead of scattering different designs together, also helps the whole table read as coordinated rather than thrown together at the last minute.
Frequently Asked Questions
How do you decorate a chocolate bar for Halloween?
The simplest methods involve dipping part of the bar in melted white or dark chocolate, drizzling a pattern on top, or wrapping the original packaging with Halloween-themed tape, stickers, or ribbon.
No special tools are required for most designs.
What chocolate bars work best for Halloween treats?
Flat, full-size or fun-size bars with a smooth surface are the easiest to decorate, since they give drizzle, dipping, and stickers a flat, even surface to work with.
How do you keep chocolate bars from melting at a Halloween party?
Store them in a single layer away from heat and sunlight, and bring them out closer to when the party actually starts rather than setting them up too early.
Can kids help make these Halloween treats?
Most of these ideas, including sprinkle dipping, sticker wrappers, and monster eyes, are simple enough for kids to help with, especially the ones that don’t involve handling melted chocolate directly.
Final Thoughts
A candy bar doesn’t need much to feel like part of the season.
A little drizzle, a strip of ribbon, or a sticker in the right spot is usually enough to turn something ordinary into a treat people actually notice.
Whichever of these Halloween chocolate bar ideas you try first, the goal isn’t to make something complicated.
It’s to take a treat that was already good and give it a moment to stand out, even if just for one night.