Easy November crafts for seniors are often harder to find than they should be.
A quick search can leave you choosing between projects with tiny pieces, fiddly steps, and more patience than some hands can comfortably give, or crafts that look so childish they don’t feel worth making in the first place.
That middle ground matters.
A senior craft should be simple enough to enjoy without a struggle, but still produce something that feels pleasant to look at, useful to keep, or nice enough to put on display.
That’s the standard behind the crafts gathered here, not simply whether they are easy, but whether they are genuinely enjoyable to make.
November gives you plenty of little moments for that kind of crafting: a quiet afternoon, a table cleared after lunch, or an evening when the earlier darkness makes staying in feel just right.
The projects here keep supplies manageable, steps approachable, and the finished results worth showing off.
And when a craft has somewhere to go afterward, the making becomes part of the fun not just something to pass the time.
Let’s start with why November is a good time for crafts that have somewhere to go.
November Is a Good Time for Crafts That Have Somewhere to Go

November already leans into color, texture, and warmth.
Fallen leaves, harvest tables, Thanksgiving gatherings, and a general slowing down all give a craft project an actual reason to exist beyond simply having something to do.
A craft feels more worthwhile when the finished piece can genuinely be displayed.
A pressed leaf sitting in a frame on a shelf, or a small wreath hanging by the front door, carries more meaning than a project that gets admired for a minute and then tucked into a drawer.
For seniors who prefer a slower pace, crafts that don’t rush through complicated instructions or require more hand strength than feels comfortable can be much more enjoyable.
A good craft should leave someone with the feeling of “I made that,” rather than the feeling of having completed a classroom assignment.
That is why the ideas below focus on simple materials, manageable steps, and finished pieces that can actually have a place around the home.
A Few Simple Ways to Make These Crafts More Comfortable
Before getting into the list, a few small adjustments can make any of these easy November crafts for seniors even easier to enjoy from start to finish.
Most of what’s needed can already be found around the house or picked up cheaply at a dollar store, with no big shopping trip required before starting.
- Choose larger materials when possible. Bigger leaves, bigger buttons, and bigger pieces of felt are simply easier to handle.
- Use pre-cut shapes if cutting feels tiring. Craft stores and printable templates can take that step off the table entirely.
- Work at a comfortable table height, with good lighting and enough space to spread supplies out without feeling cramped.
- Keep supplies within easy reach to avoid stretching, twisting, or getting up repeatedly mid-project.
- Use a glue stick or a glue pen instead of a bottle that needs heavy squeezing.
- Don’t aim for perfect symmetry. A slightly uneven leaf arrangement or a slightly crooked wreath still looks handmade and charming, not wrong.
- Take breaks between steps. No timer is running on any of these projects.
- If a craft calls for scissors, paint, or hot glue, have another person nearby to help with that one step if needed.
- Set out only the supplies needed for the current step rather than everything at once. A clear table makes a project feel calmer and far less overwhelming than a full one.
Small adjustments like these are part of what makes a craft genuinely senior-friendly, not just labeled that way.
15 Simple November Crafts Worth Making and Displaying
Each idea below follows the same simple rhythm: what you’ll need, how to make it, why it’s a good choice, and where the finished piece can go once it’s done.
That structure makes these easy November crafts for seniors simple to scan, even if you’re only picking one project for today.
Some take only a few minutes start to finish, while others are better suited to an unhurried afternoon, so it’s easy to choose based on the time and energy on hand.
1. Pressed Leaf Frame
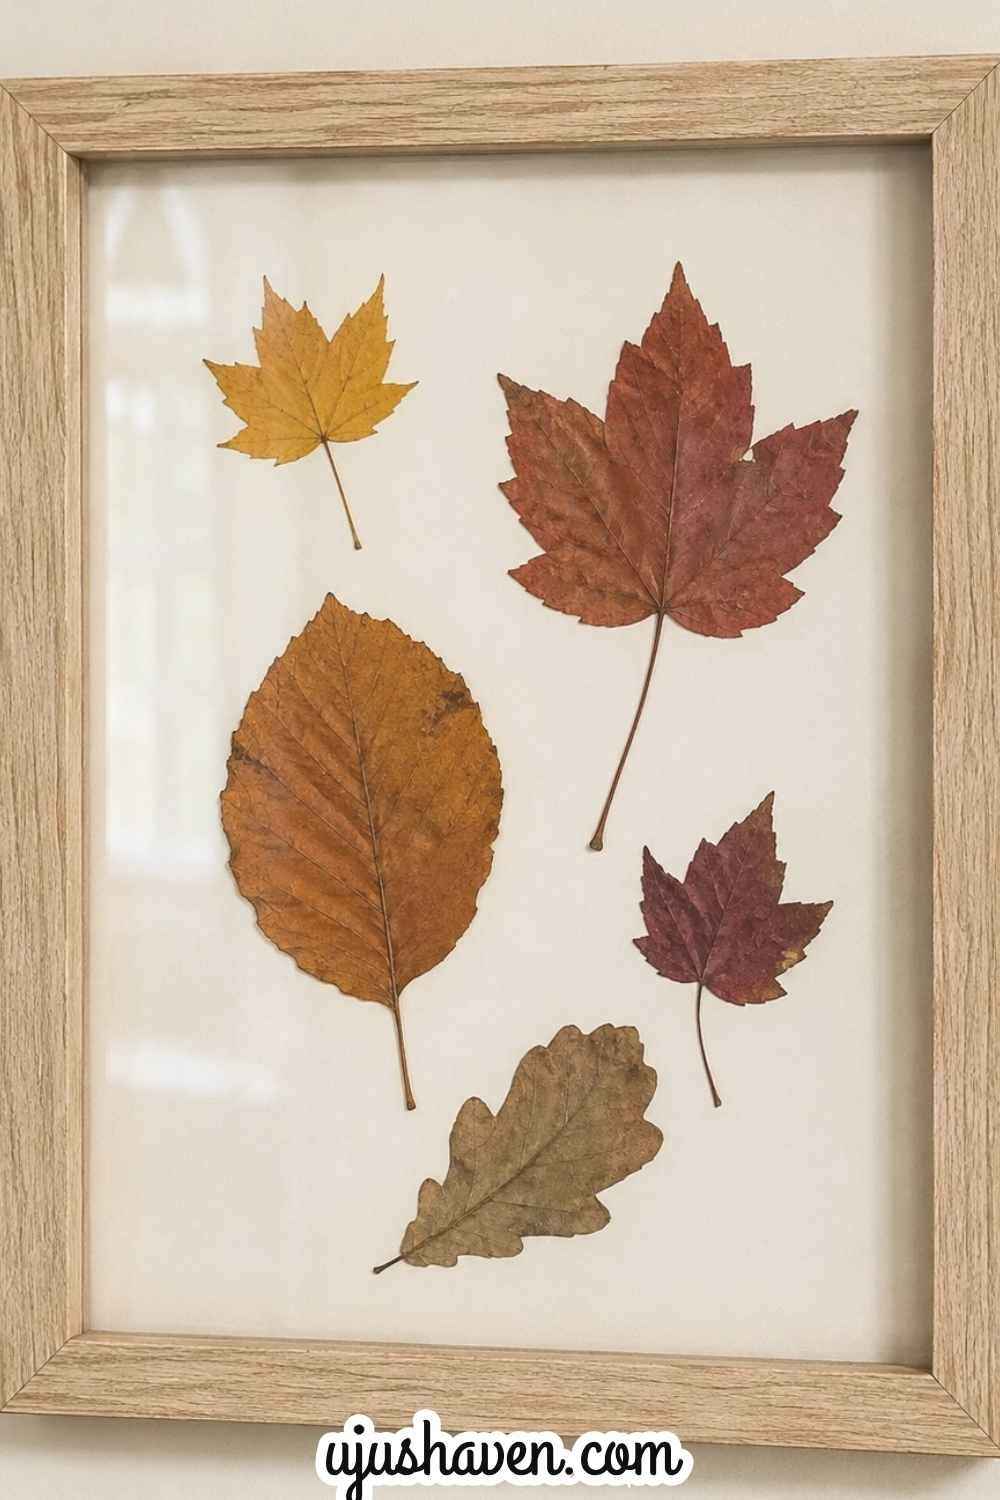
This one takes leaves gathered on a quiet walk and gives them a nice place in the home for the season.
It takes almost no supplies and very little time to put together, and the frame does most of the finishing work.
What you’ll need
- A few flat, colorful fallen leaves
- A plain photo frame with glass
- A sheet of white or cream paper
- A glue stick
How to make it
- Choose 4 to 6 flat leaves with no tears, in colors that feel pleasing together.
- Lay the leaves flat between two paper towels, place them inside a heavy book, and leave them there for 2 to 3 days until fully flat and dry.
- Cut a piece of white or cream paper to match the size of the frame’s insert.
- Arrange the pressed leaves on the paper the way it feels most pleasing.
- Lift each leaf, add a light dot of glue to its back, and press it back into place.
- Let the glue dry for a few minutes, then slide the paper into the frame and close the back.
Why it’s a good choice
No cutting and no complicated assembly is involved, just arranging and gluing at a relaxed pace.
The process feels more like decorating than crafting, which takes the pressure off getting it “right.”
Display it: A small shelf, a side table, or a spot on the mantel.
2. Paper Leaf Garland

A garland like this fills a doorway, mantel, or window with color using paper that’s likely already on hand.
It builds up leaf by leaf, with no need to rush through it in one sitting.
What you’ll need
- Colored construction paper in fall shades
- A leaf-shaped template or pre-cut leaves
- A hole punch
- Twine or ribbon
- Scissors
How to make it
- If using a template, trace around it onto the construction paper. If not, draw a simple oval shape with a point at each end to form a leaf, then cut it out.
- Cut out 12 to 15 leaves in total, mixing colors as you go.
- Punch one hole near the top of each leaf, about half an inch from the edge.
- Cut a length of twine or ribbon about 4 to 5 feet long.
- Thread each leaf onto the twine through its hole, sliding them along and spacing them about 2 inches apart.
- Tie a small loop at each end of the twine for hanging.
Why it’s a good choice
The repetitive motion of threading leaves is calming rather than tedious, and pre-cut leaves remove the need for careful cutting altogether.
It’s a project that can be built up over several short sittings.
Display it: Along a mantel, doorway, or window frame.
3. Dried Orange Slice Garland

Dried orange slices bring warm color and a light citrus scent into a room, and stringing them together is calm, unhurried work from start to finish.
The orange slices take the longest part of this project because they need time to dry in the oven.
Once they’re ready, the actual garland is simple to assemble.
If the slicing and oven step aren’t comfortable to manage alone, they’re easy to hand off to someone else, with the threading saved for later.
What you’ll need
- 4 to 5 oranges
- A sharp knife
- A baking sheet lined with parchment paper
- Twine
- A large sewing needle
How to make it
- Preheat the oven.
- Slice each orange into rounds about a quarter inch thick, setting aside the very end pieces.
- Pat the slices dry with a paper towel and lay them in a single layer on the lined baking sheet.
- Bake for 2 to 3 hours, flipping once halfway through, until the slices feel dry and slightly leathery rather than wet.
- Let the slices cool completely, about 30 minutes.
- Thread the needle with twine, then pass it through the center of each dried slice, spacing them about 2 inches apart along the length of twine.
- Tie a small loop at each end for hanging.
Why it’s a good choice
Baking the oranges does the longest part of the work, leaving only simple threading once they’ve cooled.
The natural pattern inside each orange also means no two slices need to match for the finished garland to look good.
Display it: Along a mantel, across a window, or draped over a mirror frame.
4. Pressed Leaf Coasters

This one takes the pressed leaf technique and puts it to genuinely useful work rather than only decorative work.
A single afternoon produces a set worth keeping on the coffee table well past November.
What you’ll need
- 4 to 6 pressed flat leaves (extras from the Pressed Leaf Frame work well here)
- 4 plain cork or wood coasters
- Mod Podge or a clear craft sealant
- A small foam brush
How to make it
- Choose one or two pressed leaves per coaster, sized to sit comfortably within the coaster’s edge.
- Brush a thin layer of sealant onto the top of the coaster.
- Press the leaf into place, smoothing it flat with a fingertip from the center outward.
- Brush a second, slightly thicker layer of sealant directly over the leaf and the rest of the coaster’s surface, covering it completely.
- Let the coasters dry flat for at least 2 hours, or until the sealant feels fully clear and hard to the touch.
- Repeat with the remaining coasters. Regular Mod Podge isn’t fully waterproof, so think of these as light-use or decorative coasters rather than a spot for icy glasses left sitting for hours. If daily drink duty is the plan, swapping in a waterproof topcoat for the sealant will hold up much better.
Why it’s a good choice
Aside from arranging and brushing, no cutting is required, and the finished set is something to actually use rather than something to only look at.
Layering the sealant also means any small unevenness in leaf placement disappears once it dries clear.
Display it: In active use on a coffee table, or stacked in a small dish near the couch.
5. Mason Jar Leaf Lantern
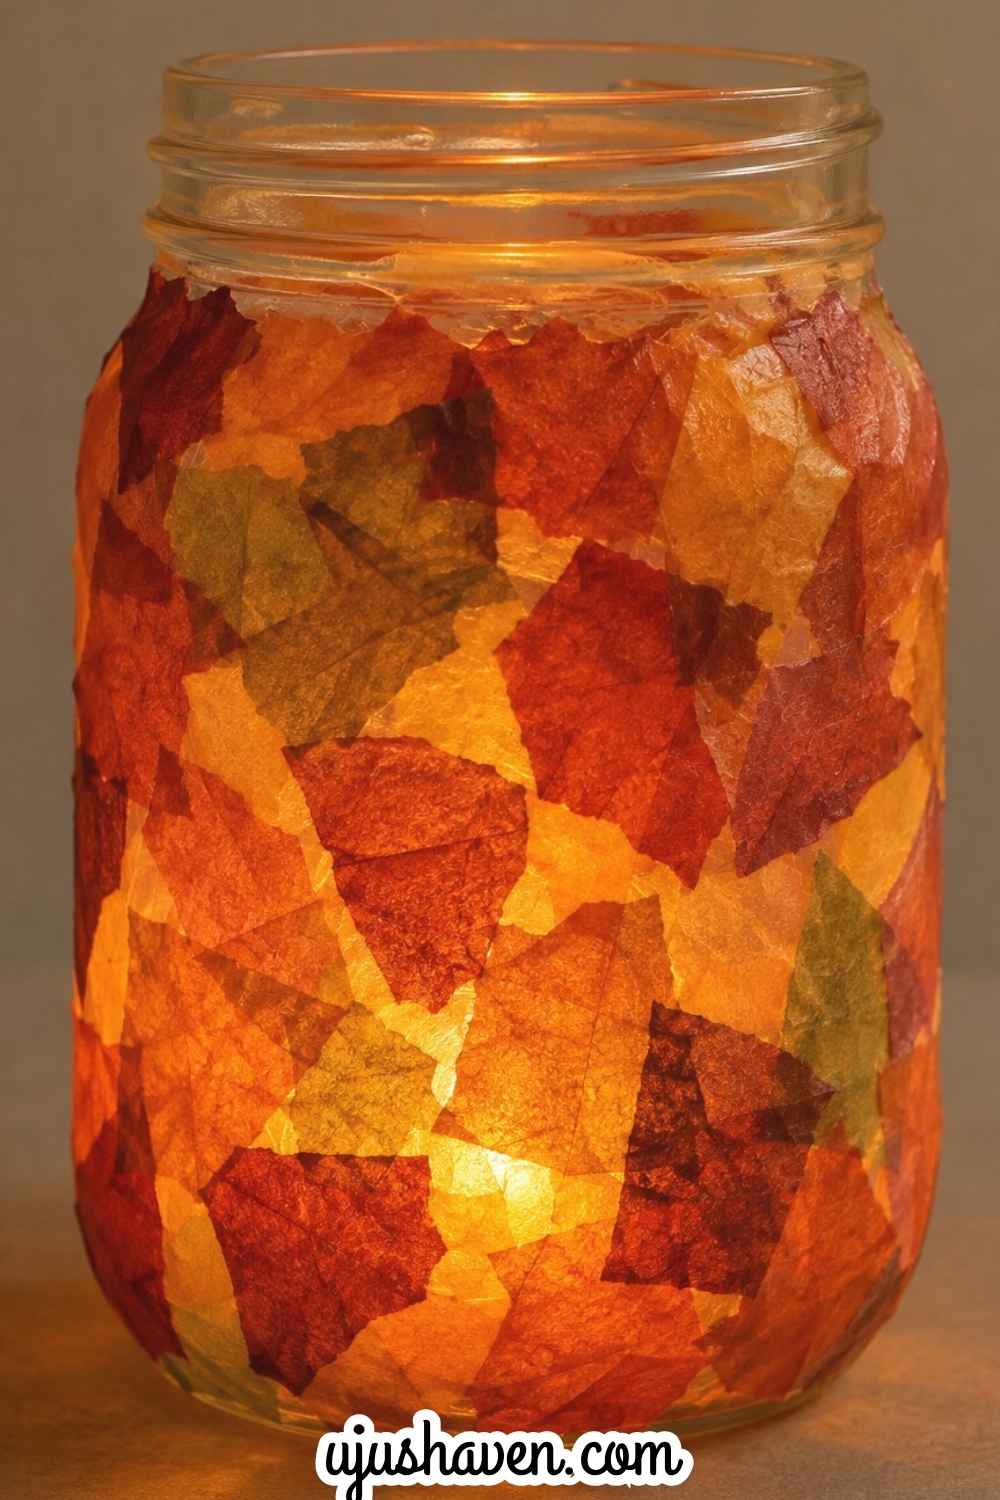
A plain mason jar becomes something warm and glowing with just a bit of tissue paper and glue.
Once the tea light goes in, the whole jar takes on a soft, colorful light of its own.
What you’ll need
- A clean mason jar
- Tissue paper in fall colors
- A paintbrush
- White craft glue and a little water
- A small battery operated tea light
How to make it
- Tear the tissue paper into pieces roughly 1 to 2 inches across.
- Mix 2 tablespoons of glue with 1 tablespoon of water in a bowl until it moves easily with a brush.
- Brush the watered down glue over a small section of the jar.
- Press a few tissue pieces onto the glued section, overlapping the edges slightly.
- Continue around the entire jar until it’s fully covered, then brush a thin final layer of glue over the top to seal it.
- Let the jar dry for at least an hour, then place the battery operated tea light inside. A real flame should not be used inside this jar.
Why it’s a good choice
Tearing paper instead of cutting it removes any concern about scissors, and the finished glow makes the small mess of gluing feel worth it right away.
Display it: A windowsill, entryway table, or as part of a Thanksgiving table setting.
6. Terracotta Pot Pumpkin
A small painted terracotta pot makes a far more polished stand-in for a pumpkin than paper ever could, and the shape does most of the work from the start.
What you’ll need
- One small terracotta pot, about 4 inches across
- Orange craft paint
- A small paintbrush
- One cinnamon stick
- A small dried leaf
- Craft glue
How to make it
- Paint the outside of the terracotta pot fully in orange, applying two thin coats and letting each dry for about 20 minutes.
- Once dry, flip the pot upside down so the open end faces the table.
- Add a small dot of glue to the base, now facing up, and press the cinnamon stick into it, holding for a few seconds to secure it as the stem.
- Glue the small dried leaf at the base of the cinnamon stick.
- Let the glue set for about 15 minutes before moving it.
Why it’s a good choice
The pot’s shape already looks like a pumpkin, so no separate step is needed for building the rounded form, just painting and adding two small finishing details.
Display it: A windowsill, entry table, or grouped in a few sizes on a mantel.
7. Rustic Acorn Bowl
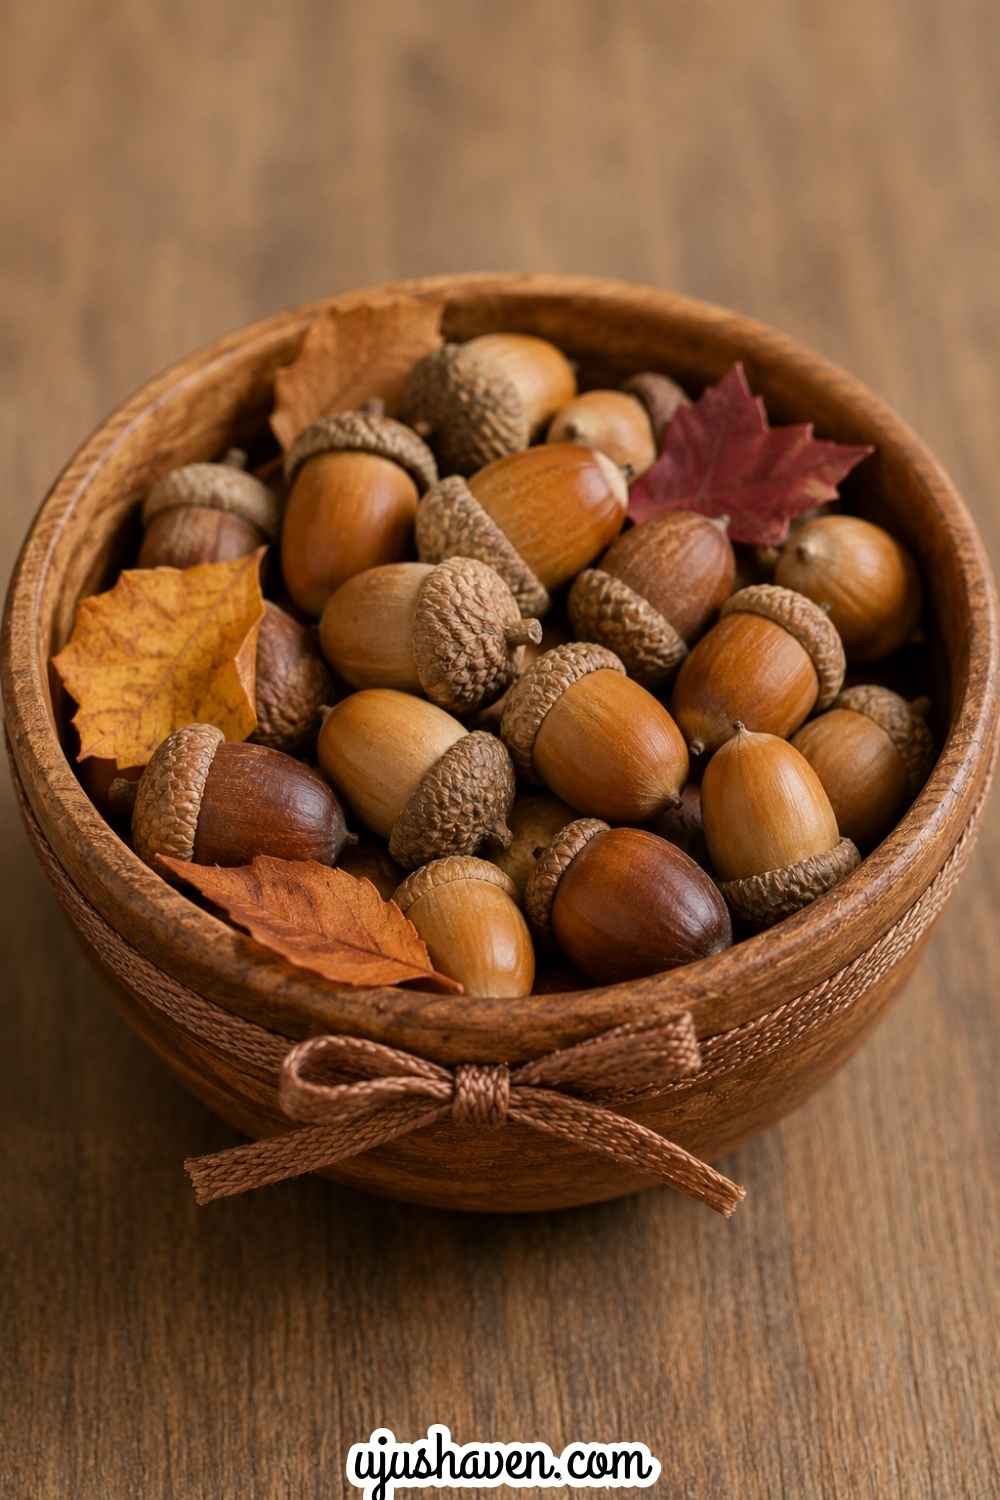
This is the gentlest project on the whole list, since it involves no cutting, gluing, or drying time at all.
A bowl and a handful of acorns are really all it asks for.
What you’ll need
- A small wooden or plain ceramic bowl
- 15 to 20 real or faux acorns
- A few small dried leaves
- Optional ribbon for the rim
How to make it
- Check that each acorn is dry and free of soft spots, then brush off any dirt and check for insects before bringing gathered acorns indoors.
- Fill the bowl about three quarters full with the acorns.
- Tuck 3 to 4 small dried leaves in among the acorns, spacing them around rather than piling them in one spot.
- If using ribbon, wrap it once around the outer rim of the bowl and tie it into a simple knot or bow at the front.
- Set the bowl in its display spot right away, since no drying time is needed for this one.
Why it’s a good choice
No cutting, gluing, or drying time is involved here, just arranging, which makes it one of the gentlest projects on this list for anyone dealing with hand fatigue.
Display it: A coffee table, entry console, or kitchen counter.
8. Fall Button Tree
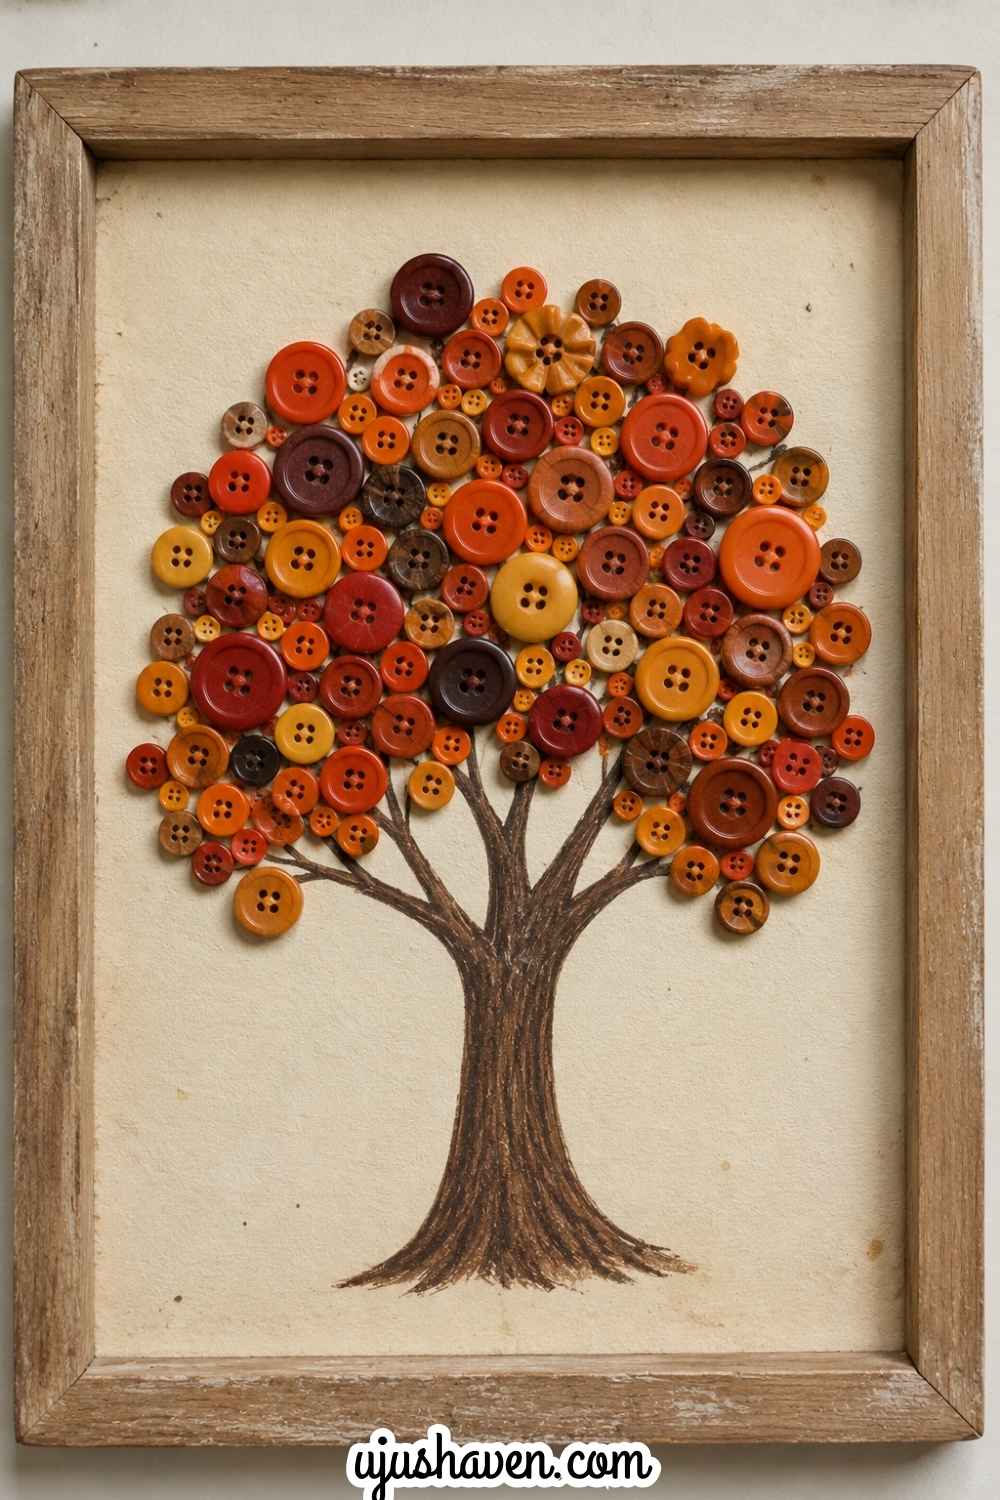
Buttons are easier to hold and place than small paper pieces, which makes this tree a comfortable, steady project to build up slowly.
Each button added brings it a little closer to full.
What you’ll need
- A sheet of cardstock or canvas
- A brown marker or paint for the trunk
- Buttons in orange, red, brown, and yellow
- Craft glue
How to make it
- Draw or paint a simple trunk shape near the bottom of the paper, with 3 to 4 short branch lines extending upward from the top of the trunk.
- Let the trunk dry fully if paint was used.
- Starting at the top of each branch, glue one button at a time, working downward and outward to build a rounded cluster.
- Overlap a few buttons slightly rather than lining them up edge to edge, which gives the tree a fuller look.
- Continue adding buttons until the top of the tree feels balanced and full.
- Let the glue dry flat for about 30 minutes before moving the piece.
Why it’s a good choice
Buttons are larger and easier to grip than small paper pieces, and this project gives a nice sense of gradual progress as the tree fills in one button at a time.
Display it: Framed on a wall or leaned on a shelf.
9. Thanksgiving Table Place Cards
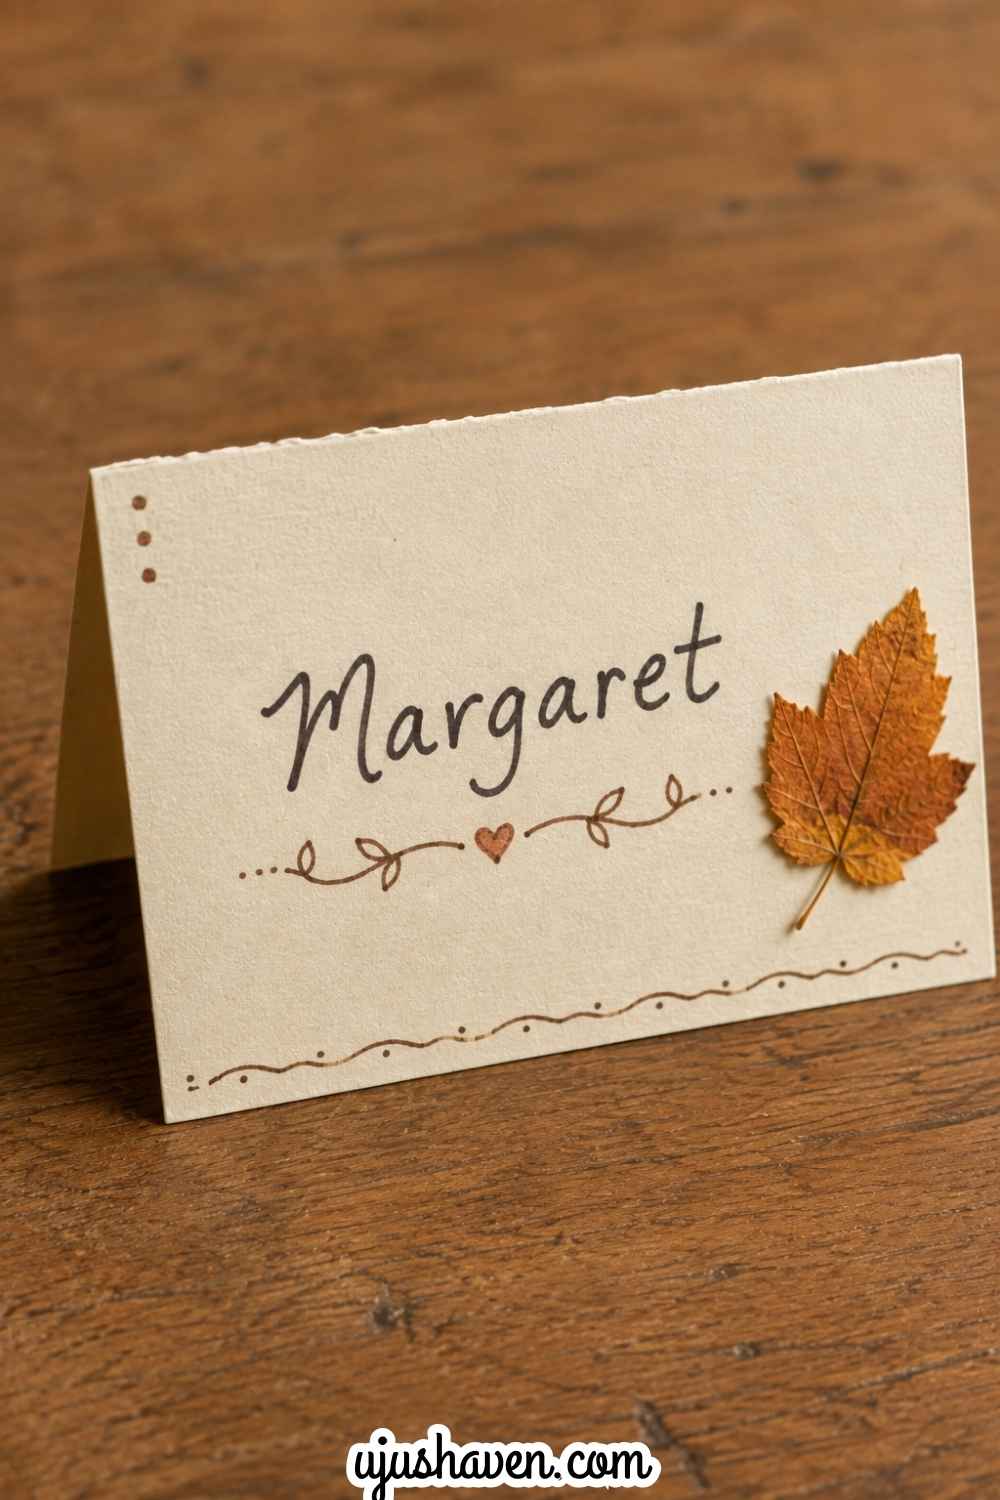
These come together quickly, yet they add a personal touch to the Thanksgiving table that guests tend to notice right away.
A single afternoon is more than enough time to finish a full set.
What you’ll need
- Cardstock
- A fine-tip marker
- Pressed leaves or small stickers
- A glue stick
- Scissors
How to make it
- Cut the cardstock into rectangles about 4 inches by 2.5 inches, one for each guest.
- Fold each rectangle in half so it stands upright like a small tent.
- Write each guest’s name clearly across the front in the marker.
- Add a small dot of glue to one corner and press a pressed leaf or sticker onto it.
- Let the glue dry flat for a few minutes.
- Set one finished card at each place at the table.
Why it’s a good choice
This one is quick, personal, and gives an immediate sense of contributing something meaningful to a Thanksgiving gathering, without requiring a long crafting session.
Display it: Directly at the Thanksgiving table, one card per guest.
10. Burlap Leaf Wreath
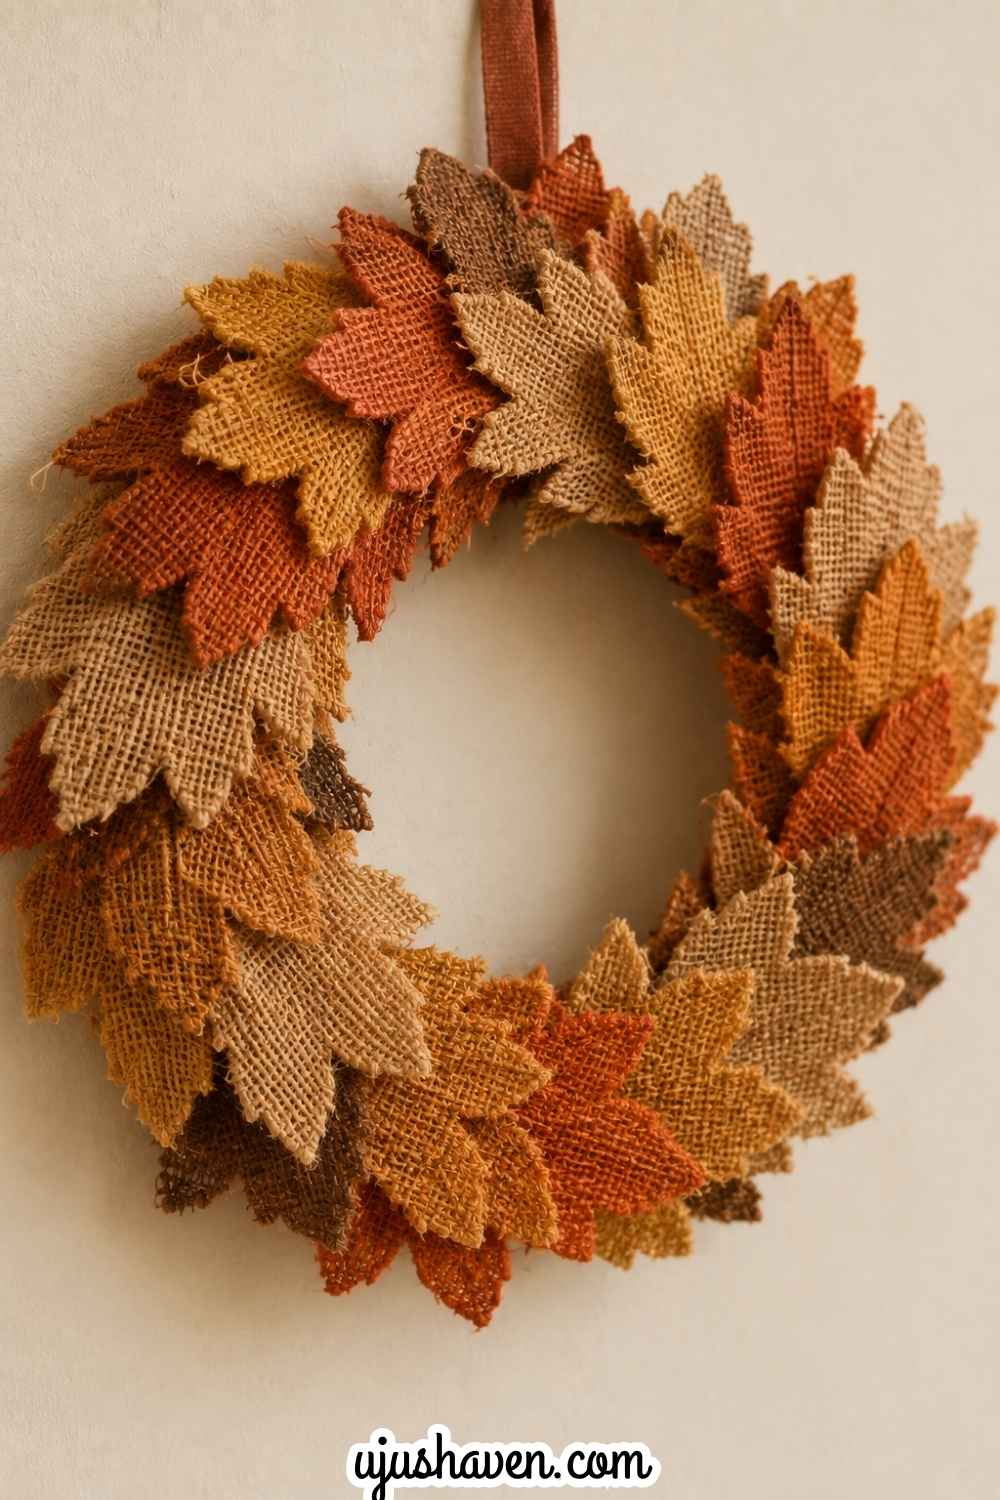
Precut leaf shapes take away any need for cutting, leaving just the simple, steady task of gluing them into place one at a time.
The soft burlap texture is gentle to work with from start to finish.
What you’ll need
- A plain wire or foam wreath form
- Precut burlap leaf shapes, enough to cover the form with some overlap
- Craft glue, or hot glue if the crafter is comfortable handling it
- Ribbon for hanging
How to make it
- Lay the wreath form flat and arrange the burlap leaves loosely around it first, just to see how many are needed for a full look.
- Starting at one point on the form, glue the base of the first leaf in place. Craft glue holds well with no heat involved, though it takes longer to set than hot glue.
- Continue gluing leaves around the form, overlapping each new leaf slightly over the base of the one before it.
- Keep working in the same direction all the way around until the form is fully covered.
- Let the glue set for about 20 minutes with craft glue, or a few minutes if hot glue was used.
- Tie a length of ribbon into a loop and glue or tie it to the back of the wreath for hanging.
Why it’s a good choice
Using precut leaf shapes removes the need for any cutting, and the soft texture of burlap is easy on the hands compared to stiffer craft materials.
Display it: The front door or above a mantel.
11. Painted Pinecone Flowers
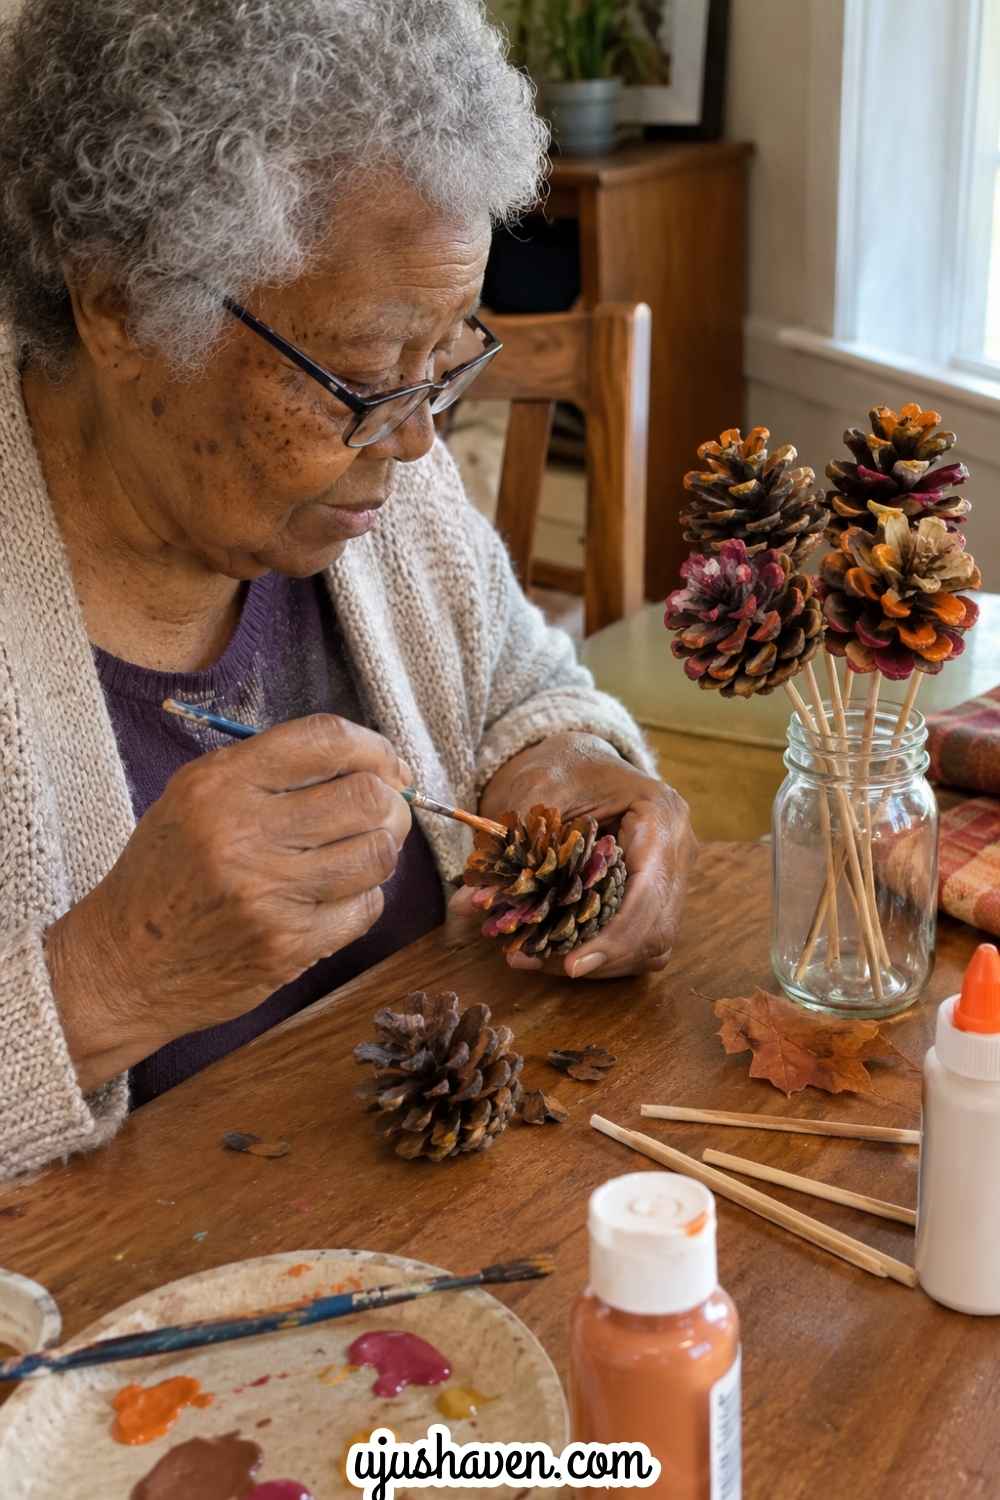
A single pinecone, painted at just the tips, ends up looking remarkably like a flower once it’s finished.
A small bouquet of them together makes a lovely little arrangement.
What you’ll need
- A few open pinecones
- Craft paint in warm autumn tones
- A small paintbrush
- Wooden picks
- Craft glue
How to make it
- Hold each pinecone by its base and paint just the outer tips of the scales, turning it slowly to reach all sides.
- Stand the pinecones upright and let them dry for about 30 minutes.
- Once dry, dab a little glue on the tip of a wooden pick, press it into the base of the pinecone, and hold it in place for a few seconds until it sets.
- Repeat with the remaining pinecones.
- Gather 3 to 5 finished pinecones together and arrange them like a small bouquet, or skip the picks entirely and arrange the pinecones loose in a shallow bowl.
Why it’s a good choice
Painting just the tips is a forgiving technique, since small unevenness only adds character rather than looking like a mistake.
Display it: In a small vase or jar on a side table.
12. Thankful Tree Wall Art
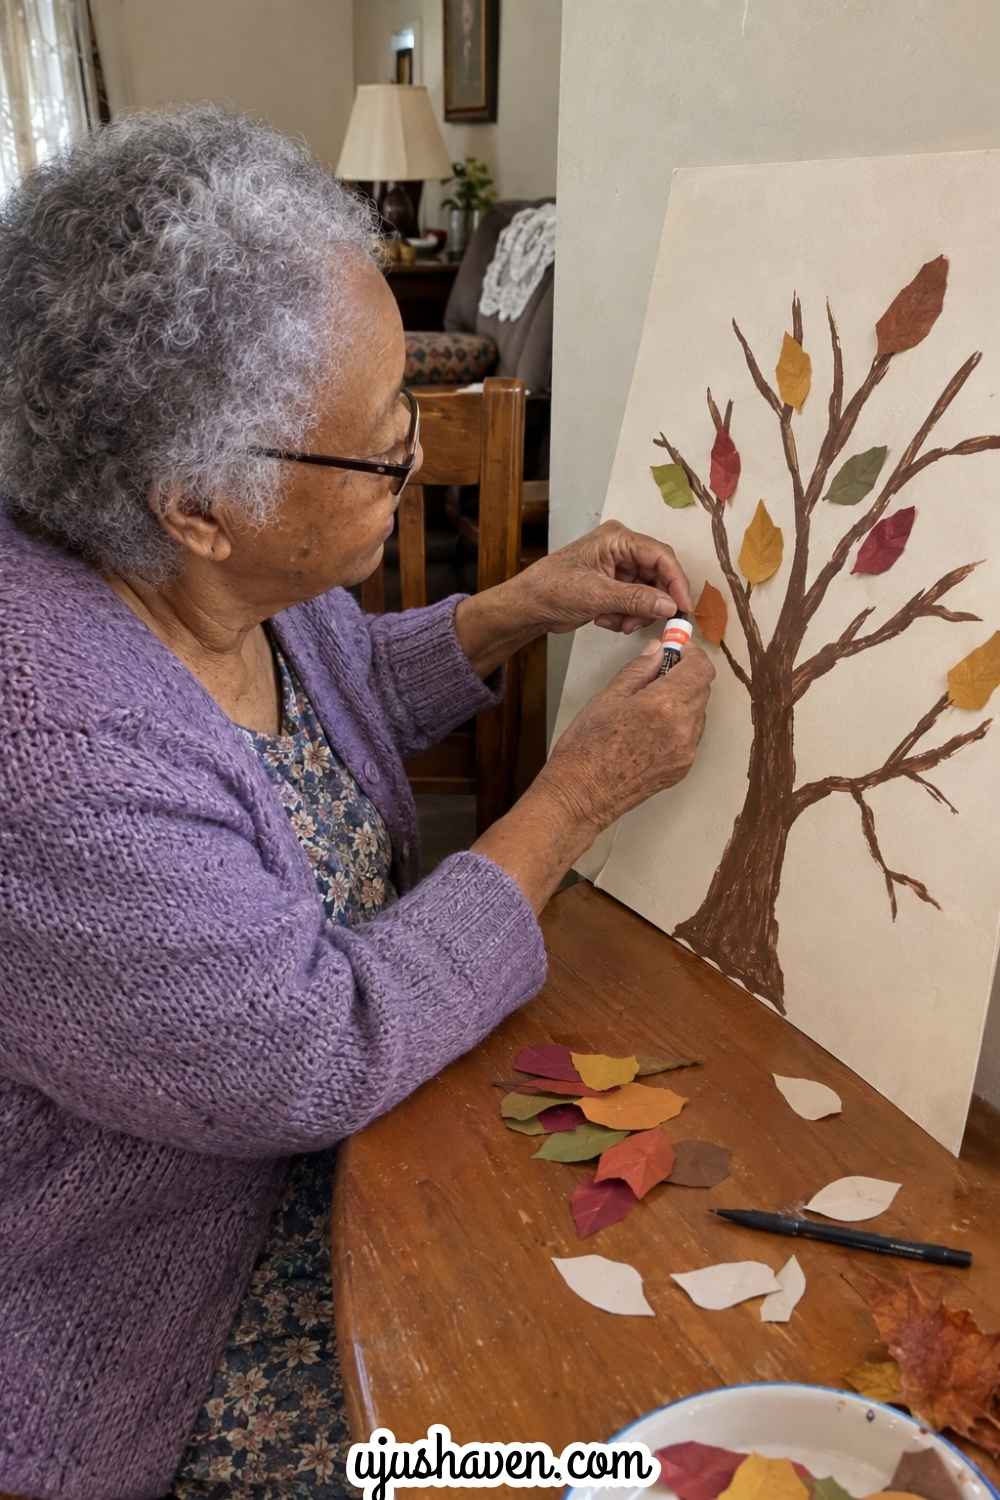
This piece grows slowly over the course of the month rather than needing to be finished in one go.
Each leaf added brings a small thought along with it.
What you’ll need
- A large sheet of paper or canvas
- A painted or drawn tree outline
- Small paper leaf cutouts
- A pen and glue stick
How to make it
- Paint or draw a tree trunk with several bare branches across the paper or canvas, and let it dry if paint was used.
- Cut 8 to 10 small leaf shapes from paper, or use pre-cut leaves.
- Write one thing to be thankful for on each leaf before it’s glued down.
- Glue the leaves onto the branches one at a time, spacing them so the tree fills in gradually rather than all at once.
- Leave a few blank leaves nearby to add more thoughts throughout the month. For more ways to bring gratitude into the season with the family, Family Gratitude Jar Ideas That Make Thankfulness a Little More Fun pairs nicely with this same idea.
Why it’s a good choice
This craft can grow slowly over several days rather than needing to be finished in one sitting, which fits comfortably into a relaxed November pace.
Display it: A living room or hallway wall through the rest of November.
13. Cinnamon Stick Bundle Decoration

This bundle takes only a few minutes to put together, and the scent alone makes it feel like the season the moment it’s tied off.
It’s a small project with an outsized amount of coziness.
What you’ll need
- 3 to 5 cinnamon sticks
- Twine or thin ribbon
- A small dried leaf or sprig
- Scissors
How to make it
- Line up the cinnamon sticks so their ends are even.
- Cut a length of twine about 12 inches long.
- Wrap the twine around the middle of the bundle 3 to 4 times, pulling snug but not tight enough to crack the sticks.
- Tie the twine off with a simple knot, then finish it with a small bow if desired.
- Tuck a dried leaf or small sprig under the twine at the front.
Why it’s a good choice
No cutting, painting, or careful positioning is needed here, just tying a simple knot.
Keeping the finished bundle near the stove or a favorite reading chair also helps, since a little warmth in the air brings out the scent even more.
Display it: Tied to a napkin ring, propped in a bowl, or set beside a candle.
14. Dried Leaf and Twig Wall Swag
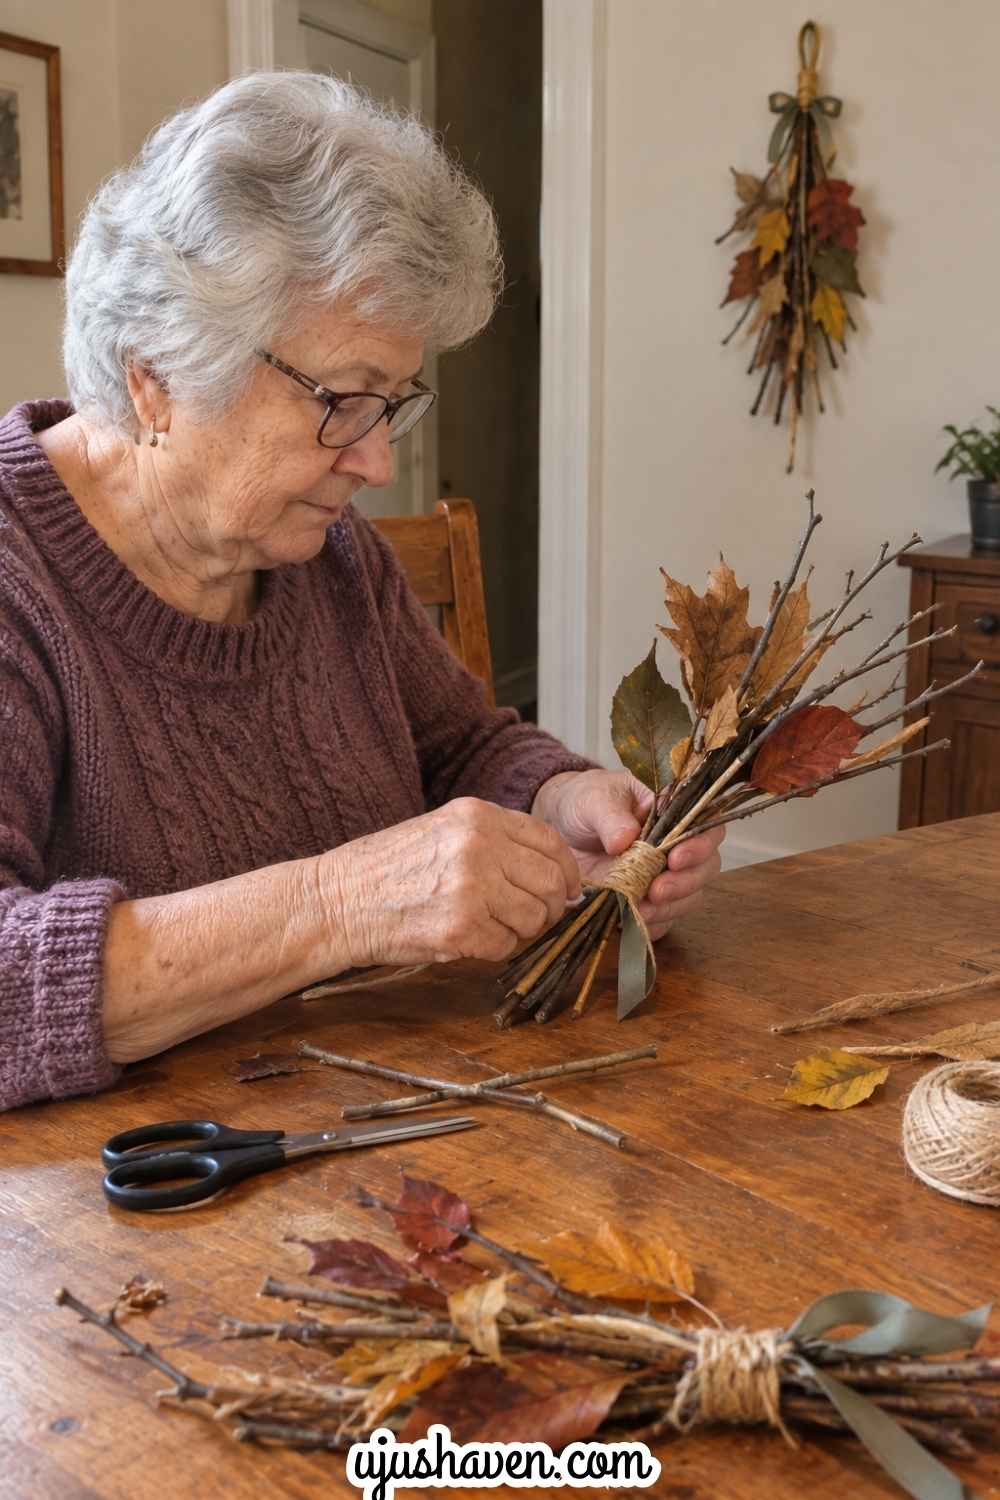
A small swag like this brings the look of a gathered autumn bundle to a door or wall without needing a full wreath form.
It takes only a handful of materials and comes together in one sitting.
What you’ll need
- A small bundle of dried twigs or branches, each 8 to 10 inches long
- A handful of dried leaves
- Twine or raffia
- Ribbon for hanging
How to make it
- Gather 5 to 6 twigs into a small fan shape.
- Tuck 4 to 5 dried leaves in among the twigs, distributing them evenly across the fan.
- Wrap twine or raffia around the base of the bundle 3 to 4 times to hold everything together.
- Tie the twine off with a secure knot, then trim any loose ends.
- Tie a length of ribbon around the same spot and form a loop for hanging.
Why it’s a good choice
No gluing or drying time is involved, only gathering and tying, which keeps the whole project quick and low mess.
Display it: A front door, a wall near the entryway, or above a mantel.
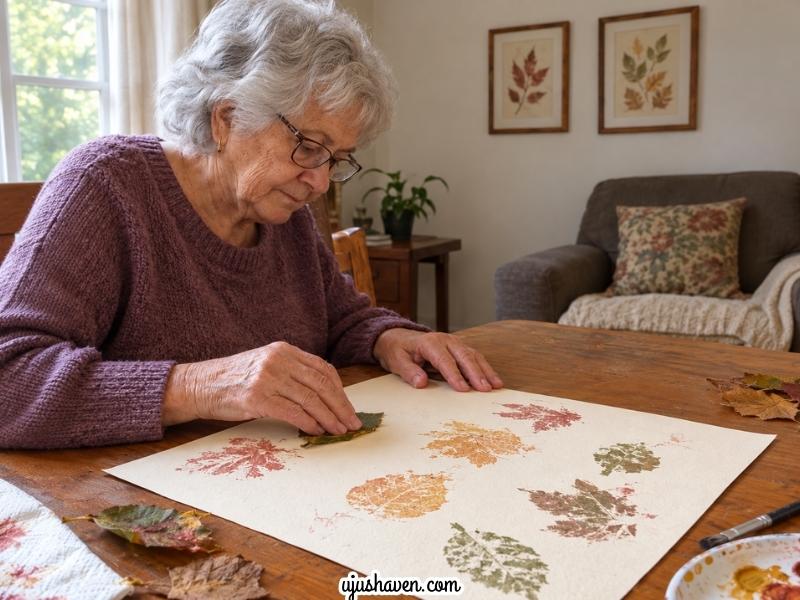
15. Leaf-Stamped Fall Wall Art

Real leaves do the detail work here, leaving behind natural prints that look intentional even when they’re not perfectly placed.
A few prints together make for a lovely small wall grouping.
What you’ll need
- A few sturdy fallen leaves
- Washable paint in fall colors
- A sheet of thick paper or canvas
- A small paintbrush
- A paper towel for blotting
How to make it
- Choose leaves with clear, raised veins on the underside, since that side gives the best print.
- Brush a thin, even layer of paint onto the underside of the leaf, covering it fully without letting the paint pool in one spot.
- Press the painted side of the leaf firmly onto the paper and hold it in place for a few seconds without letting it slide.
- Lift the leaf straight up in one motion to reveal the print.
- Wipe the leaf clean or switch to a new one, then repeat with different leaves and colors across the page.
- Let the finished piece dry fully, about 30 minutes, before framing or handling it further.
Why it’s a good choice
Stamping is a gentle, repetitive motion that doesn’t require fine detail work, and the natural leaf shapes mean every print looks intentional even without perfect placement.
Display it: Framed as a set of two or three prints on a living room wall.
If wall decor is a favorite area to build on, DIY Paper Flowers for Home Decor: Easy Designs That Instantly Elevate Your Space offers a few more approachable ways to add color to a room without much fuss.
Turn One Simple Craft Into a November Afternoon
Once a craft is chosen, no rule says it has to be finished in ten minutes flat.
Pick one from the list, put on some favorite music, make a cup of tea or another favorite drink, and give yourself an unhurried afternoon to see it through.
A few easy November crafts for seniors become even more enjoyable when they’re paired with something else already loved:
- Looking through old family photos while the glue dries
- Making Thanksgiving decorations as a small group project
- Writing gratitude cards to go along with the Thankful Tree Wall Art
- Decorating the dining table with the finished place cards or centerpiece pieces
- Putting together a small handmade gift from one of the simpler ideas
- Crafting with grandchildren or friends who happen to be visiting
If a family gathering is already on the calendar, a shared craft can slot right into the day without adding pressure to it.
15 Best Family Get Together Themes has a few ideas worth glancing at if the whole family is getting together and a craft feels like a nice addition to the day.
And for anyone planning ahead for the holiday itself, 17 Thanksgiving Activities for Seniors That Turn Favorite Memories Into Part of the Celebration rounds out this list nicely with more ways to fill a Thanksgiving afternoon.
Easy November Crafts For Seniors Can Make a Home Feel More Personal
Handmade seasonal pieces don’t have to be expensive or elaborate to matter.
A small leaf picture on a shelf, a table decoration made from things gathered outside, or a handmade wreath on the front door can make a whole room feel more personal, simply because someone took the time to make it.
That’s really the heart of easy November crafts for seniors done well.
The goal was never to produce something flawless.
It was to have something enjoyable to spend an afternoon on and end up with a piece that feels genuinely worth keeping around, simple to make and lovely to display, exactly as promised at the start of this list.
FAQs About Easy November Crafts for Seniors
What are some easy November crafts for seniors?
Pressed leaf frames, paper leaf garlands, dried orange slice garlands, and mason jar leaf lanterns are all good starting points. Each one uses simple materials and a short list of steps, which makes them approachable for a relaxed afternoon.
What crafts are best for seniors with limited hand dexterity?
Crafts that involve arranging rather than cutting tend to work best, such as the rustic acorn bowl, the cinnamon stick bundle, or the dried leaf and twig wall swag. Precut shapes, larger materials, and a glue stick instead of a squeeze bottle all help reduce strain on the hands.
What are some Thanksgiving crafts seniors can make?
The Thanksgiving table place cards and thankful tree wall art both connect directly to the Thanksgiving table and can be finished well before guests arrive.
What are easy fall crafts that seniors can display at home?
The pressed leaf frame, burlap leaf wreath, and leaf-stamped wall art are all made to be shown off rather than tucked away, on a mantel, a wall, or a front door.
What can seniors make with simple craft supplies?
Many of these projects rely on things already found around the house, like buttons, twine, small jars, and fallen leaves, which keeps the supply list short and the barrier to starting low.
A Simple Craft Can Make November Feel a Little More Special
None of these fifteen November crafts for seniors were chosen because they were the fastest or the flashiest. They were chosen because each one leaves behind something worth keeping, without asking for more patience, precision, or hand strength than feels comfortable to give. That’s what easy November crafts for seniors should feel like from the very first step.
The goal was never to make something perfect. It was to enjoy the process and end up with a piece that feels good to have around.
If fifteen feels like a lot, that’s fine. Pick one. Set aside an afternoon. Let that be enough for now.