If you’ve ever wanted to brighten your space with something simple yet beautiful, DIY paper flowers might just be the easiest way to start.
There’s a quiet moment most of us have at home the kind where you look around and feel like something’s missing.
The space is clean, everything is in place, but it still feels a little flat.
Maybe it’s the empty corner on a shelf or that wall that could use just a bit more personality.
A lot of times, the instinct is to go out and buy something new another vase, another piece of decor.
But somehow, it doesn’t always feel as special as you hoped.
I’ve noticed that the pieces that truly stand out in a room are the ones that feel personal, the ones that carry a bit of your own touch.
I remember once folding a few simple sheets of paper into flowers on a quiet afternoon, not expecting much.
But when I placed them in a jar by the window, the whole space softened.
It felt lighter, warmer like the room finally exhaled.
That’s the beauty of something like DIY paper flowers.
It’s not just about filling a space; it’s about creating little details that make your home feel more like you.
There’s something calming about the process too cutting, shaping, watching something simple turn into something surprisingly beautiful.
And the best part? It doesn’t have to be complicated.
In this post, you’ll find easy, creative DIY paper flowers that can instantly elevate your space simple designs that bring charm, color, and a personal touch without the stress.
Why DIY Paper Flowers Are the Secret to Effortless Home Decor
They Bring Beauty Without the Ongoing Cost
There’s something lovely about fresh flowers, but the cycle can feel familiar buy them, enjoy them briefly, then replace them again.
Over time, it adds up. DIY paper flowers offer a different kind of ease.
You create them once, and they stay just as beautiful without asking for more.
It’s a simple shift that makes decorating feel lighter, especially when you still want that soft, floral touch around your home.
Low Maintenance, High Impact
Real flowers need water, sunlight, and constant care.
With homemade paper flowers, there’s none of that quiet pressure.
You can place them on a shelf, a bedside table, or even a wall arrangement, and they simply stay.
No wilting, no cleanup just consistent charm.
It’s one of those paper flower decor ideas that looks thoughtful but feels effortless to maintain.
Made to Match Your Space Perfectly
One of the most satisfying parts of DIY paper flowers is how customizable they are.
You’re not limited to what’s in season or what the store has.
You choose the colors, the shapes, the size everything.
If your space is soft and neutral or bold and vibrant, paper flowers for home decoration can be tailored to fit right in.
A Personal Touch You Can Feel
There’s also something quietly meaningful about decorating with something you made yourself.
It changes the way a space feels.
DIY paper flowers don’t just fill a room they add a sense of care, creativity, and personality that’s hard to replicate with store-bought decor.
Essential Materials You Need to Make DIY Paper Flowers (Without Overspending)
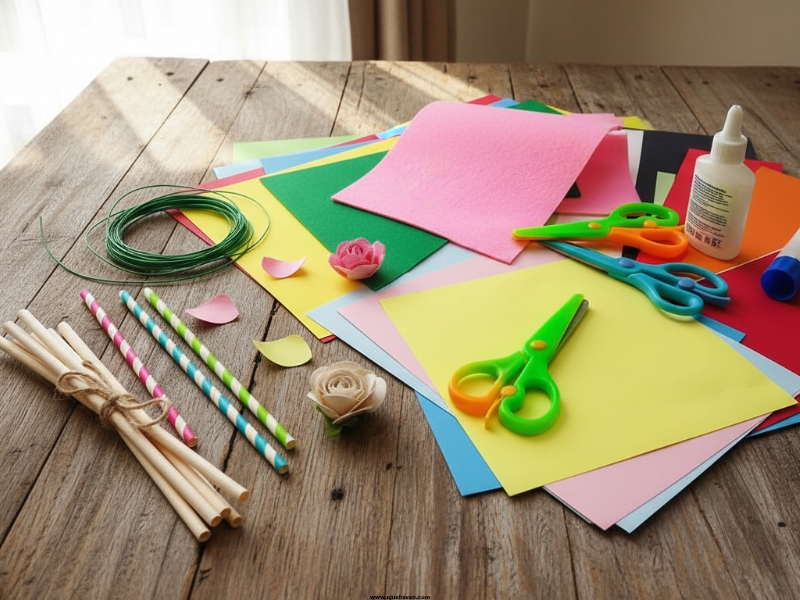
Start Simple: The Basics You Actually Need
When it comes to materials for DIY paper flowers, it’s easy to think you need a full craft kit but you really don’t.
A few simple things can get you started right away.
- Paper (colored paper, crepe paper, or even plain white sheets)
- Scissors
- Glue (liquid glue or a glue stick)
- Something for stems (floral wire, sticks, or even straws)
That’s honestly enough to begin.
If you’ve ever wondered how to make paper flowers at home without overthinking it, this is your starting point.
Smart Swaps That Save You Money
If you don’t have specific craft supplies, there’s always a workaround.
Printer paper can stand in for specialty paper, old magazines can add interesting textures, and tape can replace glue in a pinch.
For stems, skewers, broom sticks, or rolled paper work just fine.
It’s less about having perfect tools and more about using what’s already within reach.
Choosing Paper That Feels Right
Not all paper behaves the same way, and that’s part of the fun.
Softer paper like crepe is easier to shape into petals, while thicker paper holds structure better for bold designs.
Mixing both can give your flowers a more natural look without extra effort.
Small Tips That Make a Big Difference
Try sticking to a simple color palette at first it helps everything feel more put together.
Lightly curling the edges of your petals or layering different shades can instantly add depth.
These little details don’t take much time, but they quietly elevate the final look.
Easy DIY Paper Flower Designs Anyone Can Make (Step-by-Step)
Something comforting about starting with a simple design no pressure, no overthinking, just letting your hands figure things out as you go.
These DIY paper flowers are the kind you can make on a quiet afternoon, the kind that slowly turn into something you’re proud to display.
1. Simple Paper Rose (Soft and Classic)
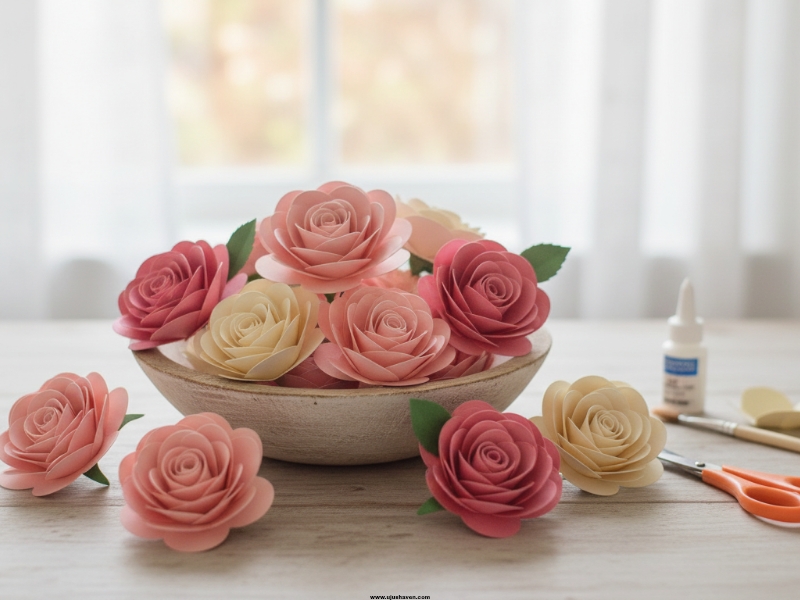 Something timeless about a rose is it instantly softens a space, even in its simplest form.
This version keeps things easy while still giving that delicate, romantic feel.
What is needed:
- Colored or crepe paper
- Scissors
- Glue
- A thin stem (floral wire, stick, or straw).
How to do it:
- Cut petal shapes in varying sizes.
- Start with the smallest petal, curl the edges gently, and wrap it around the tip of your stem.
- Gradually add larger petals, layering them around the center and securing with a little glue.
- Let the outer petals loosen slightly for a natural, soft look.
Pro tip: Slightly loosen the outer petals so it doesn’t look too “perfect”-that’s what makes it feel real.
Where it looks best: In a small vase on a bedside table or coffee table for a soft, romantic touch.
2. Paper Peony (Full and Lush)
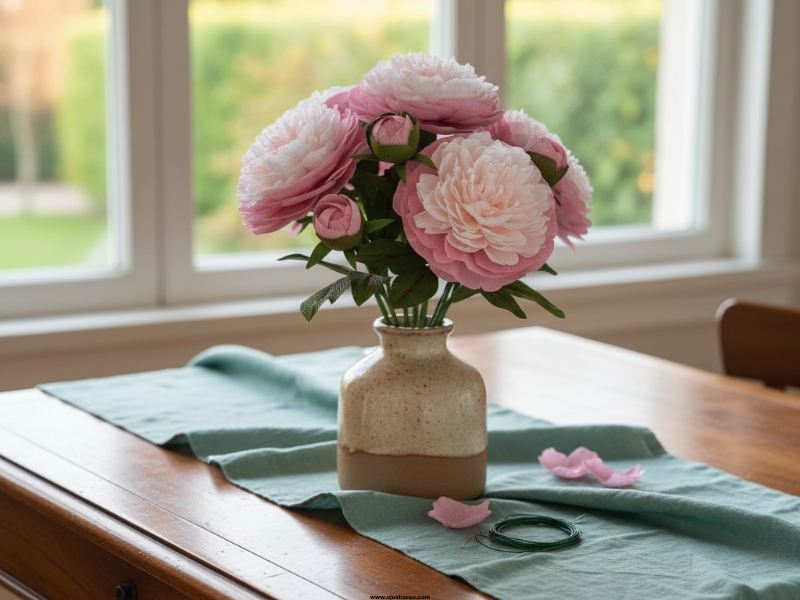
Peonies have that full, almost cloud-like look that makes any corner feel a little more special.
Even in paper form, they bring a quiet kind of richness to your decor.
What is needed:
- Multiple sheets of soft or crepe paper
- Scissors
- Glue
- A sturdy stem.
How to do it:
- Cut lots of rounded petals in different sizes.
- Crinkle the centers lightly and layer them generously around your stem.
- Fan the petals outward and slightly overlap them to create that full, cloud-like shape.
- Using two close shades adds depth and realism.
Pro tip: Mix two close shades of the same color to give it that full, natural depth.
Where it looks best: As a centerpiece on a dining table or styled on open shelves.
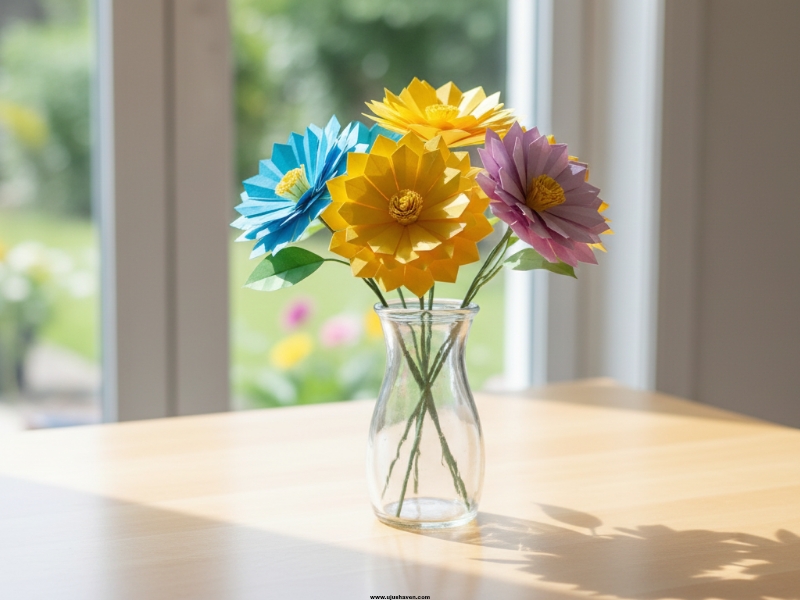
3. Paper Daisy (Light and Cheerful)

Daisies have a way of making things feel lighter and more relaxed, like a small hint of sunshine indoors.
This simple design captures that easy, cheerful vibe without much effort.
What is needed:
- White or colored paper
- Scissors
- Glue
- Thin stems.
How to do it:
- Cut long oval petals and a small circular center.
- Attach the petals evenly around the circle using glue.
- Keep some petals slightly uneven to add charm, and press the center gently to make it pop.
- Perfectly cheerful yet simple.
Pro tip: Keep the petals slightly uneven it adds charm and keeps it from looking too stiff.
Where it looks best: In mason jars by the window or in bright kitchen corners.
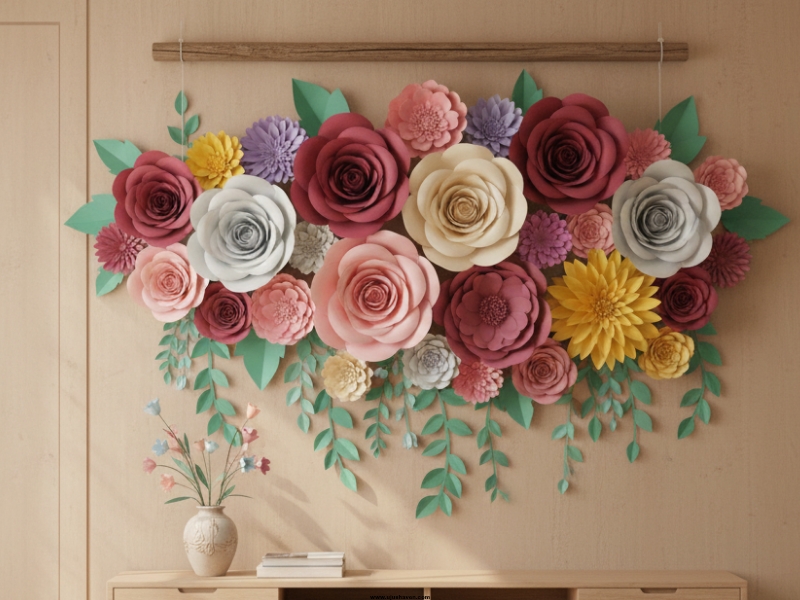
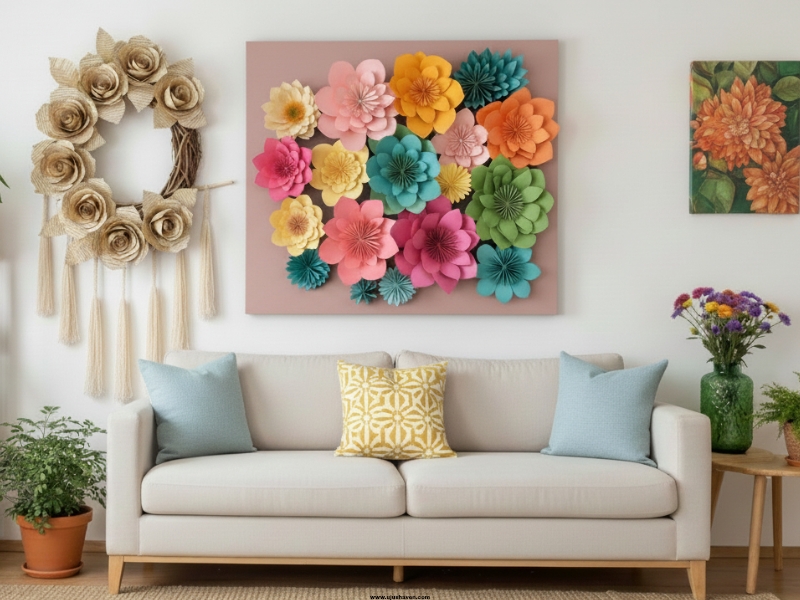
4.Large Wall Flower (Statement Piece)
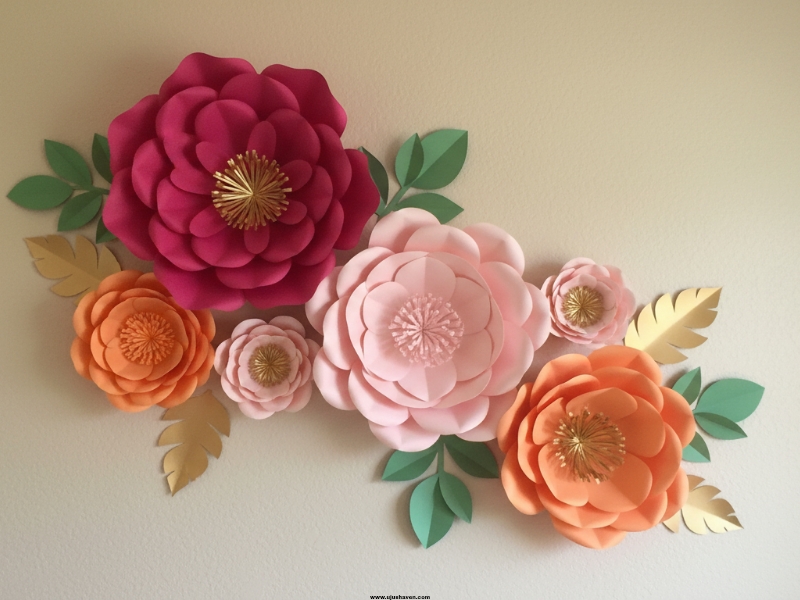
Sometimes all a space needs is one bold detail to bring it to life.
These large DIY paper flowers do exactly that, turning an empty wall into something that feels styled and intentional.
What is needed:
- Thick paper or cardstock
- Scissors
- Glue
- A flat backing for assembling layers.
How to do it:
- Cut oversized petals and curl the edges slightly.
- Layer each petal outward on your base, securing with glue as you go.
- Continue building until you have a full, dramatic shape.
- Let some petals bend naturally for a more high-end feel.
Pro tip: Use thicker paper so the structure holds and doesn’t collapse over time.
Where it looks best: As a wall backdrop in living rooms, bedrooms, or even above a headboard.
5. Simple Layered Flower (Beginner-Friendly)
If you’re just getting started, this is one of those designs that feels easy right away.
It’s simple, forgiving, and still ends up looking surprisingly put together.
What is needed:
- Colored paper
- Scissors
- Glue
- Thin stem (optional)
How to do it:
- Cut flower shapes in different sizes.
- Stack them from largest to smallest, gluing gently at the center.
- Fluff each layer, slightly bending petals to add depth.
- You can mix shades to create a subtle contrast without extra fuss.
Pro tip: Alternate colors for each layer to create contrast without extra effort.
Where it looks best: Scattered across shelves or used as part of a gallery wall.
6. Paper Tulip (Clean and Minimal)
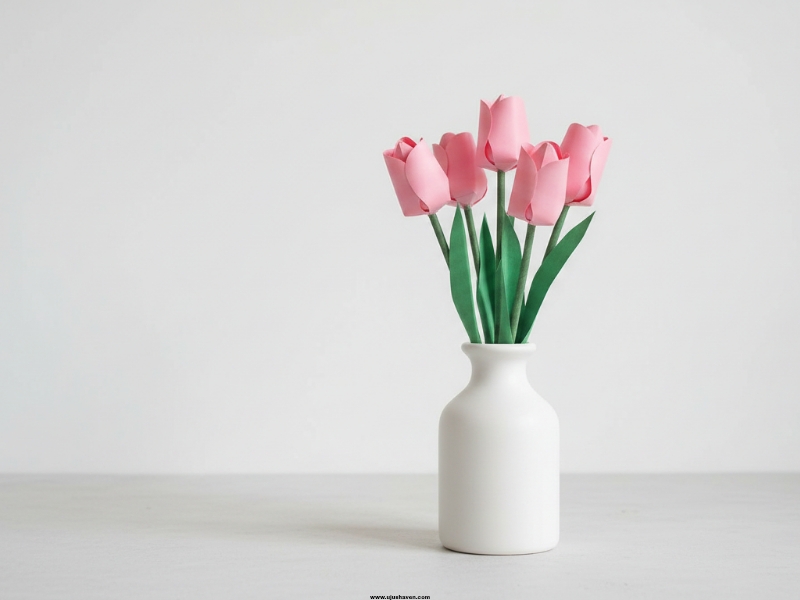
Tulips carry a quiet elegance that works beautifully in almost any space.
This version keeps things minimal, making it perfect when you want something subtle but still thoughtful.
What is needed:
- Colored or plain paper
- Scissors
- Glue
- A straight stem.
How to do it:
- Cut a cup-shaped petal and fold slightly inward.
- Roll it gently into a closed bud and secure the base with glue.
- Attach to your stem and slightly shape the top to mimic a tulip’s natural curve.
- Minimal effort, but instantly elegant.
Pro tip: Keep the shape slightly closed it’s what gives tulips that elegant look.
Where it looks best: In tall, slim vases for a clean, modern feel.
Each of these designs shows how easy it can be to make DIY paper flowers at home without it turning into a complicated project.
You don’t need perfect cuts or fancy techniques just a bit of time, a little patience, and a willingness to let simple things turn into something beautiful.
Creative Ways to Style DIY Paper Flowers in Your Home
There’s a certain point where making the flowers is only half the fun the real magic happens when you start placing them around your space.
It’s in those small styling choices that DIY paper flowers begin to feel less like a project and more like part of your home.
You can also mix these DIY paper flowers with other DIY wall art ideas to create a more layered, personalized look.
Turn a Blank Wall Into Something That Speaks
An empty wall can feel a little forgotten, but a soft cluster of paper flower wall decor can completely change that.
You can arrange them loosely like a gallery or let them flow from one corner outward.
It doesn’t have to be perfect just a gentle mix of sizes and colors can make the space feel more alive and personal.
If you’re starting to enjoy creating your own decor, these DIY paper flowers pair beautifully with other simple wall art ideas that can transform your space.
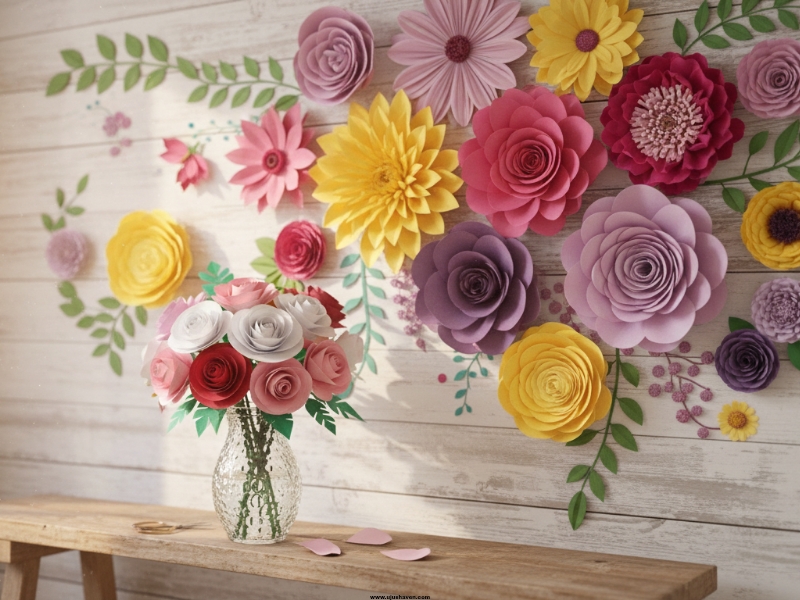
Add Warmth to Everyday Surfaces
Tables, shelves, even that quiet corner of your console these are the spots that come to life with simple paper flower arrangement ideas.
A small bunch in a jar or a layered arrangement on a tray can make everyday spaces feel styled without trying too hard.
Bring Softness Into the Bedroom
Having a few delicate details in your bedroom could be something calming.
A single stem by your bedside or a small arrangement on a dresser adds a quiet, thoughtful touch.
It’s one of those DIY home decor ideas that doesn’t overwhelm but still shifts the mood of the room.
Refresh With the Seasons
One of the nicest things about DIY paper flowers is how easily they adapt.
You can switch colors with the seasons lighter tones for a fresh, airy feel or deeper shades when you want something cozier.
It keeps your space feeling new without starting from scratch every time.
Let Small Details Tell a Bigger Story
Sometimes it’s not about one big statement but the little moments scattered around a flower tucked into a mirror frame, a few layered along a shelf.
These subtle touches quietly tie everything together, making your home feel more intentional, more you.
These DIY paper flowers also blend beautifully with soft wall hanging ideas if you want to add more texture and movement to your space.
Pro Tips to Make Your DIY Paper Flowers Look Real and High-End
There’s a moment when your DIY paper flowers start looking “almost there” pretty, but not quite lifelike yet.
That’s usually where a few small tweaks make all the difference.
It’s less about doing more and more about noticing the little details that quietly change everything.
Layering Petals for a Natural Look
Real flowers aren’t flat or perfectly even, and your DIY paper flowers shouldn’t be either.
Try layering petals in different sizes, letting some sit slightly higher or lower than others.
That unevenness is what gives depth and makes paper flower decor ideas feel more realistic and soft instead of rigid.
Color Blending That Feels Subtle, Not Loud
Instead of using just one solid color, mix close shades like blush and soft pink or cream and pale yellow.
This small shift adds dimension without overwhelming the design.
It’s one of those homemade paper flowers tricks that instantly makes your work look more intentional and refined.
Shaping That Brings Them to Life
A little shaping goes a long way.
Curl the edges gently with a pencil, press the center slightly inward, and let some petals open more than others.
These tiny movements make DIY home decor ideas feel more natural, almost like the flowers are slowly unfolding in real time.
Common Mistakes That Make Flowers Look Flat
One of the easiest mistakes is rushing through symmetry perfectly even petals can actually make flowers look less real.
Another is using only one texture or shade, which can make everything feel one-dimensional.
And sometimes, too much glue can flatten the shape instead of helping it hold.
The Quiet Difference Between “Nice” and “High-End”
What separates simple paper flower arrangement ideas from something that looks elevated is usually restraint.
Not overworking the petals, not overloading the colors, and letting simplicity do some of the talking.
When you slow down just a little, DIY paper flowers start to feel less like a craft and more like decor you’d actually see in a styled home.
Frequently Asked Questions About DIY Paper Flowers
Sometimes the easiest way to understand something is through the little questions that come up while you’re thinking about trying it for the first time.
And with DIY paper flowers, those questions usually sound familiar simple, practical, and a bit curious.
Are DIY paper flowers easy to make?
Yes, and that’s what makes them so comforting to try.
Most DIY paper flowers easy designs don’t require special skills just basic folding, cutting, and a bit of patience.
Once you make one or two, it starts to feel surprisingly natural, like something you can always come back to when you want to create something calming.
How do I make DIY paper flowers step by step?
The process is usually simpler than it looks.
You start by choosing your paper, cutting out petal shapes, shaping them slightly for depth, and then layering them around a center point.
DIY paper flowers step by step guides often follow this same rhythm, just broken down gently so it never feels overwhelming.
Can paper flowers be easy and beautiful at the same time?
Absolutely. That’s actually where their charm lies.
Paper flowers easy and beautiful designs often rely on small details soft edges, layered petals, and gentle color choices.
It’s not about complexity, but about how thoughtfully each piece comes together.
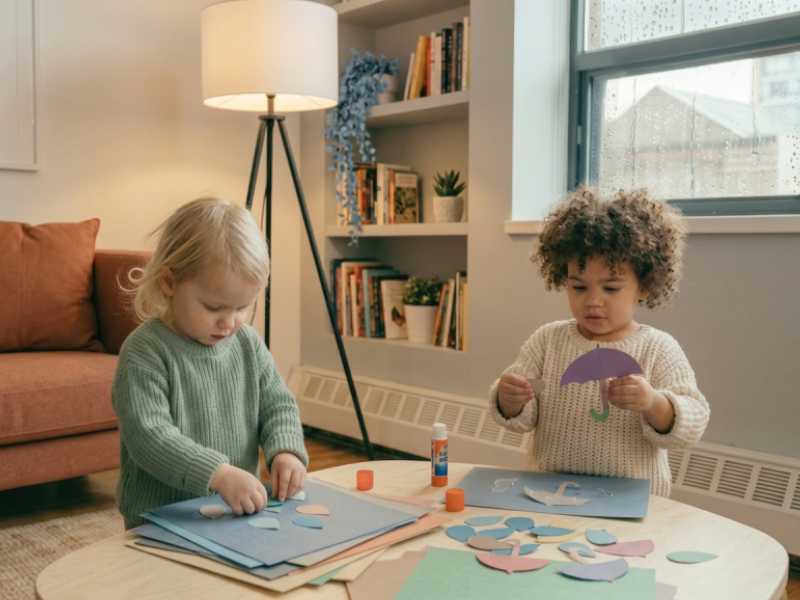
Are DIY paper flowers suitable for kids?
Yes, and they can be a really lovely activity to share.
Simple DIY paper flowers for kids usually involve larger shapes, safe scissors, and easy glue techniques.
It’s less about perfection and more about creativity and fun moments of making together.
What are some 8 easy paper flowers I can start with?
A good starting set usually includes roses, daisies, tulips, peonies, simple layered blooms, small rosettes, wall flowers, and basic spiral flowers.
These 8 easy paper flowers give you a nice mix of styles without feeling too complicated, especially when you’re still finding your rhythm.
What are simple paper flowers good for?
Simple paper flowers work beautifully when you want something light and effortless in your space.
If it’s for shelves, tables, gifts, or wall accents, they quietly add charm without asking for too much attention just a soft detail that makes a room feel more personal.
You may also like: